Should You Get DeepCool CK560?
DeepCool CK560 Case Summary
The DeepCool CK560 has made a solid point with this case given its ample features and unrestricted airflow. The overall build quality is quite good and our first impression of the CK560 WH is all positive. At this price, it is one heck of a potential case for any build and comes recommended by us.
Pros
- Stylish look
- A non-tinted Glass panel with captive thumb screws
- 3x A-RGB fans and 1x non-RGB fan pre-installed
- Dust Filtration
- Adequate cooling provision
- GPU Support Bracket
- Tool-less storage mounting
- Bridgeless PCIe slots
Cons
- Dust filtration on the front is somewhat compromised
- Not a full white version
DeepCool has launched new series of PC Cases. They have sent us the CK560 White edition case for testing and featured a white build. This is a mid-tower case with some salient highlights like:
- A GPU bracket support
- Convenient front panel handling
- Dust filtration all around
- 3x 120mm A-RGB fans on the front and a 140mm non-RGB fan on the rear.
- Airflow focused
- Tempered Glass Side Panel
Packaging And Unboxing
Before we jump into Unboxing, let’s look at the dimensions first. 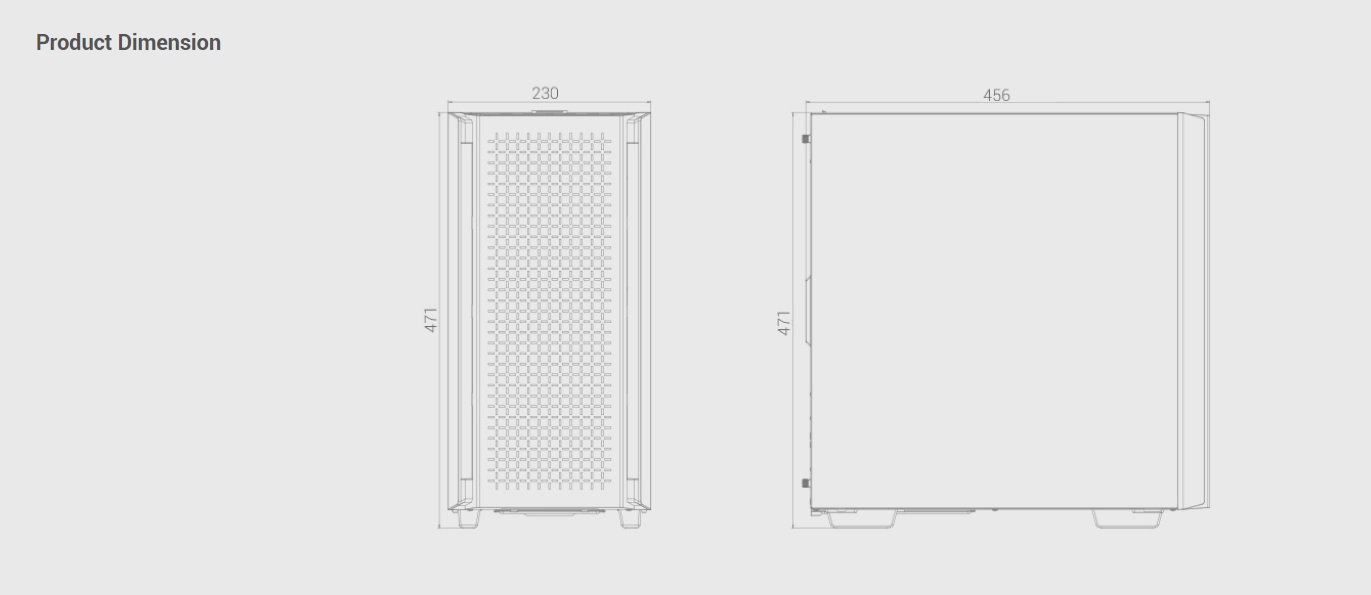
The chassis is shipped inside a standard brown color cardboard box.
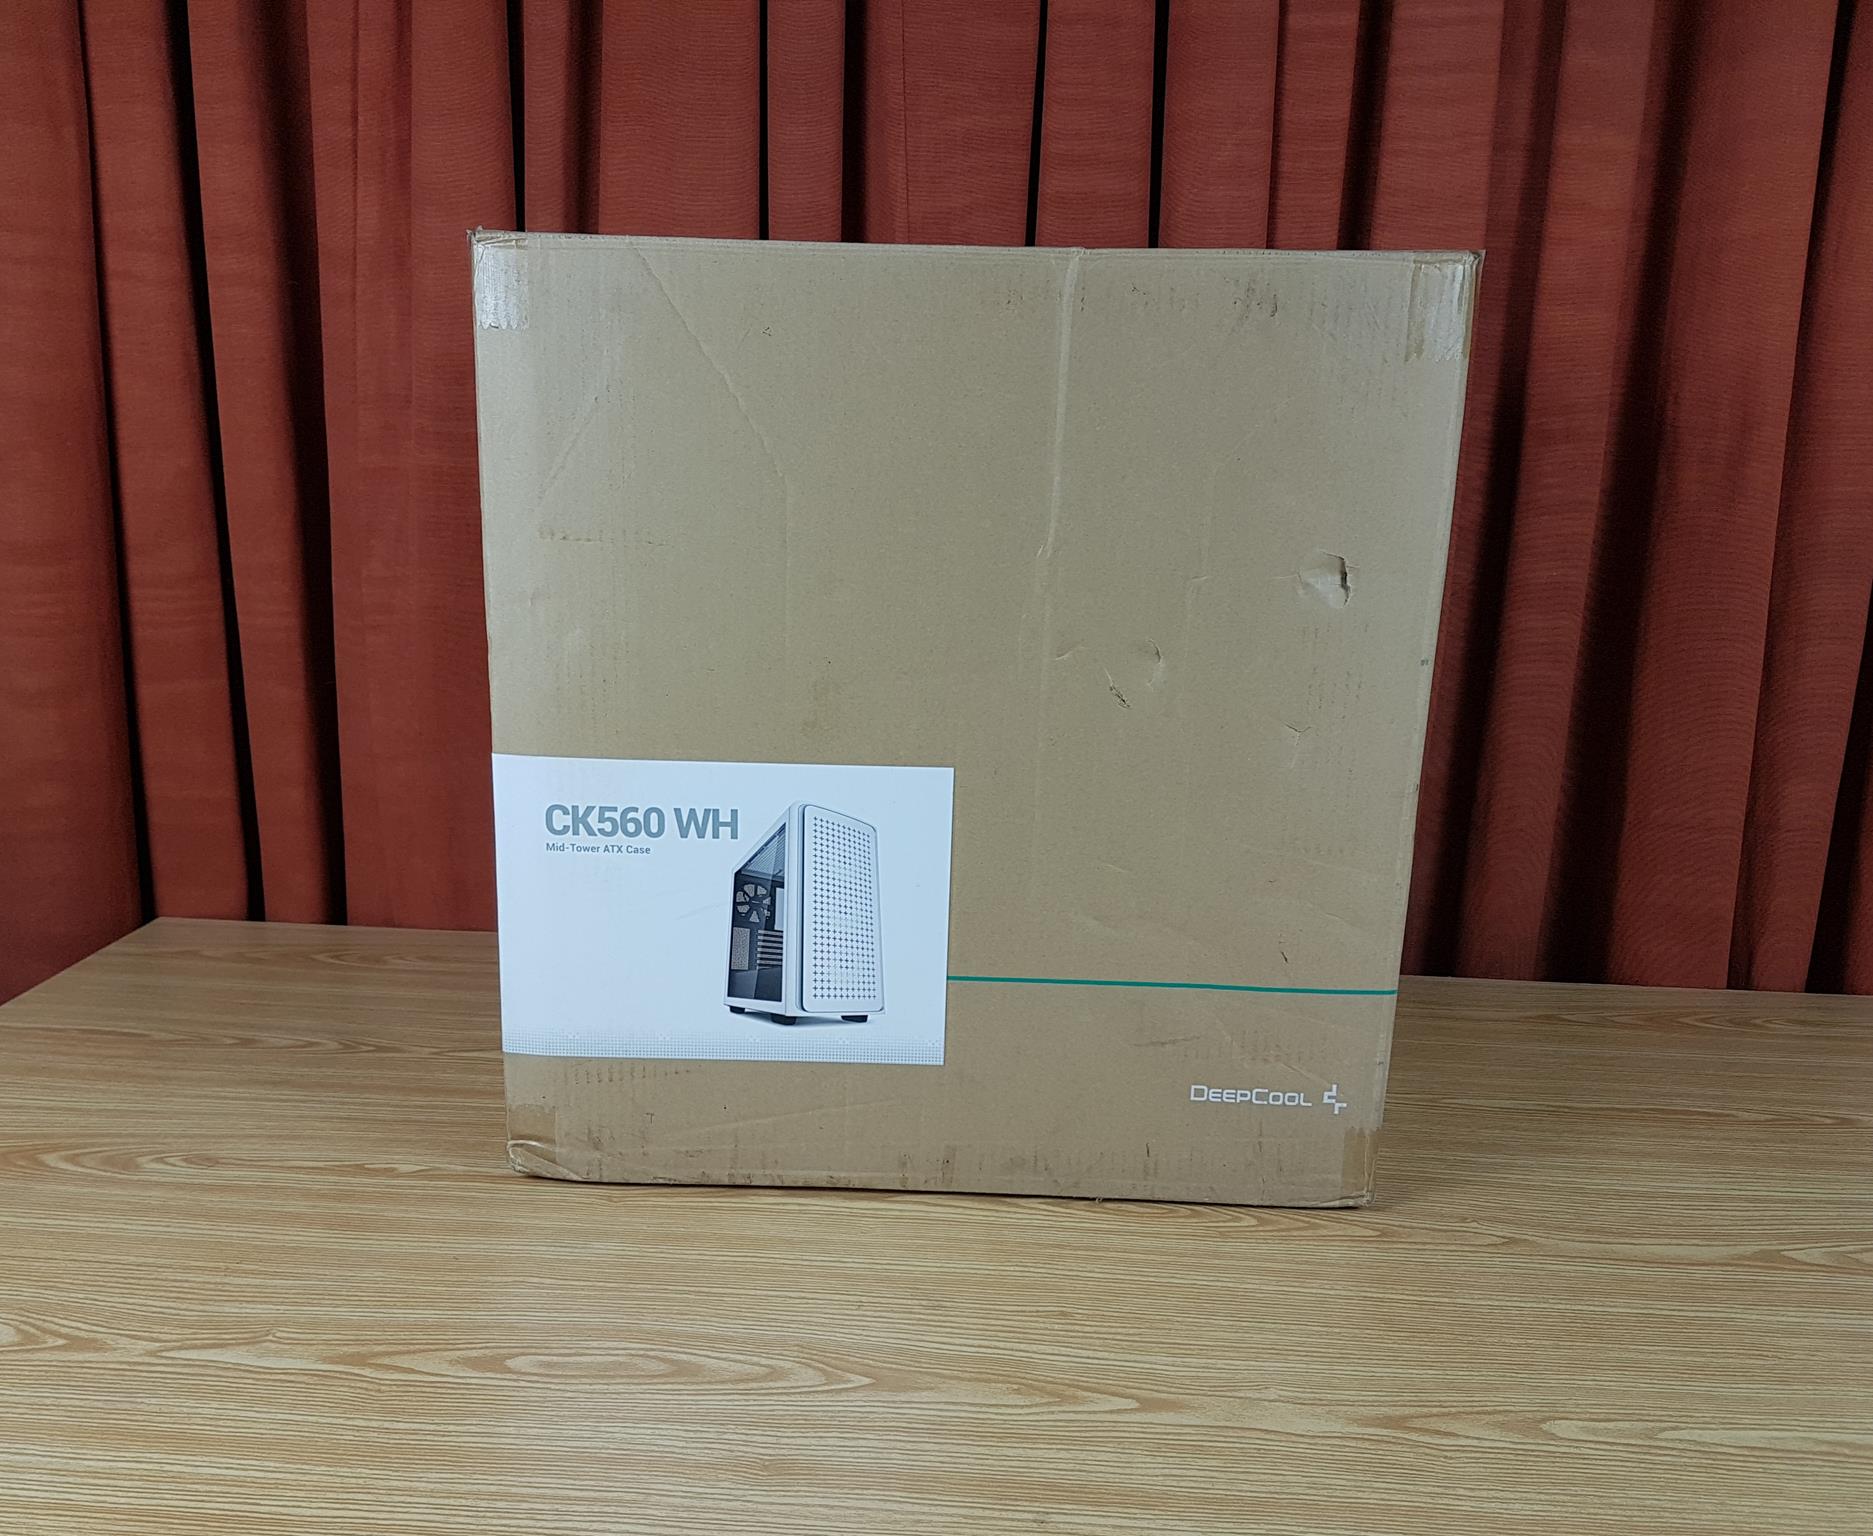
CK560 White is a mid-tower ATX PC case available in white and black colors. We are testing the white edition.
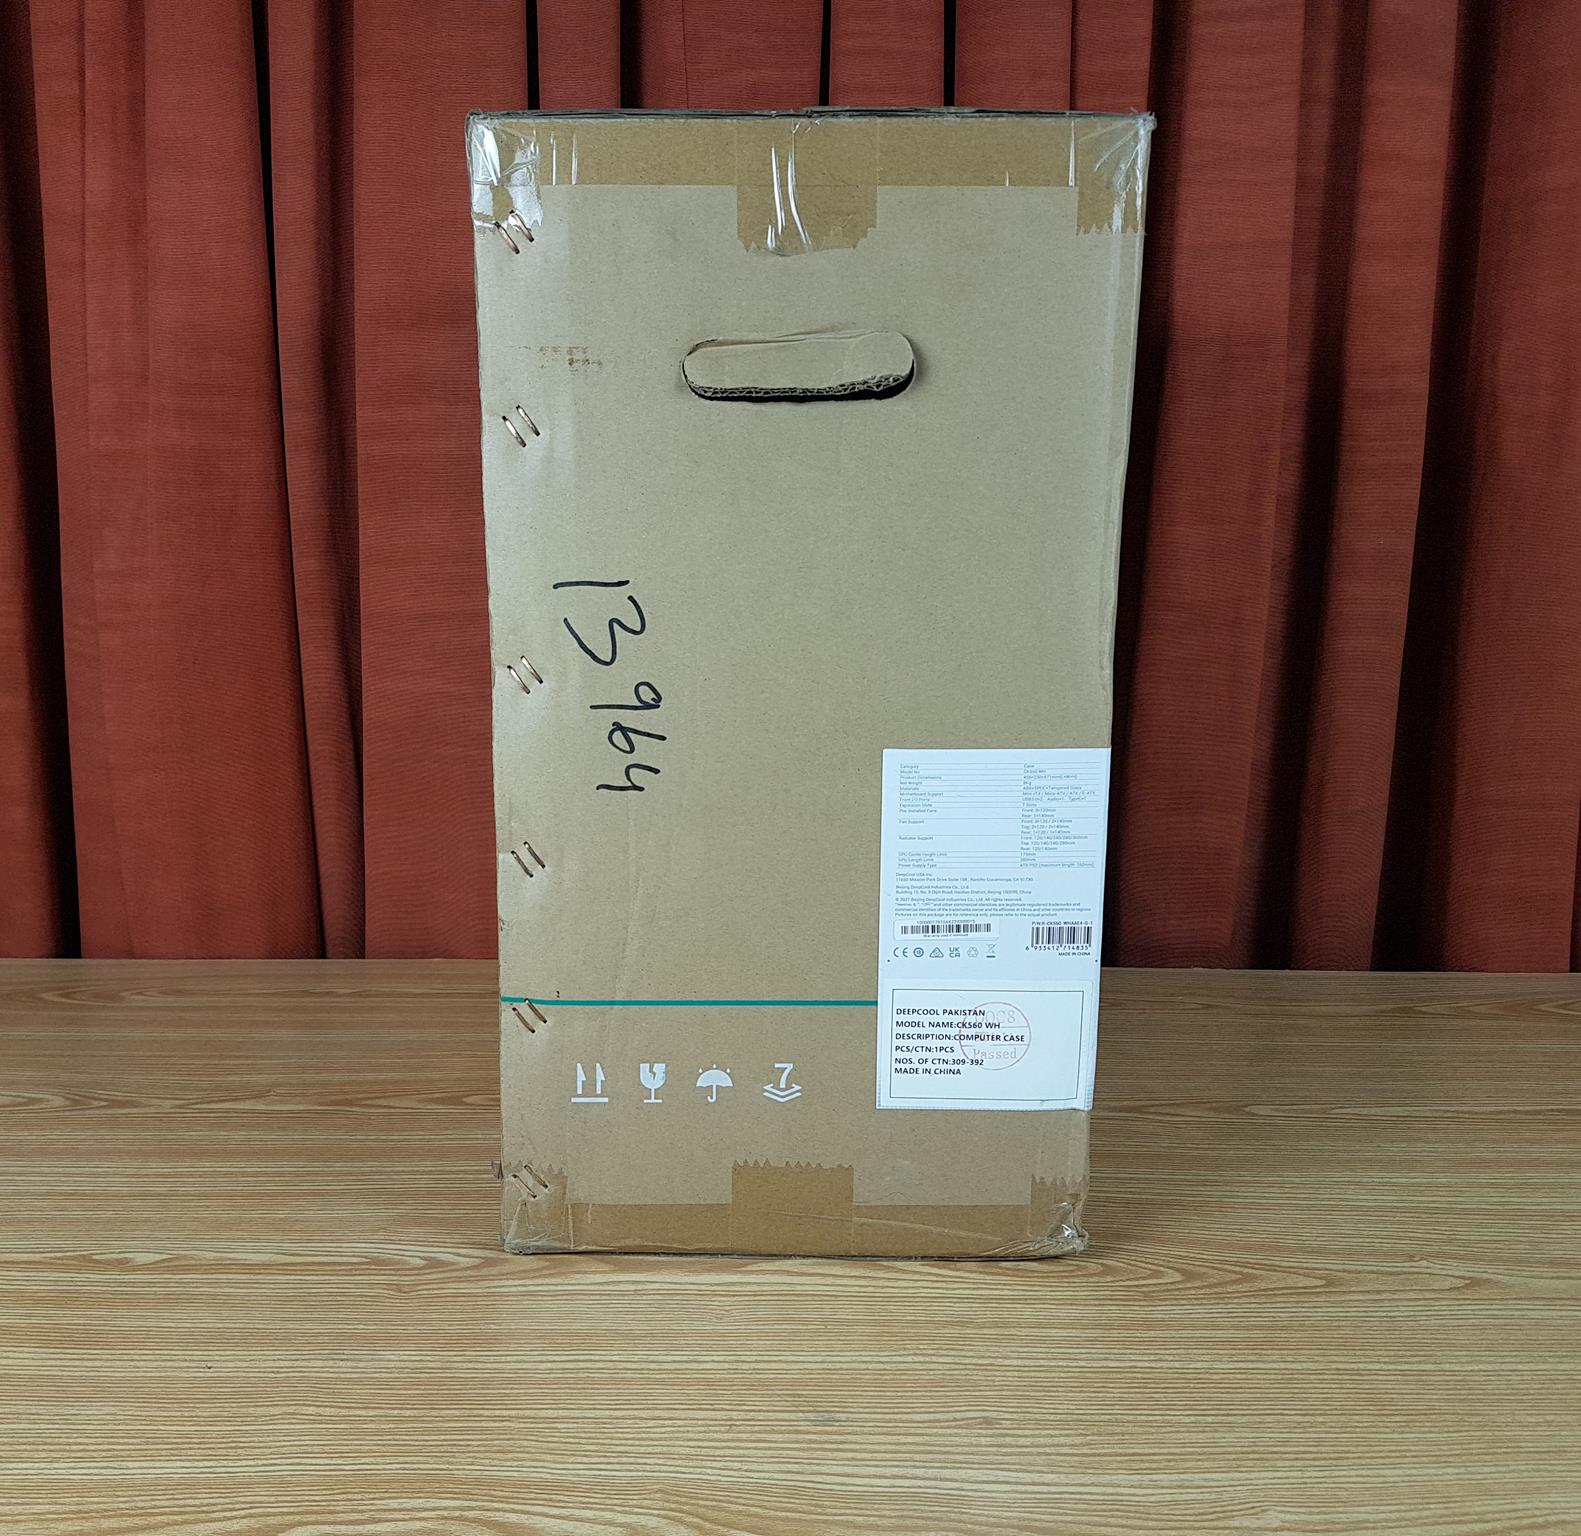
The salient specifications are printed in a tabular format. The part number and serial number are also printed.
The following are included in the box:

- Plentiful Zip Ties
- 1x container of the screws
- User Guide
- 1x Proprietary connector to standard 5V female A-RGB connectors cable
Closer Look
Here is what DEEPCOOL is saying about the chassis, “The DeepCool CK560 WH Mid-Tower Case offers a streamlined PC building experience with great compatibility and high-airflow performance thanks to four powerful pre-installed fans and ample ventilation throughout the white chassis.”
The DEEPCOOL CK560 is a compact mid-tower case available in black and white colors. It has a dimension of 456x230x471mm. It is made of steel, plastic, and tempered glass. The chassis has a net weight of 8Kg.
Let’s start by taking a closer look at the exterior of the chassis.
Exterior
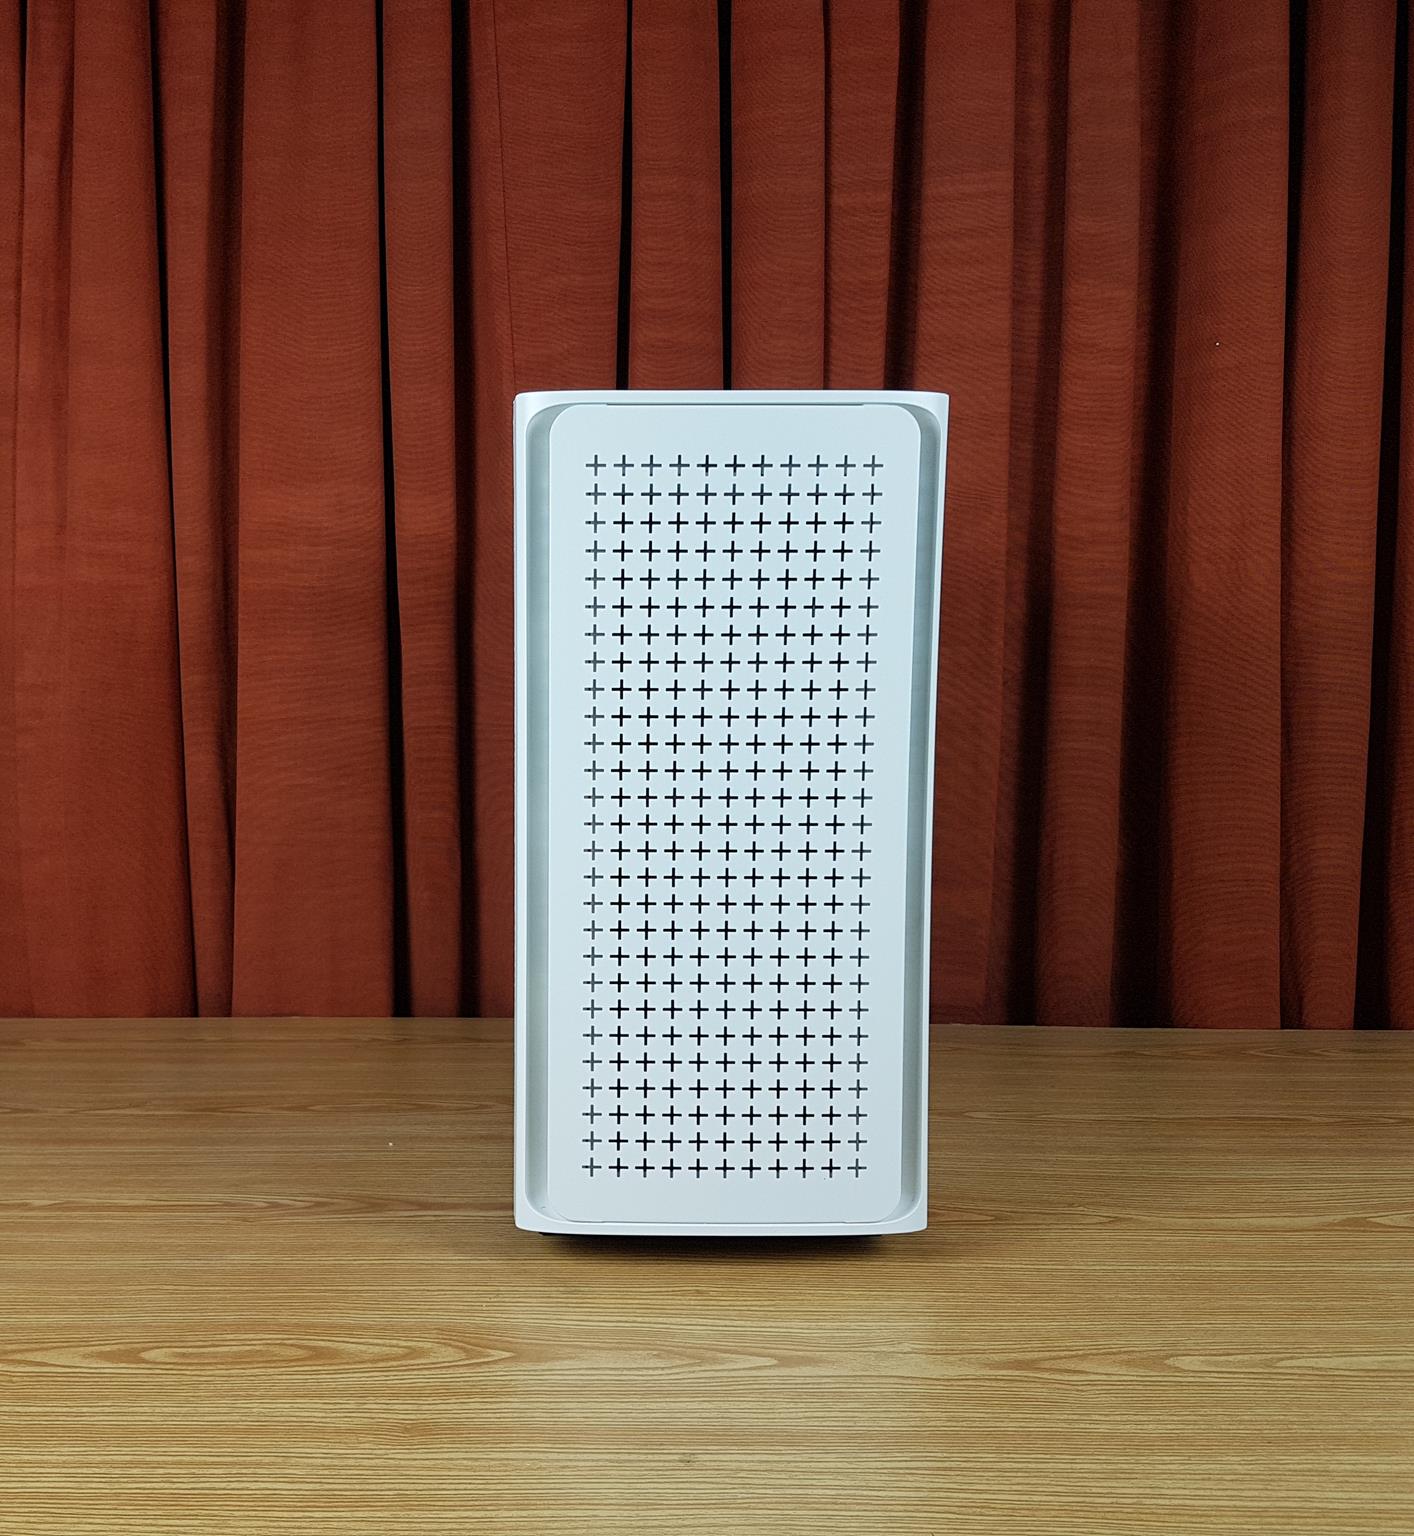
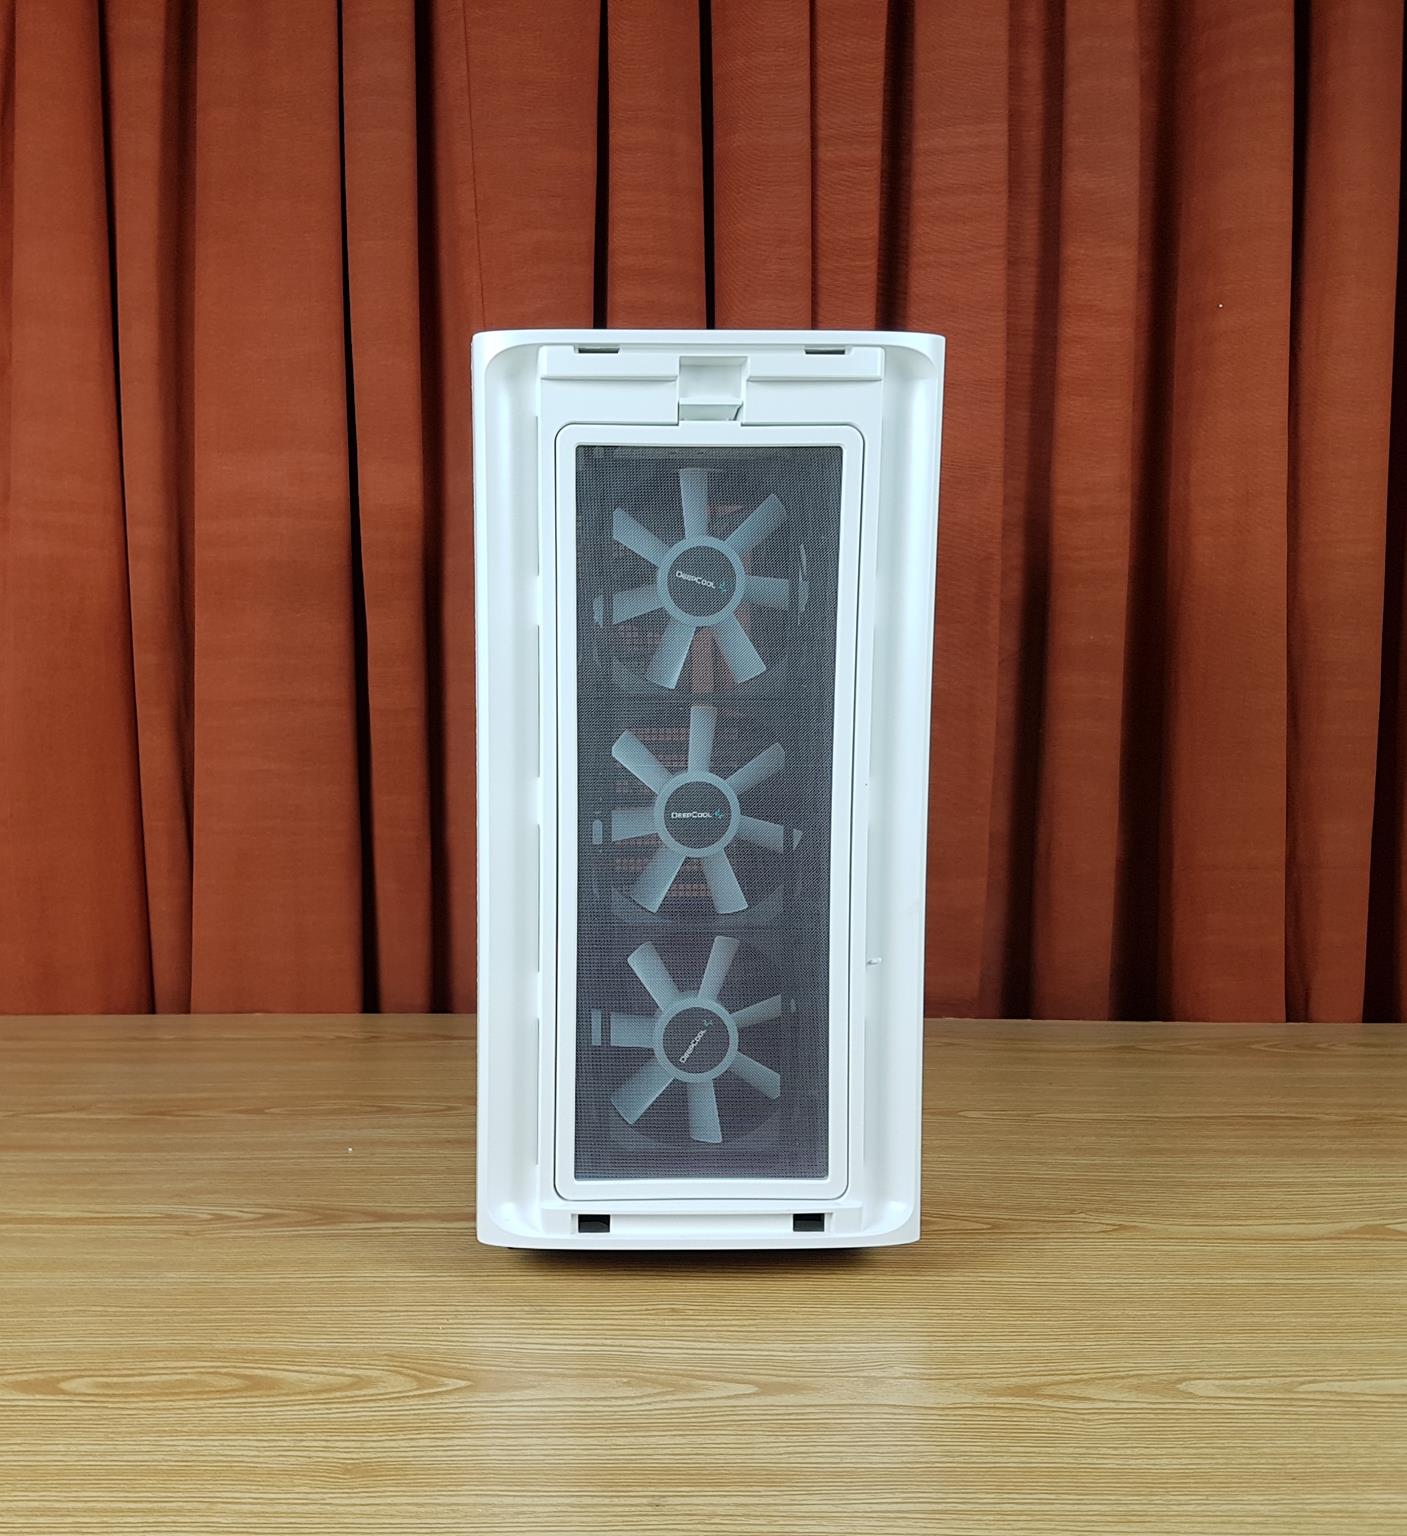
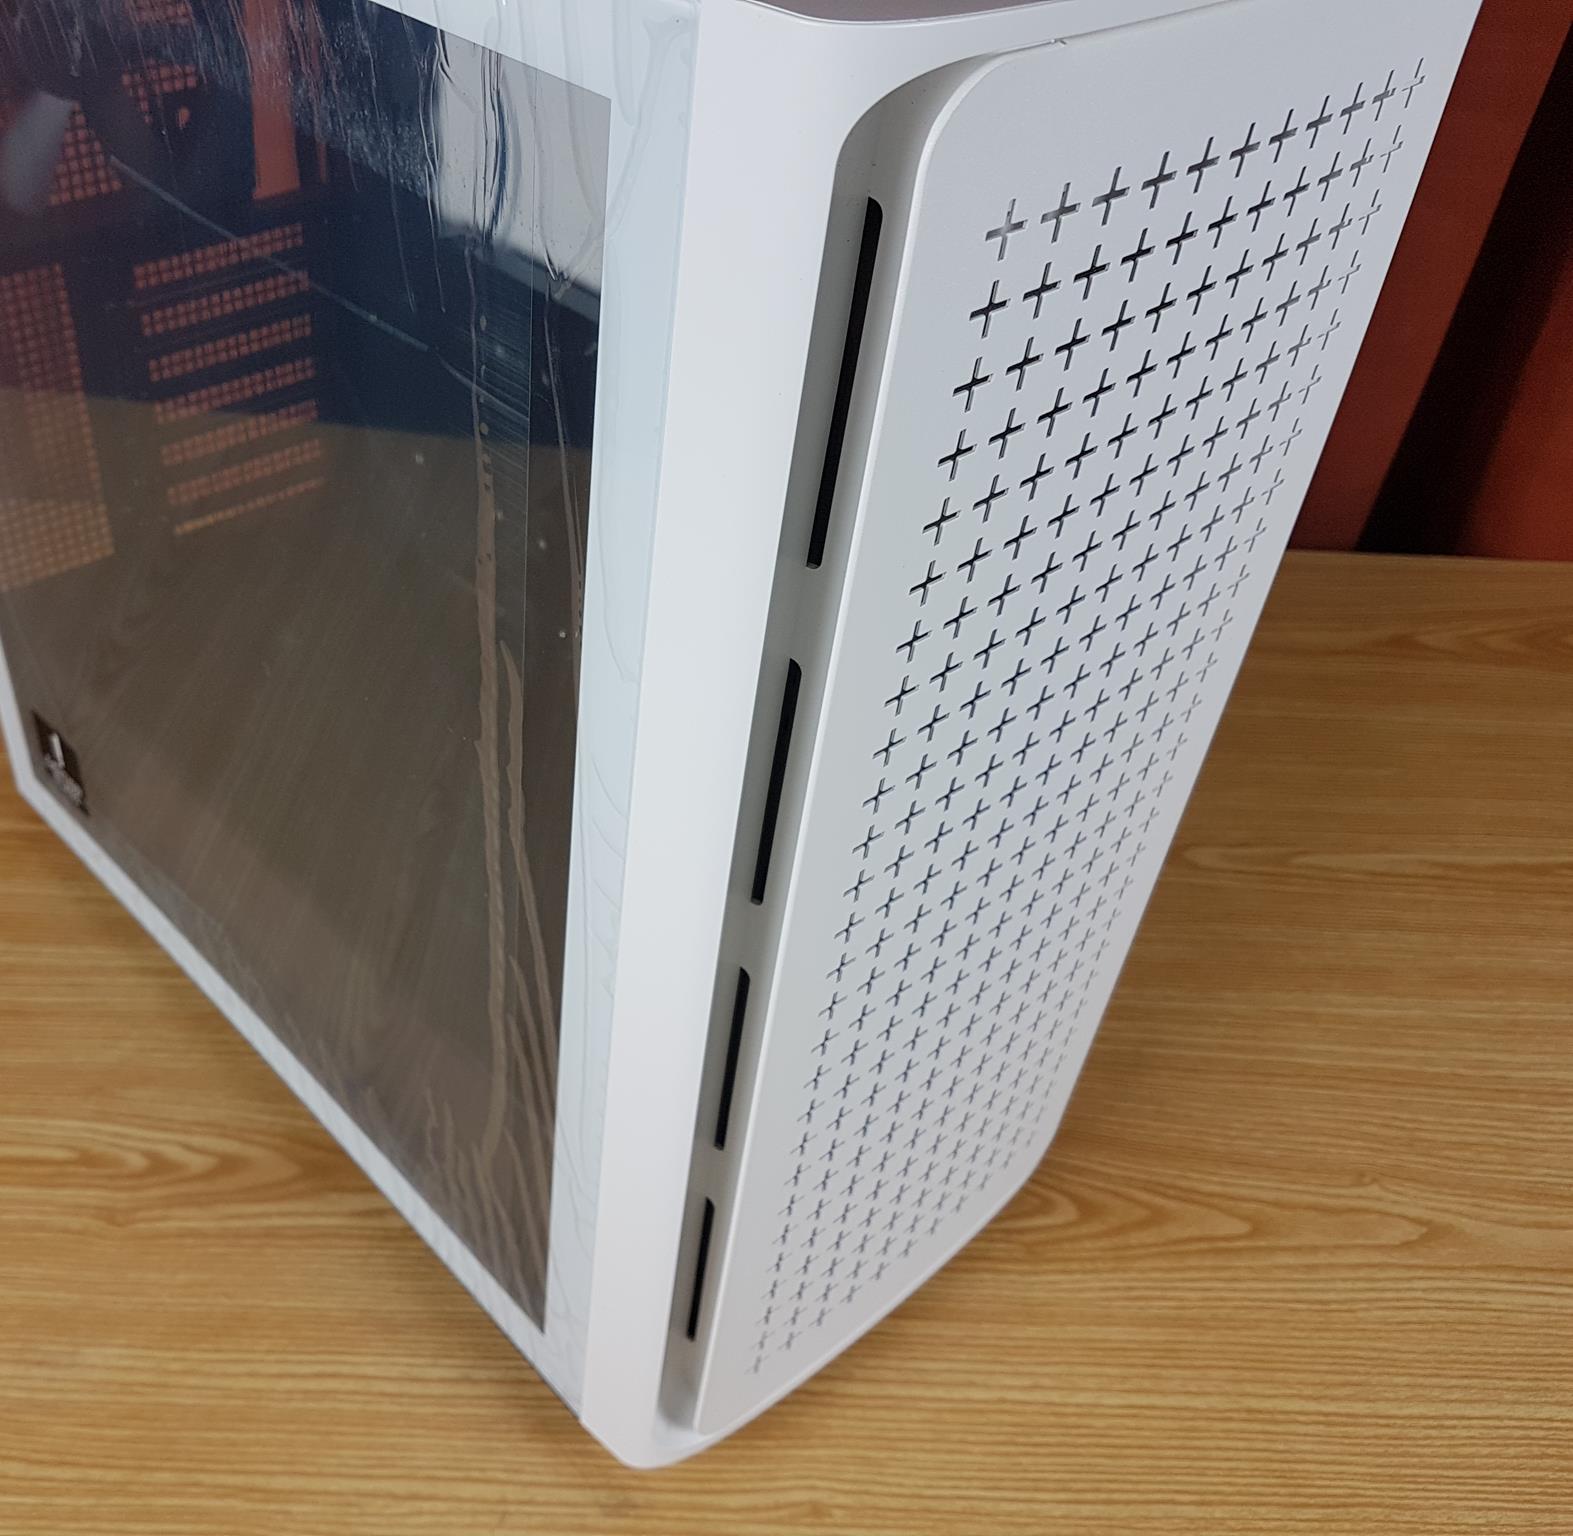
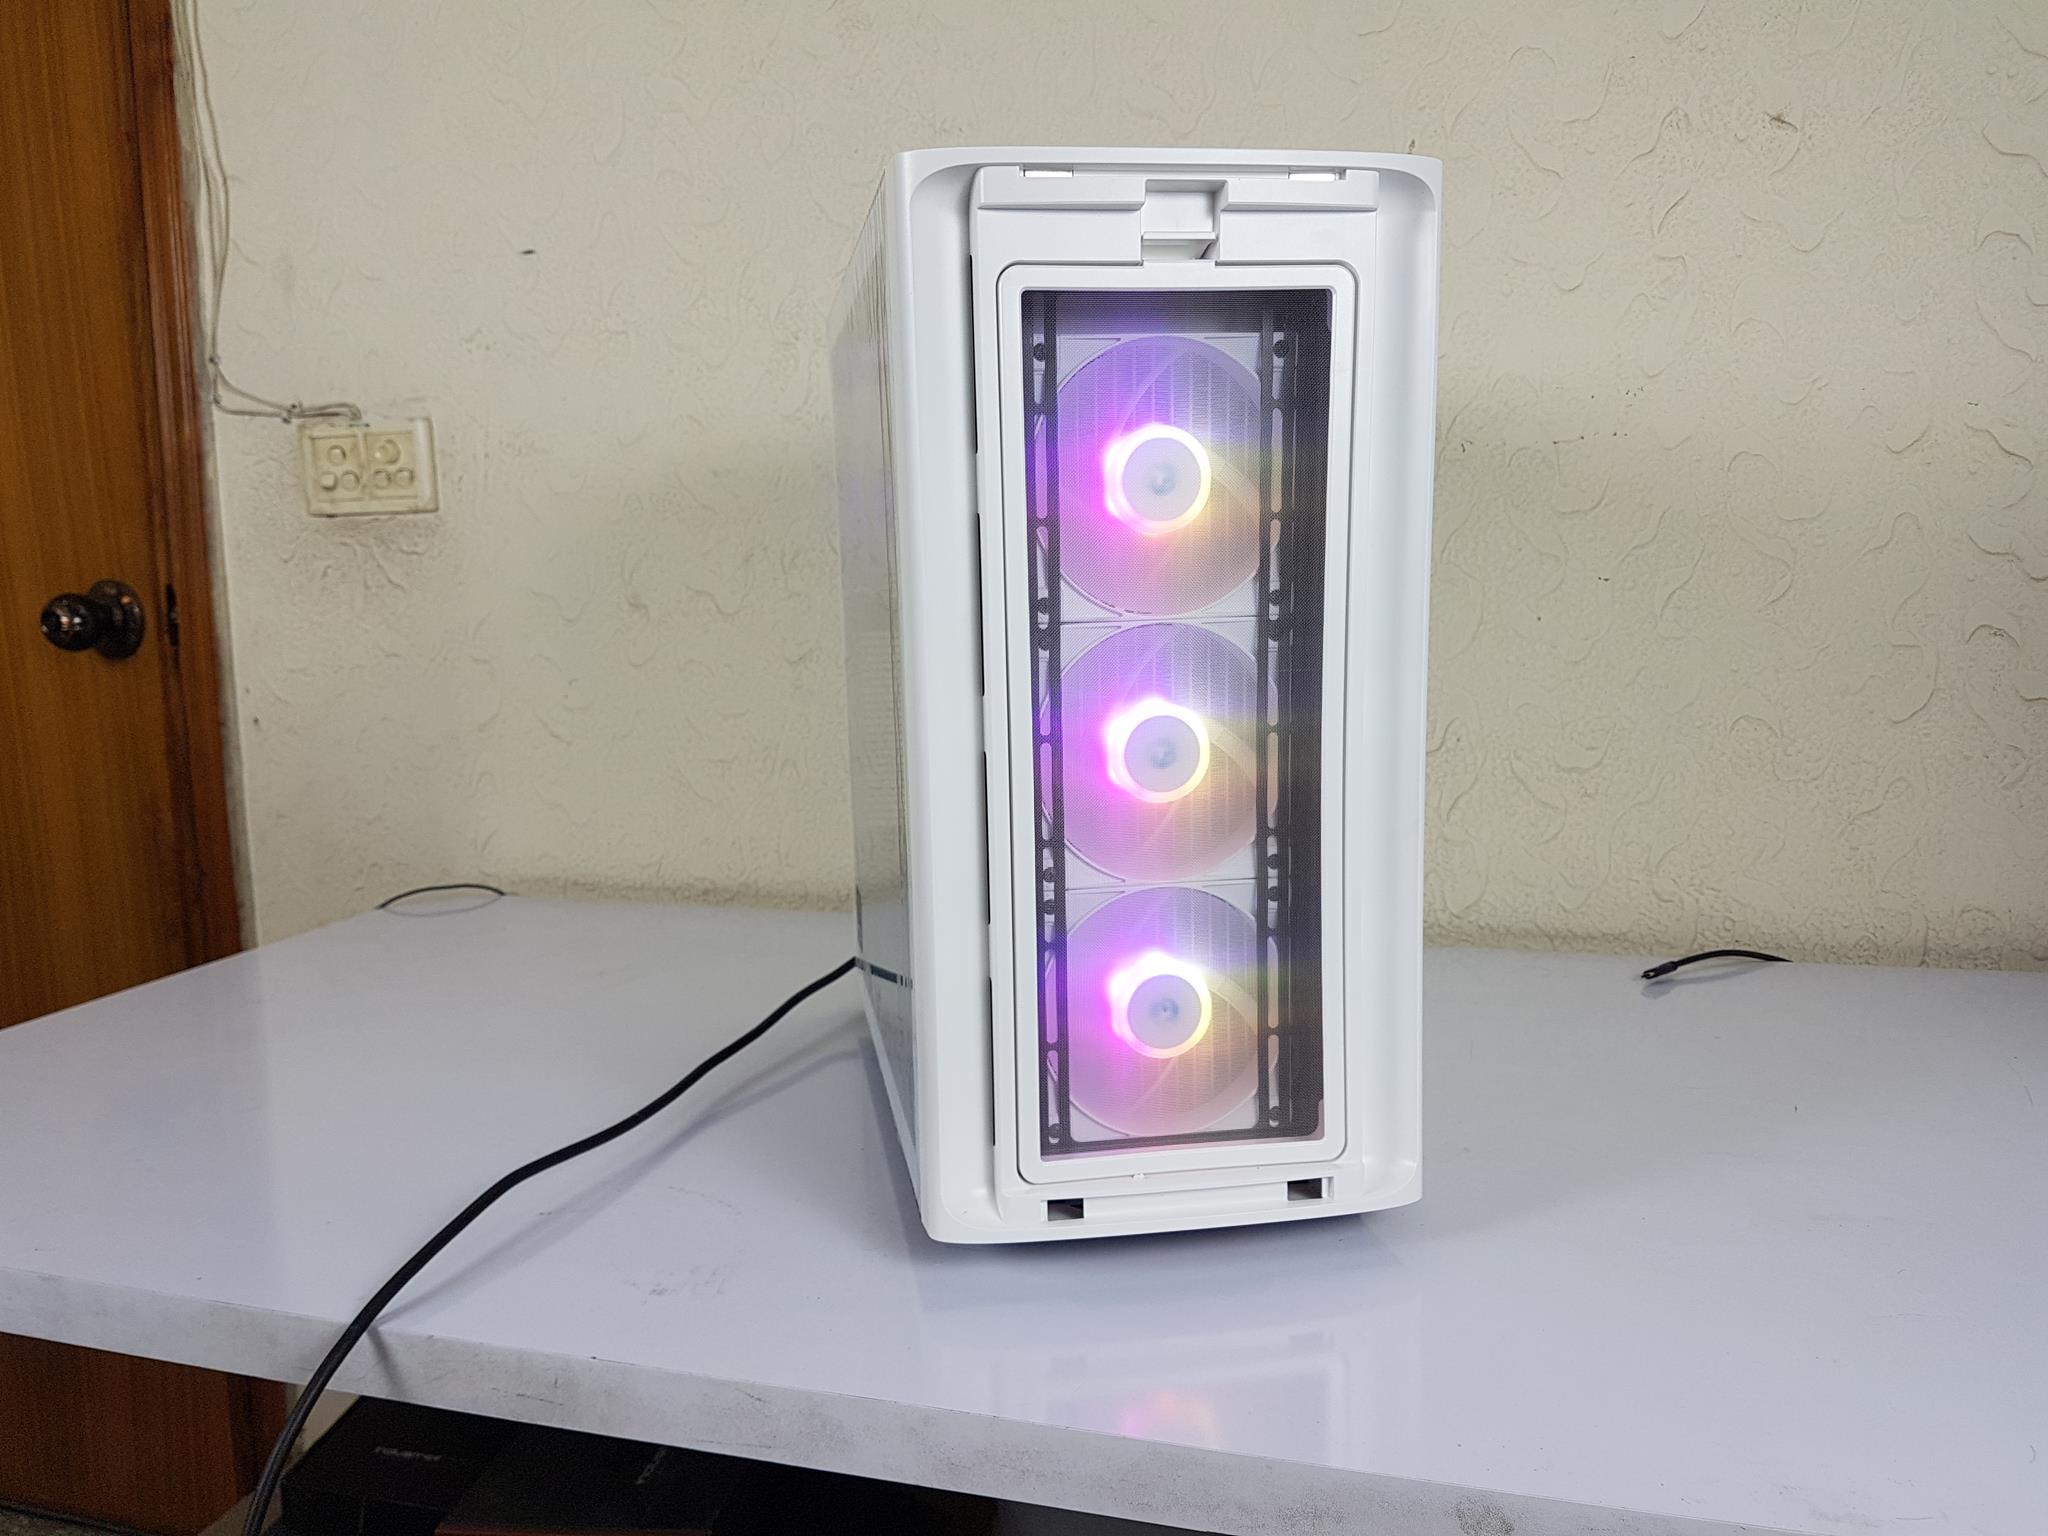
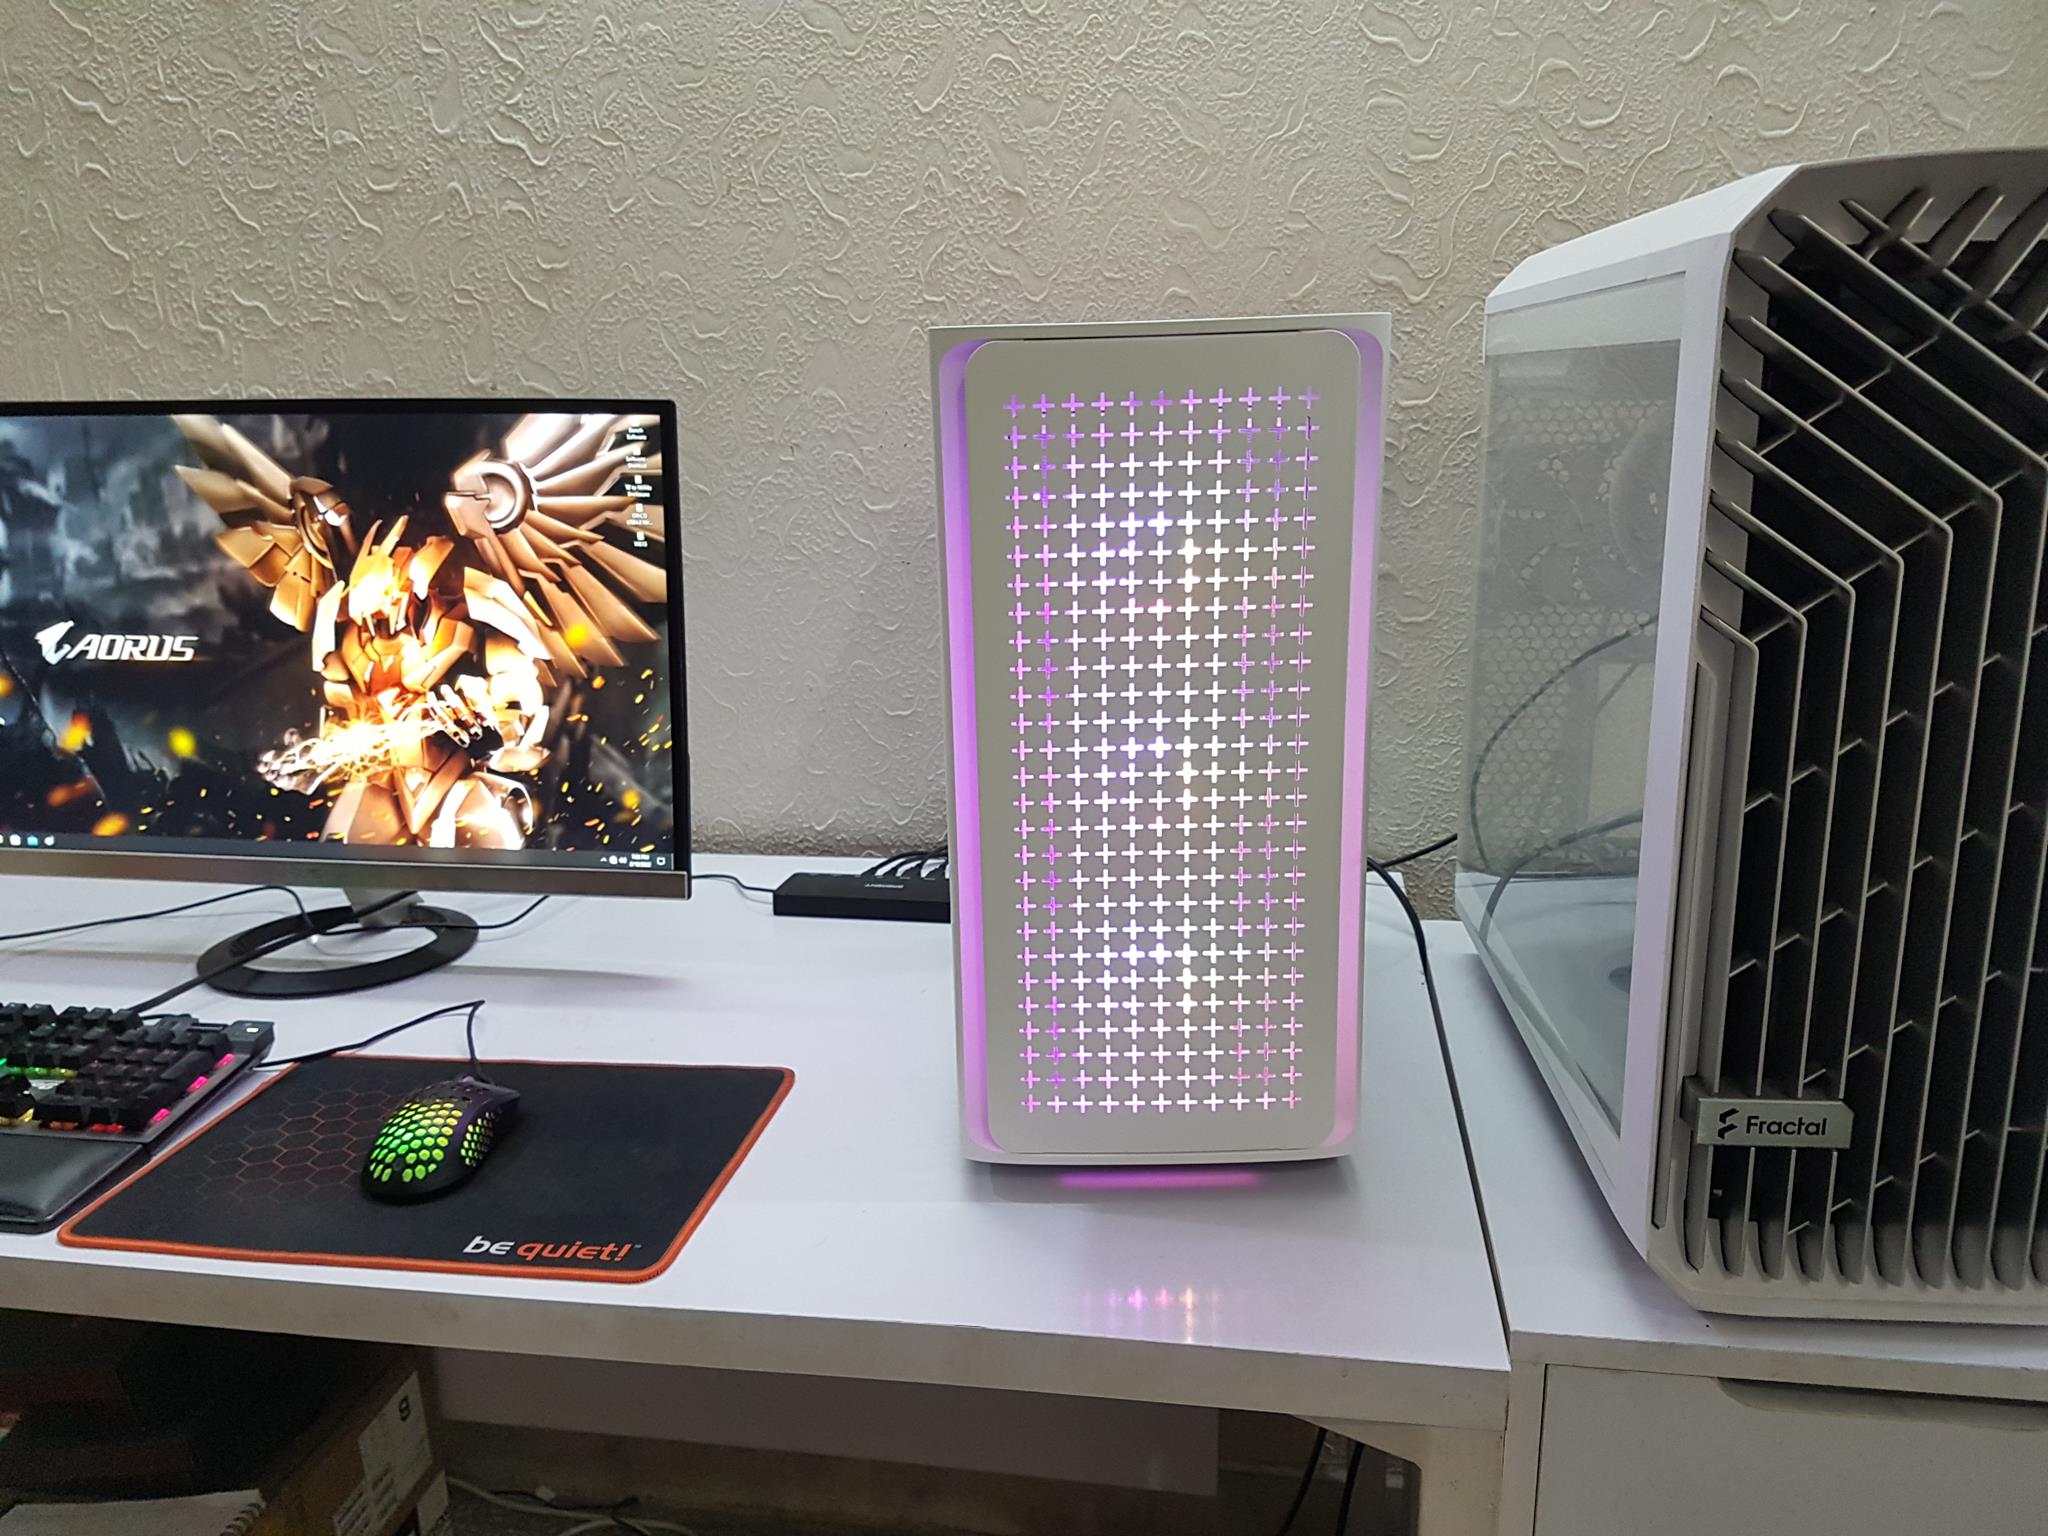
The front panel is a piece of marvel. DeepCool has implemented a patterned design that symbolizes DeepCool’s new brand logo and syncs in well with the AK series coolers in particular. The front panel has a + symbol pattern all over itself. DeepCool is achieving two goals with this design; air ventilation and synced outlook in their ecosystem. The panel is made of steel and the paintwork is nicely done. The cool element of this panel is that it is attached using magnets to the frame of the case. The user can easily pull it and place it without the need to exert any force.
The above picture shows the front side of the case after removing the front panel. There is a fine dust cover panel running on the entire length. Its handling is also convenient. Pressing the latch on the top will release the dust filter panel so that the user can take it out.
There are cutouts on both sides of the front panel. The interesting thing is these cutouts are recessed behind the front dust filter. This implementation has actually failed the front dust filtration.
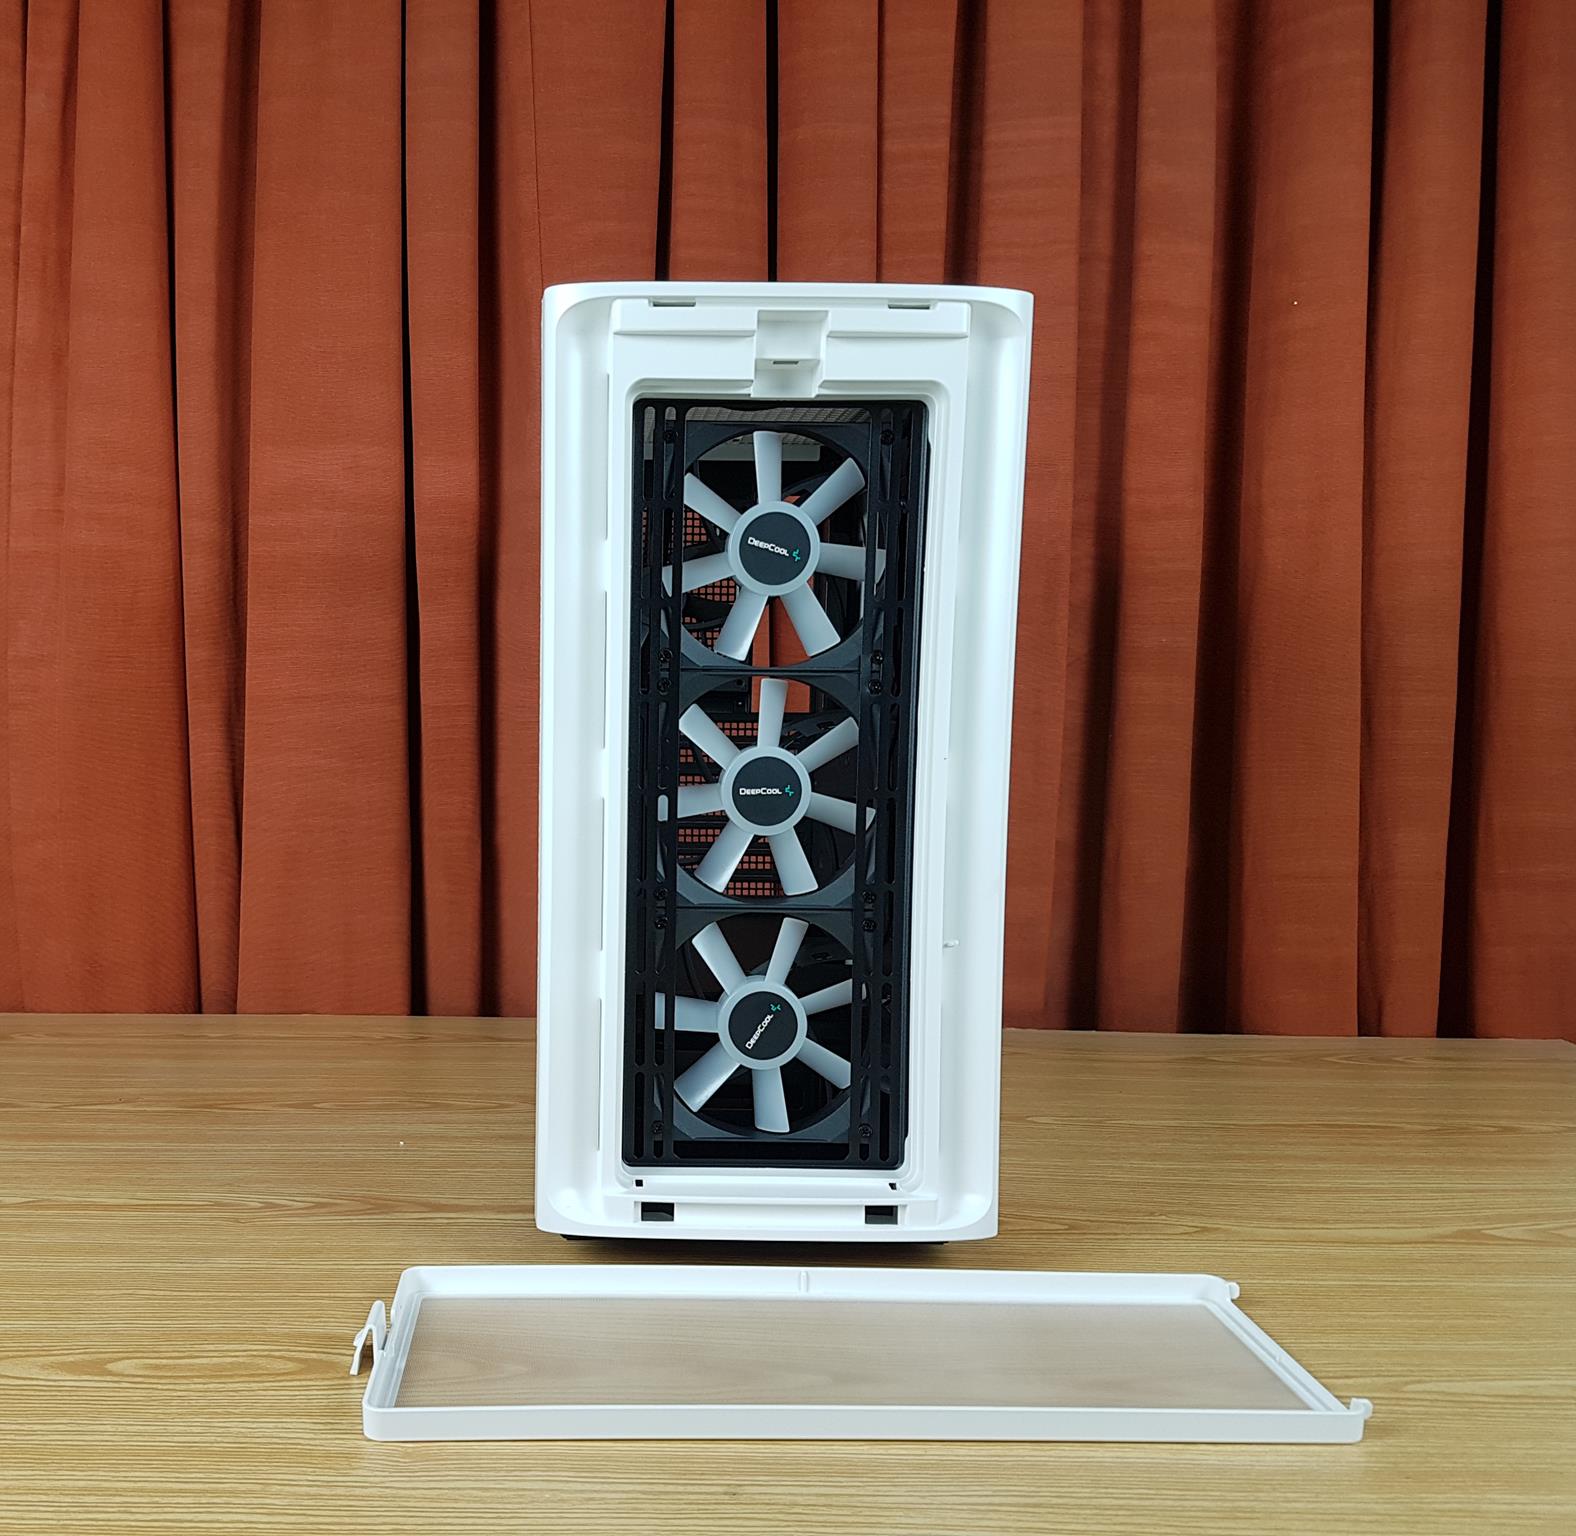
The above picture shows the front view of the case after removing the front panel and dust filter panel. DeepCool has provided 3x 120mm A-RGB fans on the front. Take note that the fans are installed on the backside of the mounting rail. By adding more to the length of the case, these fans could have been mounted on the front side which would have given more clearance on the backside of the mounting rails. The A-RGB LEDs are housed in the center.
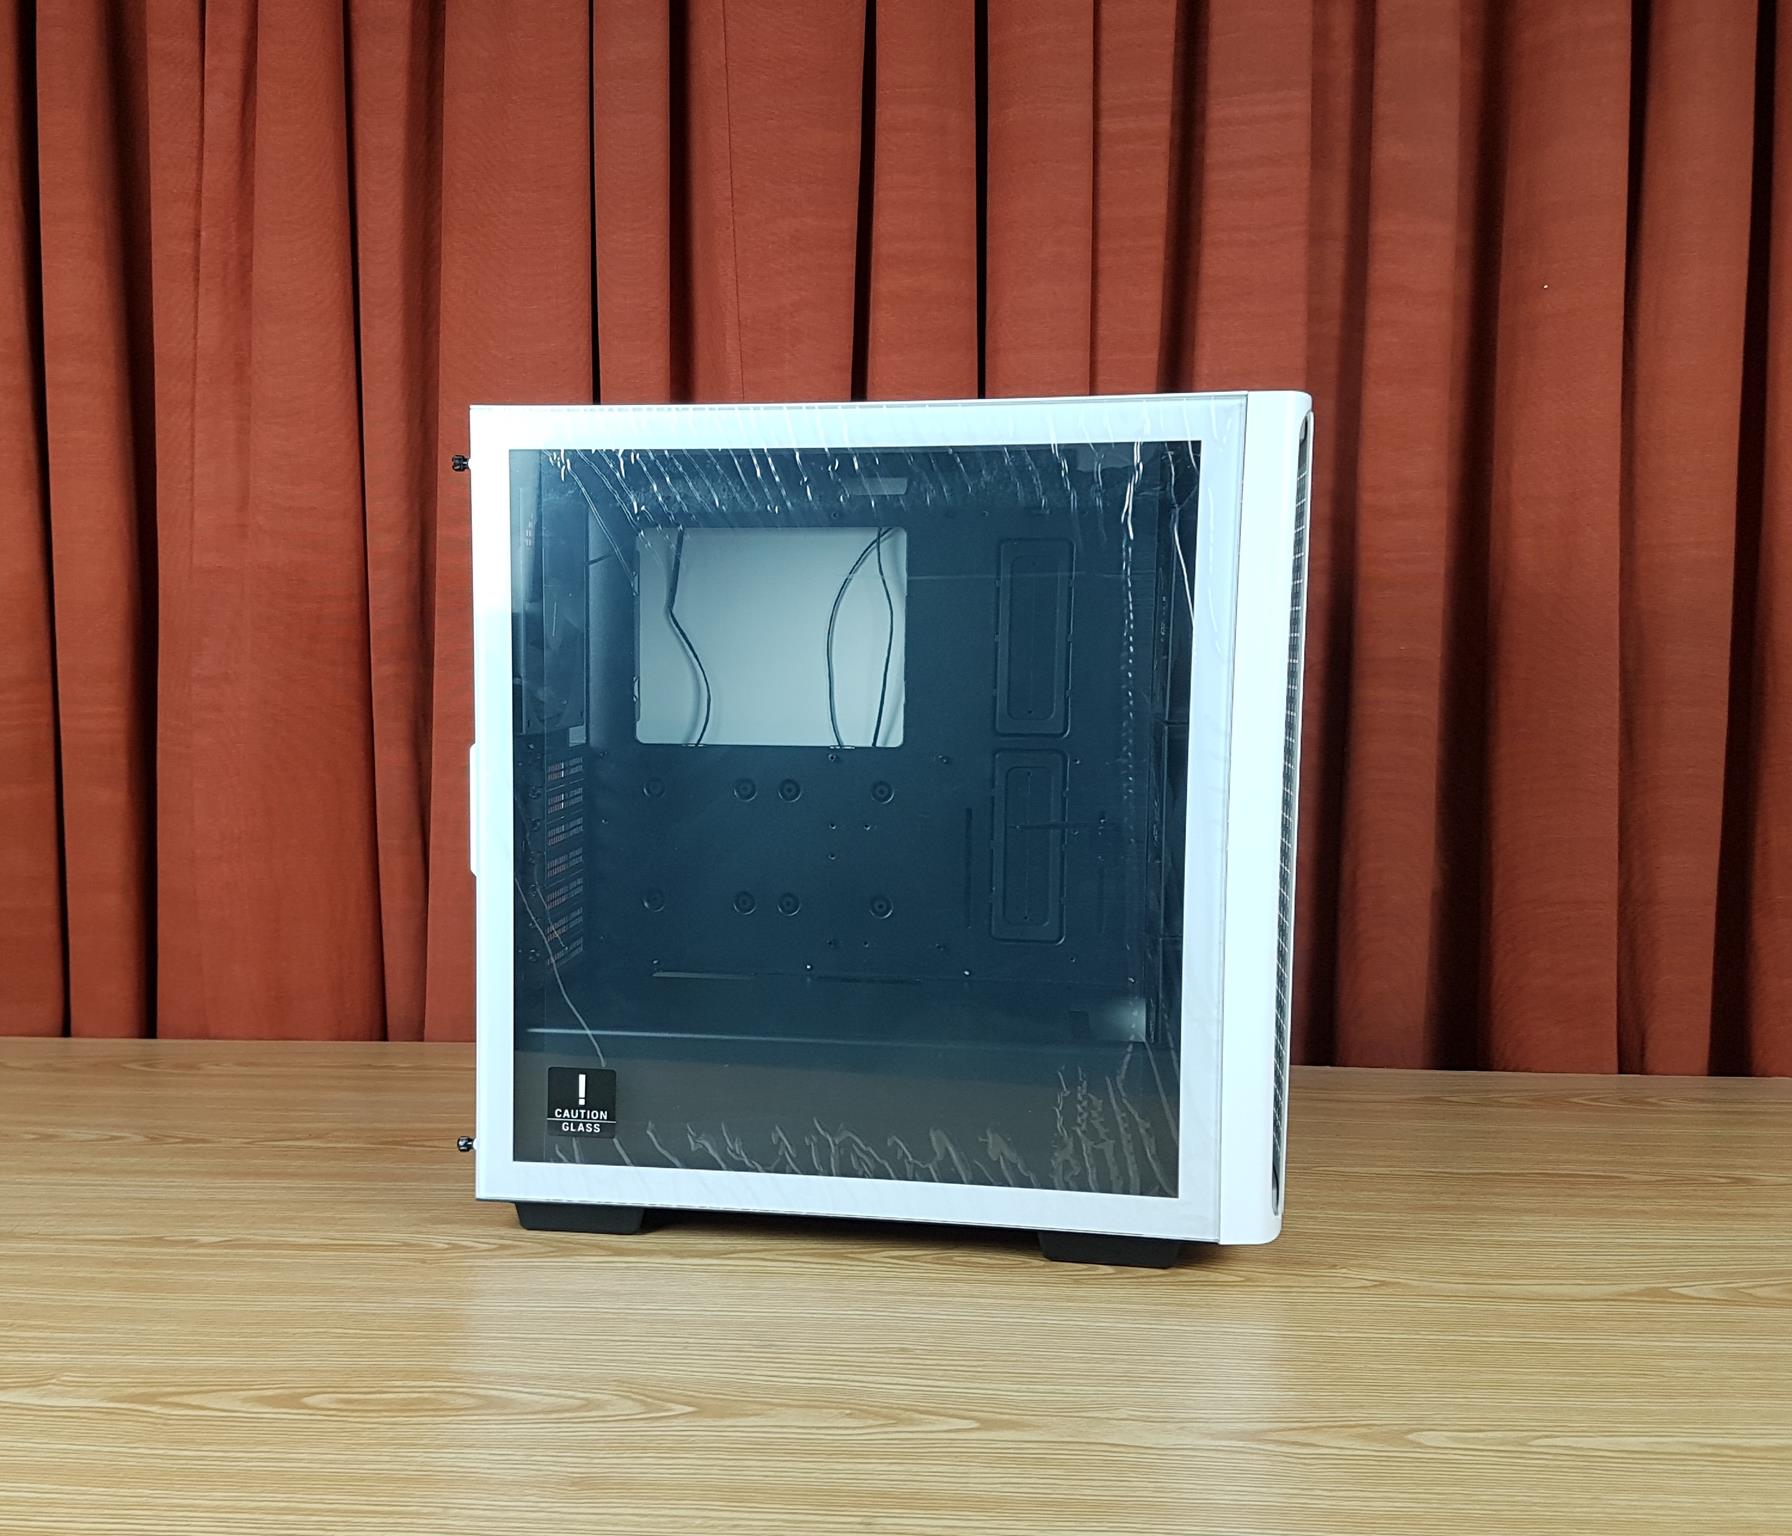
The DEEPCOOL CK560 WH has a tempered glass panel on the side. The thickness of the panel seems to be 3mm so take care during handling. The panel is not tinted and gives a good enough see-through view. The panel is not hinged as it is placed on the bottom mount and secured using two screws on the top. I wish DEEPCOOL has gone for a hinged design here! The panel flushes fully with the frame of the case.

We have a standard layout on the rear. There is a cutout for the IO shield of the motherboard. On its right, there is a vented area for the 120mm and 140mm fan mount. One non-RGB 140mm fan is preinstalled. The 140mm fan’s height is not adjustable. However, the height of the 120mm fan is adjustable.
We have 7 PCIe slots in the horizontal layout. The slot covers are reusable. These slots are implemented recessed inside the case. There is no vertical slot. That area has a perforation for ventilation.
There is an ATX PSU mount on the bottom.
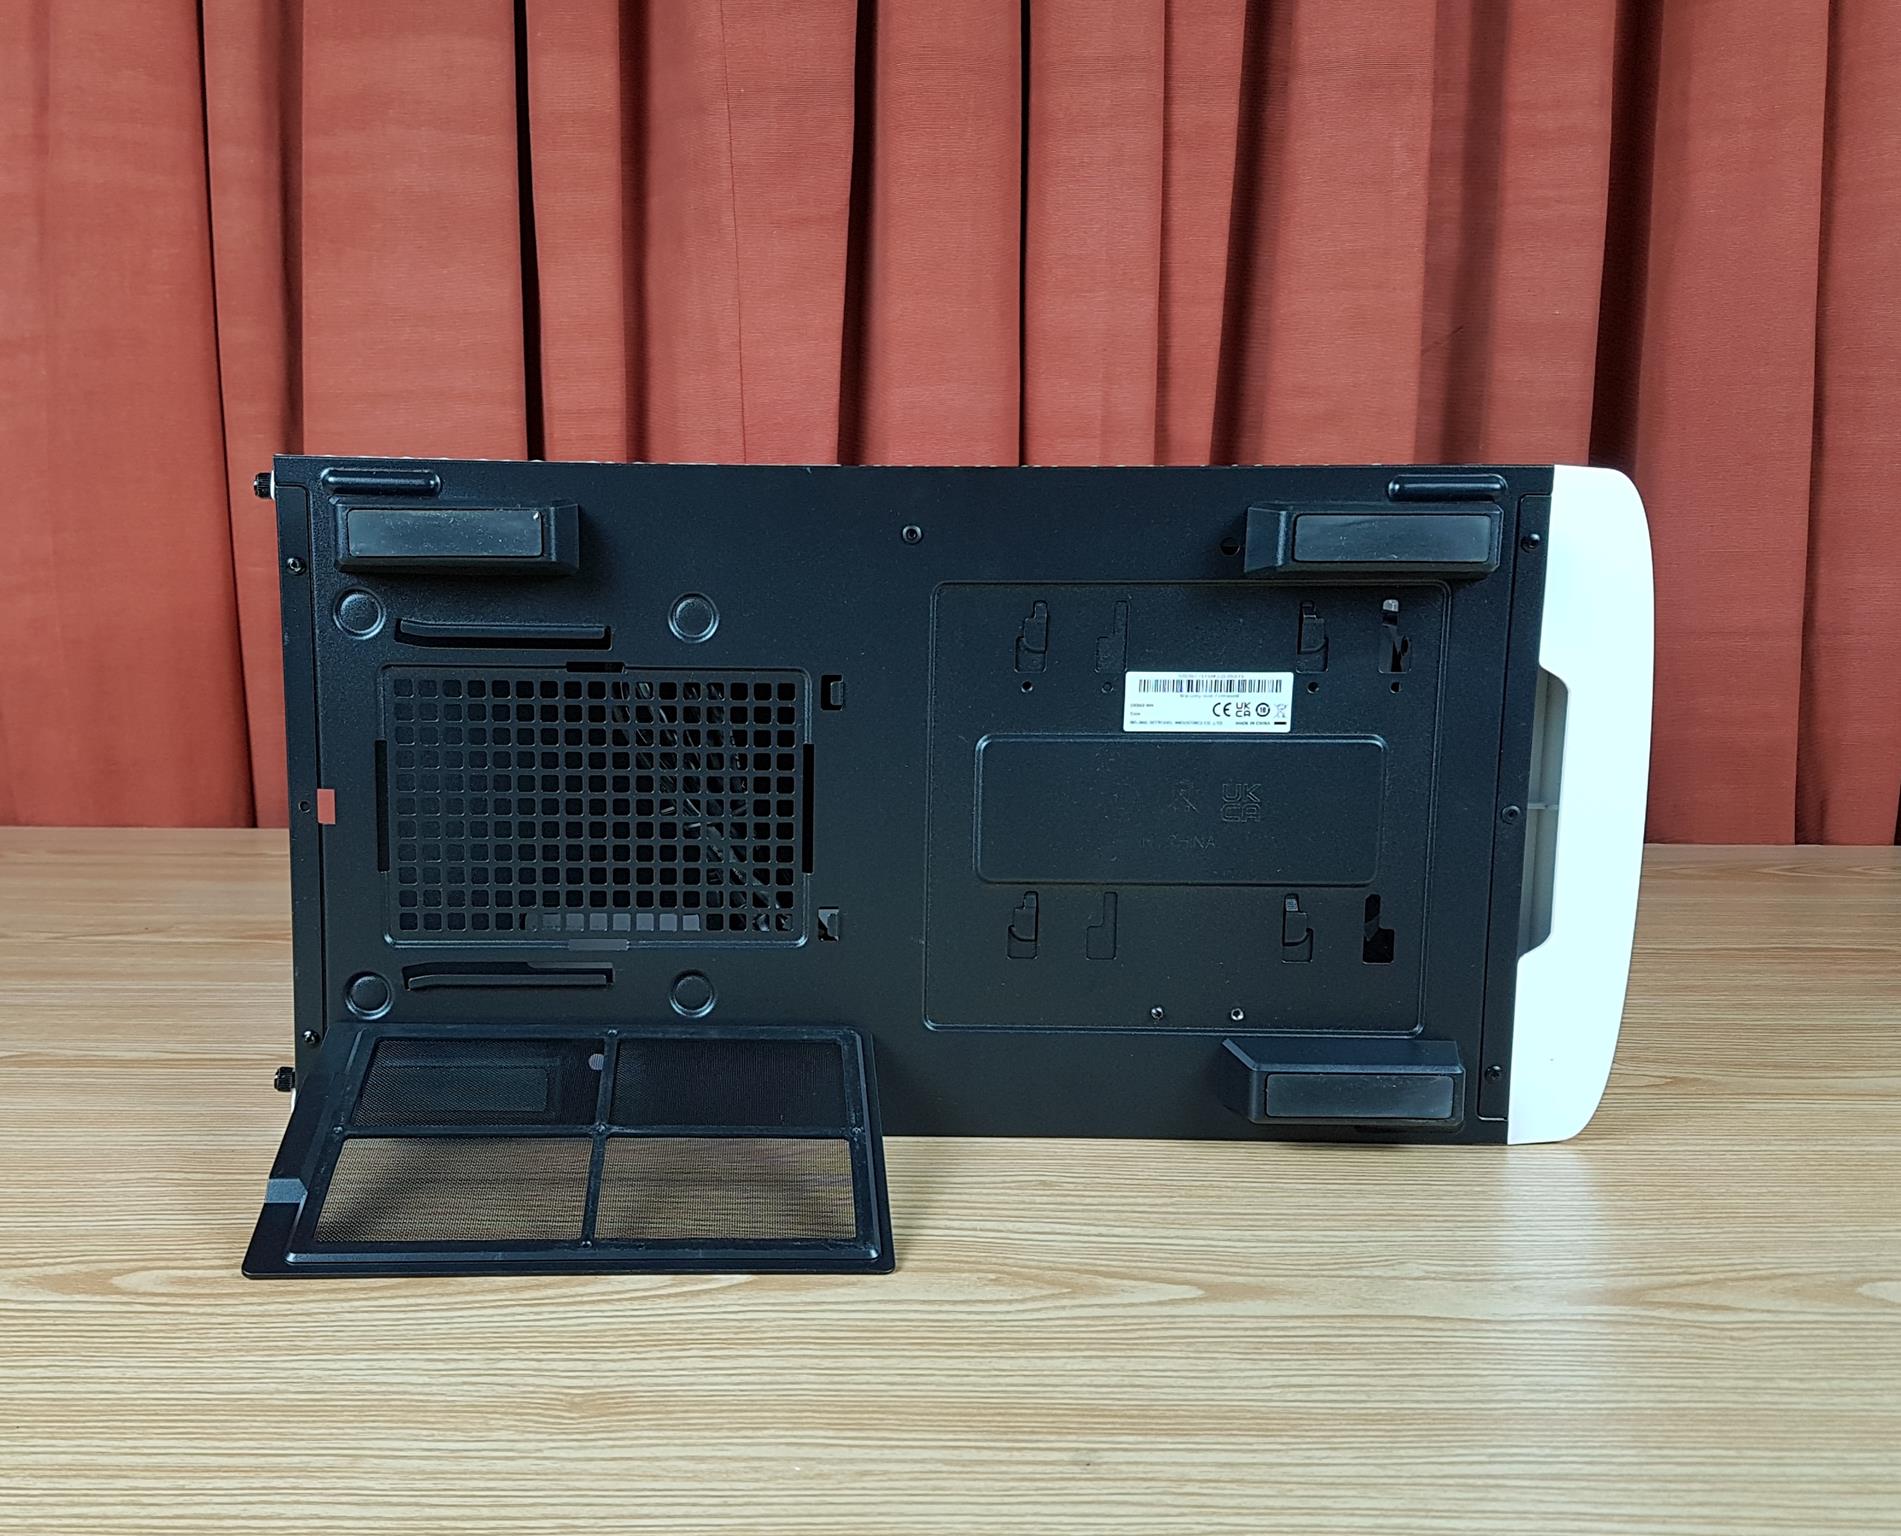
The PSU area is vented and is covered by a non-magnetic dust filter. The black color feet give a sufficient lift to the chassis from the bottom for better ventilation. The feet have anti-slip and anti-vibration pads to avoid scratching the surface.
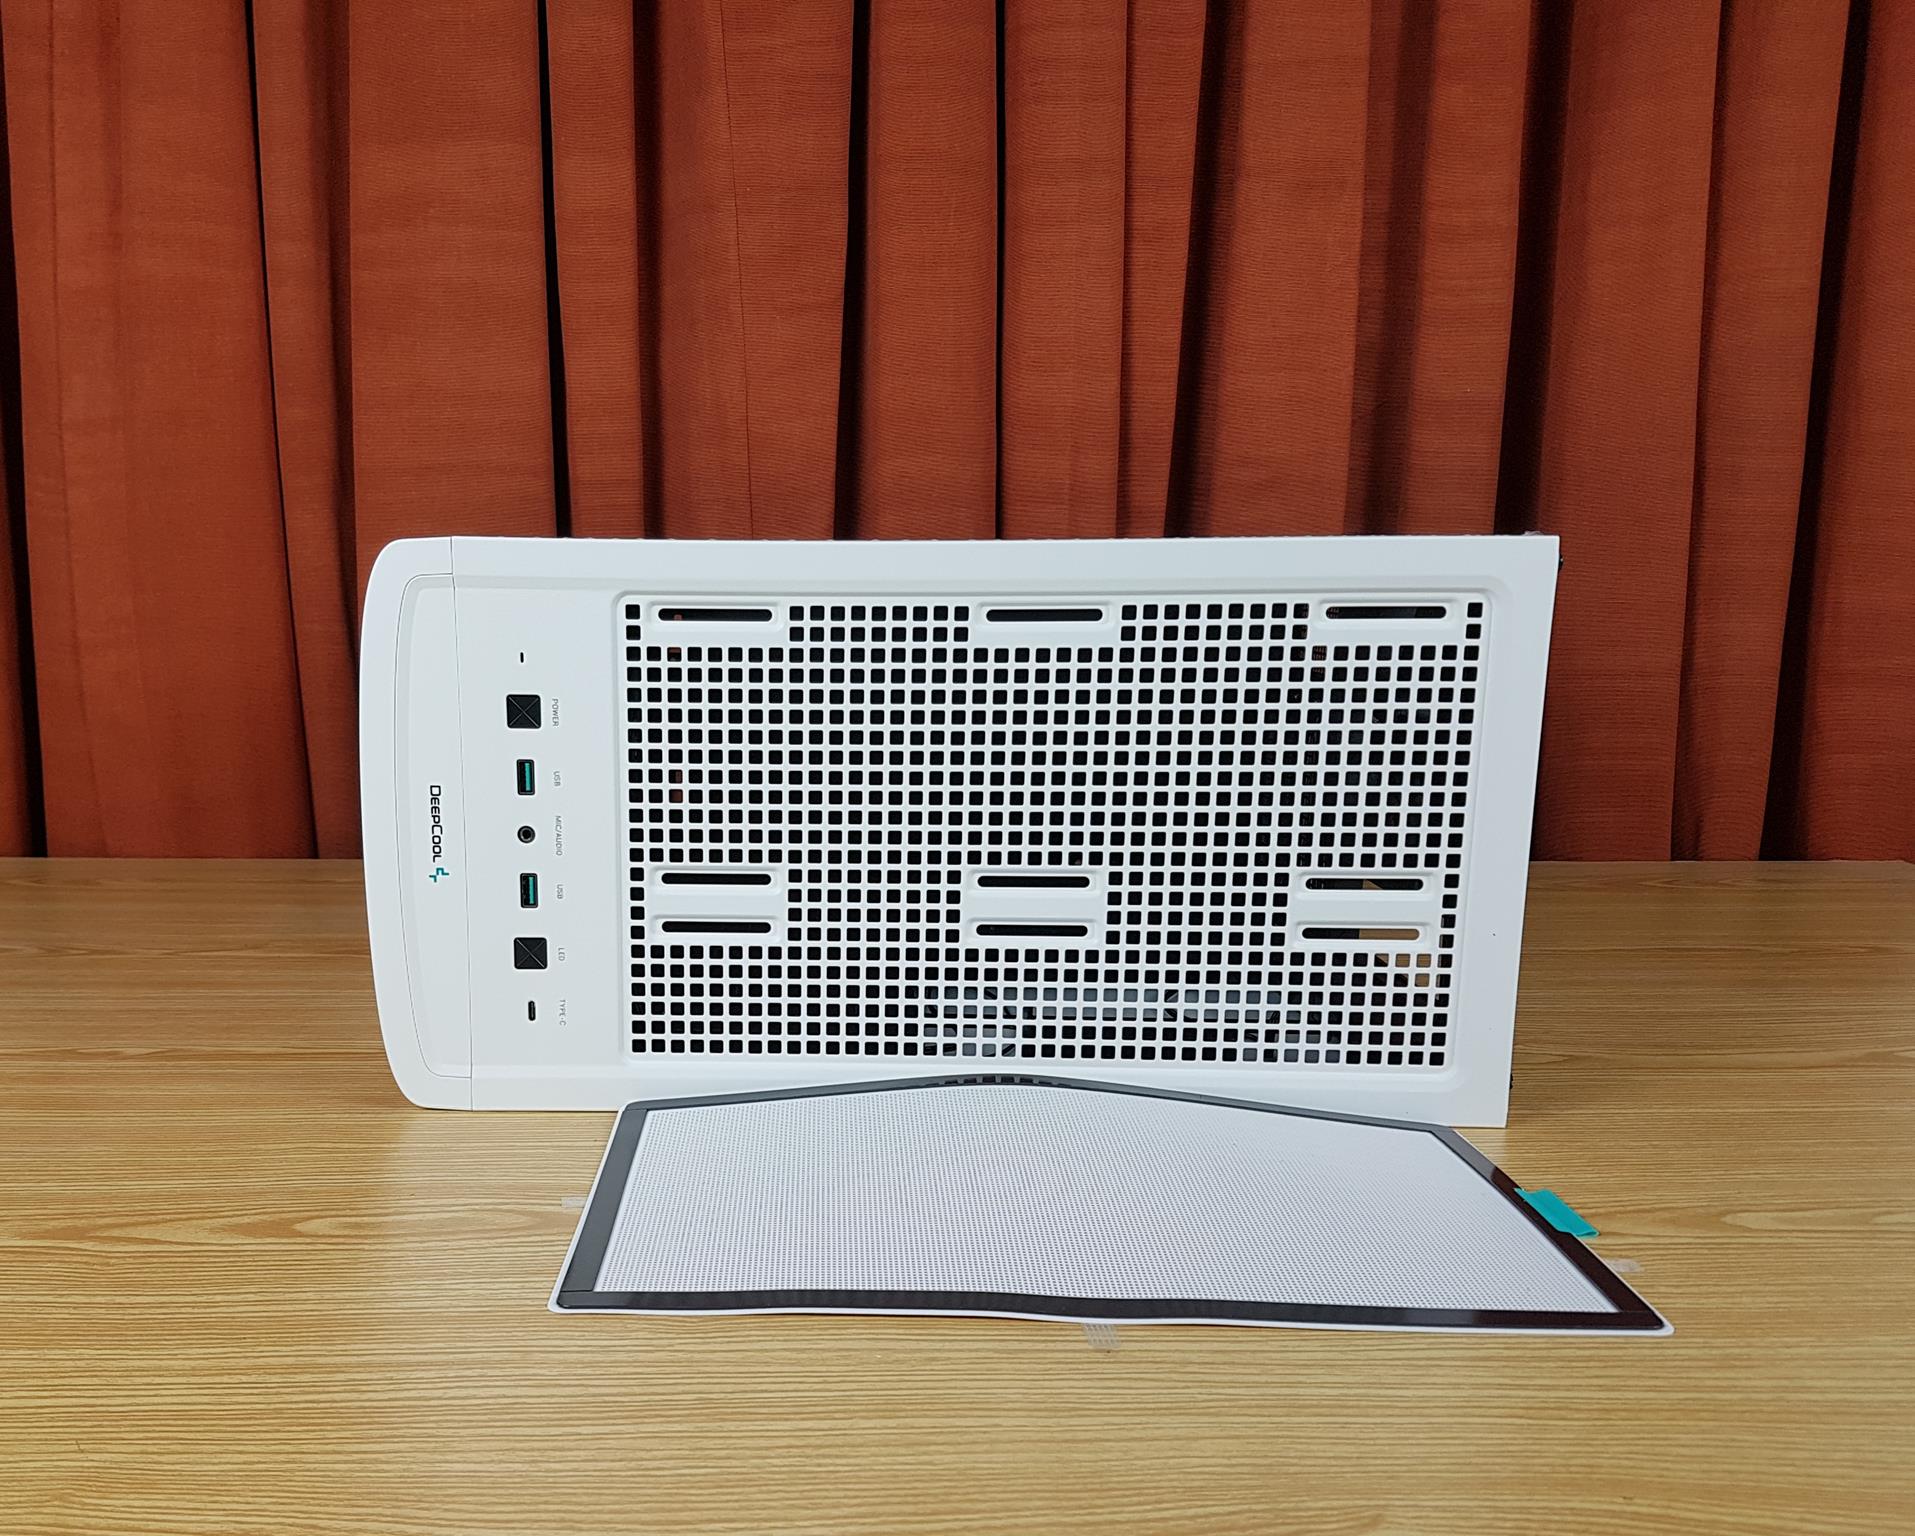
The top view shows the rail mount system with perforation on the main vent area. We have a rail mount mechanism. The case has a good width giving an offset towards the motherboard tray. The IO panel is also on the top side located towards the front of the case. The top area has a magnetic dust filter. There is a DeepCool branding towards the front of the panel.
The following connectivity options are on the I/O panel.
- Audio Jacks
- 2x USB 3.0 Ports
- 1x USB Type-C port
- Power Button
- LED Button
Please note that there is no Reset button as DEEPCOOL has taken out the Reset option in favor of the LED button. In my opinion, this should have been implemented the other way around by adding another button for Reset.
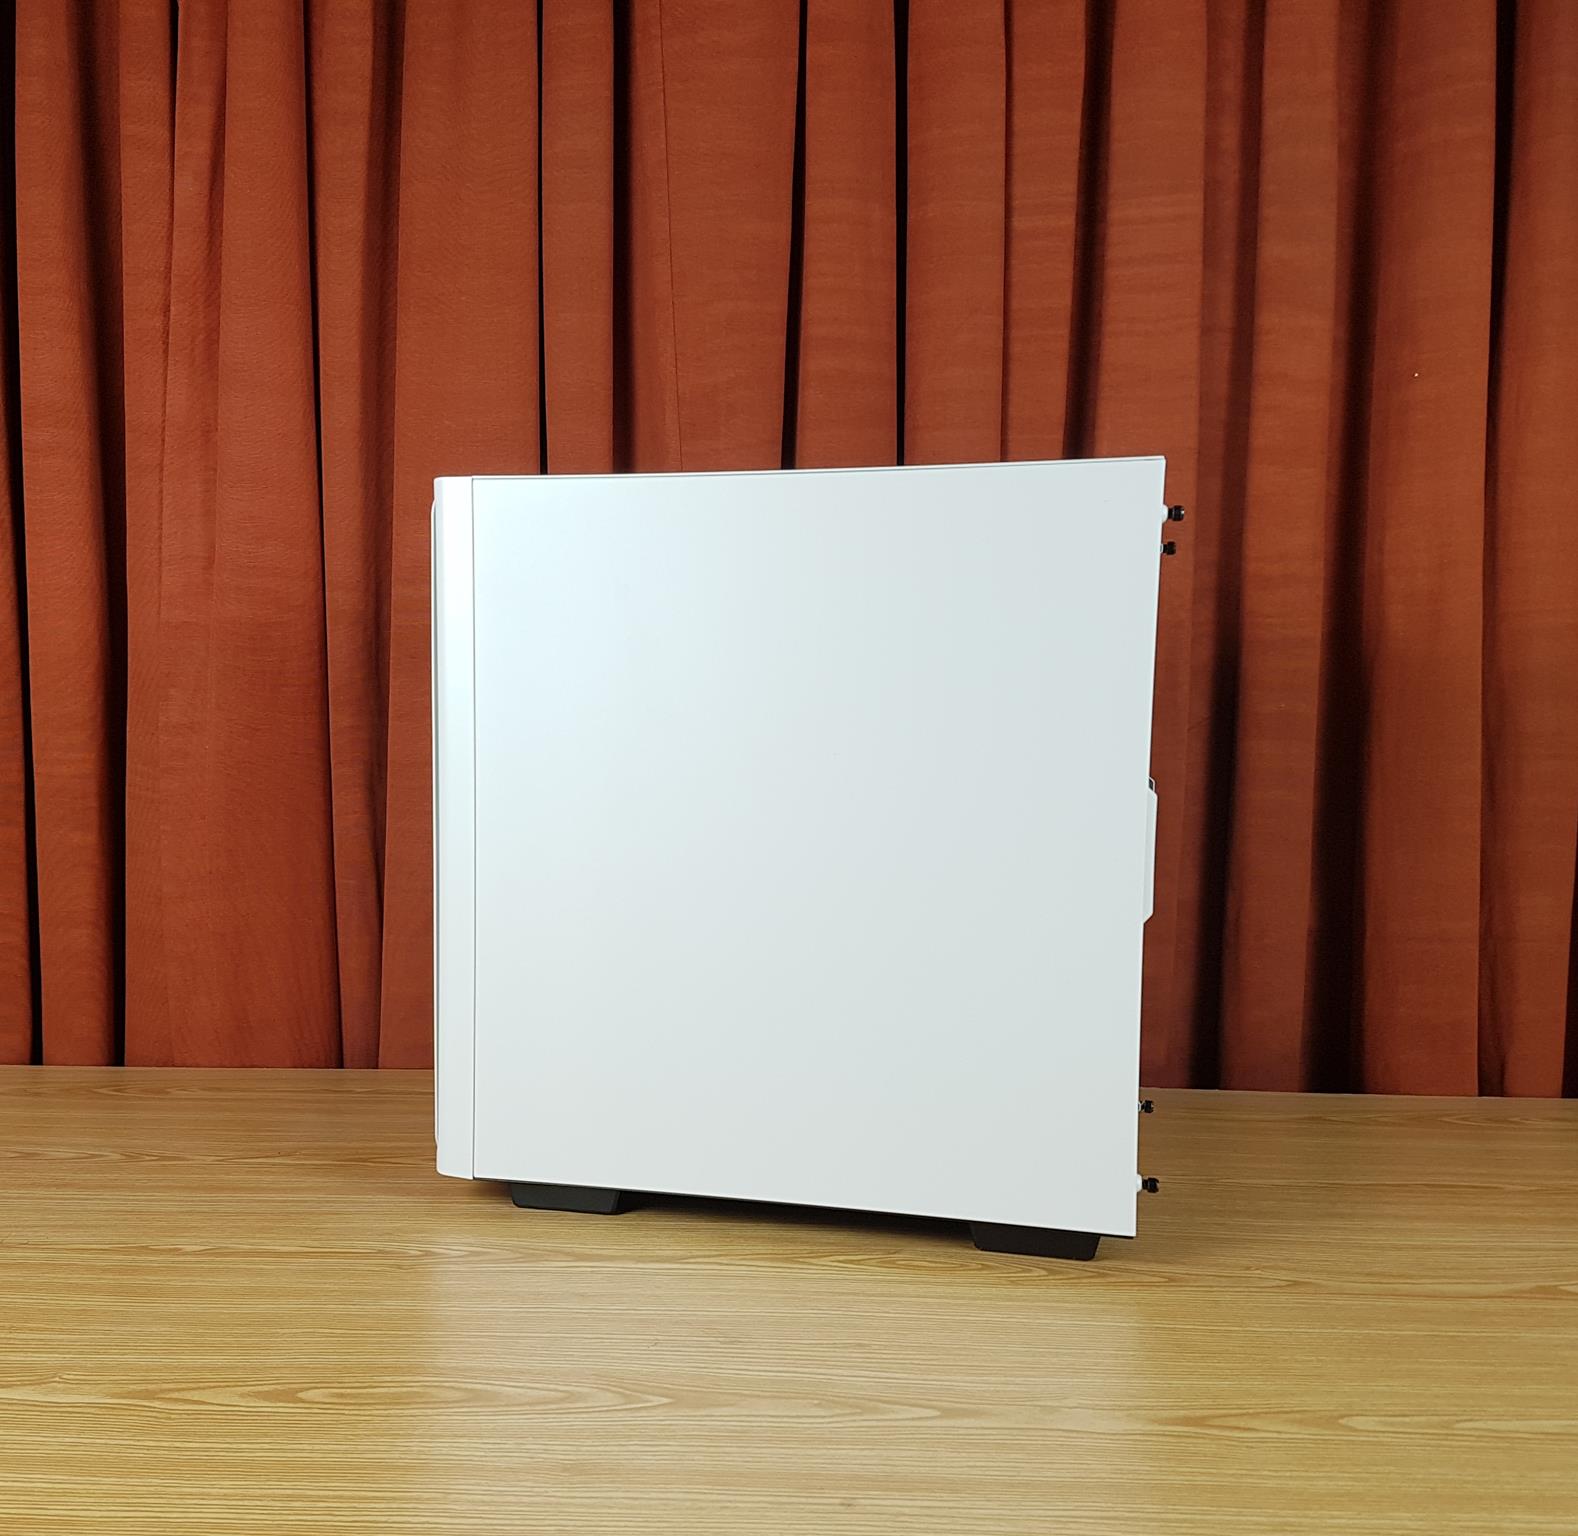
The side panel is made of steel. It is finished in white color and has a solid build quality.
Interior
Let’s take a look at the interior of the chassis.
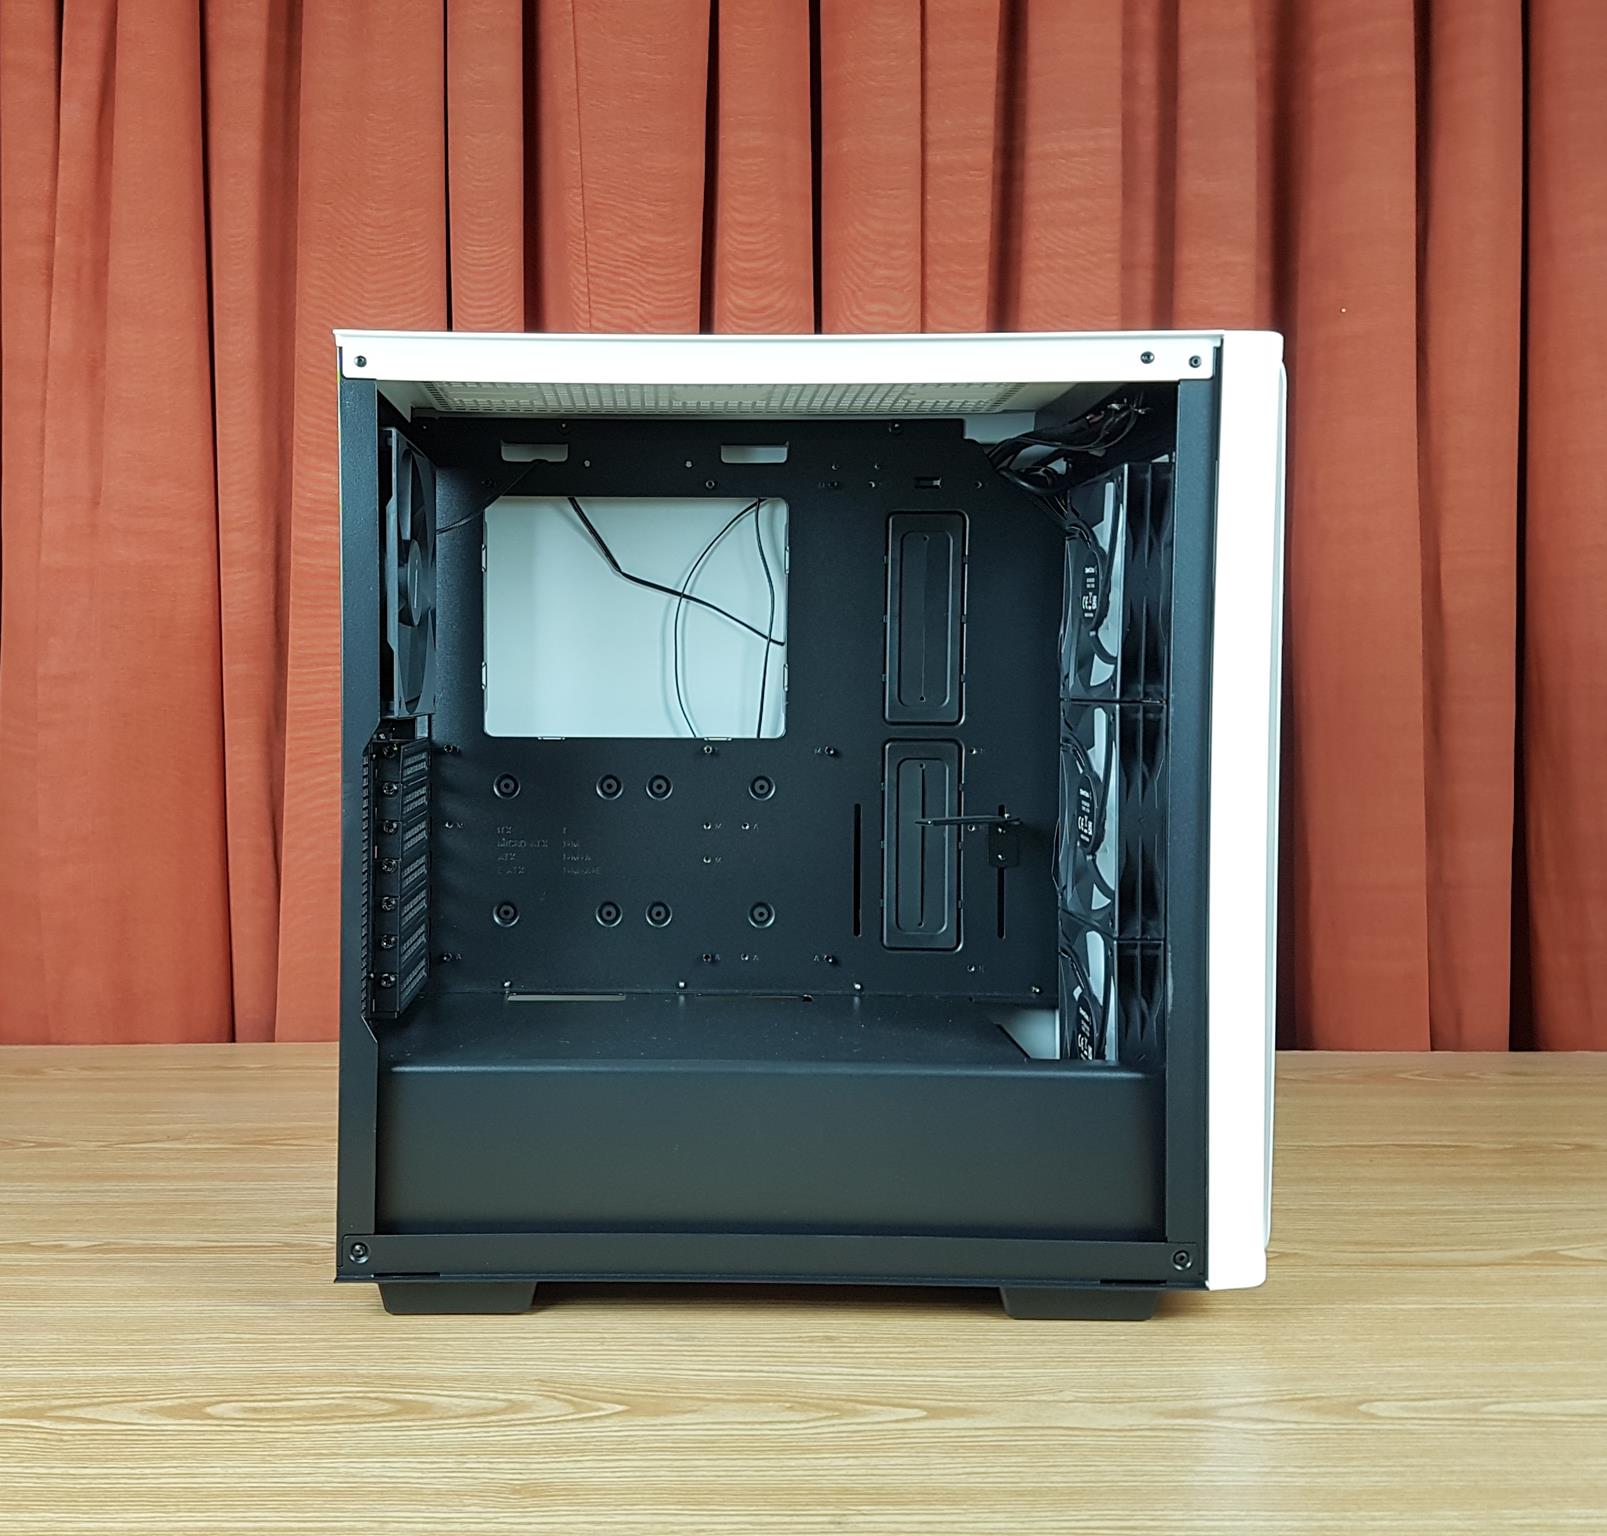
This case is black and white not all white as is evident from the picture. I wish they had done a complete white case for the pure white build. But this combination will allow the black and white contrast to build. The overall build quality is good much like what we saw on the MatreXx 70 ADD 3F case from DeepCool. The inner frame’s height is 345mm and the length is 395mm without front fans. We have good enough room to play with the components despite being a compact case. The PSU shroud is fixed and made of steel.
The PSU shroud is not vented. That would mean, you can install the PSU in one direction which is the fan facing down as the fan will pull in the fresh air from the bottom and exhaust the hot air from the rear. Making the fan side face upwards would choke the unit from getting fresh air. There are two cutouts near the motherboard tray. These can be used to pass the cables through for connectivity at the base of the motherboard.
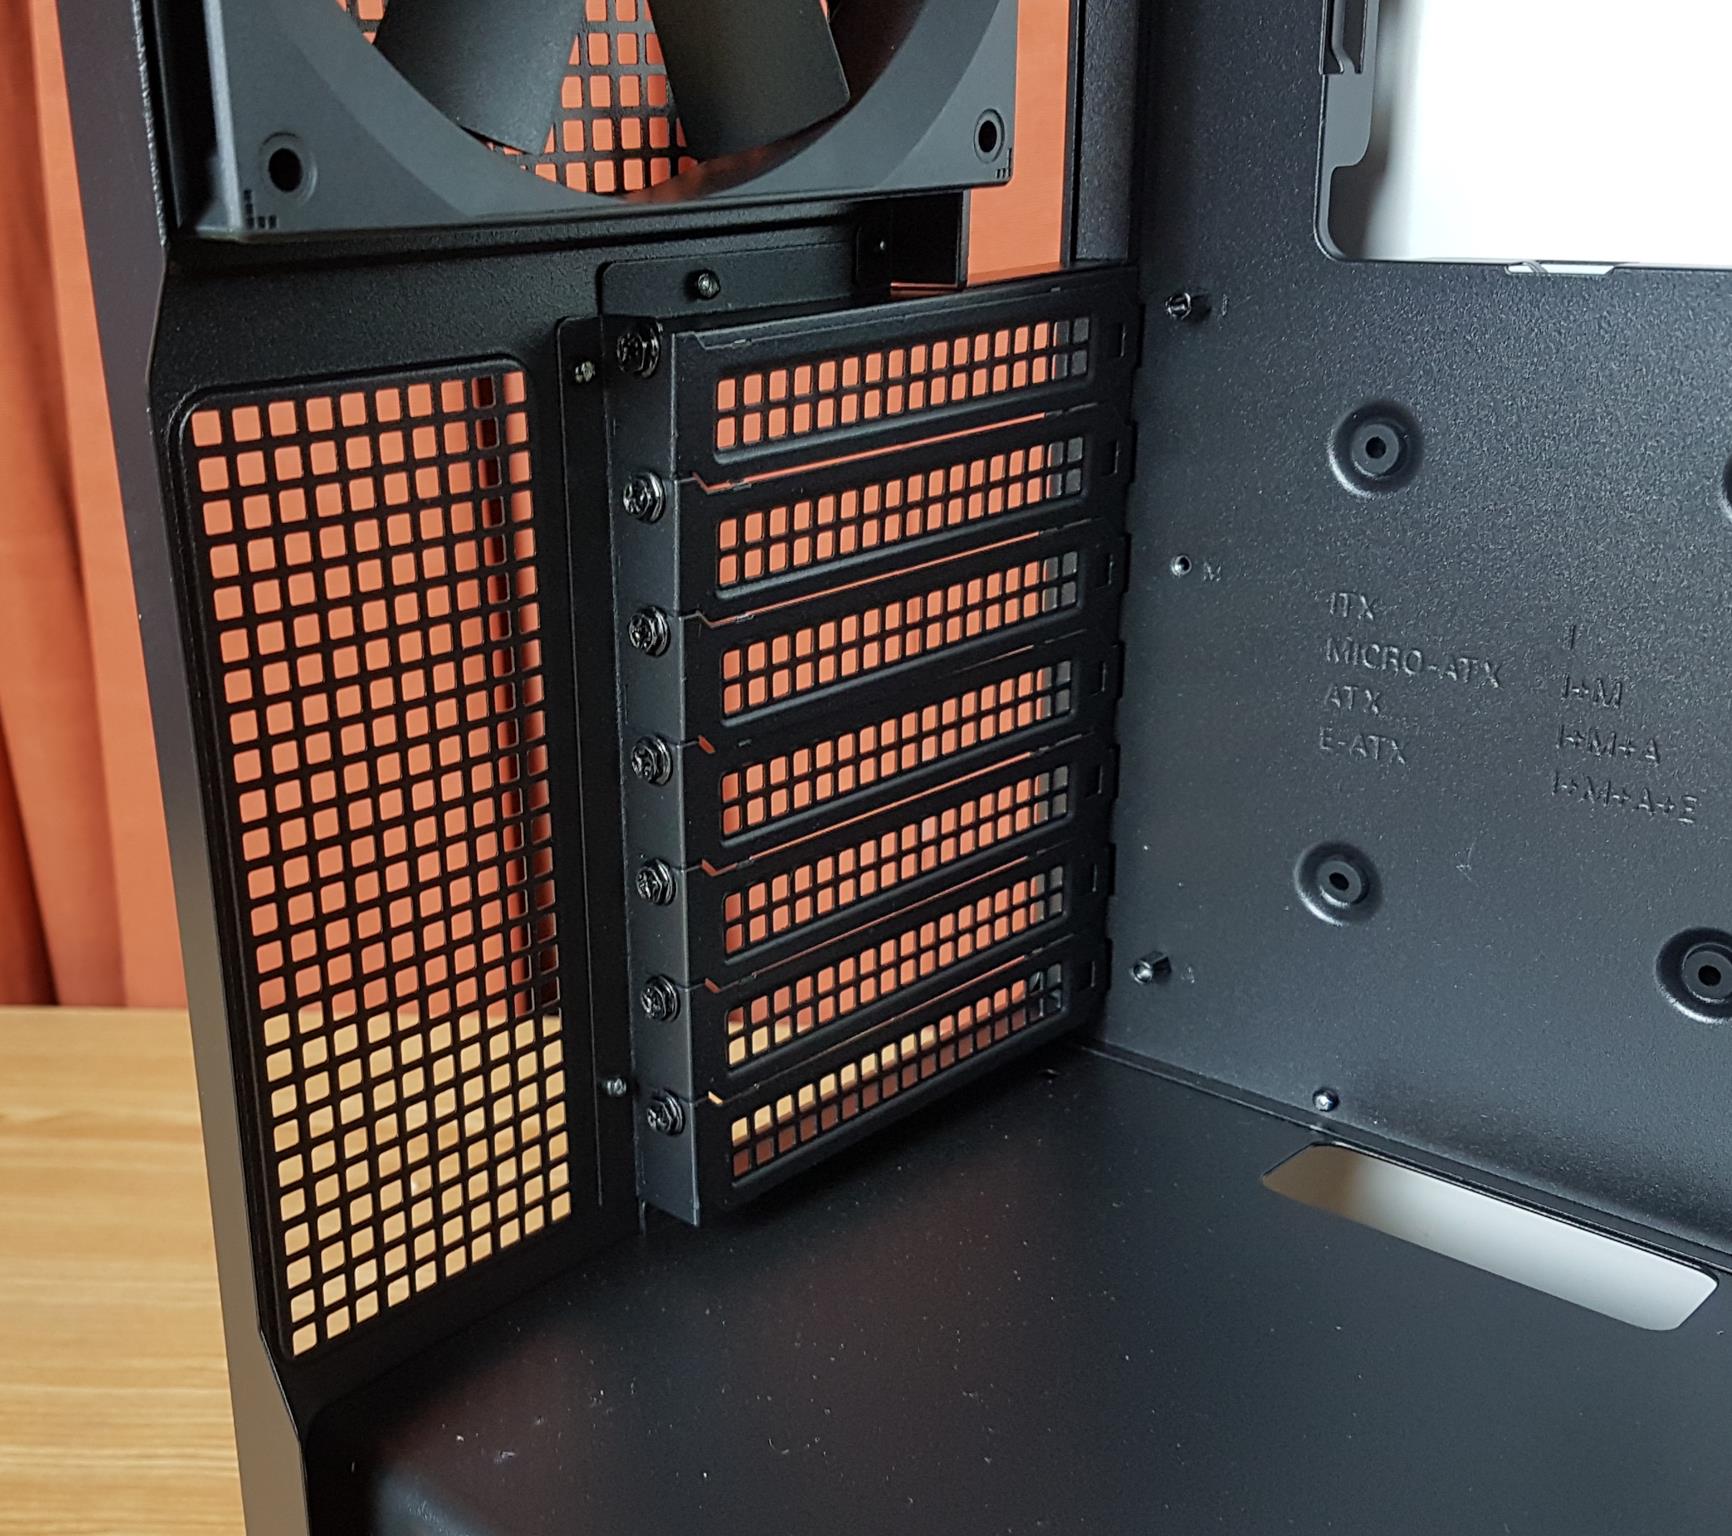
The DeepCool CK560 WH has 7x PCIe slots. Each slot has a reusable and vented cover. There are no vertical slots in this case. The area right next to the 7x slots is vented for ventilation.
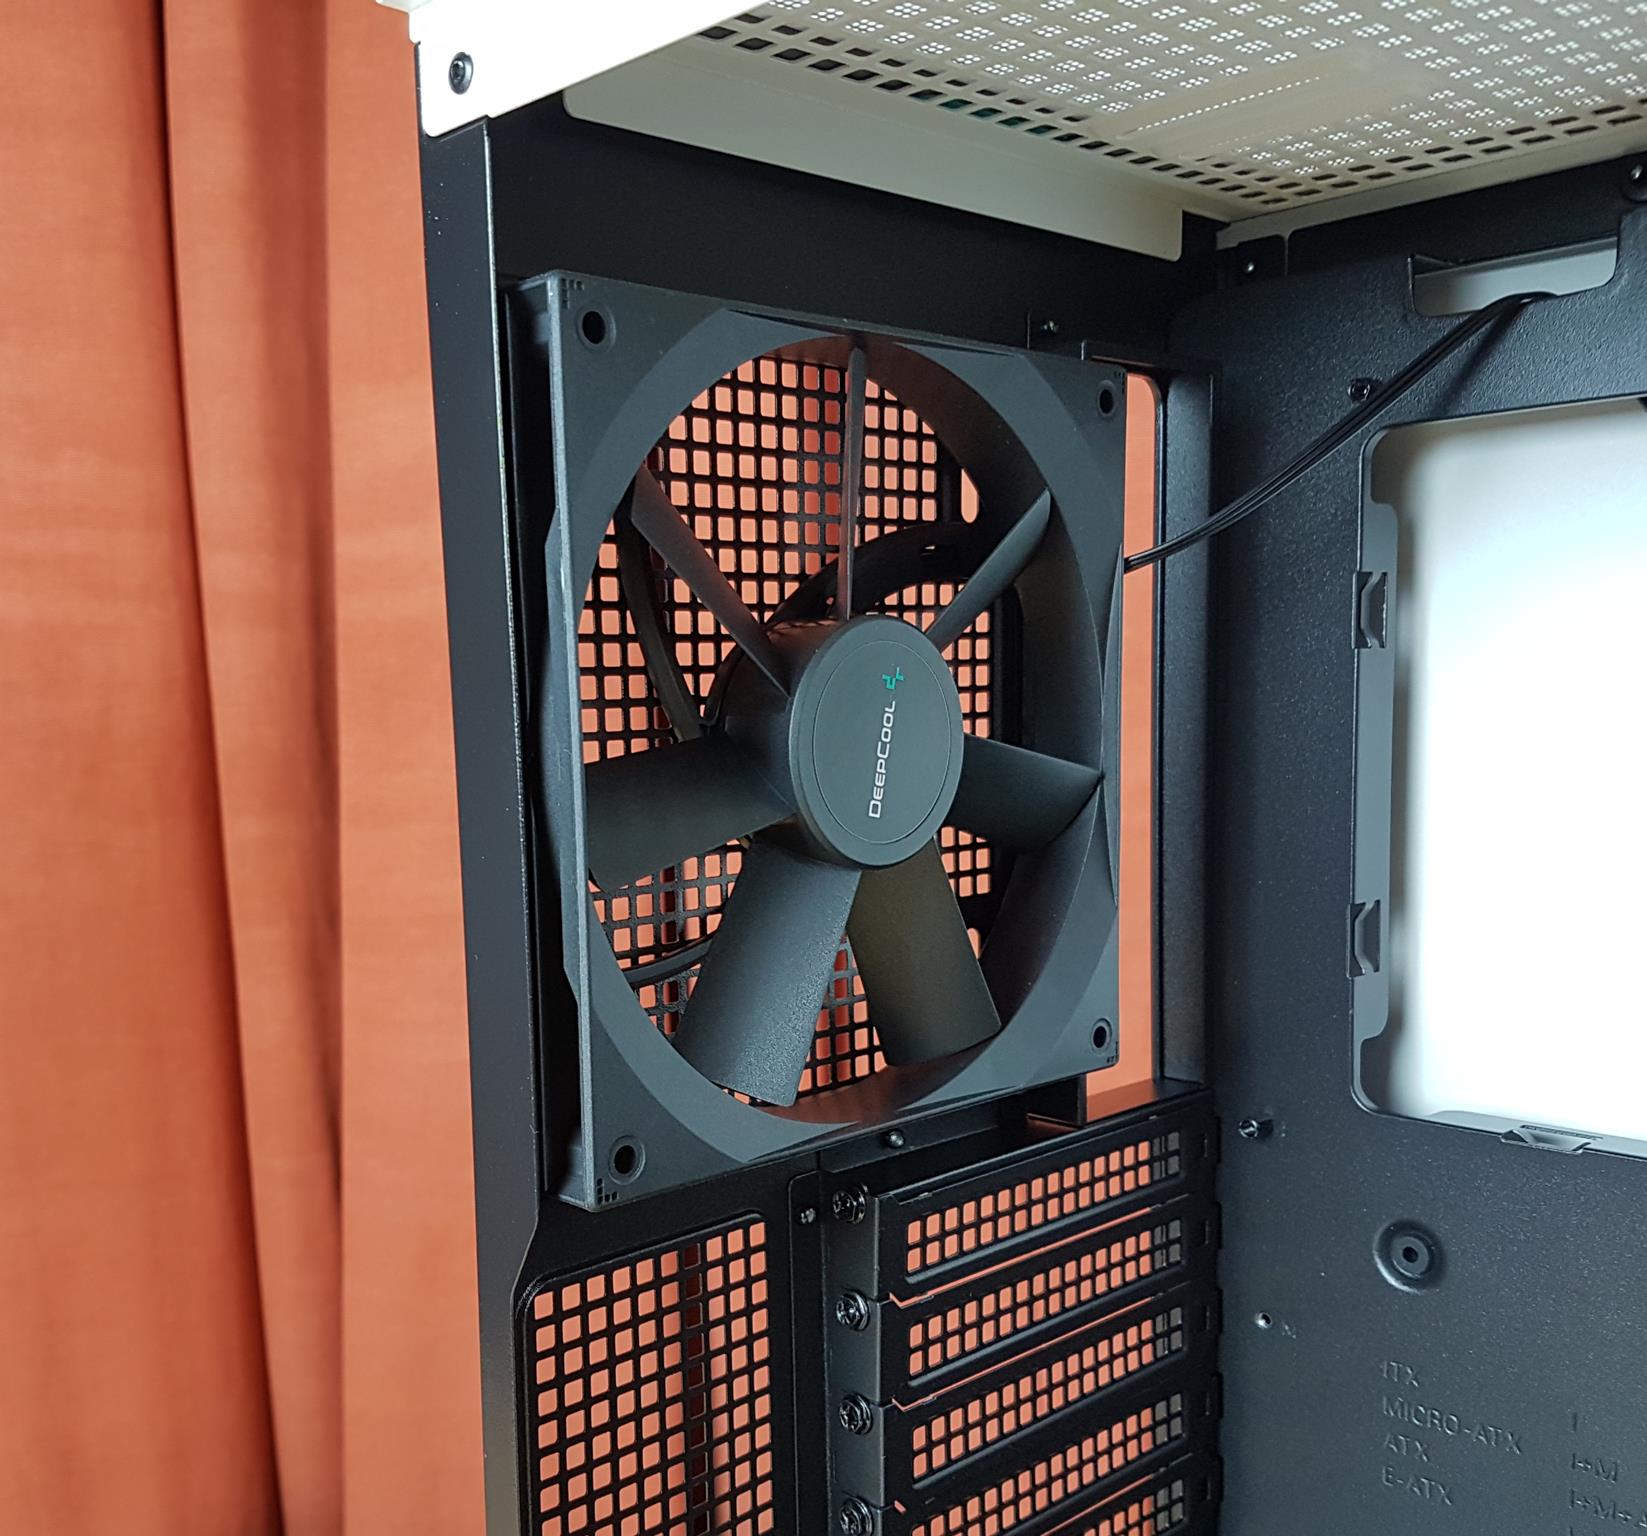
There is a 140mm fan on the rear. With 3x 120mm fans on the front and 1x 140mm fan on the rear, DeepCool is making a good point.
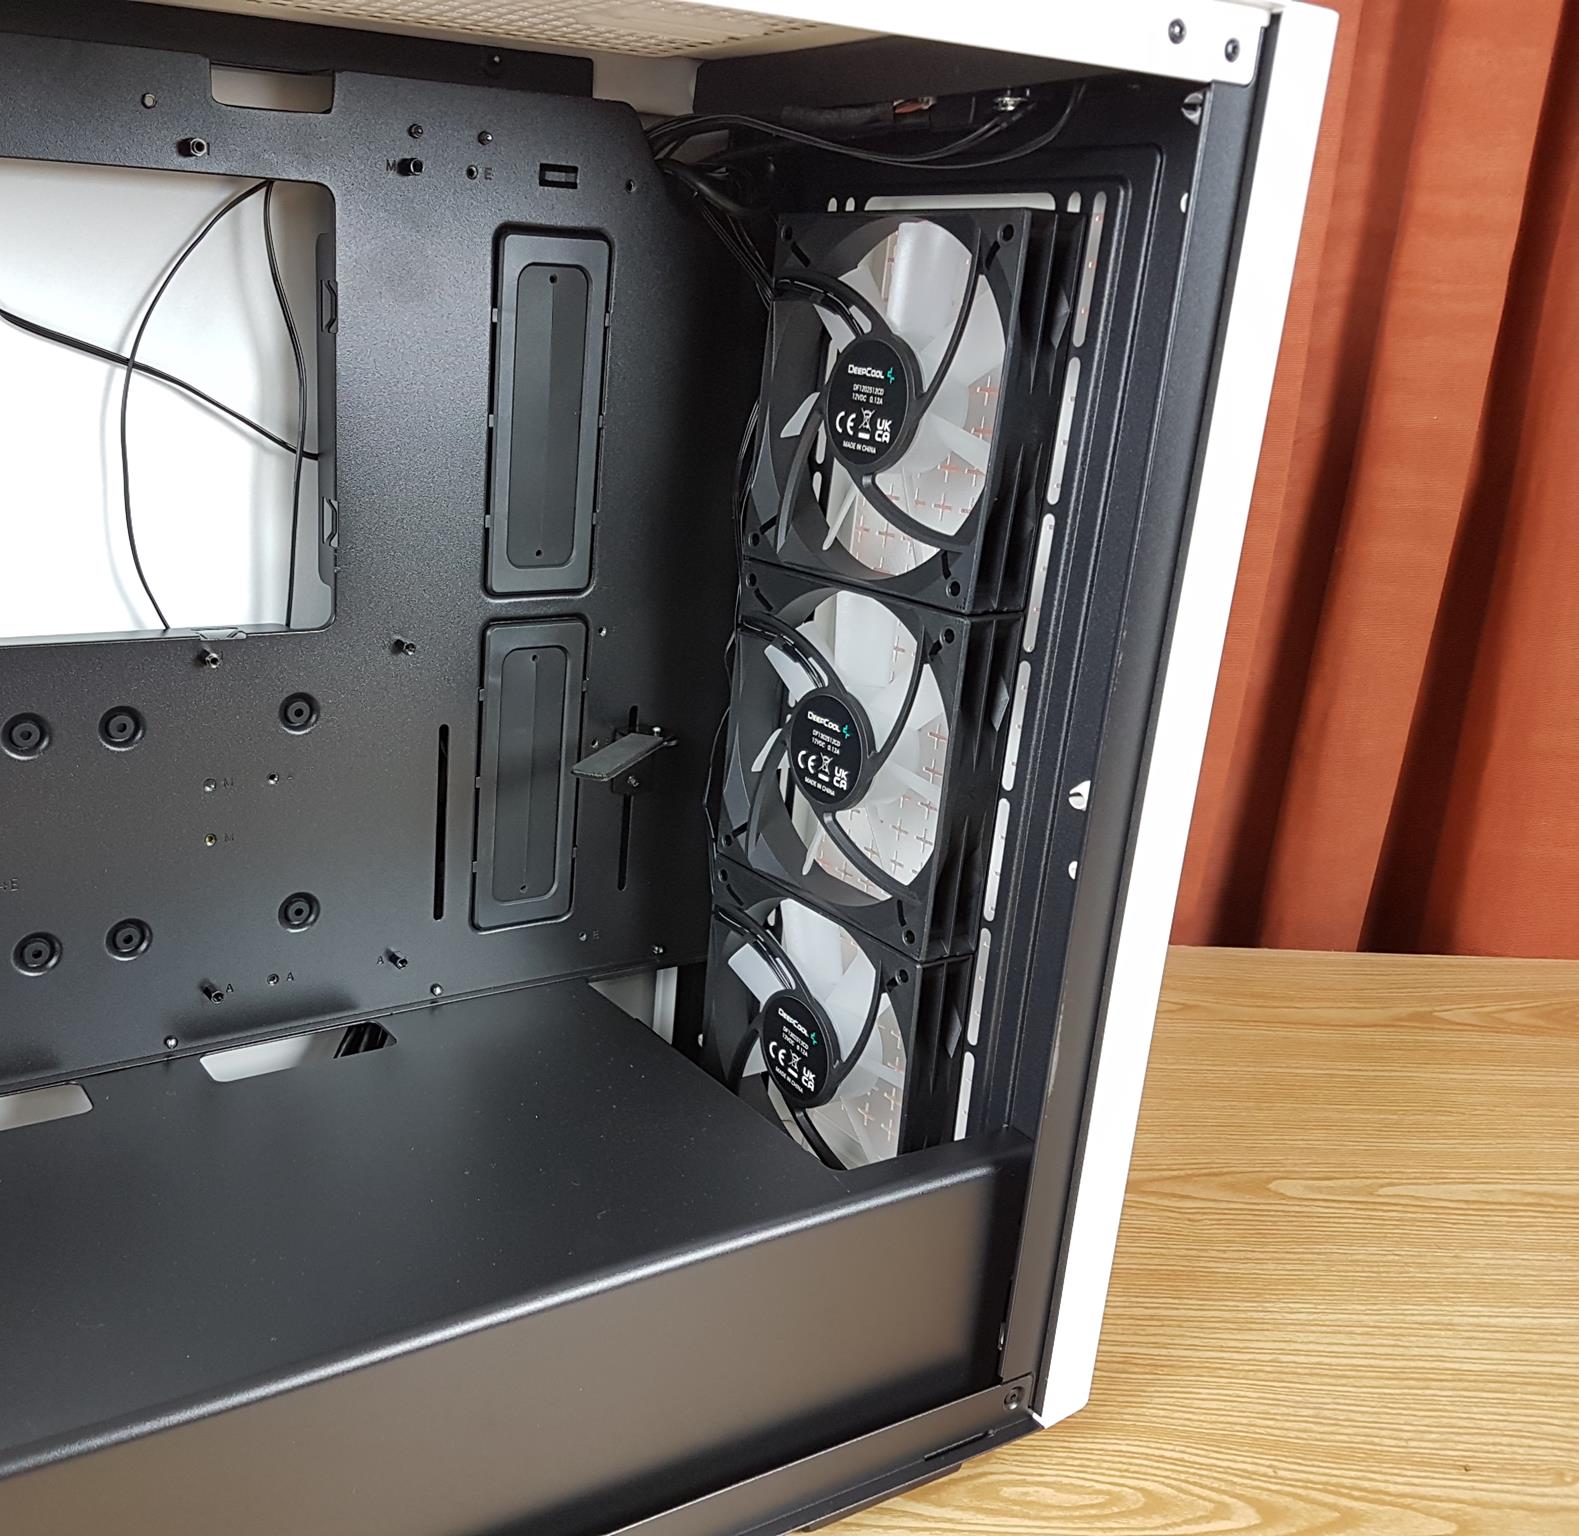
The above picture shows the front mount rail. There are 3x 120mm fans pre-installed on the front. The mounting rail has a good build quality. The fans are installed on the backside of the mounting.
The gap on the front from the mounting rail to the PSU shroud is roughly 38mm or so including the pre-installed fans. That would mean push/pull in 240mm radiator is possible but not above that.
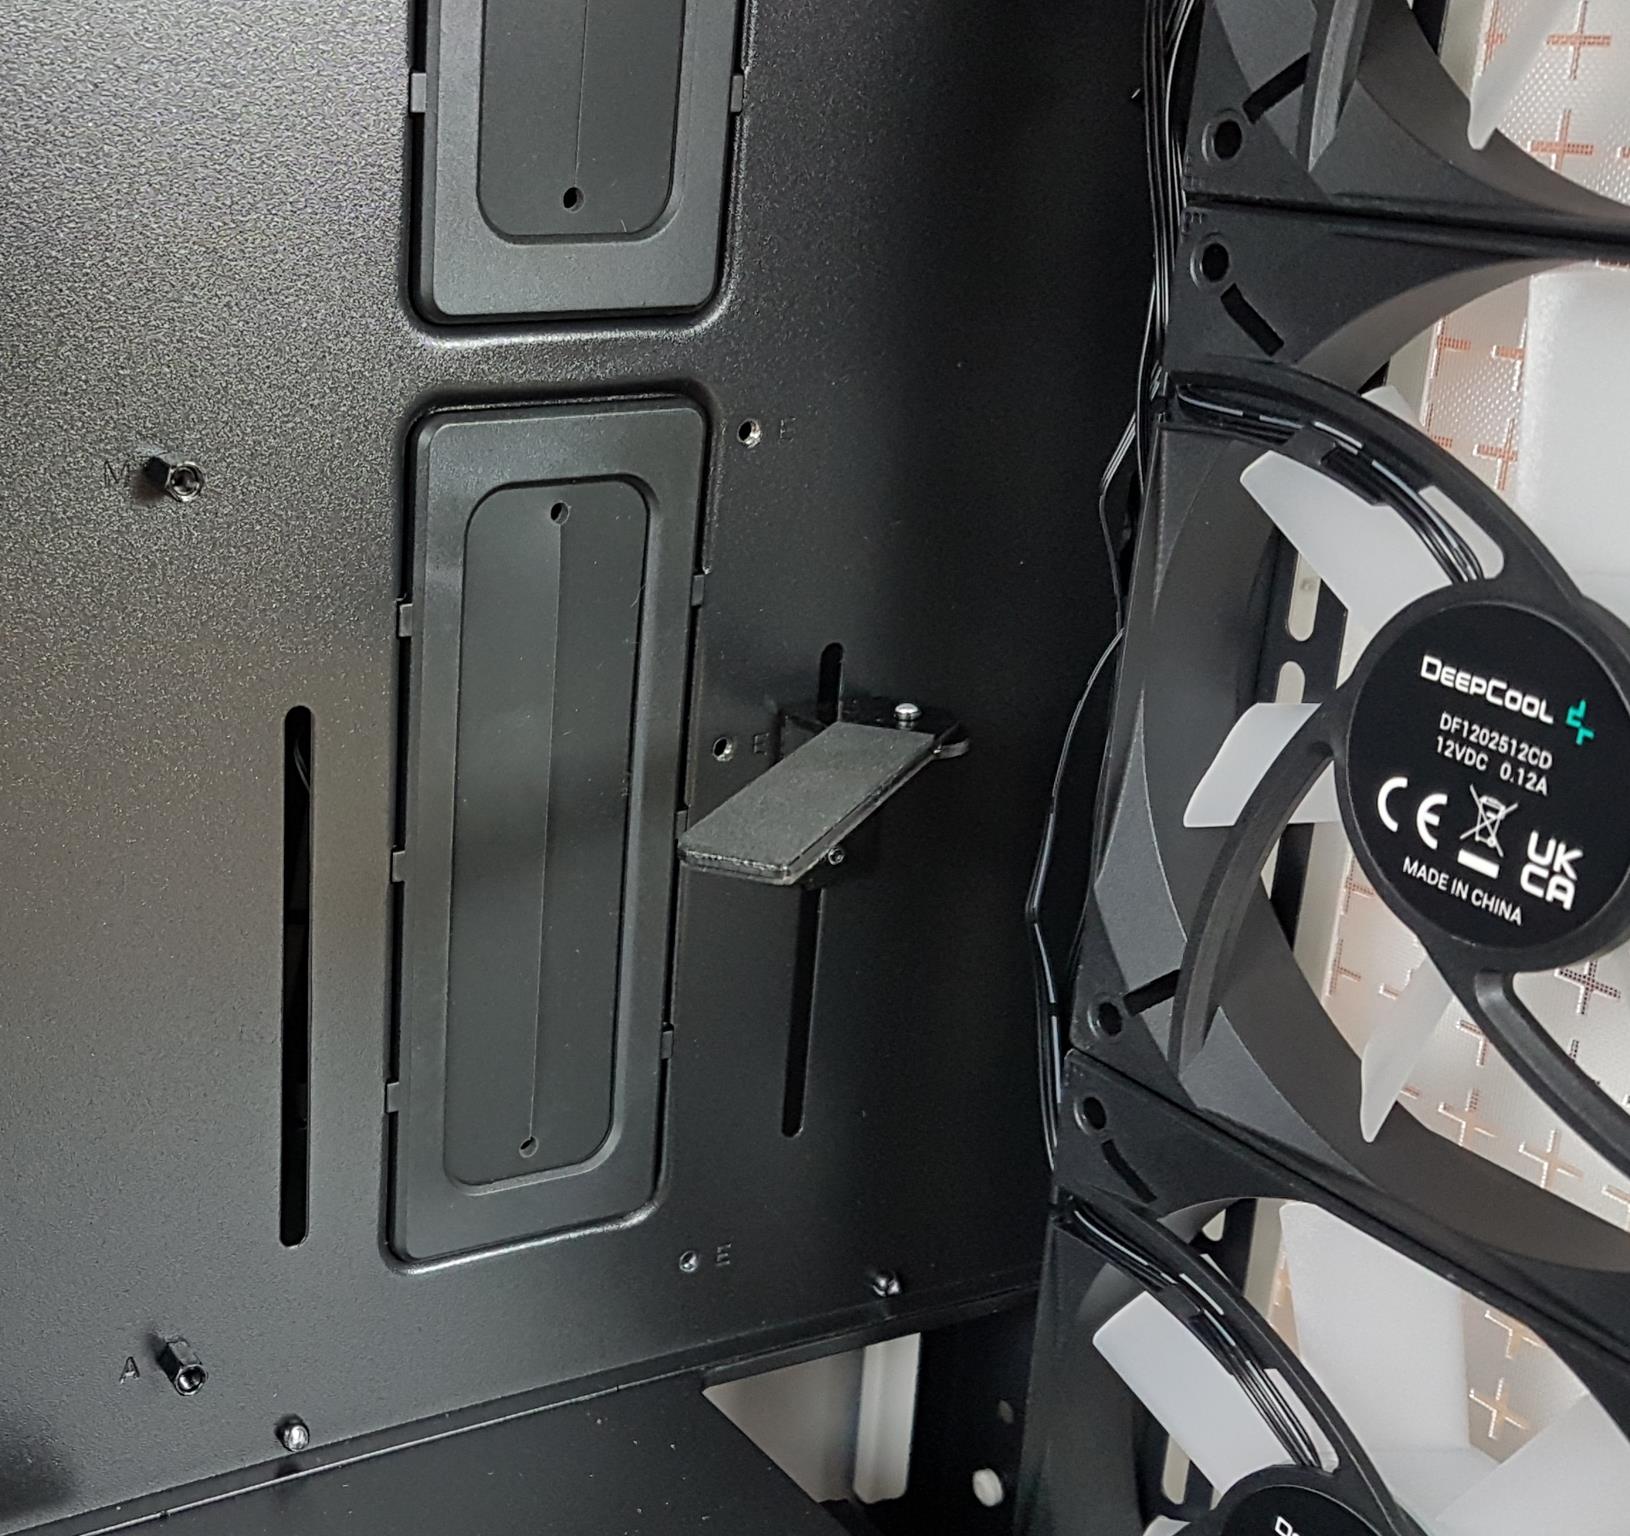
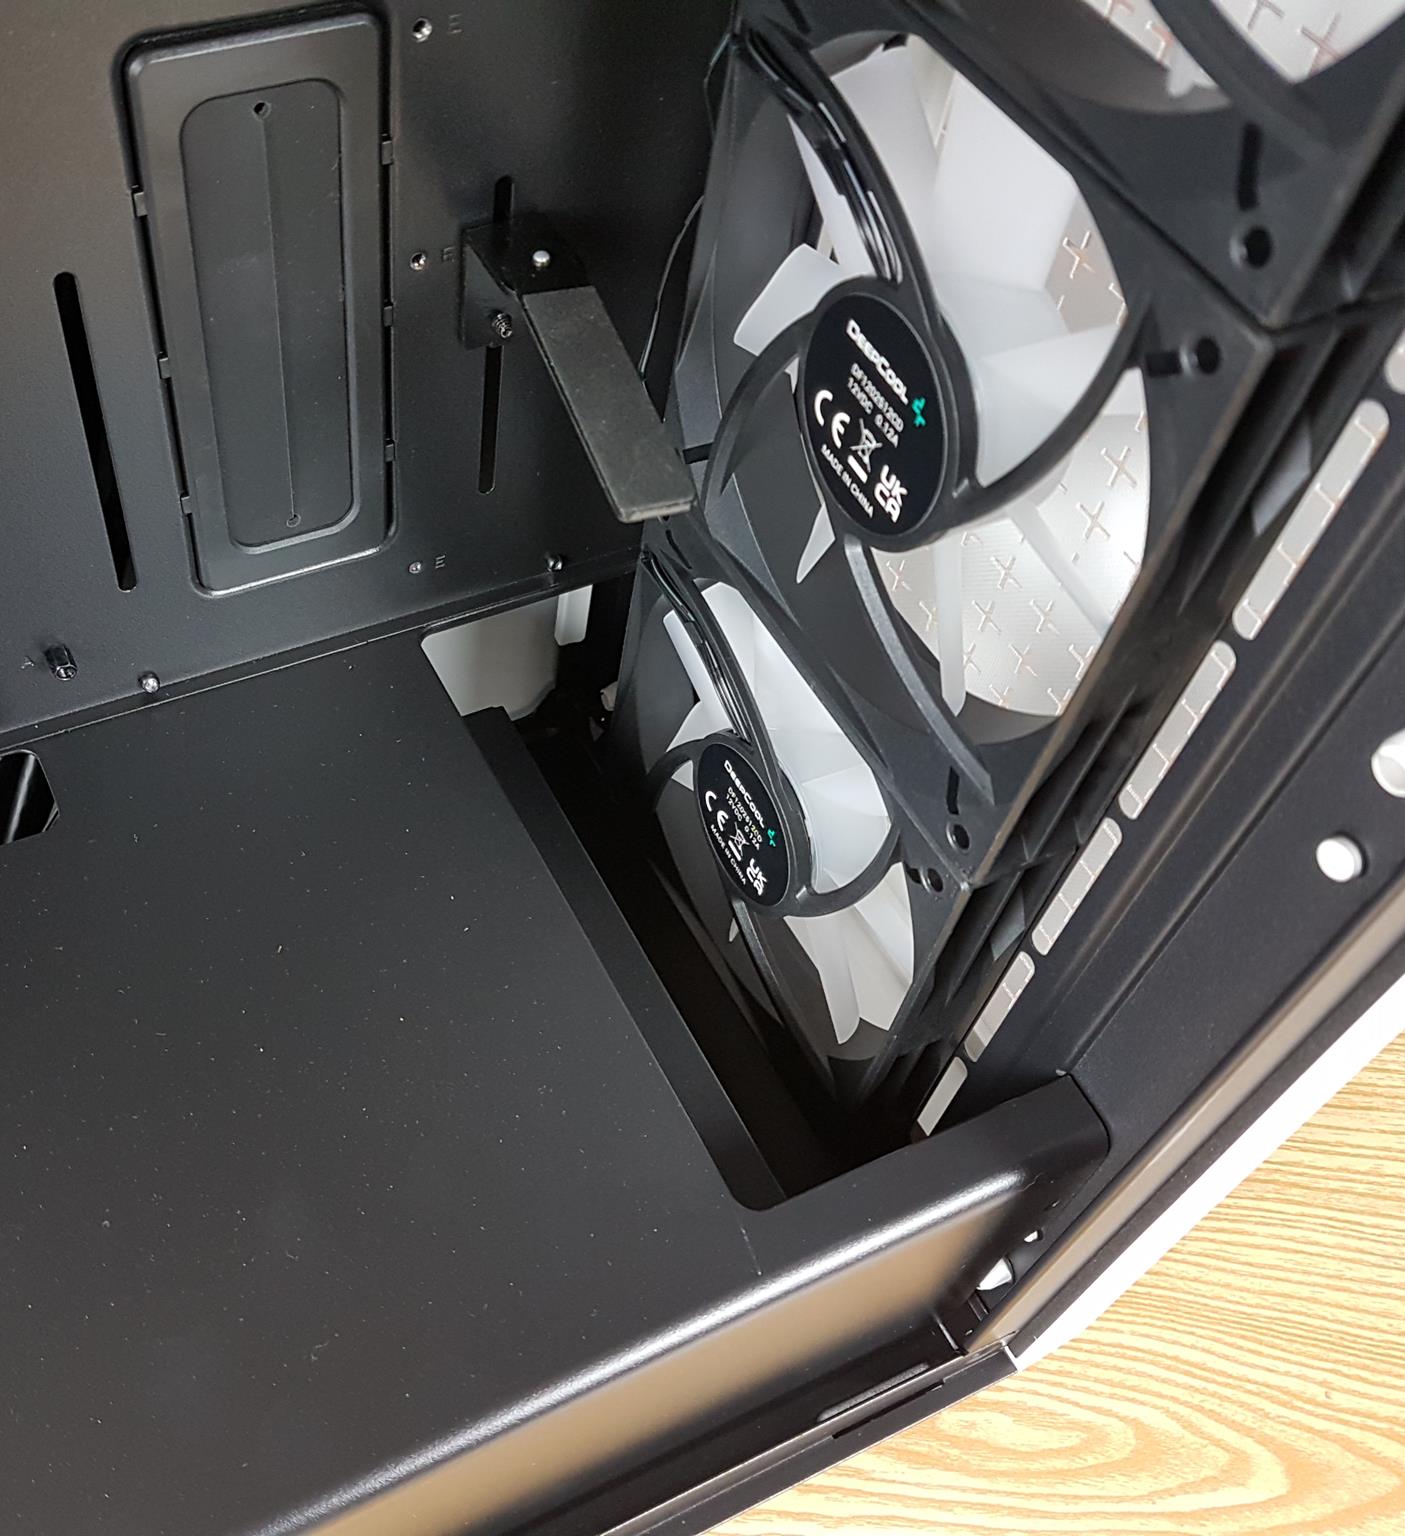
DeepCool has provided a GPU support bracket. The user can adjust the height of this bracket and can also slide its arm as per the requirement. There is a pad on the arm which will make contact with the graphics card. This would avoid any scratching on the graphics card’s shroud. The user can remove the bracket as well.
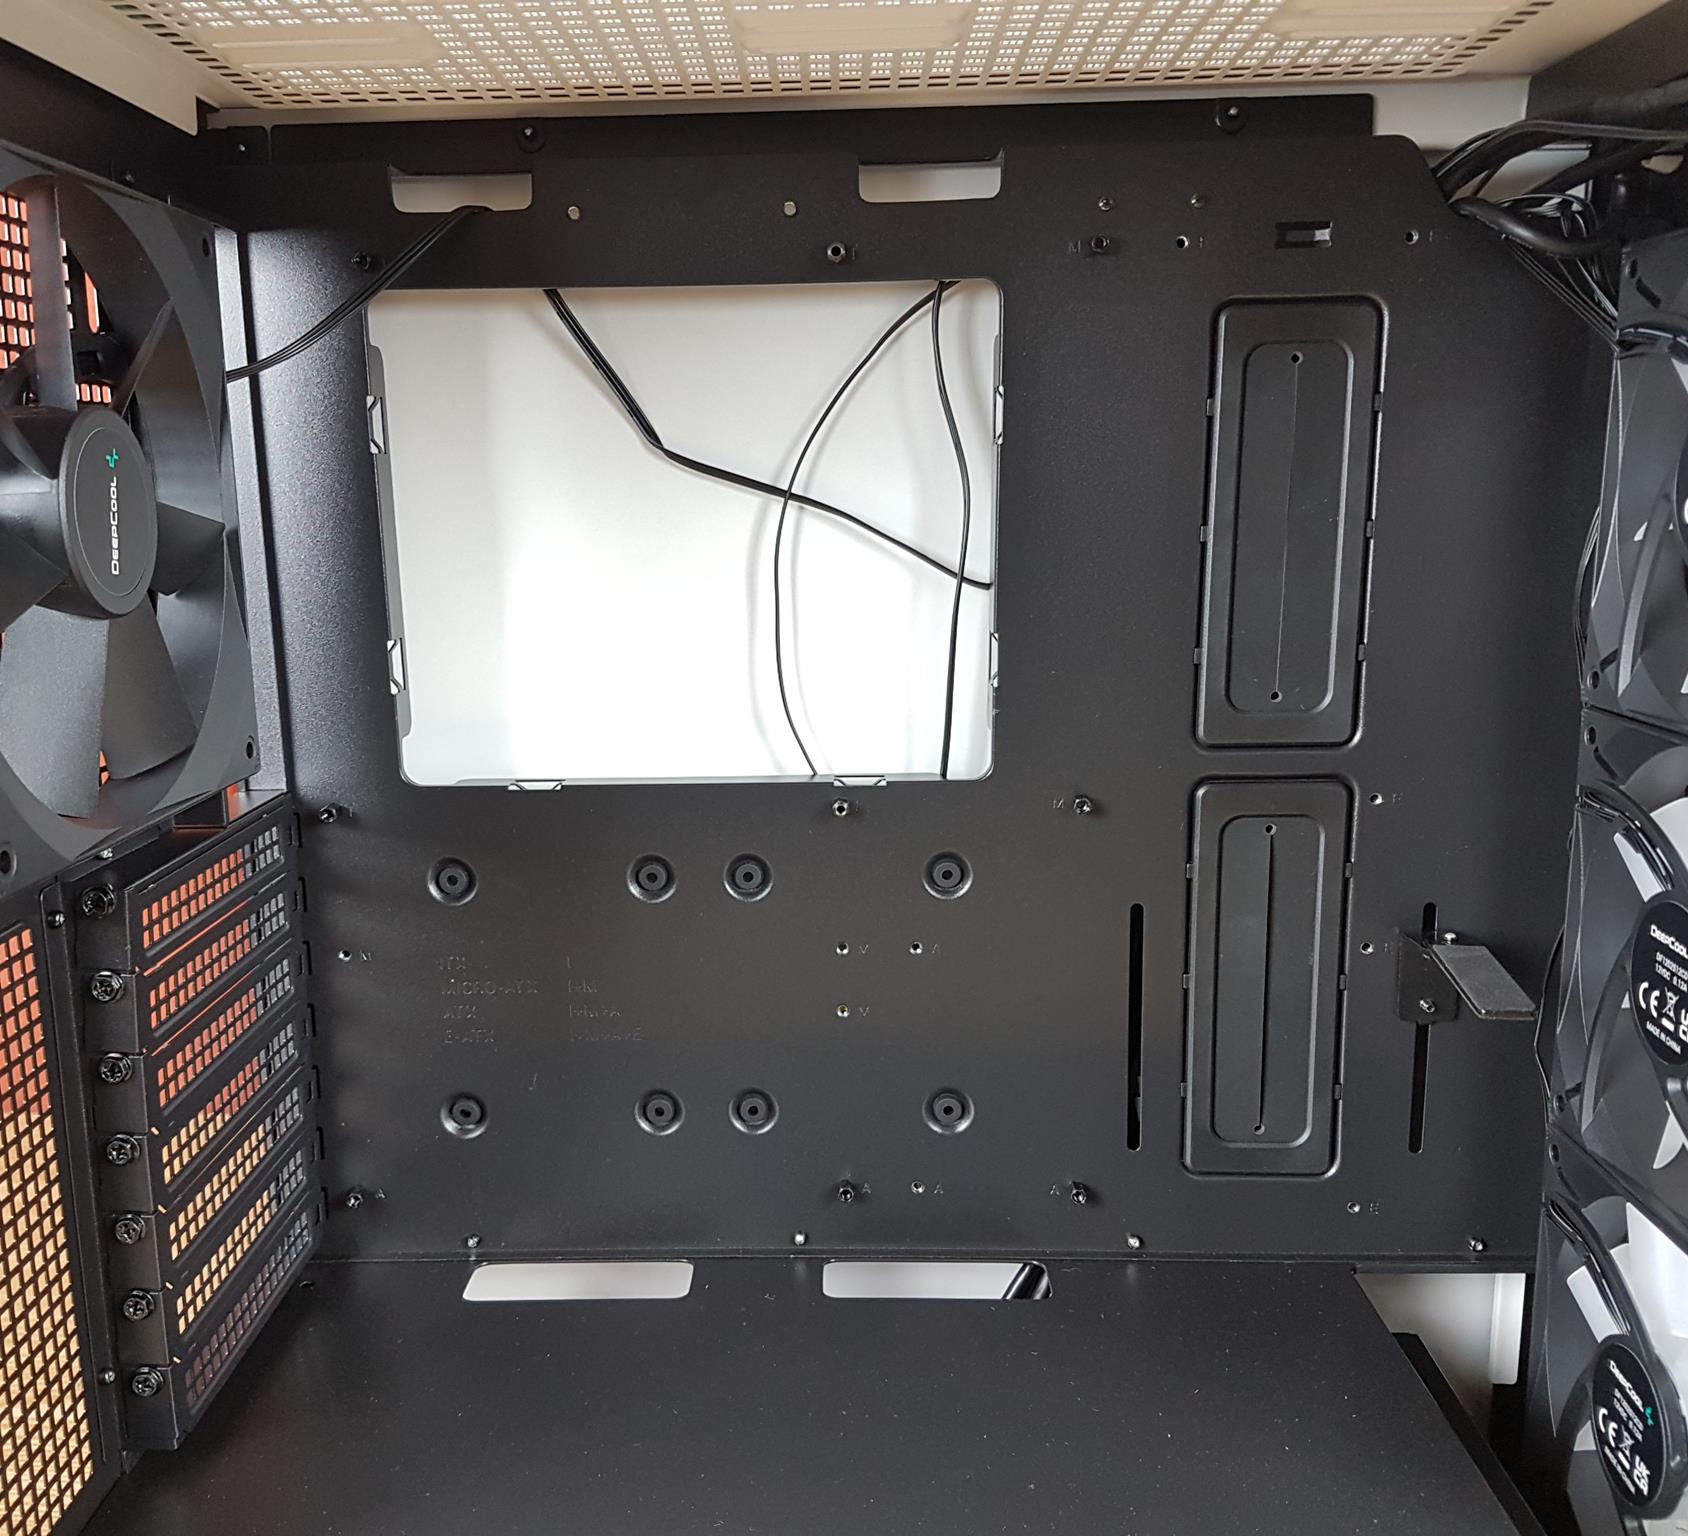
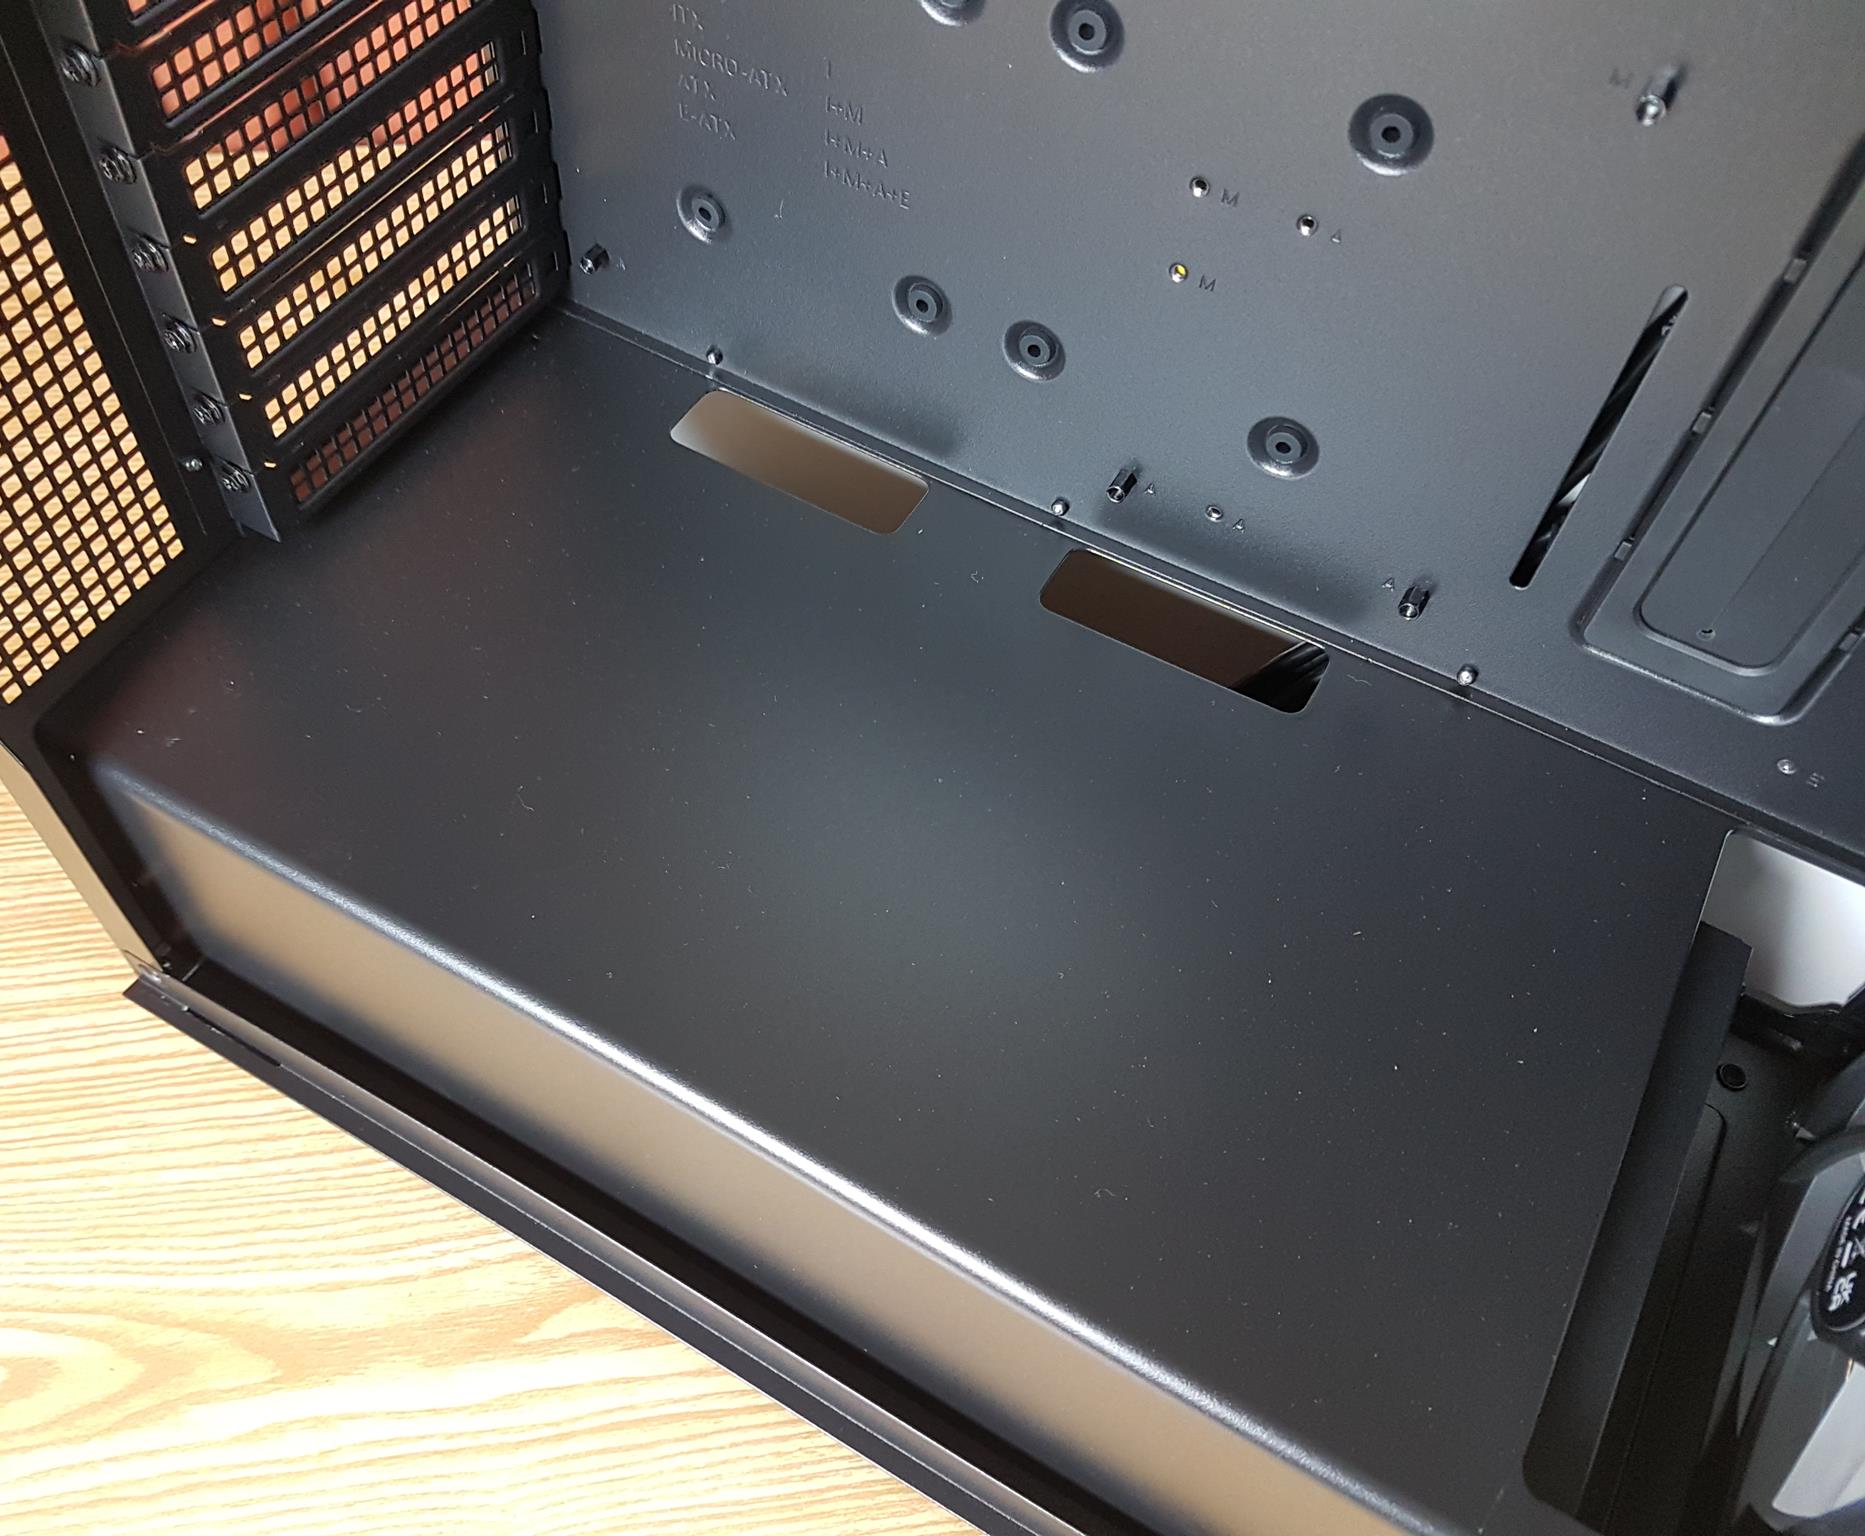
The case comes with 9x pre-installed standoffs. The case supports mini-ITX, micro-ATX, ATX, and E-ATX size motherboards. Please keep in mind that the E-ATX size motherboard will cover the cutouts and will sit close to the GPU support bracket. The top displacement is 39mm.
We have a large size cutout to install the CPU cooler conveniently. There is a single large size cutout on the top left to pass the EPS and other cables. There is a considerable space between the left and the second cutout on the top. Then there are two large-size cutouts in a vertical layout on the right side of the motherboard tray. 2x SSDs can be installed on the back of the motherboard tray.
Following Is the Support For The Cooling In This Case
- Up to 3x 120mm or 2x 140mm fans on the front [3x 120mm A-RGB pre-installed]
- 1x 120/140mm fan on the rear (1x 140mm Pre-Installed)
- Up to 2x 120/140mm fans on the top
- Up to 360mm Radiator on the front
- Up to 280mm Radiator on the top
- Up to 140mm Radiator on the rea
Let’s take a look at the other side of the chassis.
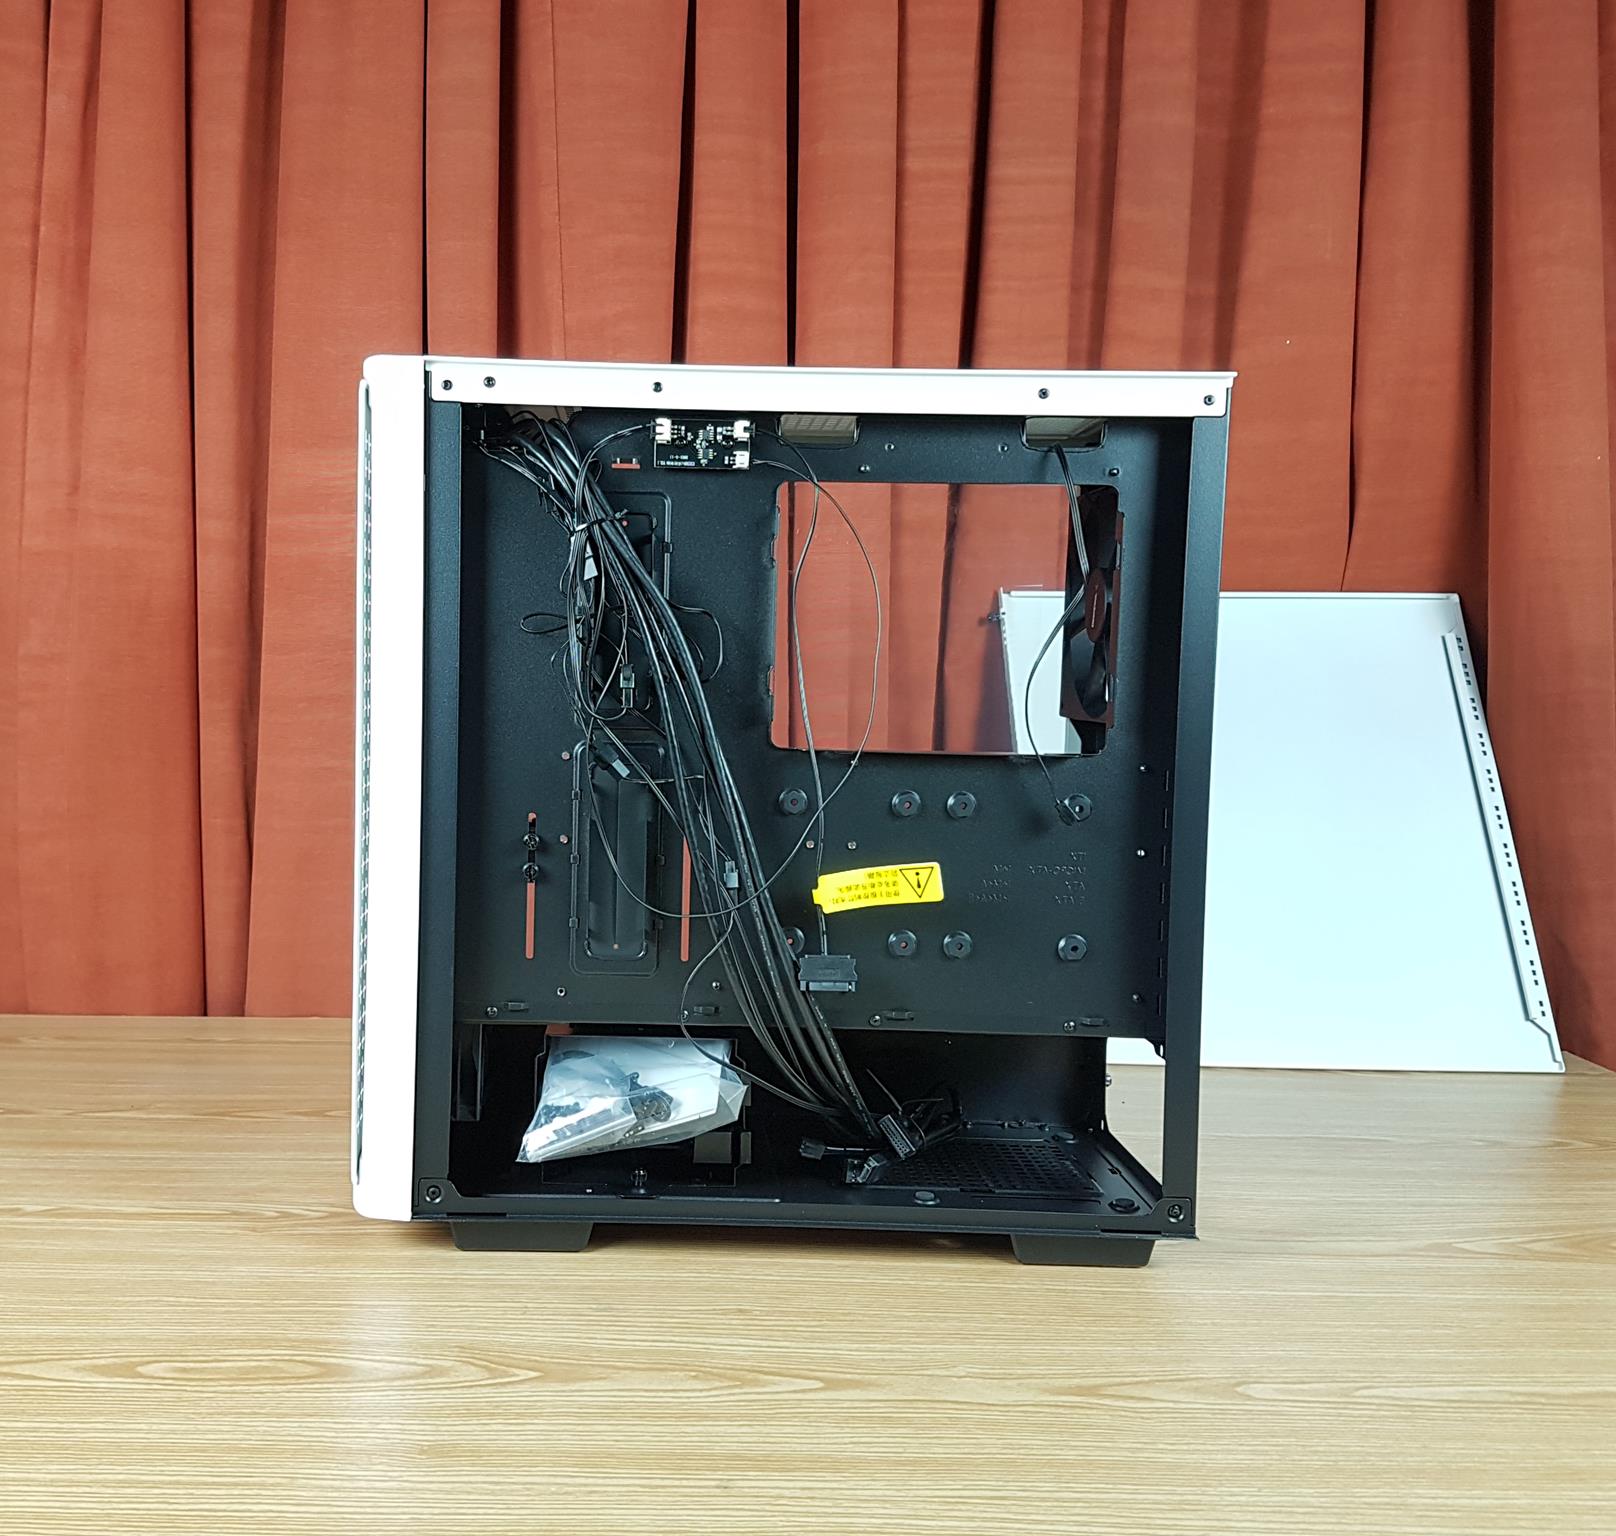
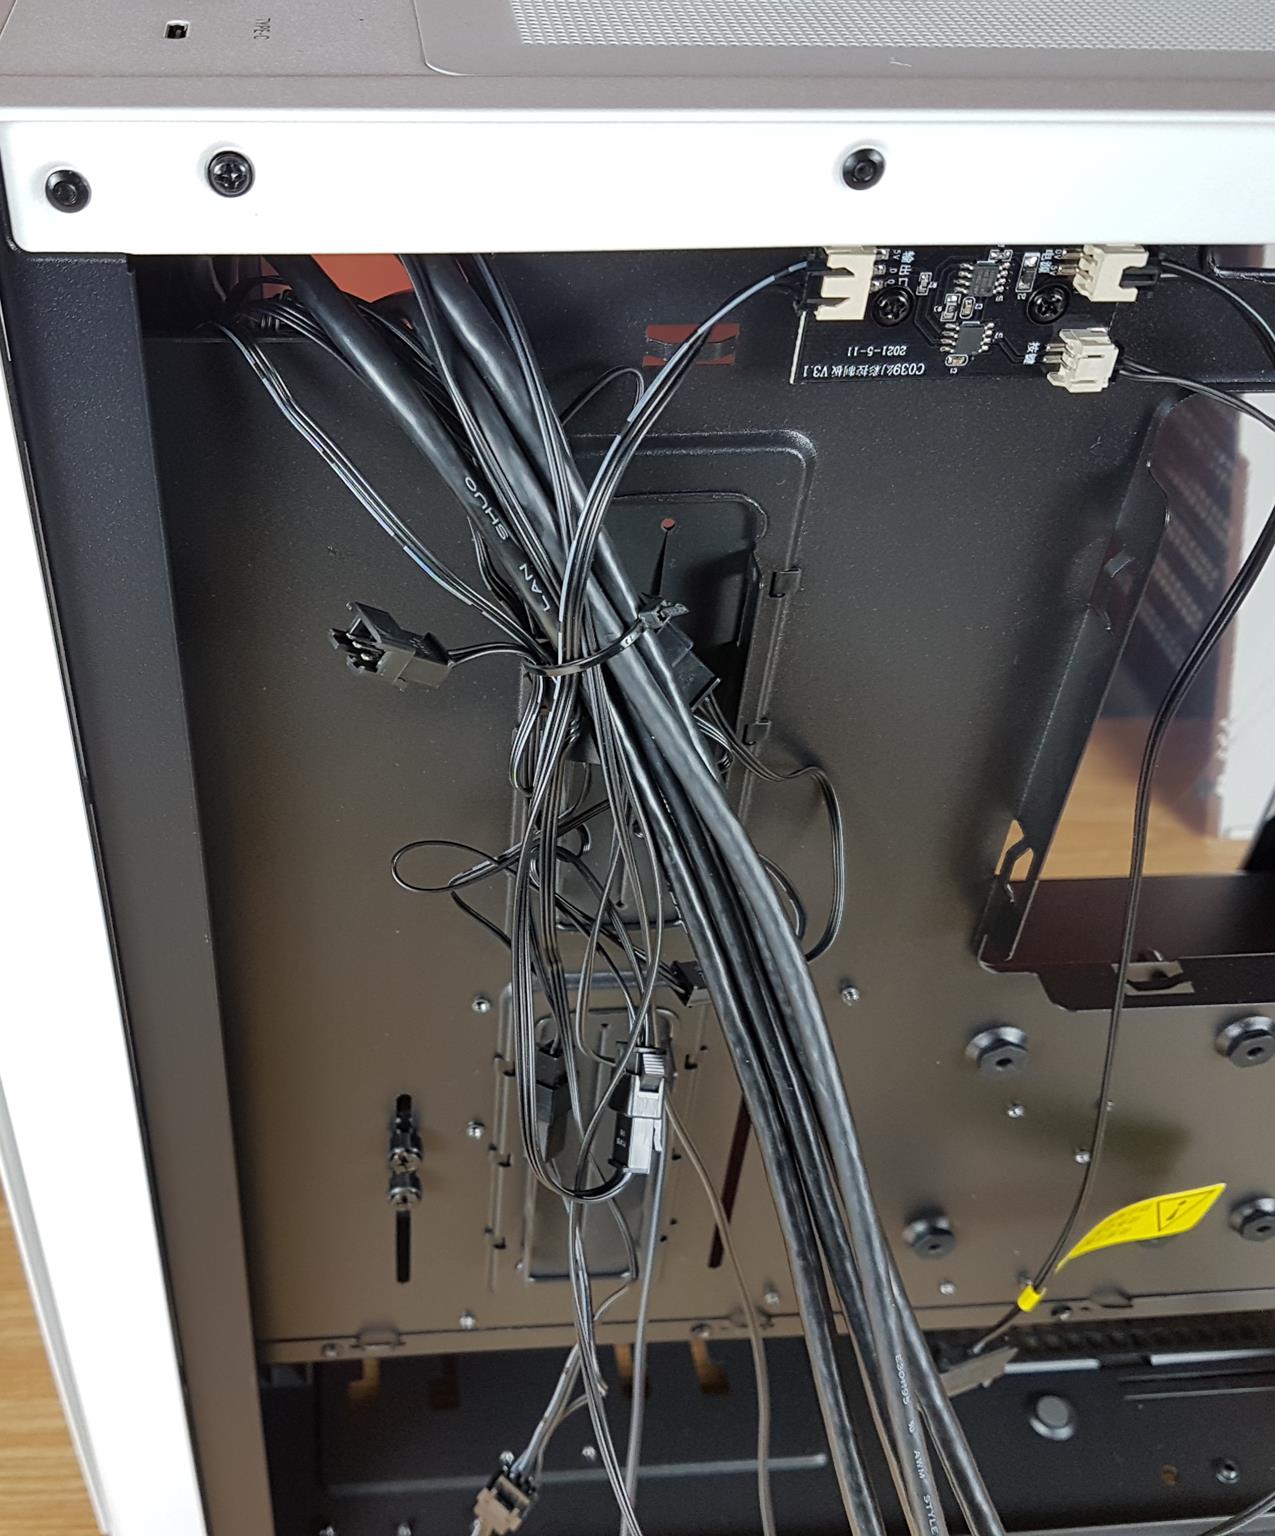
The above picture shows the backside of the case with the panel removed. The dual chamber design is apparent here. The cables are tucked into the frame using the cable tie. The accessories bag is placed in the HDD cage. The rubber padding on the motherboard tray is for the SSDs and this is tool-less design using the push pins.
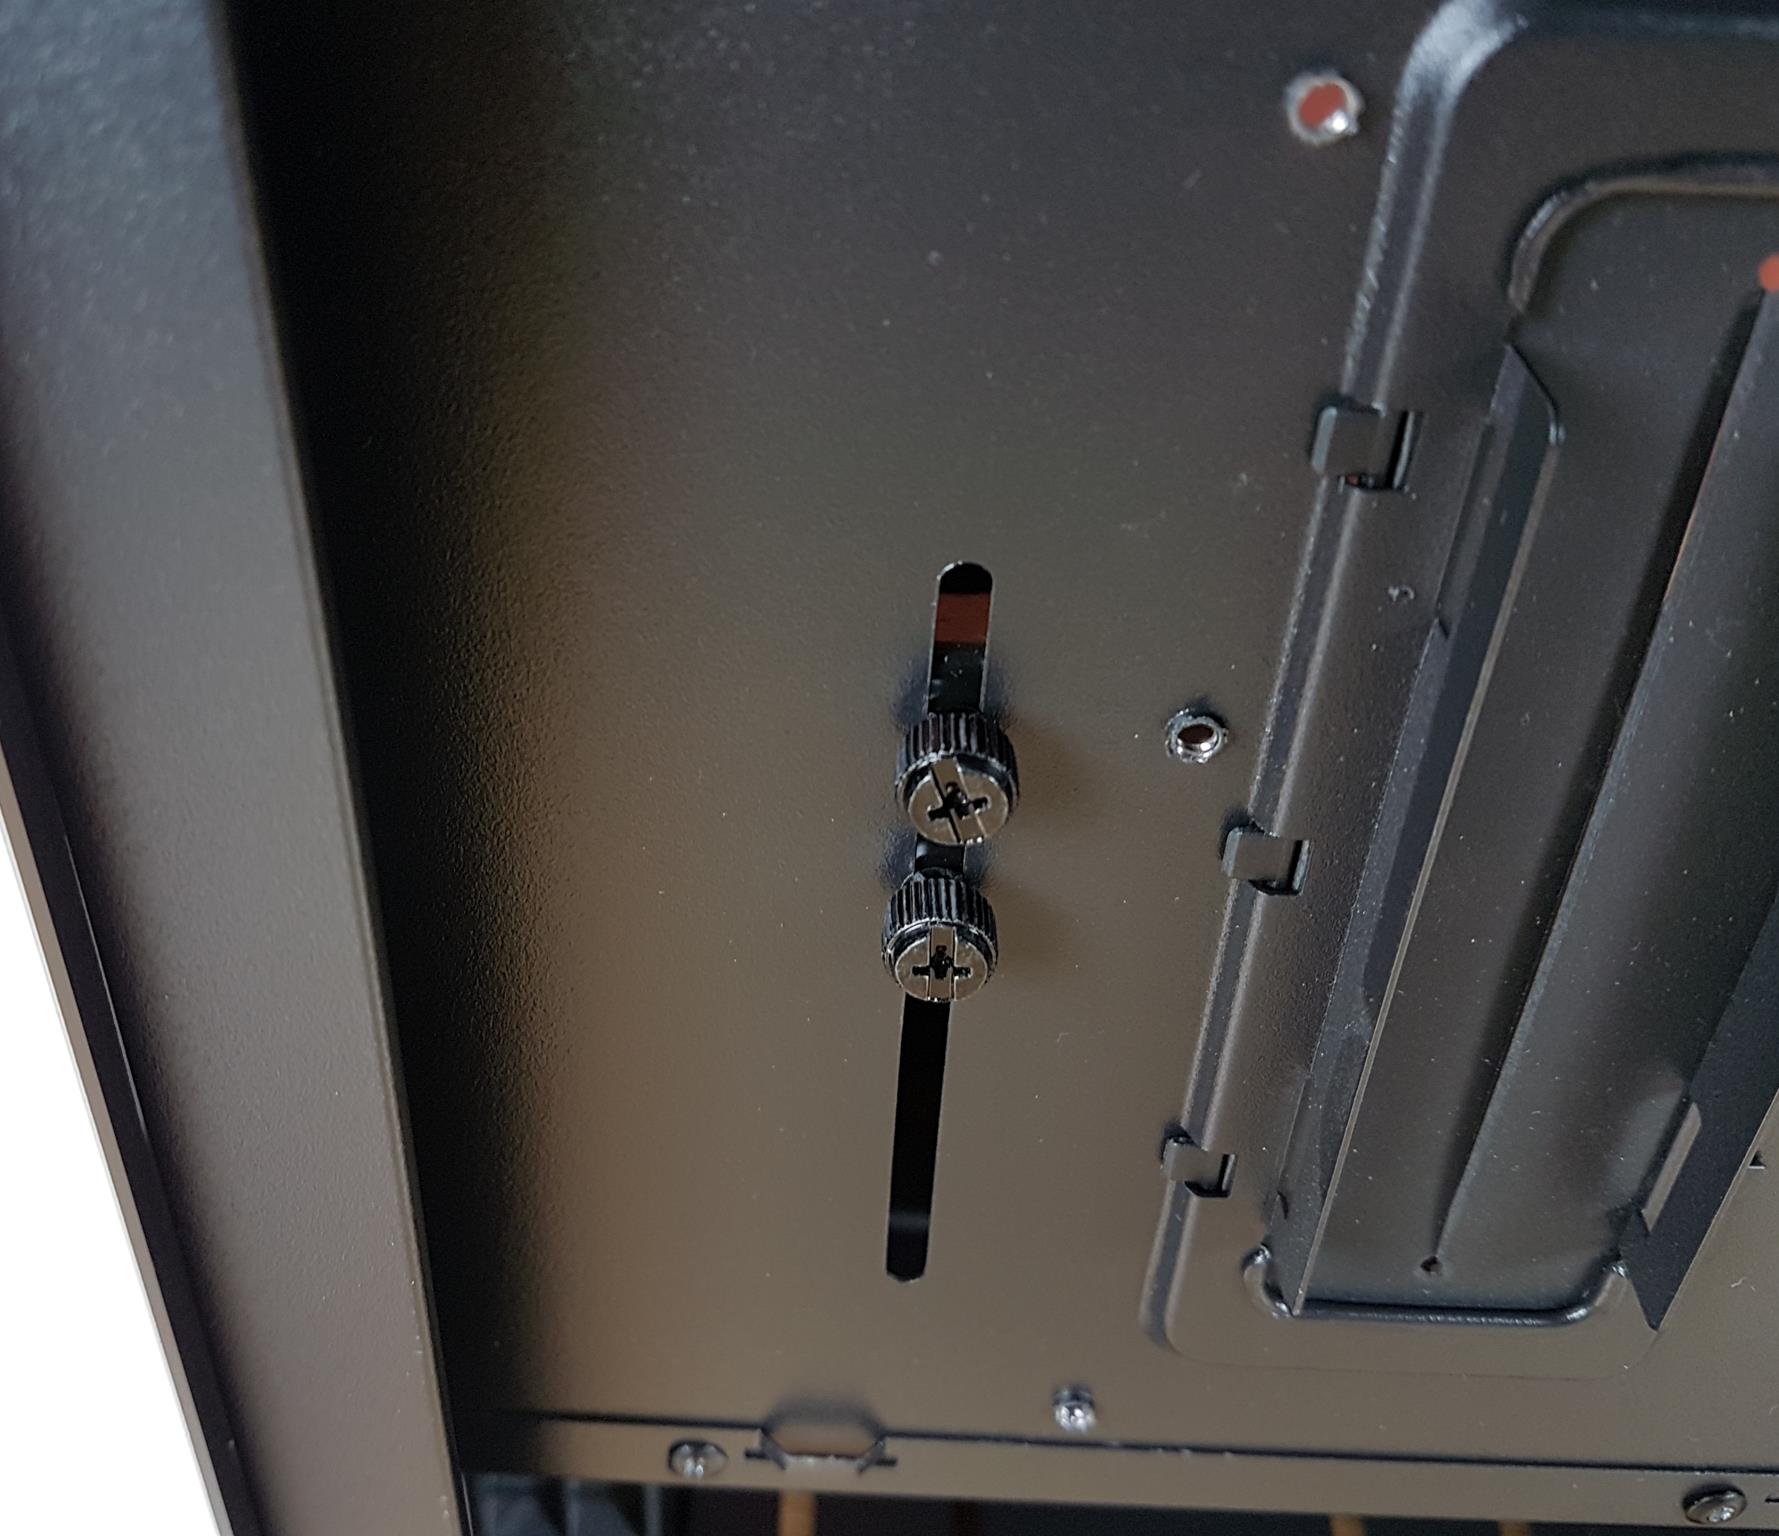
The above picture shows 2x thumb screws on the back side of the motherboard tray. These are holding the GPU support bracket. Loosening them will enable the user to slide the bracket vertically. The user can remove these screws to remove the bracket fully.
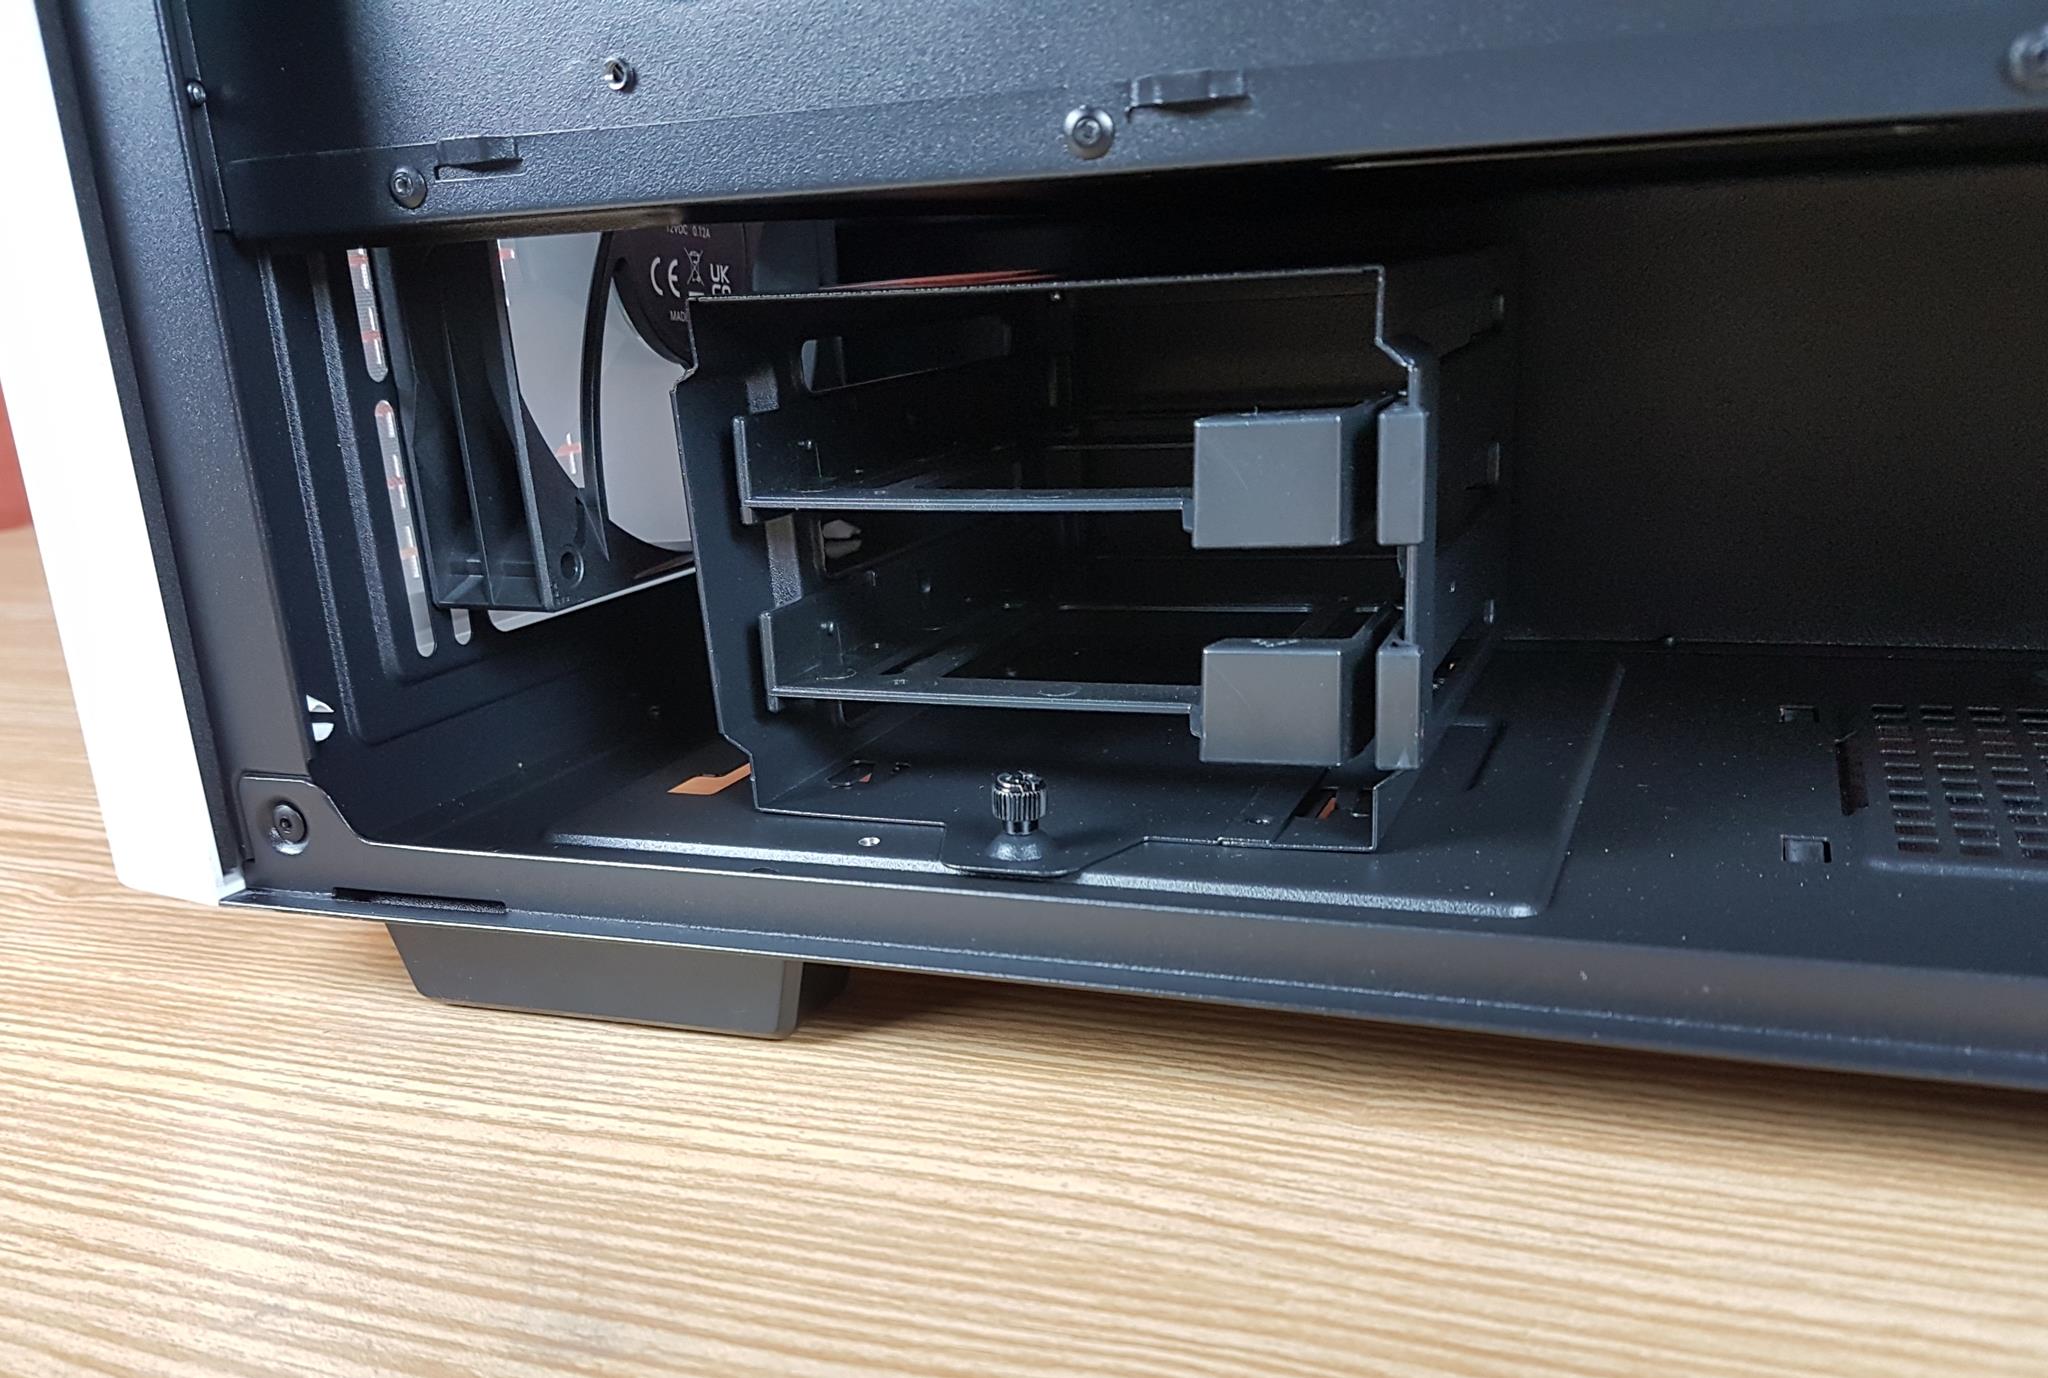
There is a removable HDD cage in the bottom chamber. It is toolless and has two caddies. The position of the cage is adjustable. The storage provision is:
- Up to 2x 3.5” and 2x 2.5” drives or a combination thereof
The cage is secured to the frame using a thumbscrew. This is a better implementation than having the cage secured using screws from the underside of the case bottom.
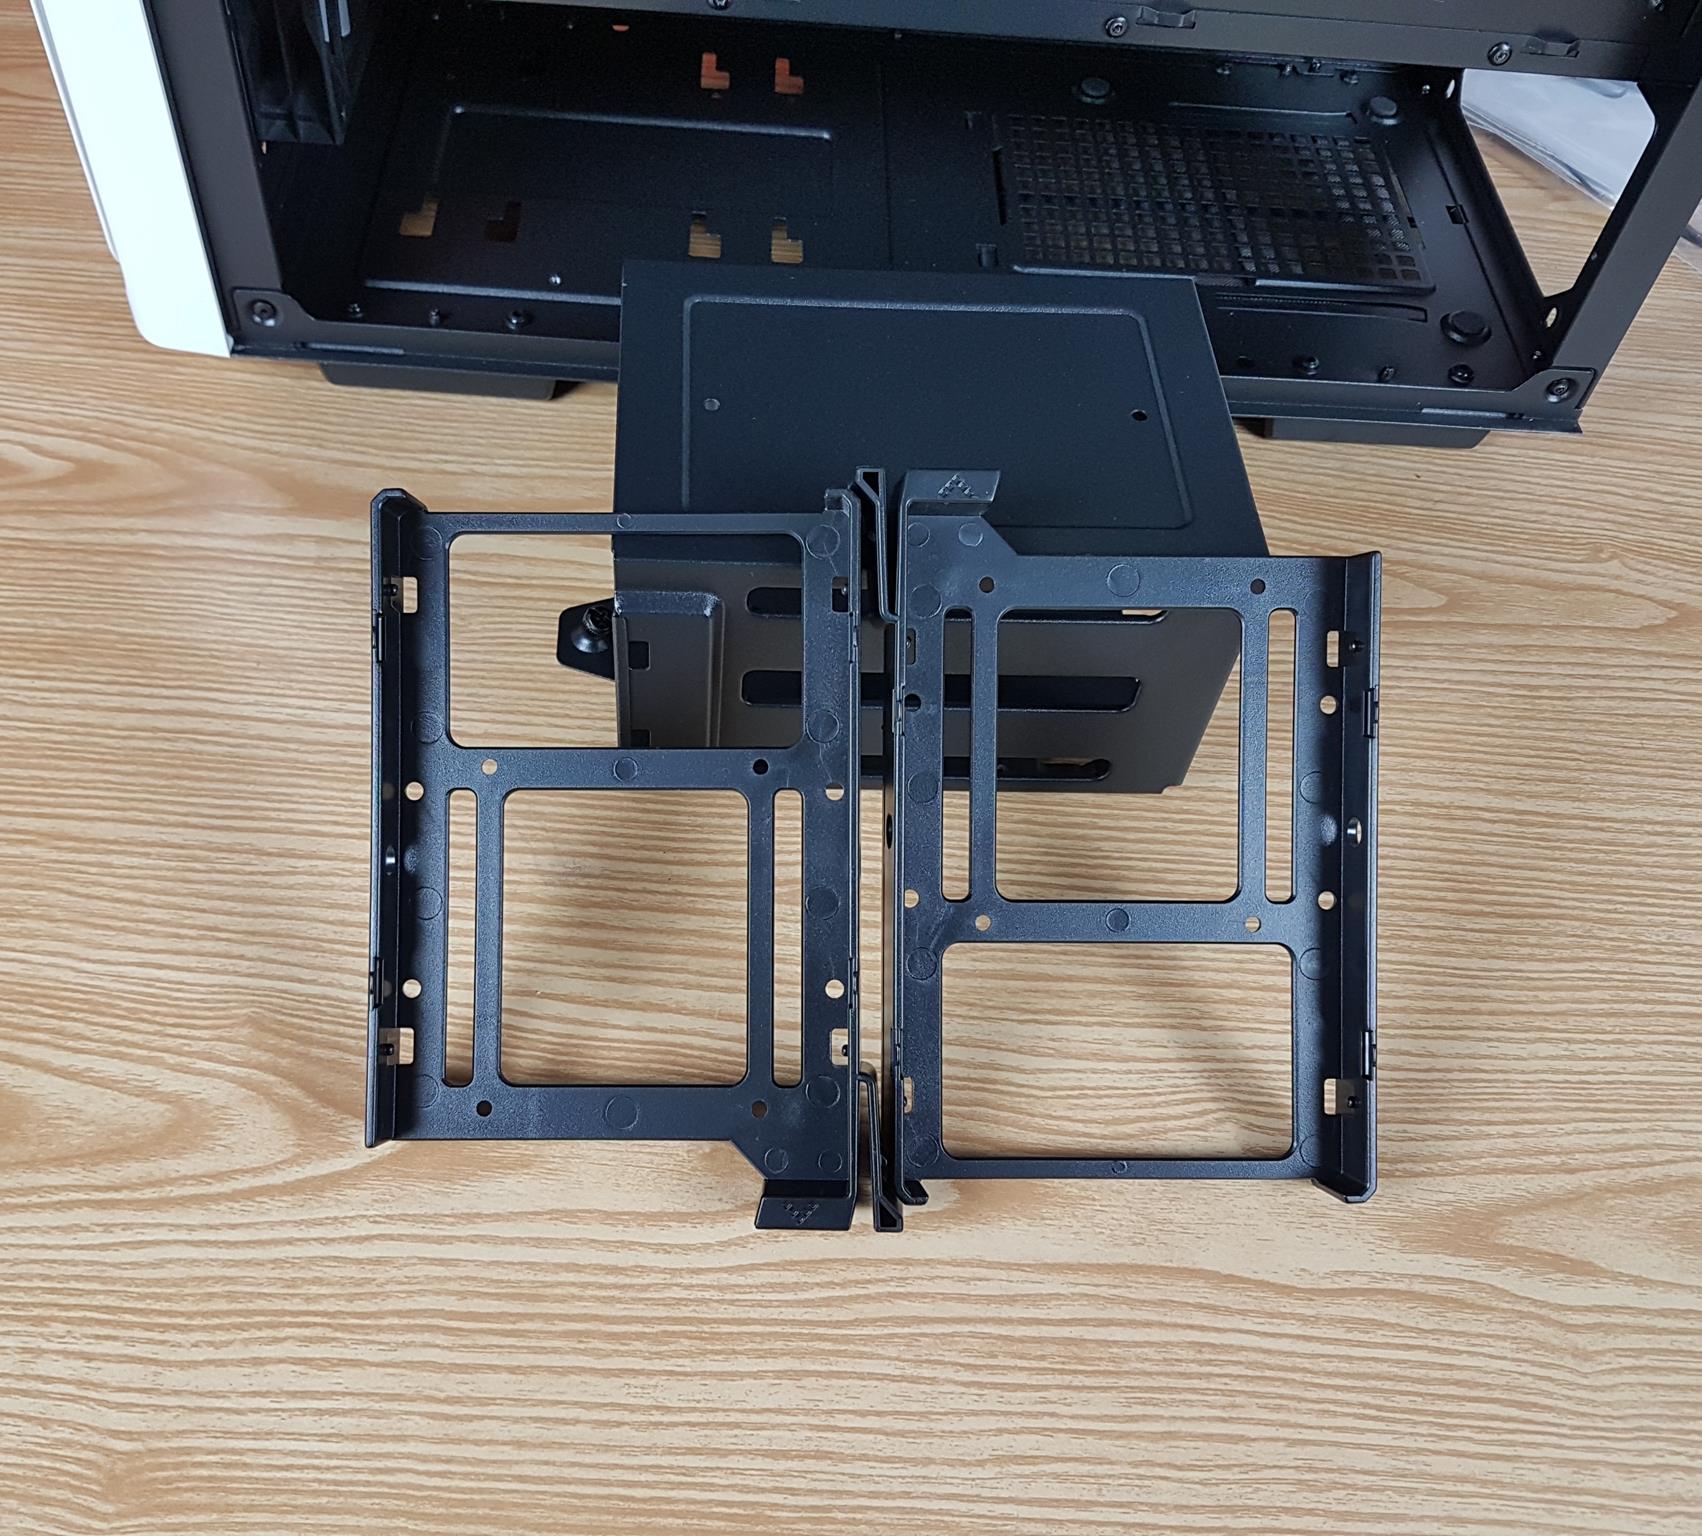
The above picture shows the cage removed from the case. The cage is made of steel material. The caddies are plastic made and they are tool-less.
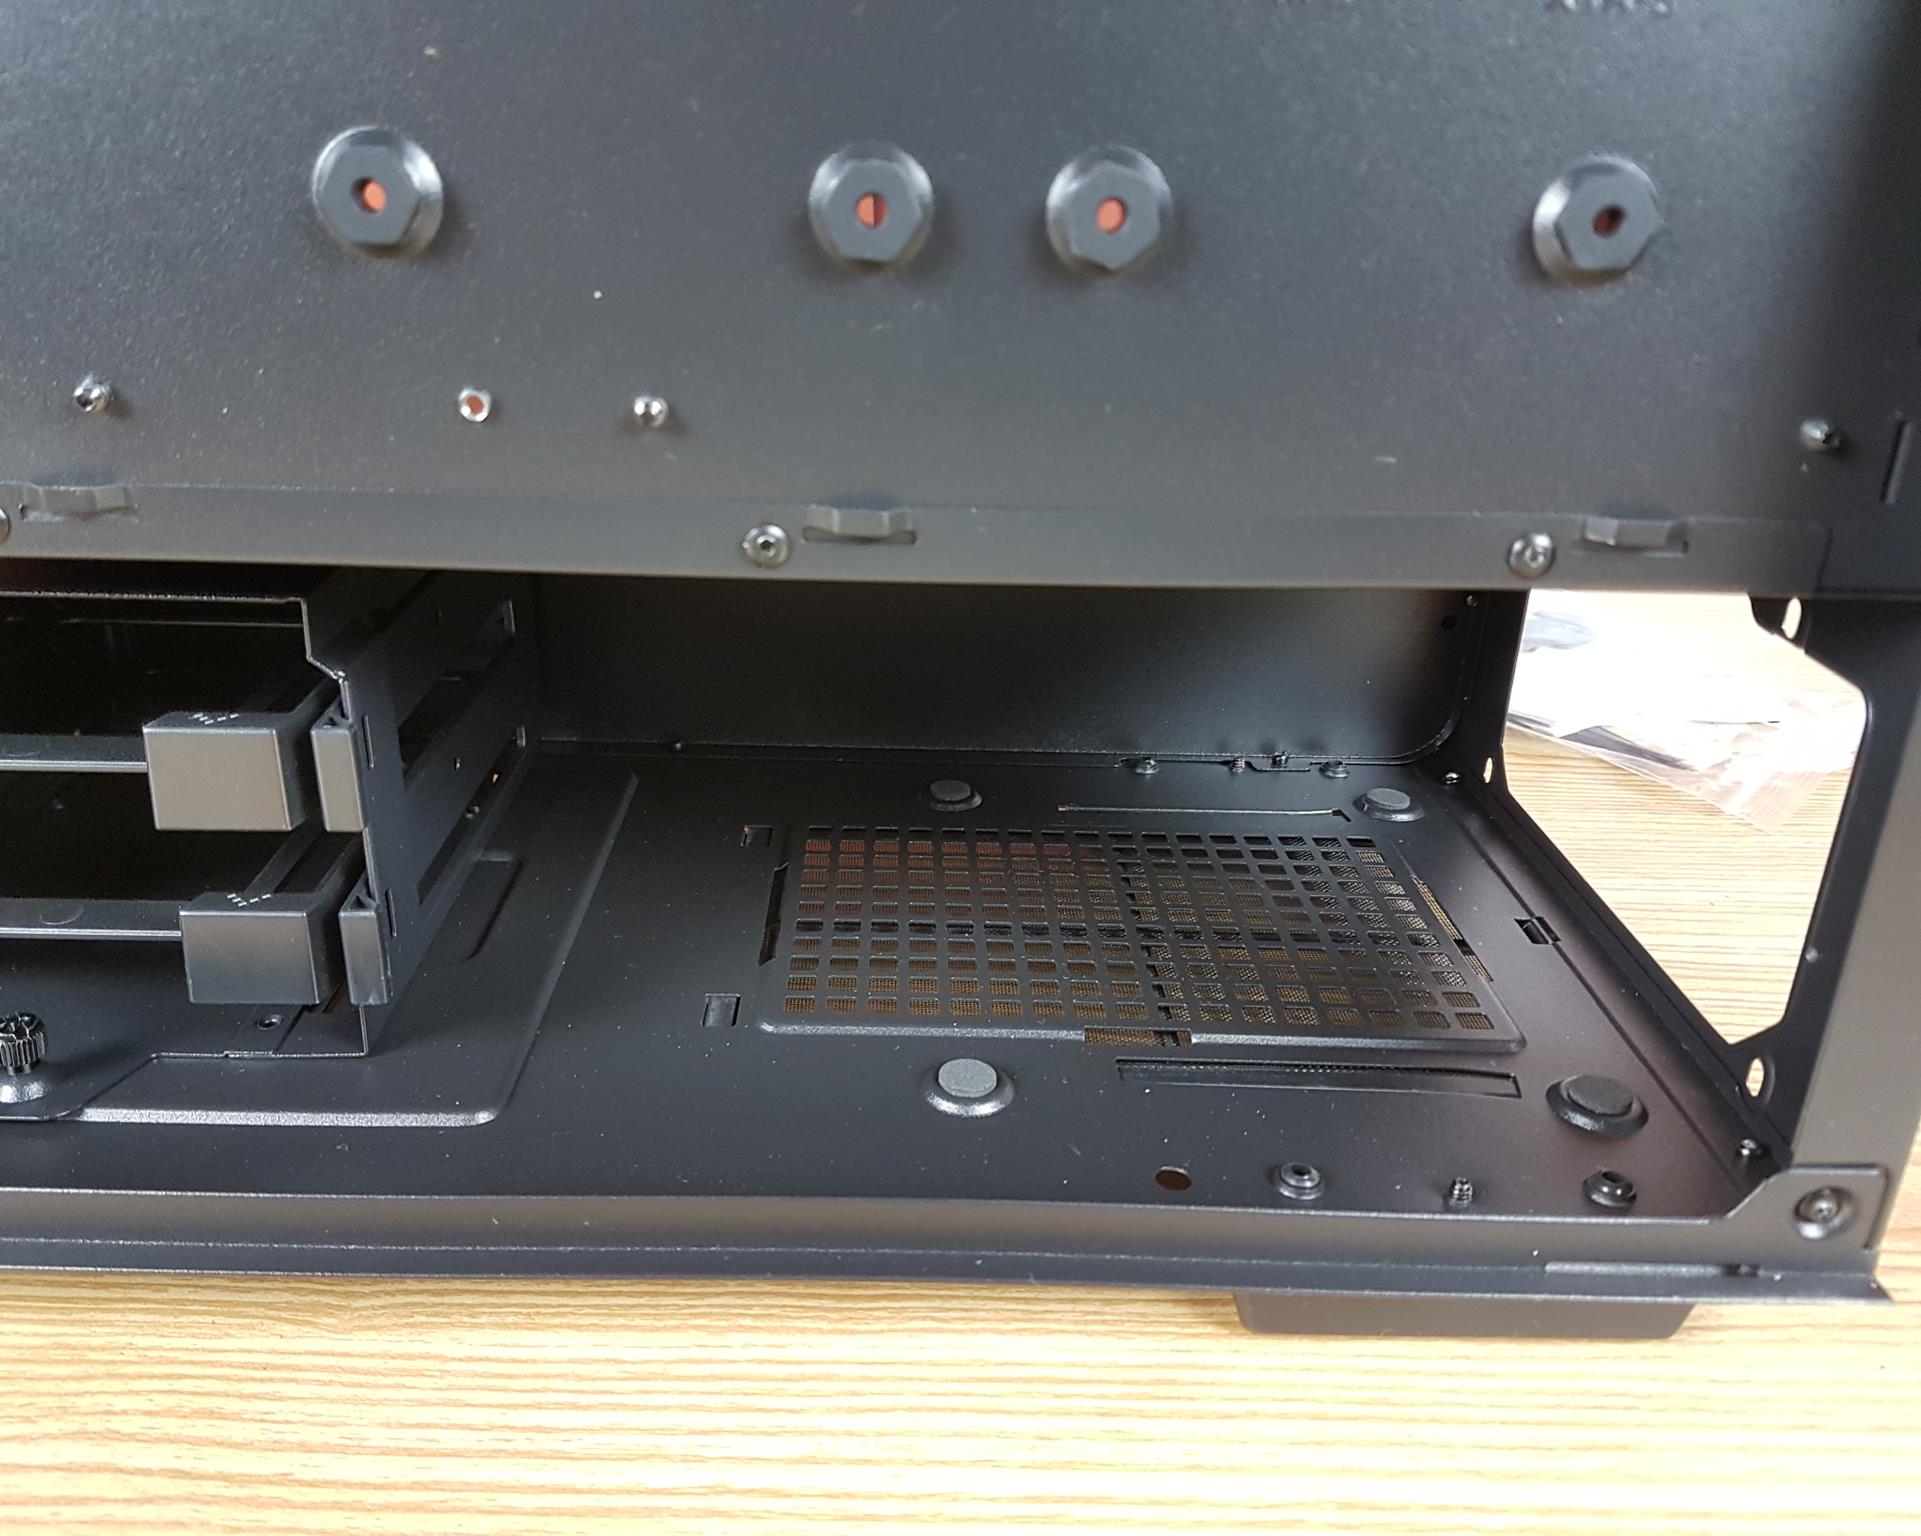
The above picture shows the PSU placement bay or area. We have 4 raised surfaces with rubber pads. The PSU is placed over these surfaces. The PSU is to be slide in from the side of the case. We have the following clearance for the PSU with the cables:
- 240mm in stock configuration
- 370mm without HDD cage
PSU Length Limitation Is Specified As 160mm
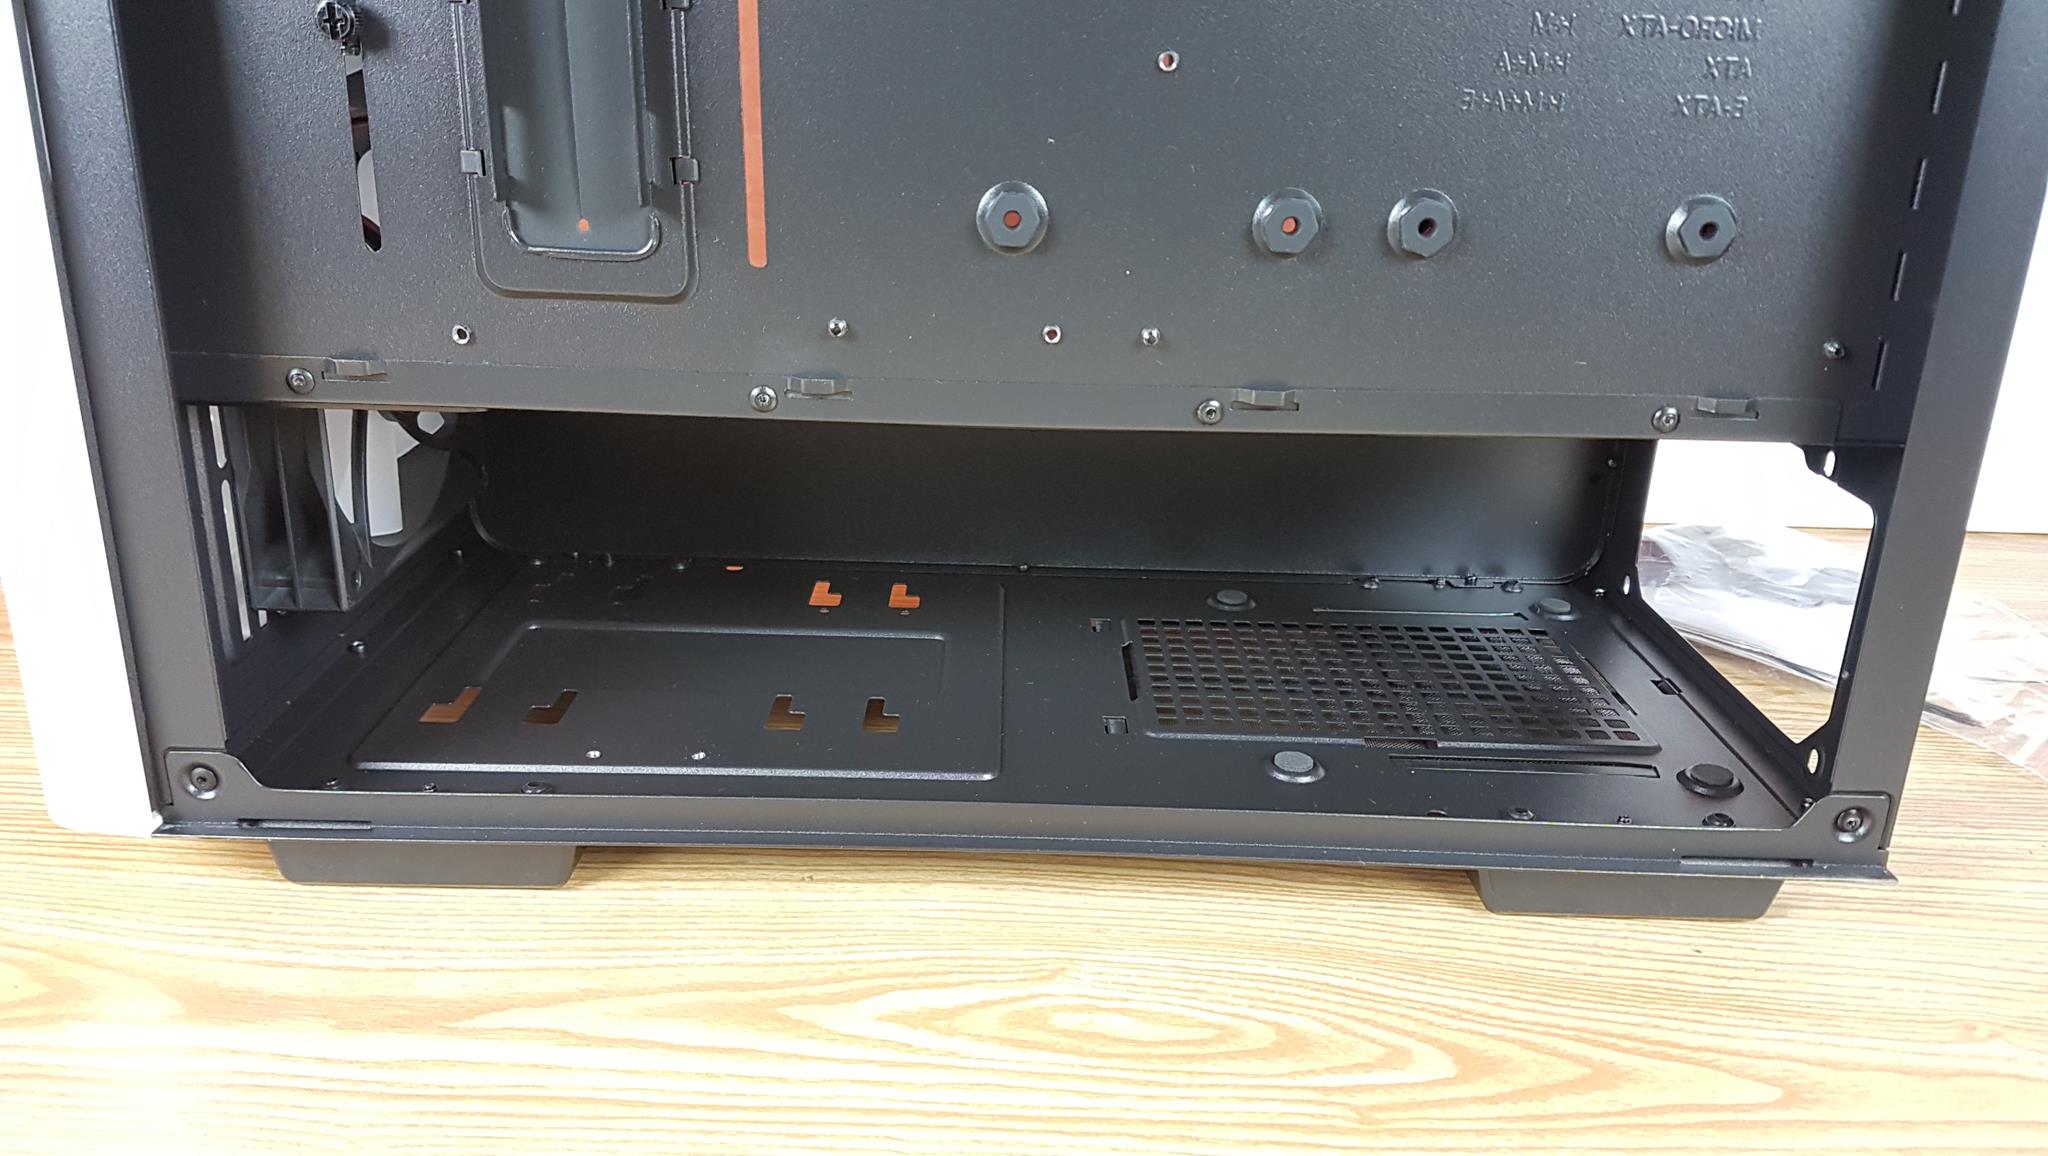
The above picture shows the bottom chamber with the HDD cage removed. If an HDD cage is not required then we have good clearance for the PSU cables placement.
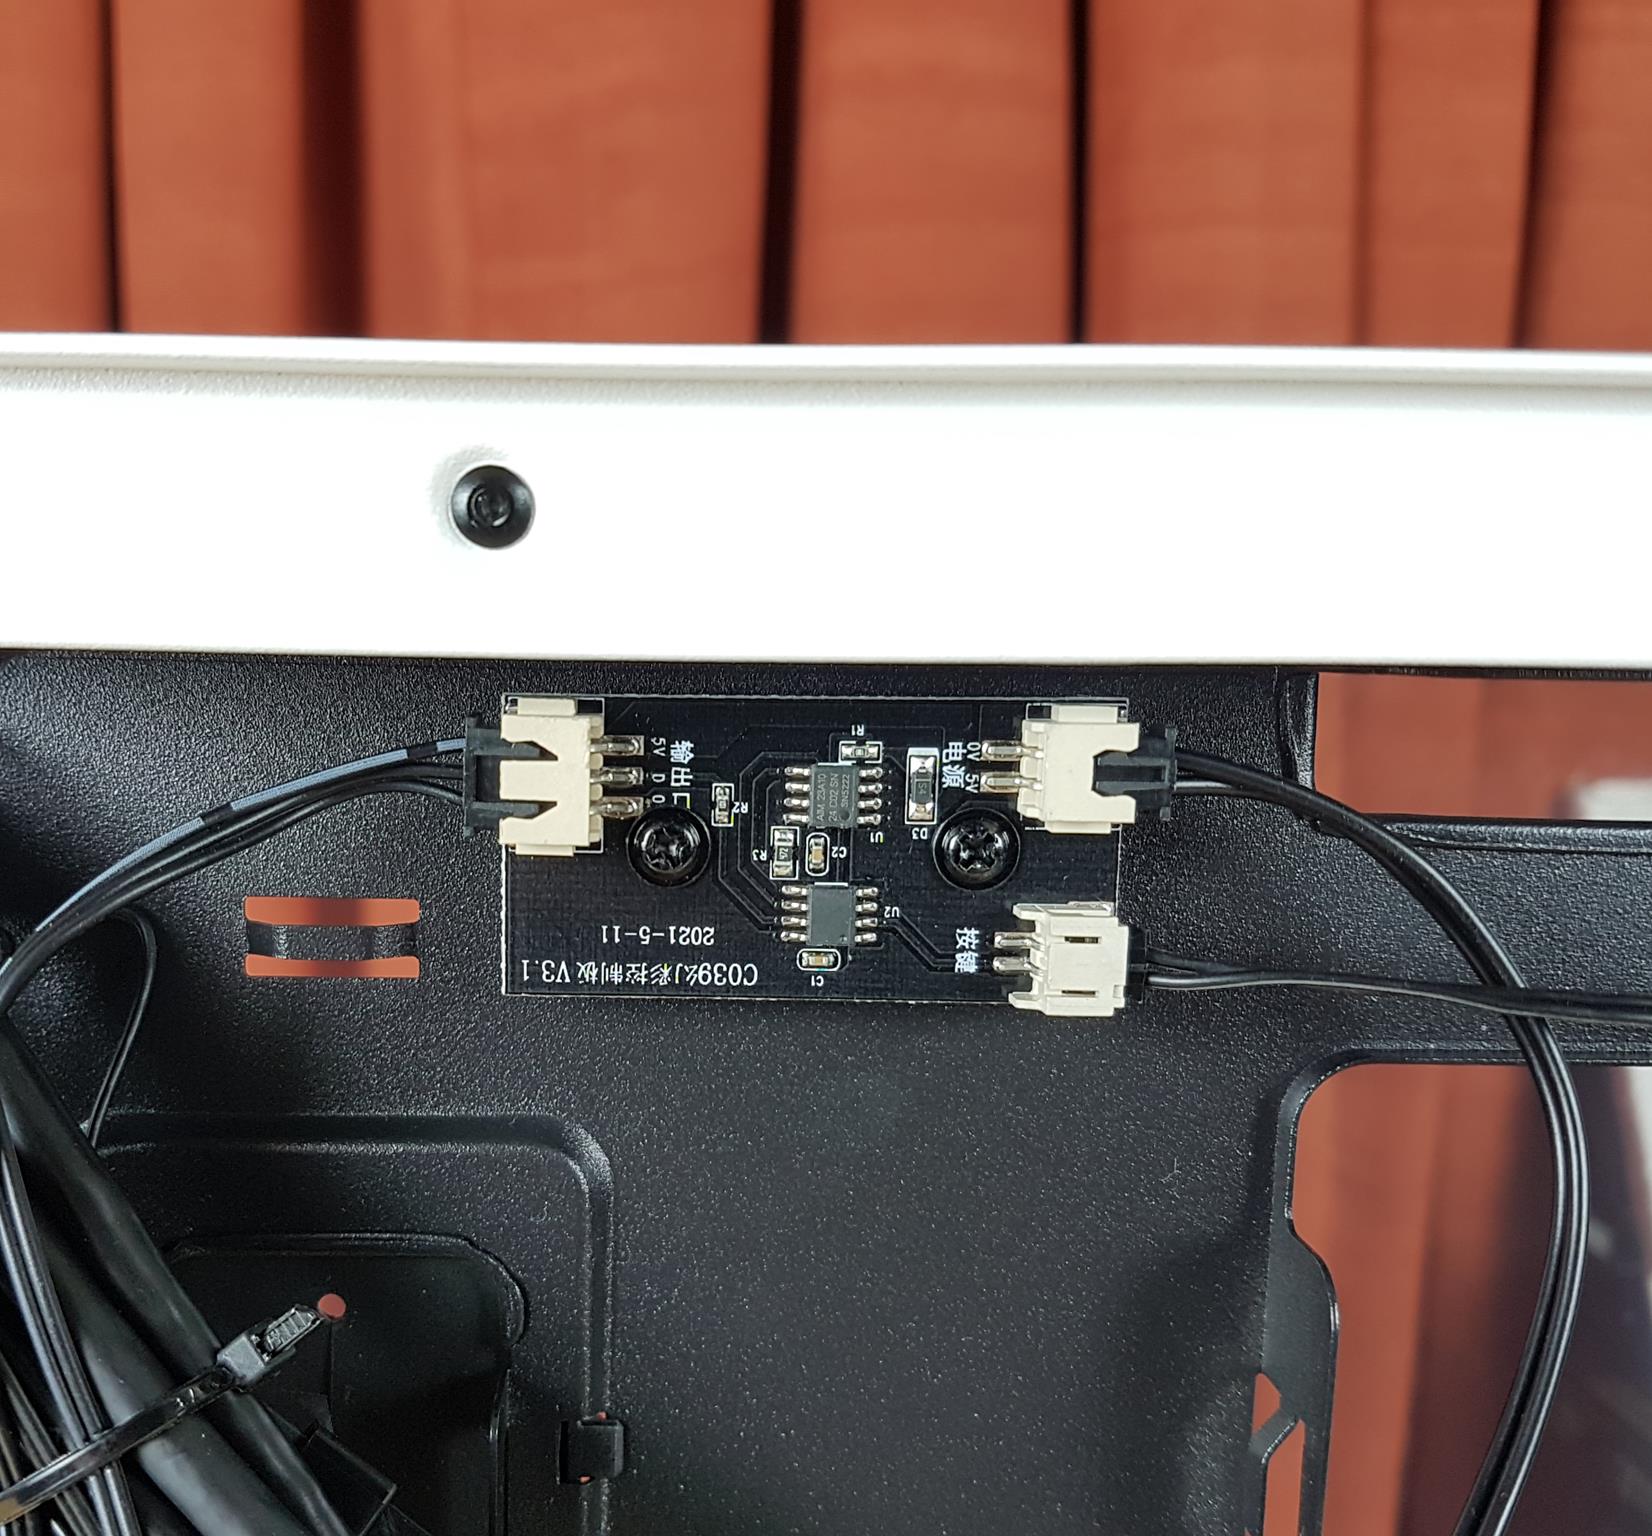
The above picture shows the pre-installed hub. The fans and their lighting elements are daisy-chained and connected to the hub. The hub is SATA powered.
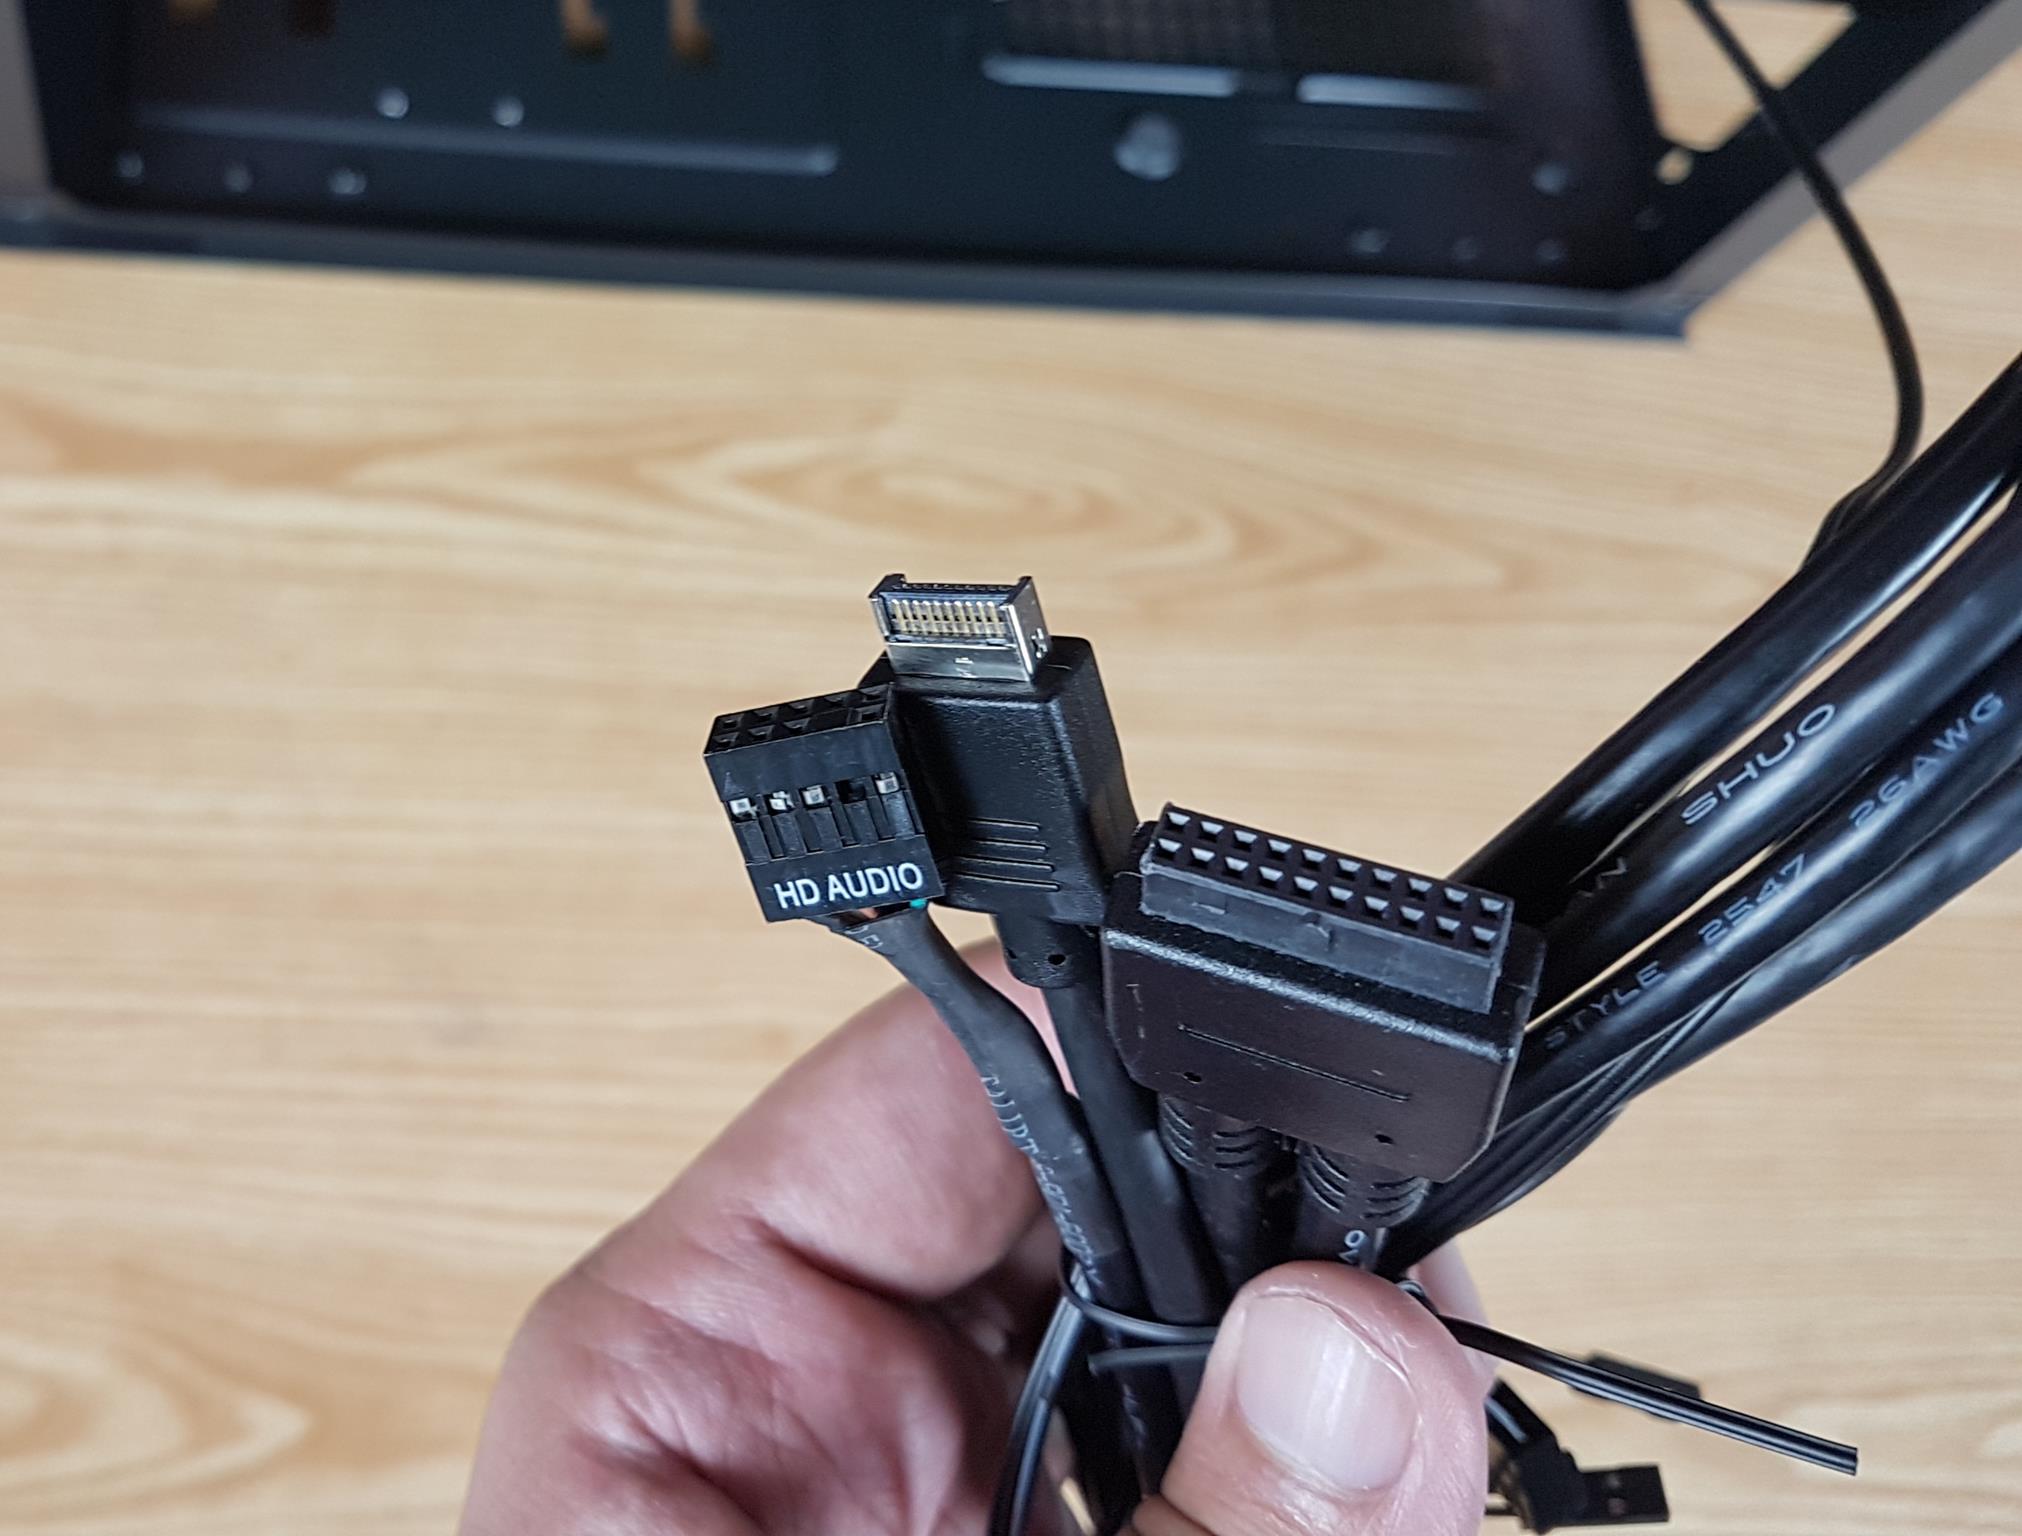
We have the following cables coming out of the front IO panel:
- USB 3.0
- USB Type-C
- HD Audio
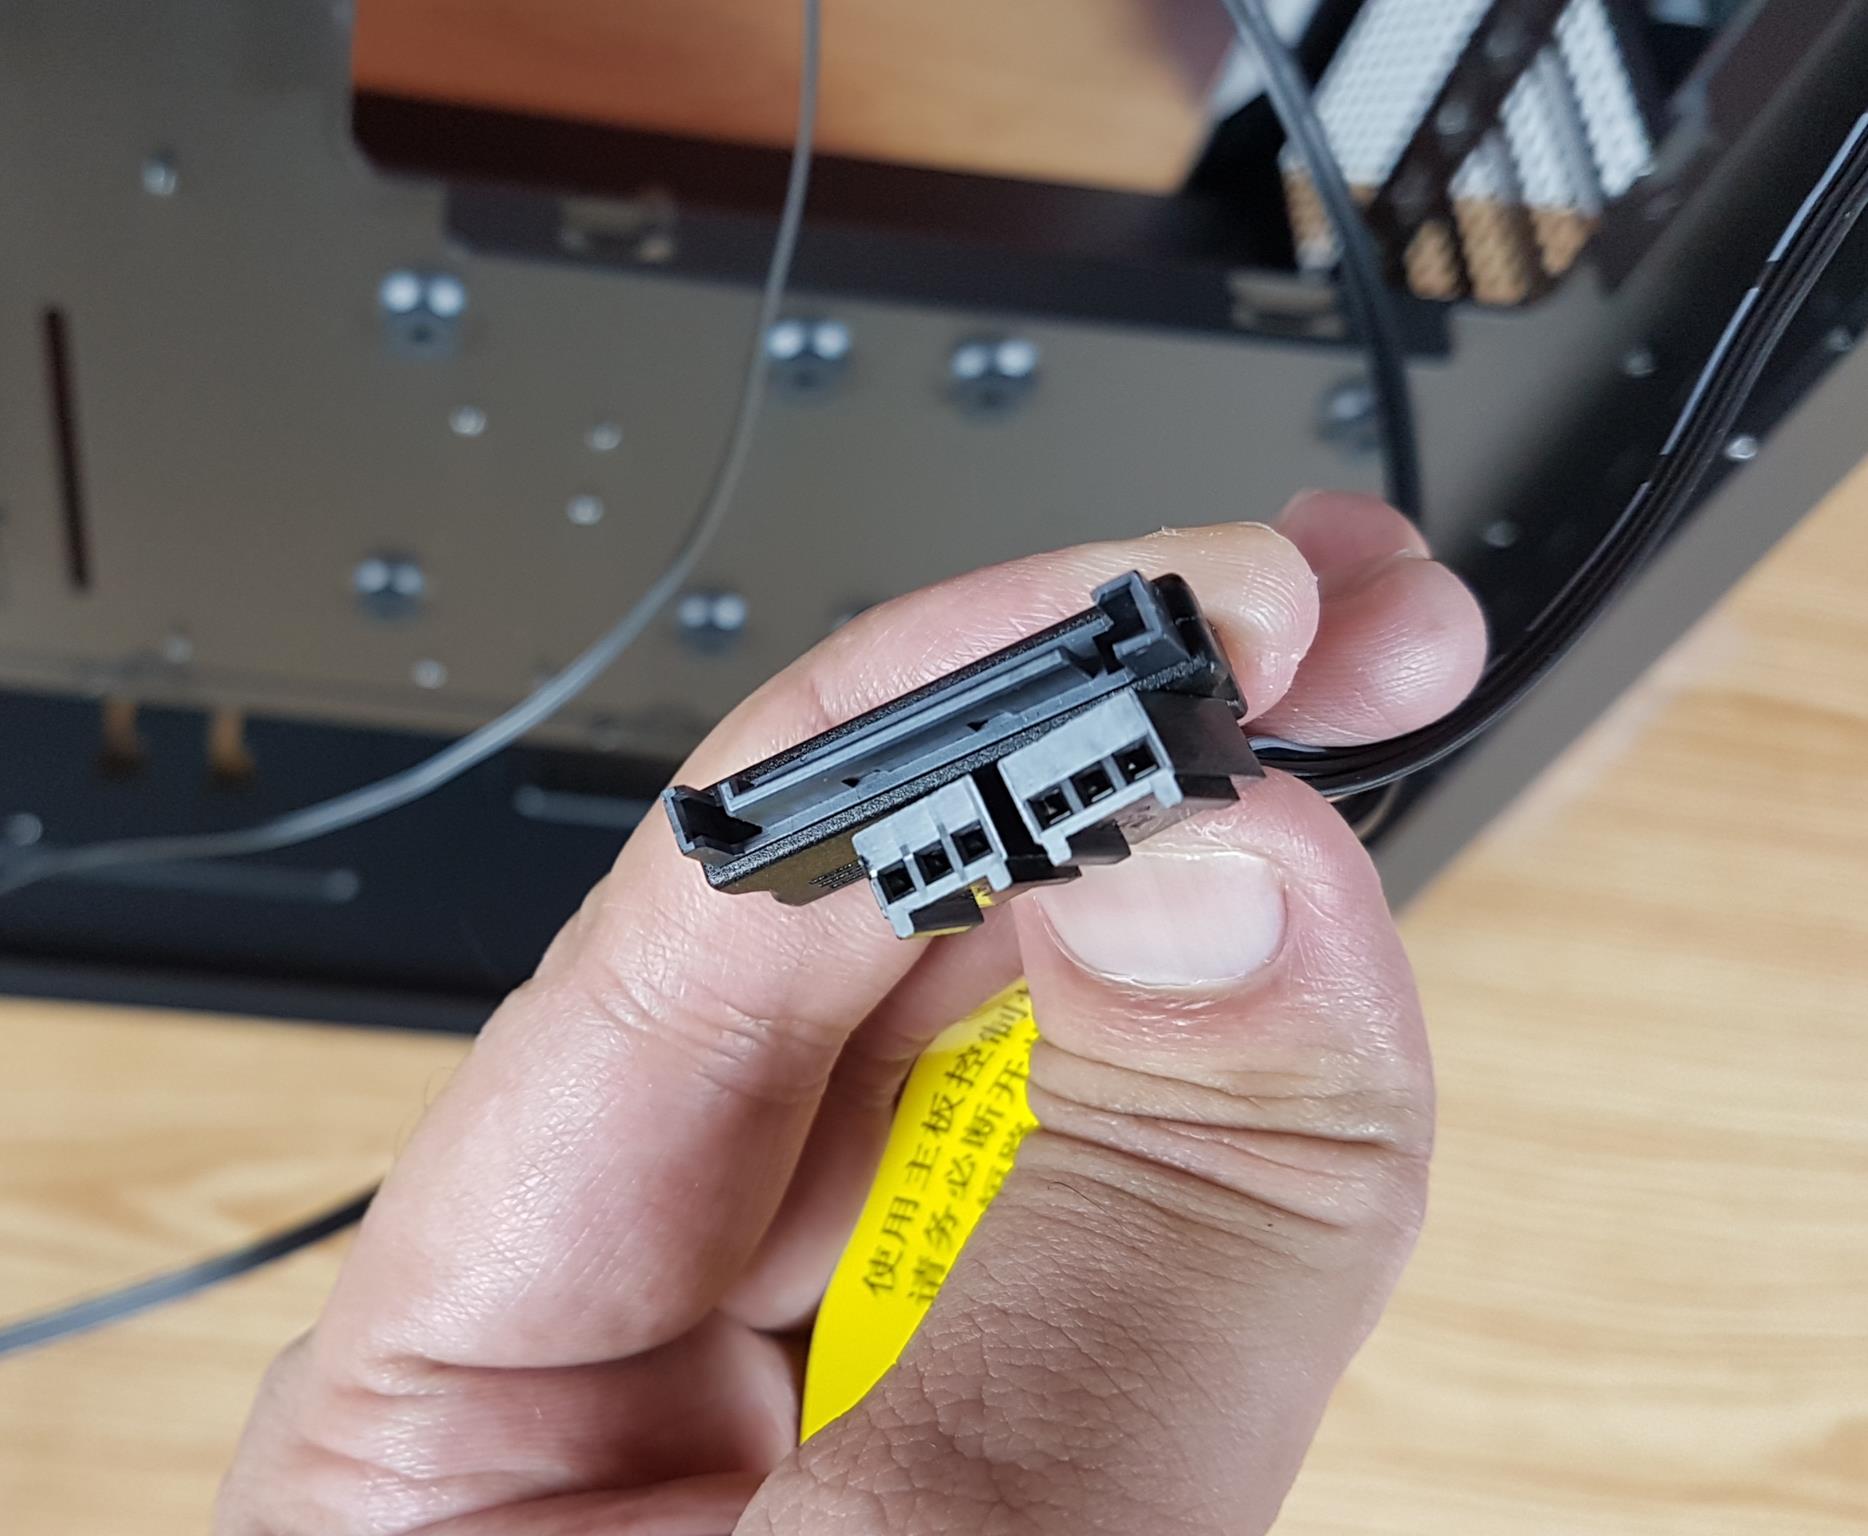
The above picture shows the 2x 3-pin fan connectors and the SATA connector. 1x 3-pin is for the rear 140mm fan.
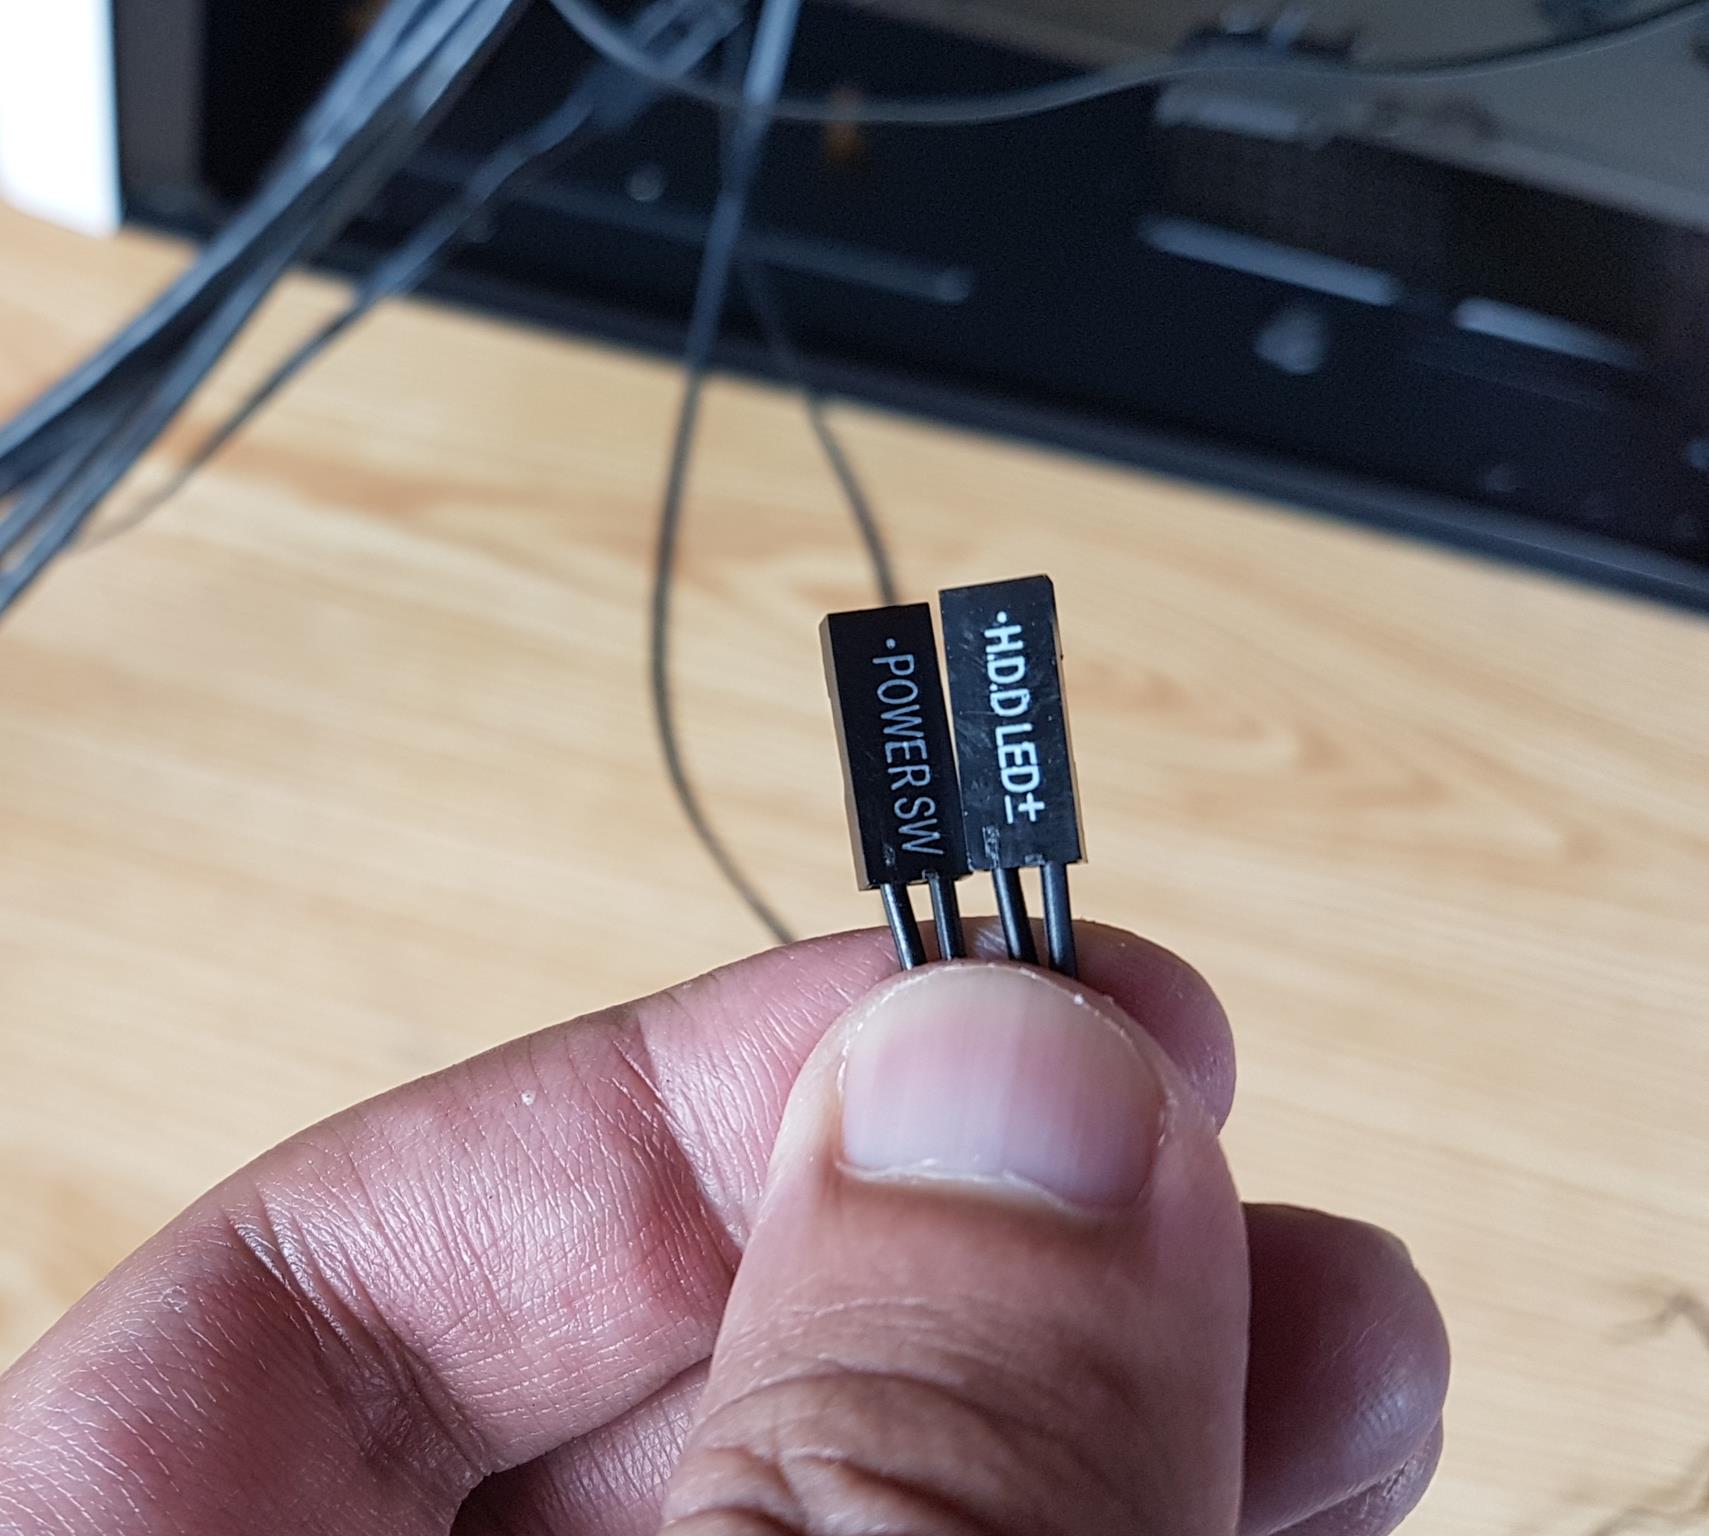
There is a Power and HDD LED system panel connectors. There is no reset connector as it is used for the hub.
The above is a close-up view of the tucked cables. It can be seen that the fan cables are daisy-chained.
Test Build And Experience
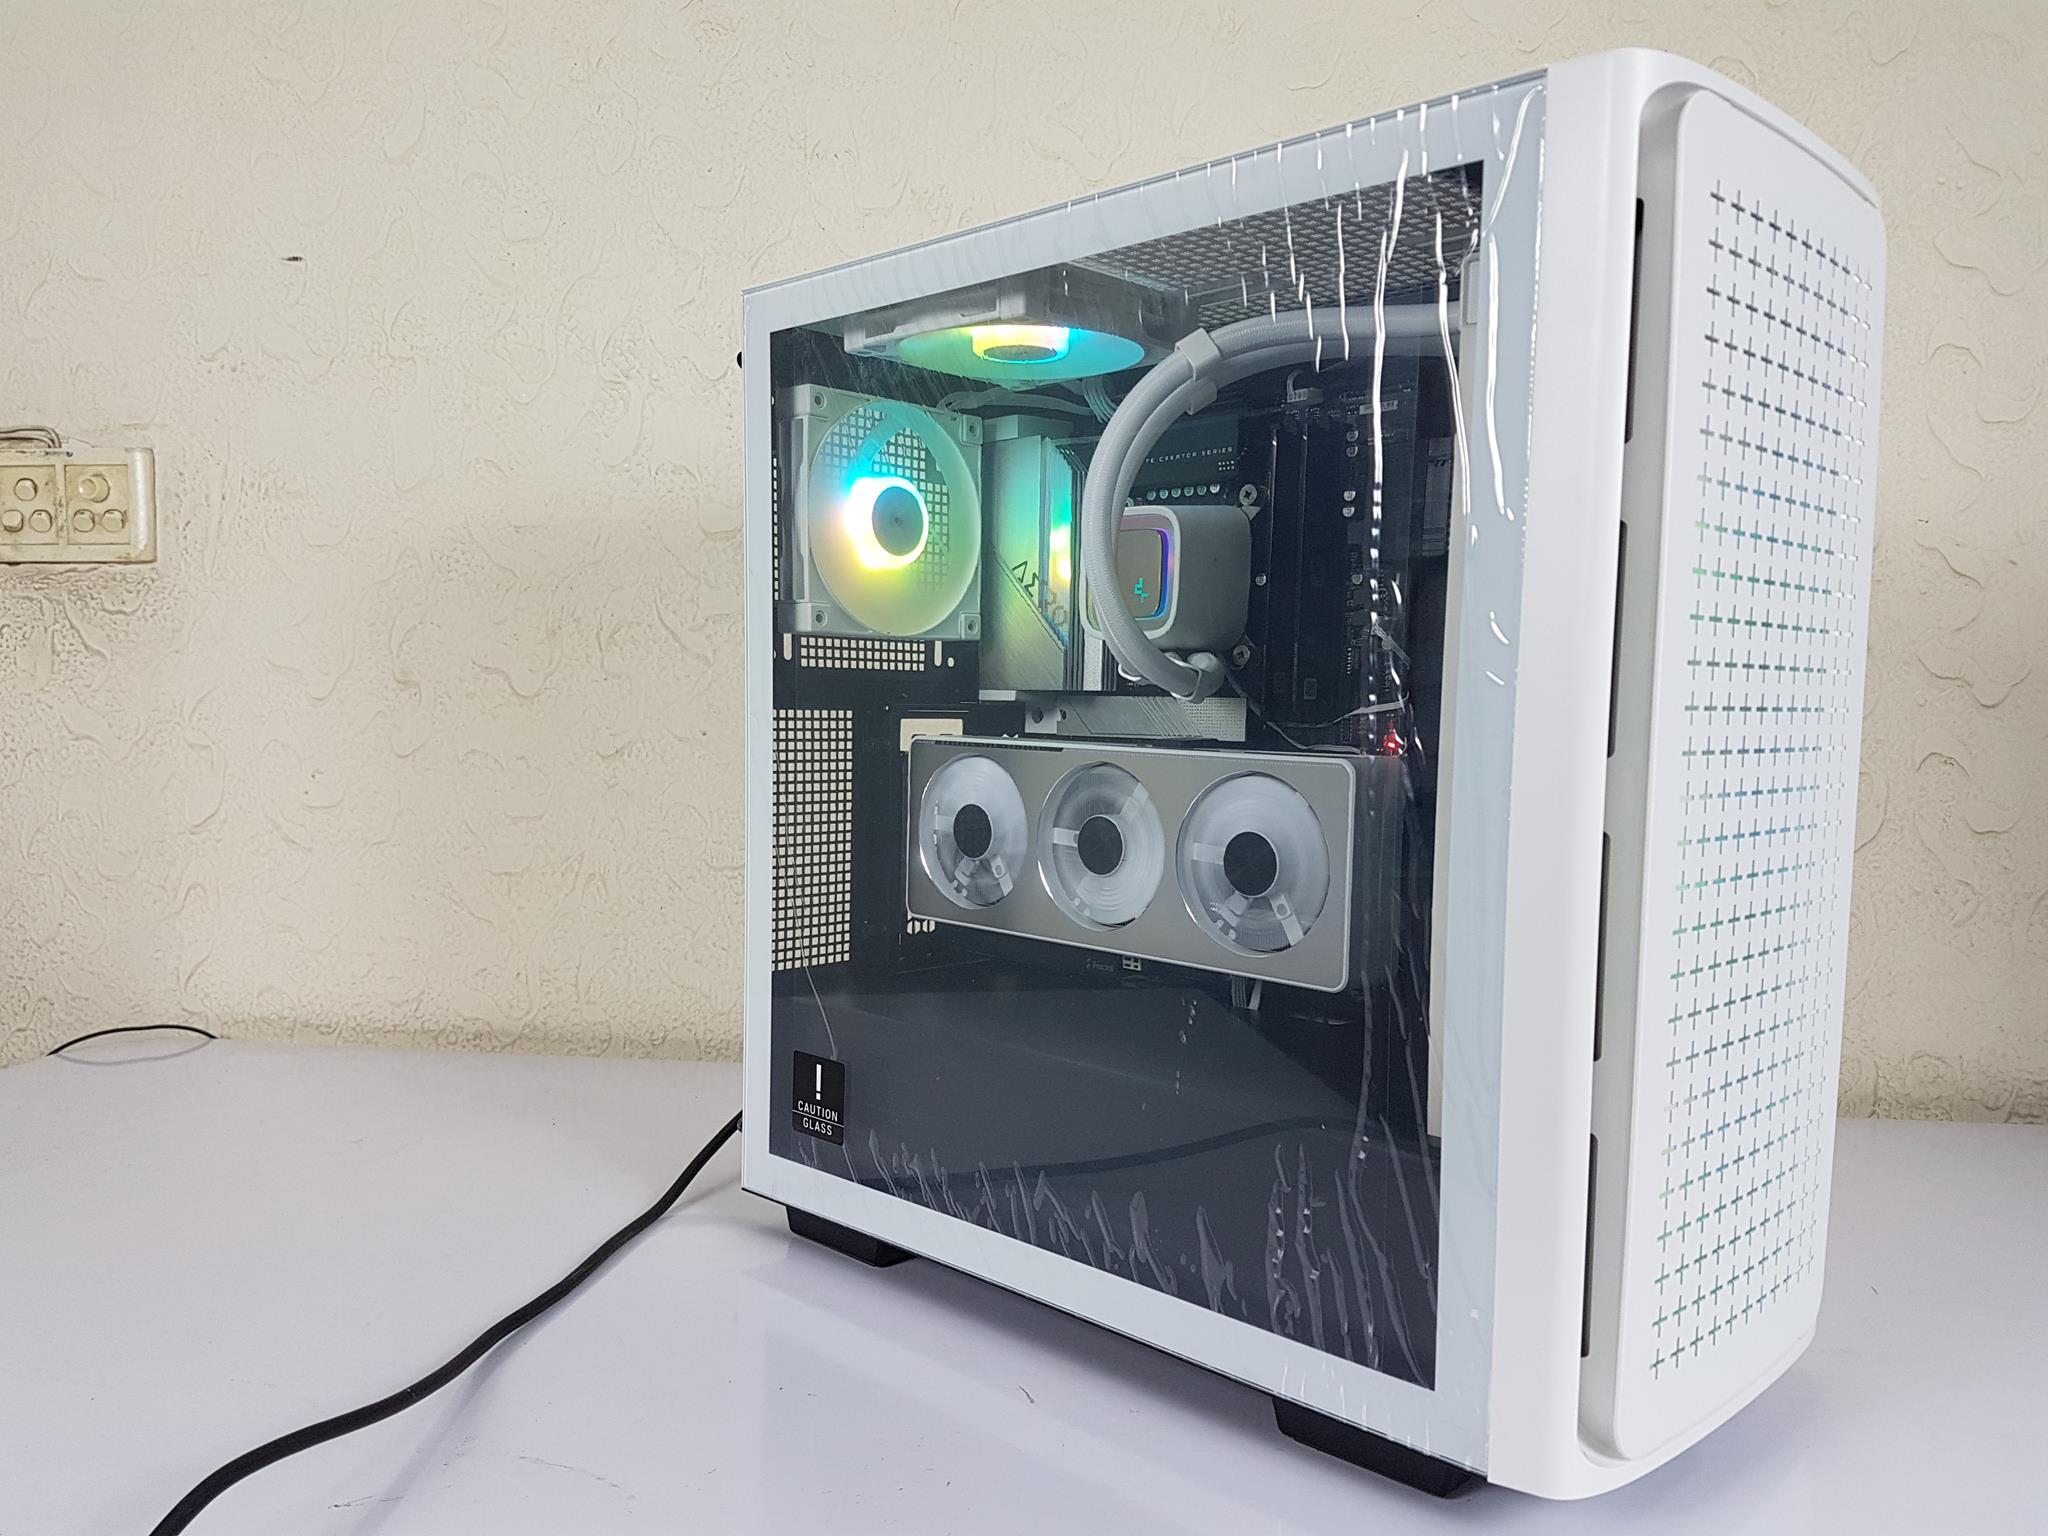
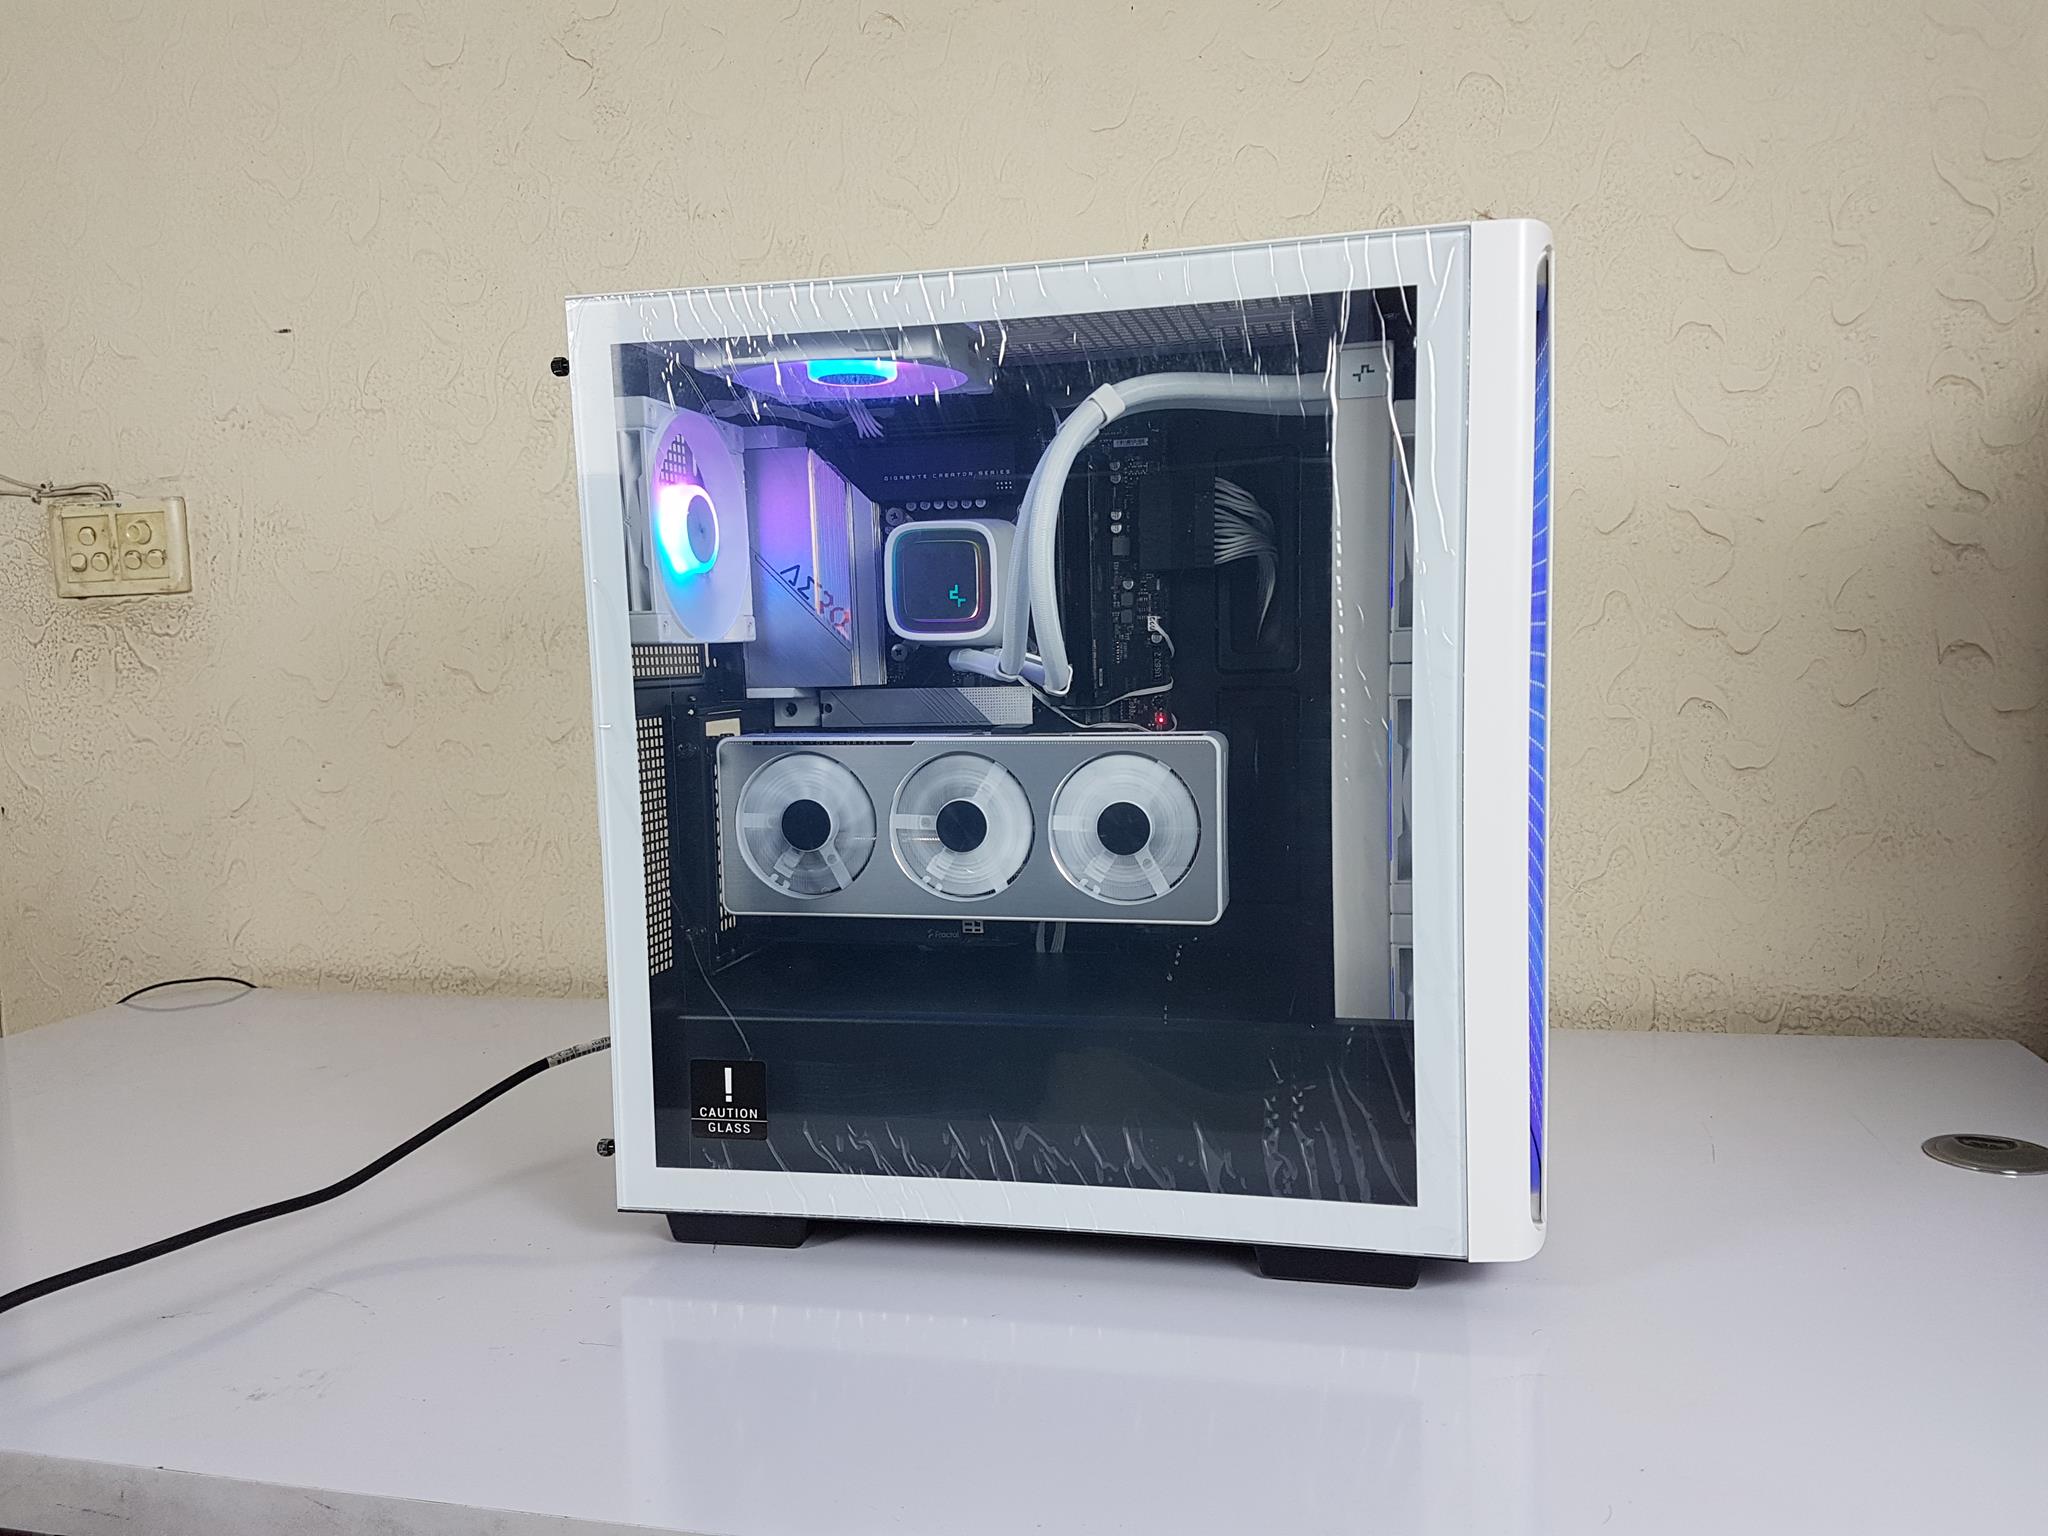
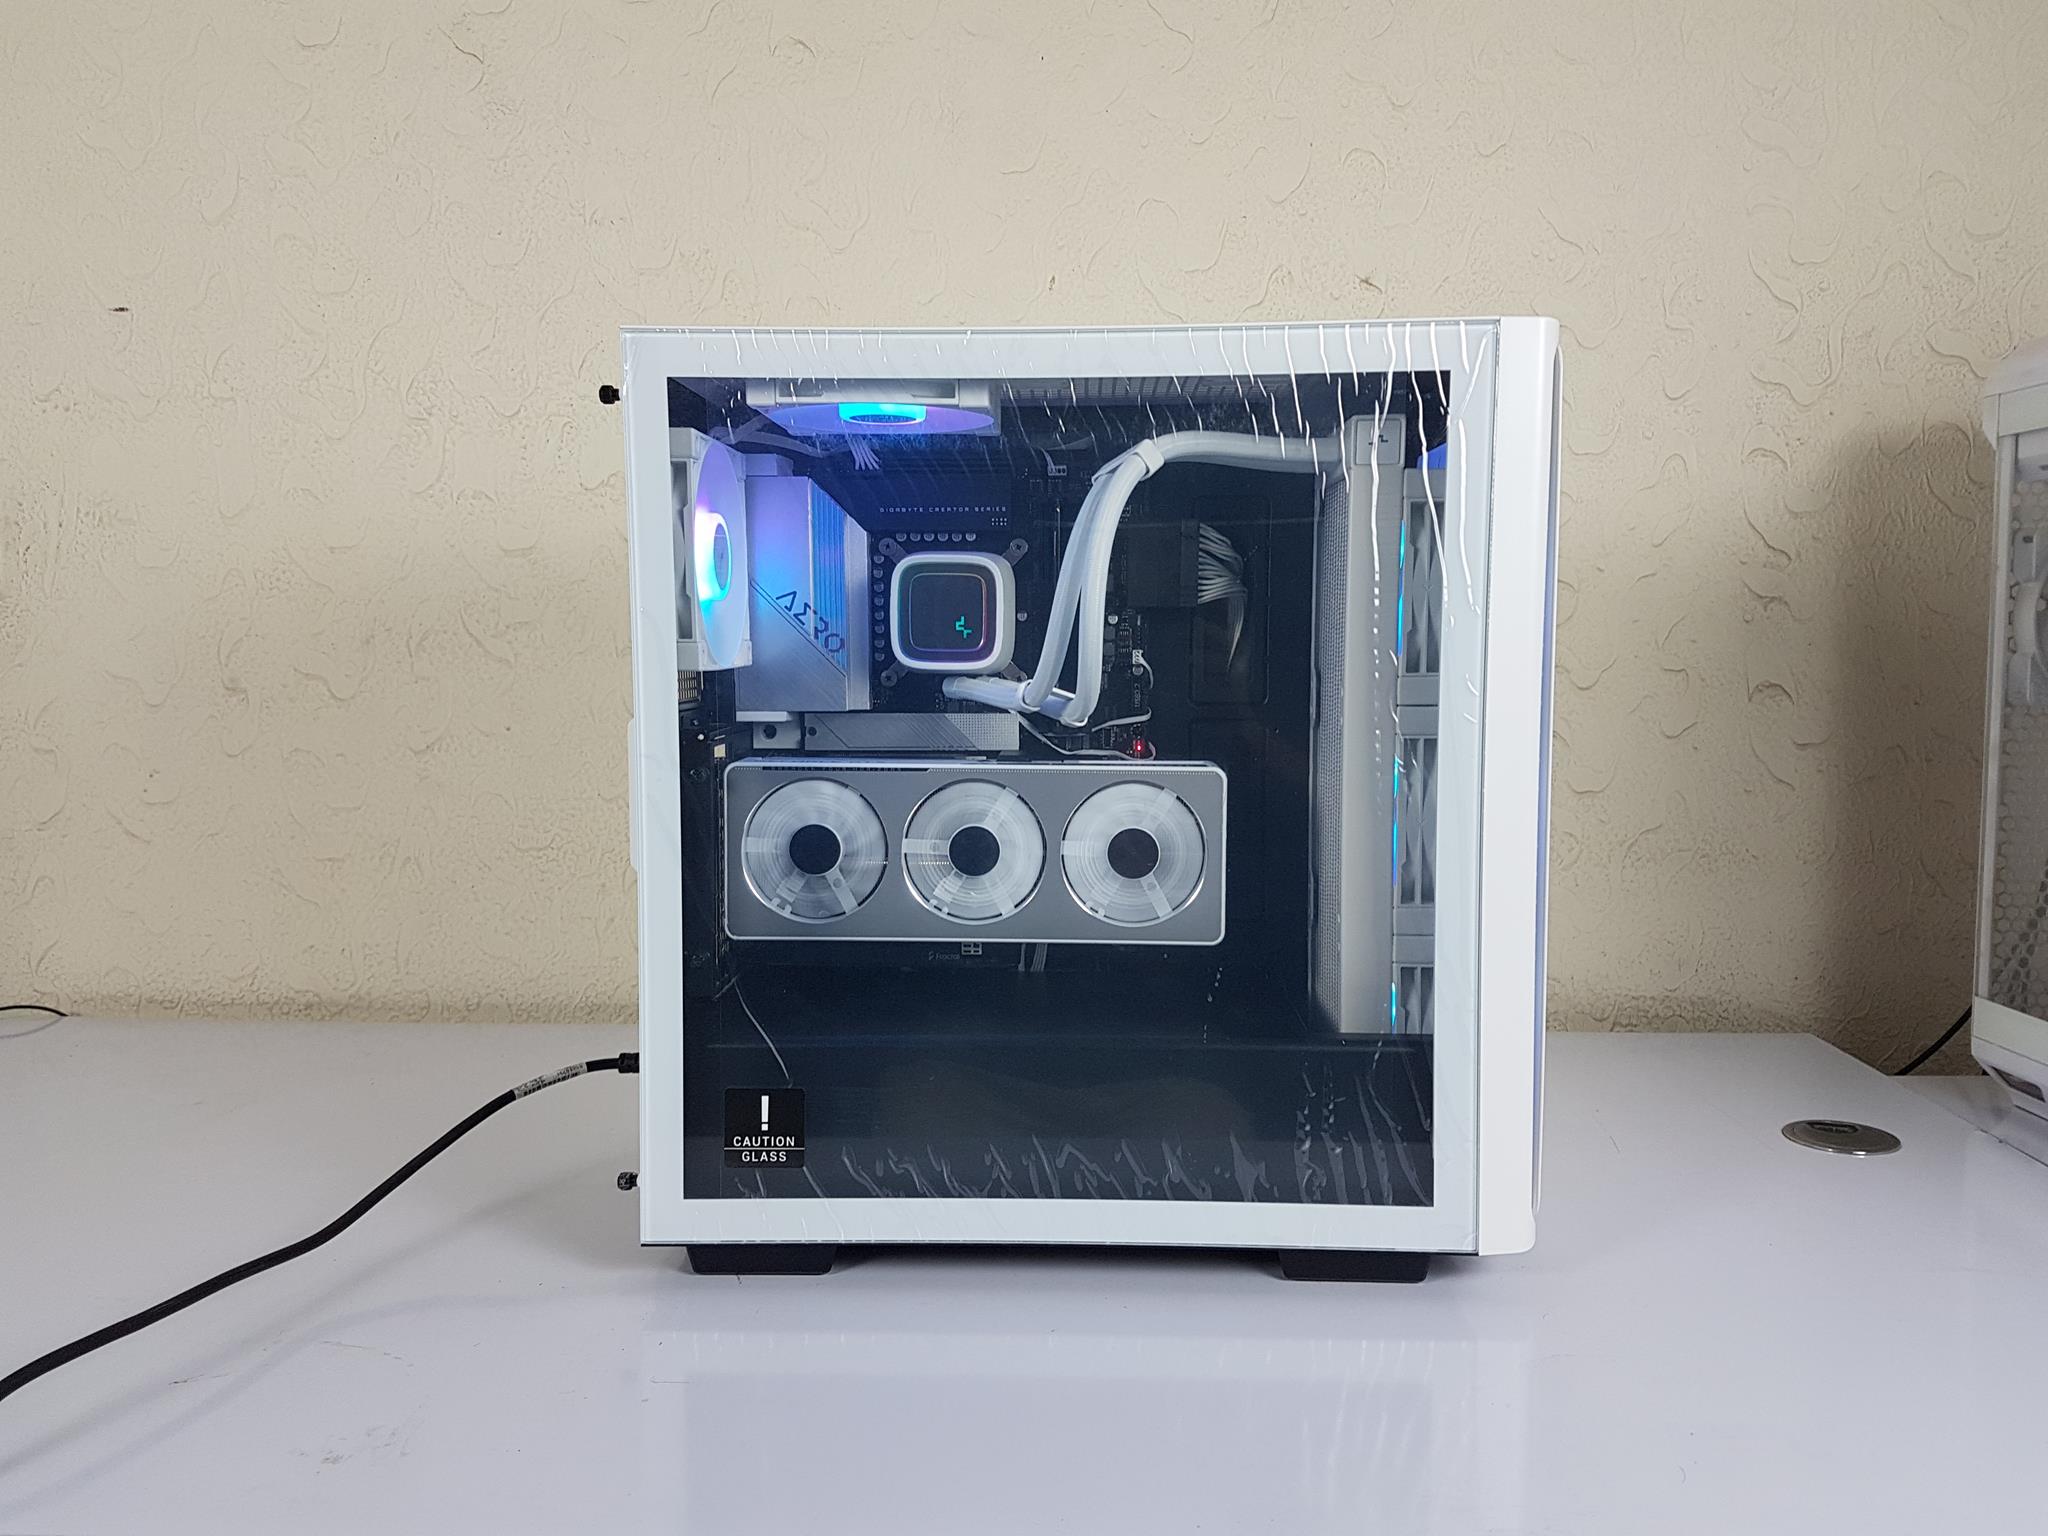
We are taking a different approach to the test build. We have removed the pre-installed fans. This is done to install an AIO on the front and a bit of customization for this particular build. The motherboard was installed followed by the DeepCool LS720 WH on the front. The graphics card was installed in a vertical layout using a Fractal Design Vertical bracket. Then the PSU was installed.
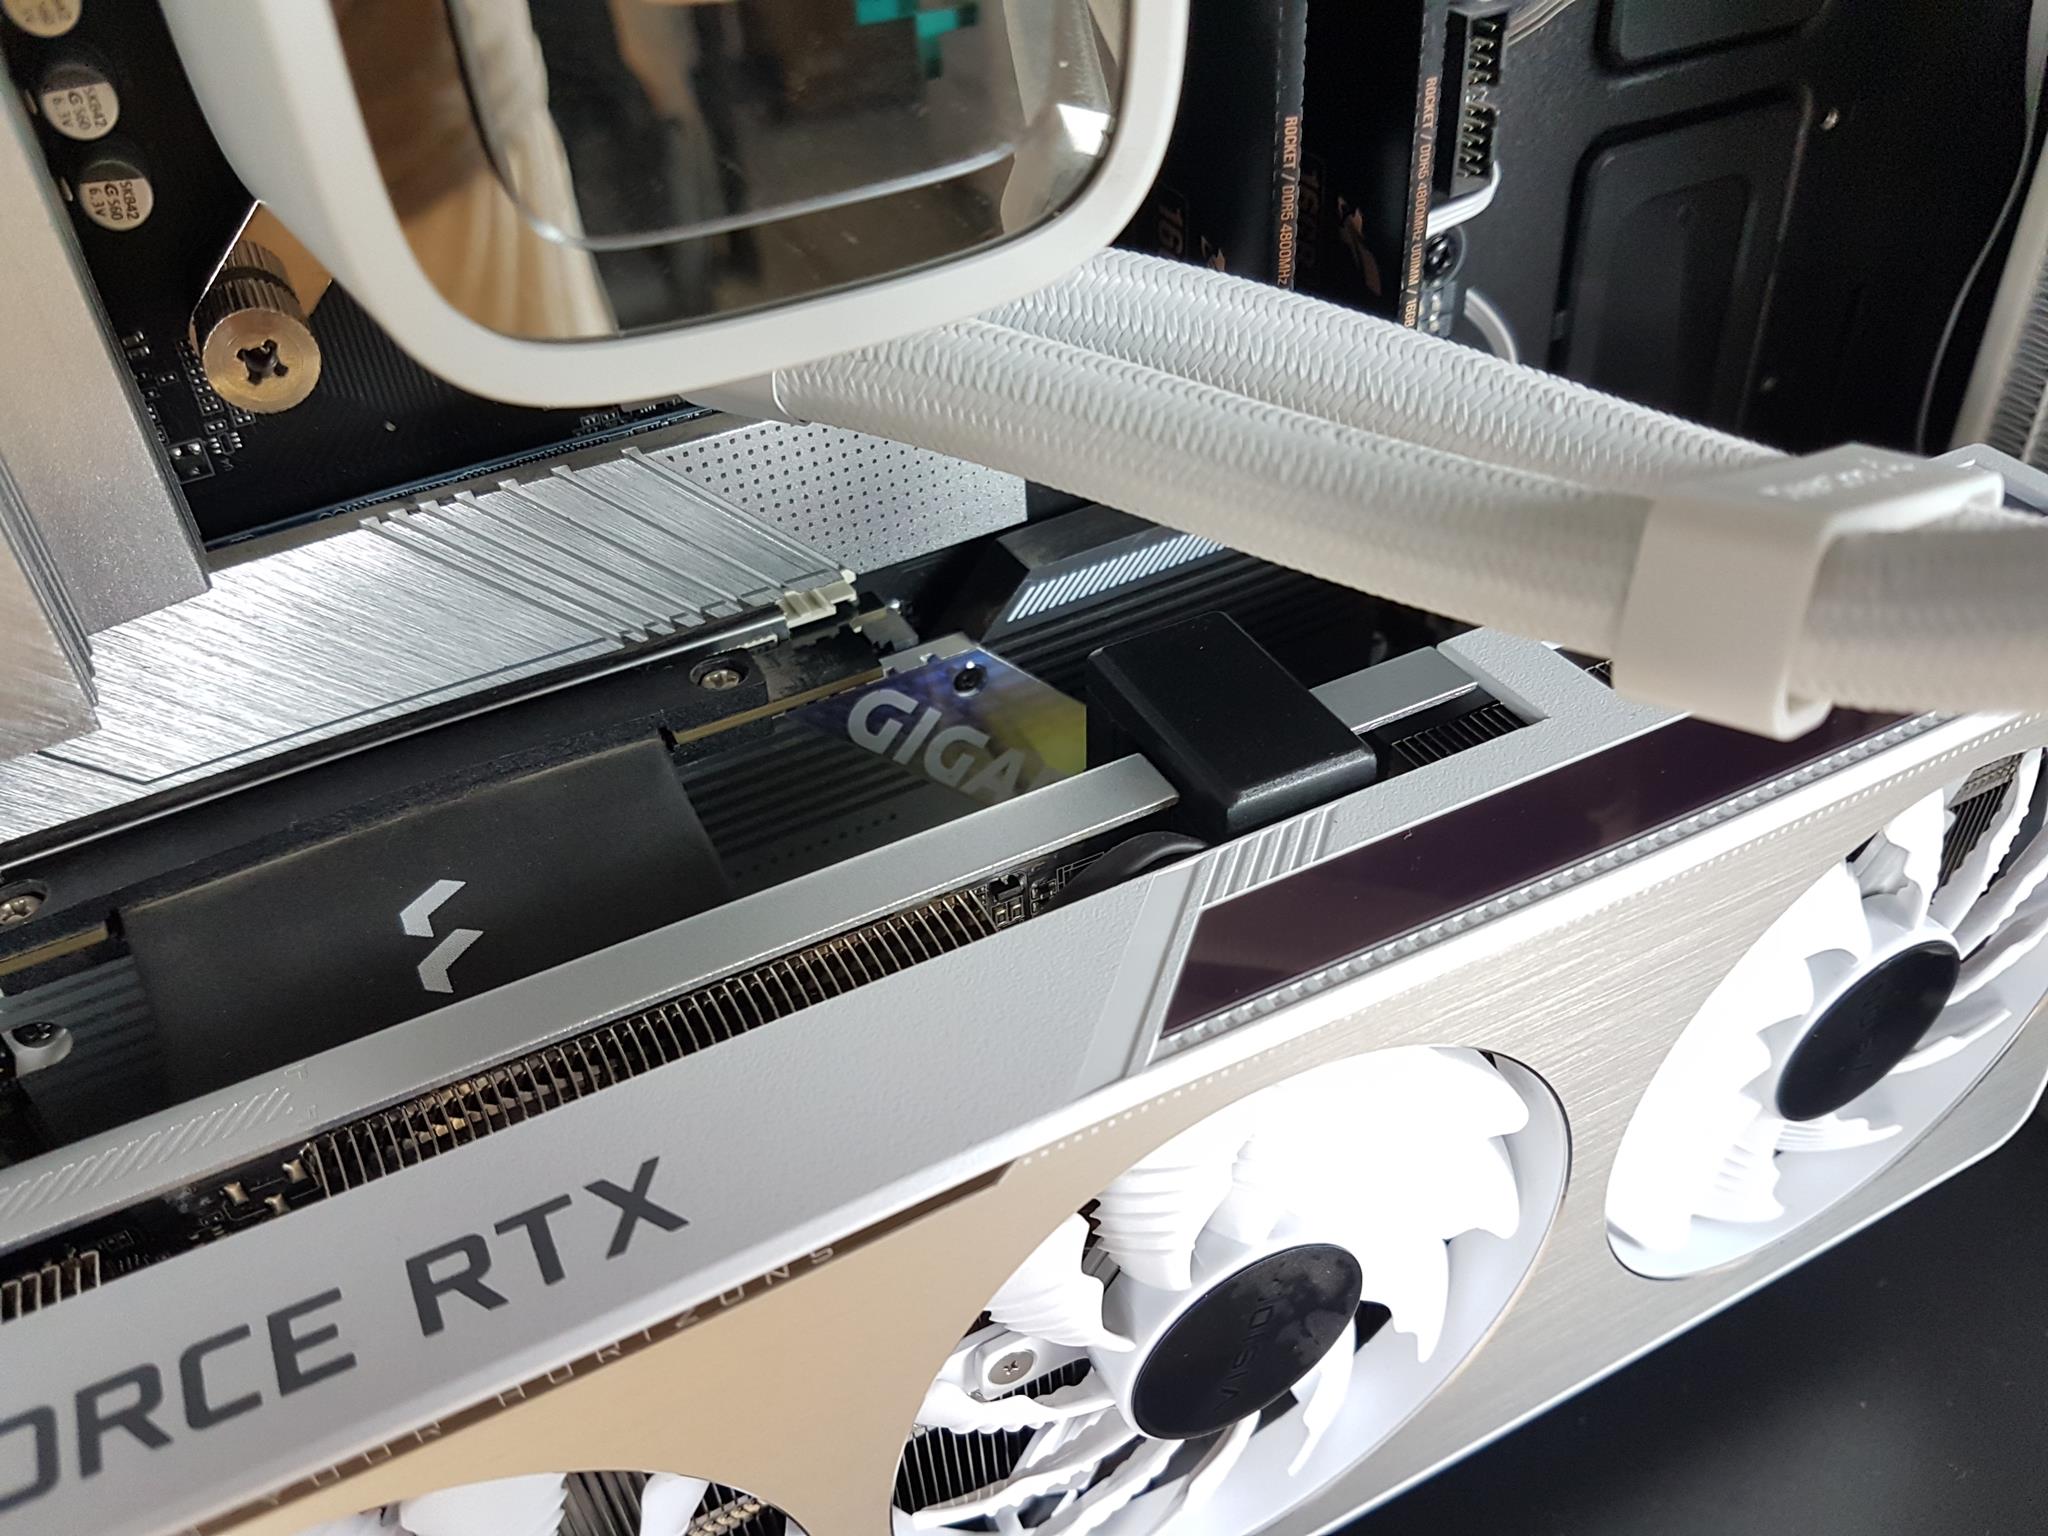
We have used the 180° adapter connector from modDIY for the GPU. This connector hides the power cable on the back side of the graphics card.
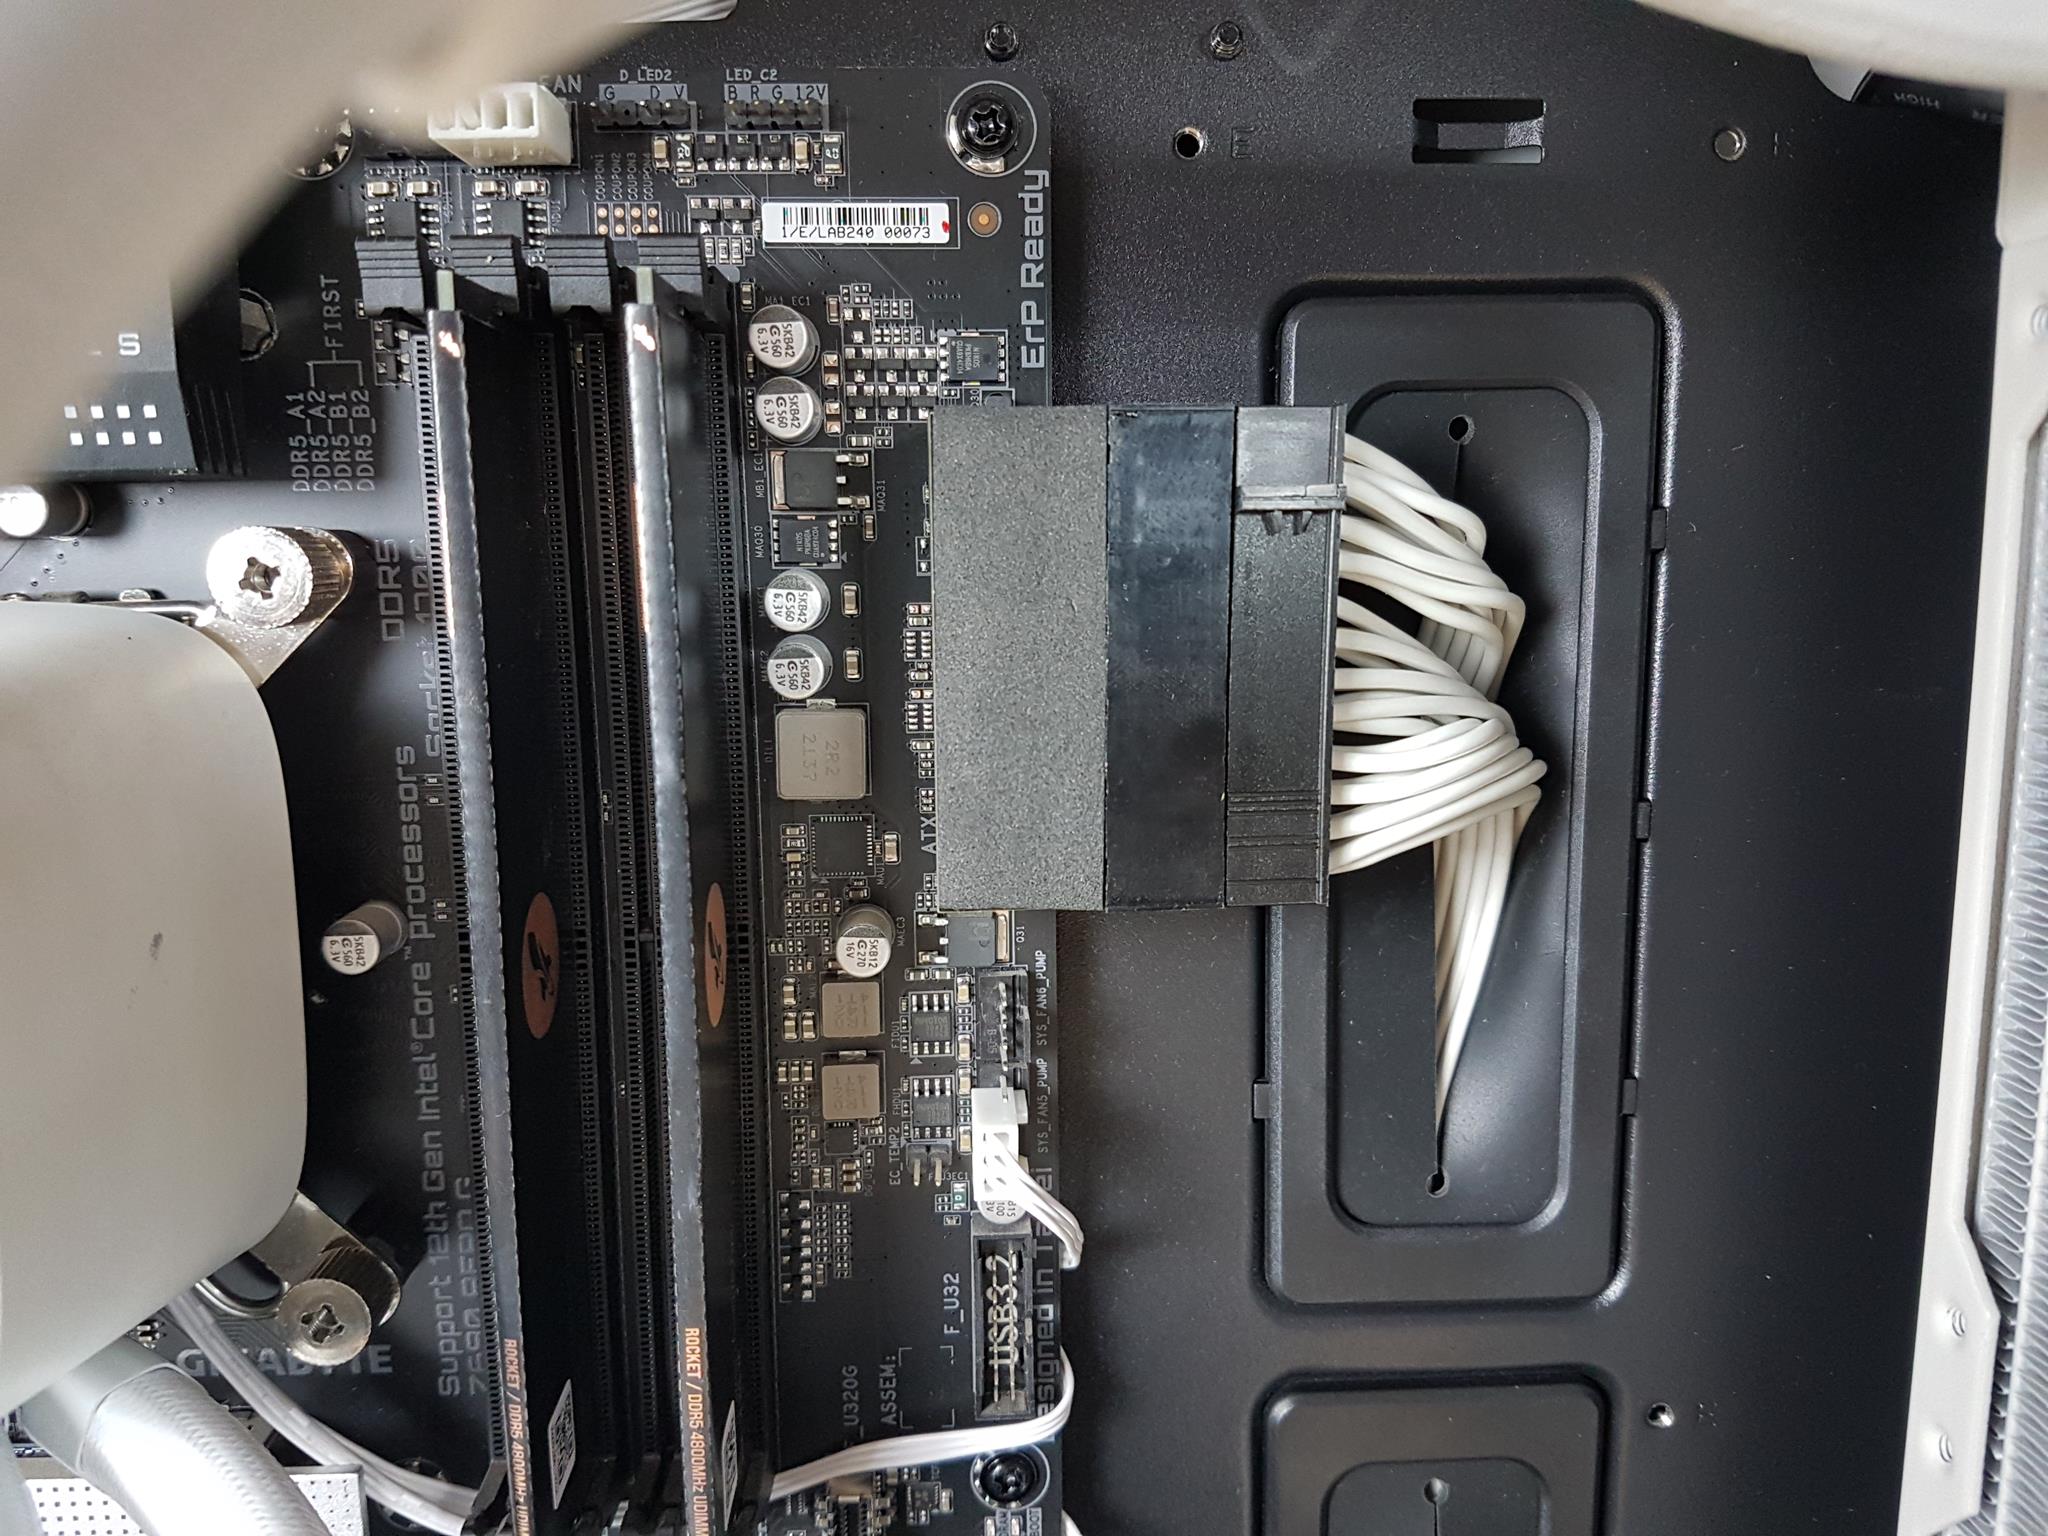
We have used a 90° adapter connector for the 24-pin ATX connector.
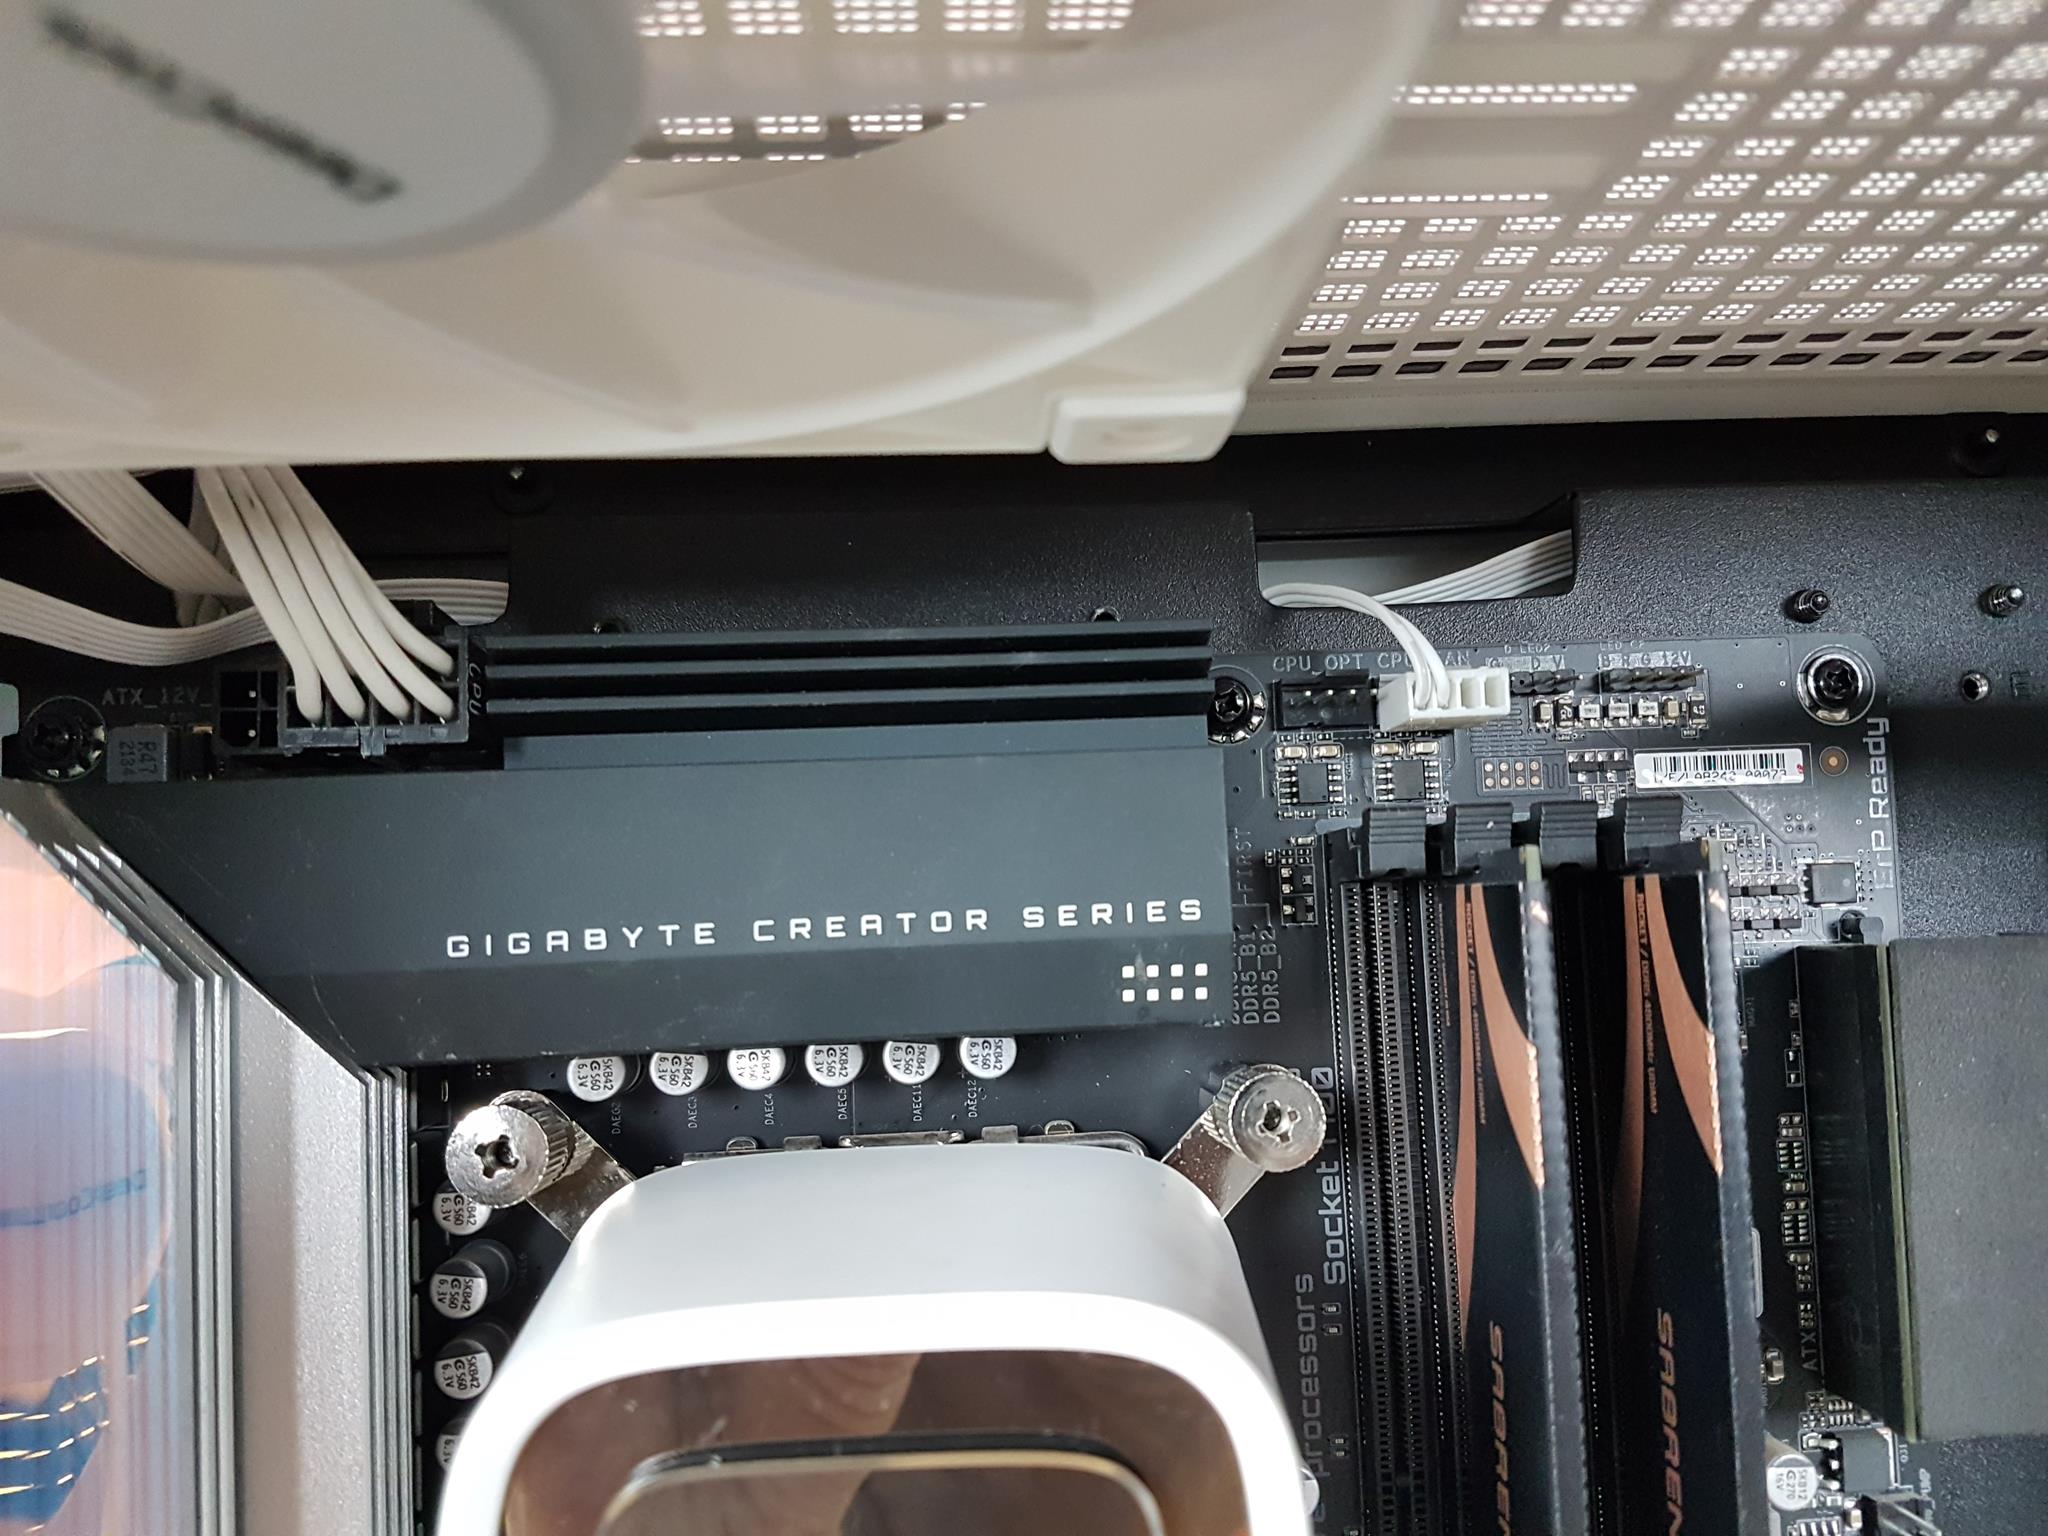
The above picture shows the EPS and the fan power connectors installed.
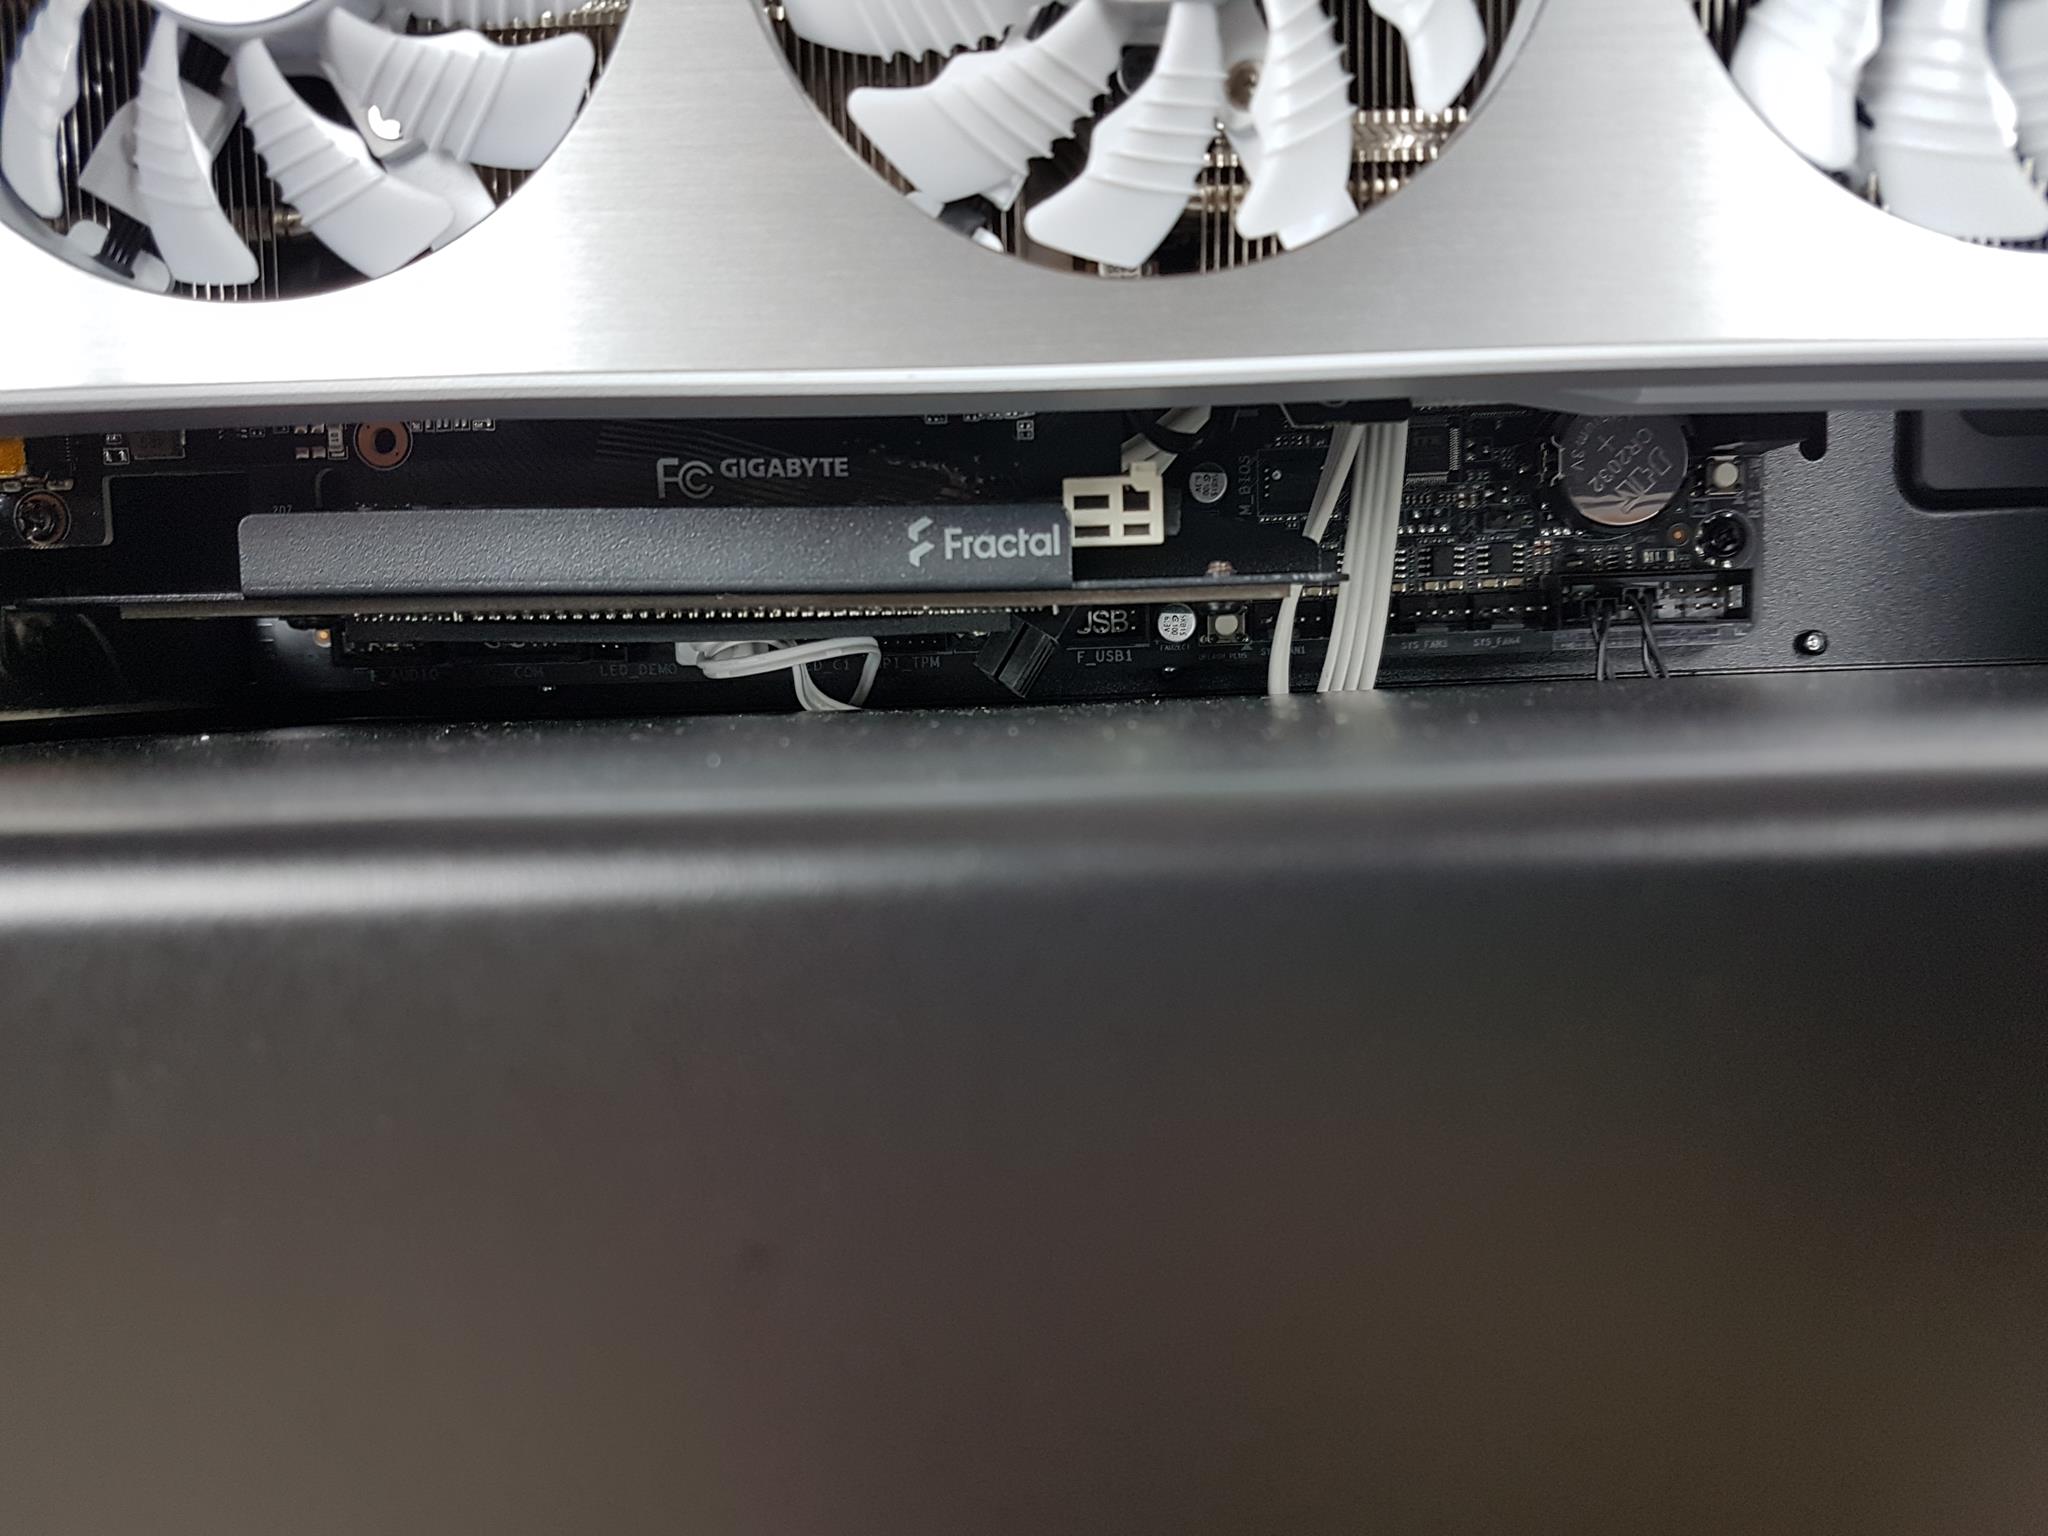
The bottom connectivity of the motherboard has no hindrance.
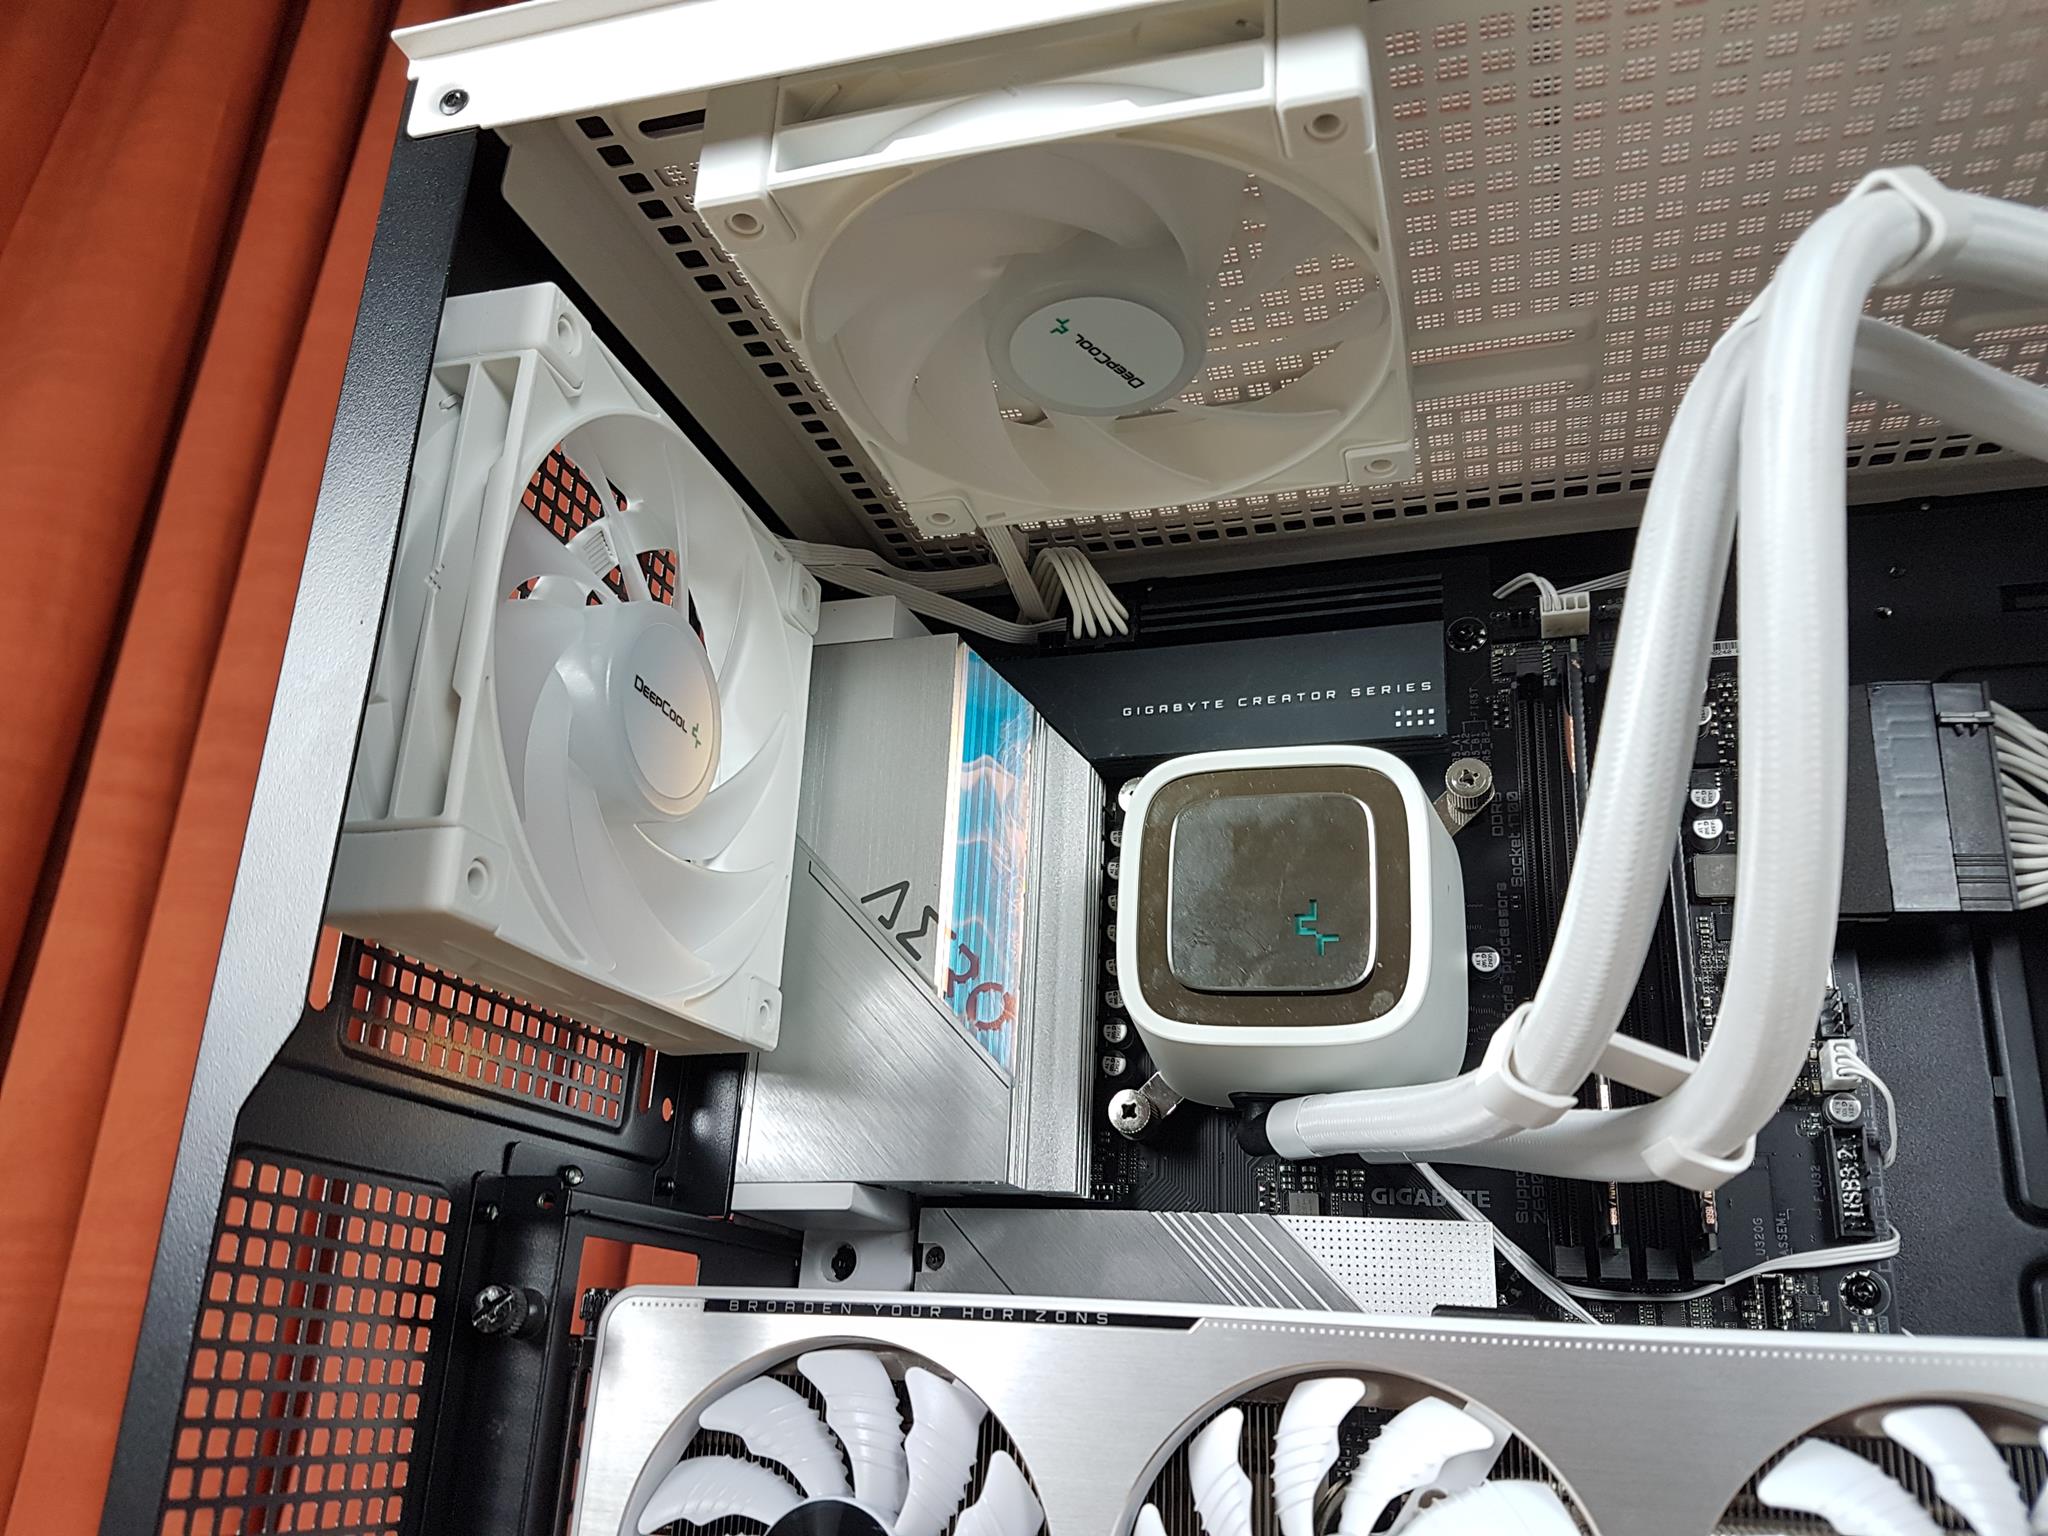
We have installed two FC120 A-RGB White fans on the top and rear.
The cable managements turn out to be easy despite having no cable tie point on the far left side of the case.
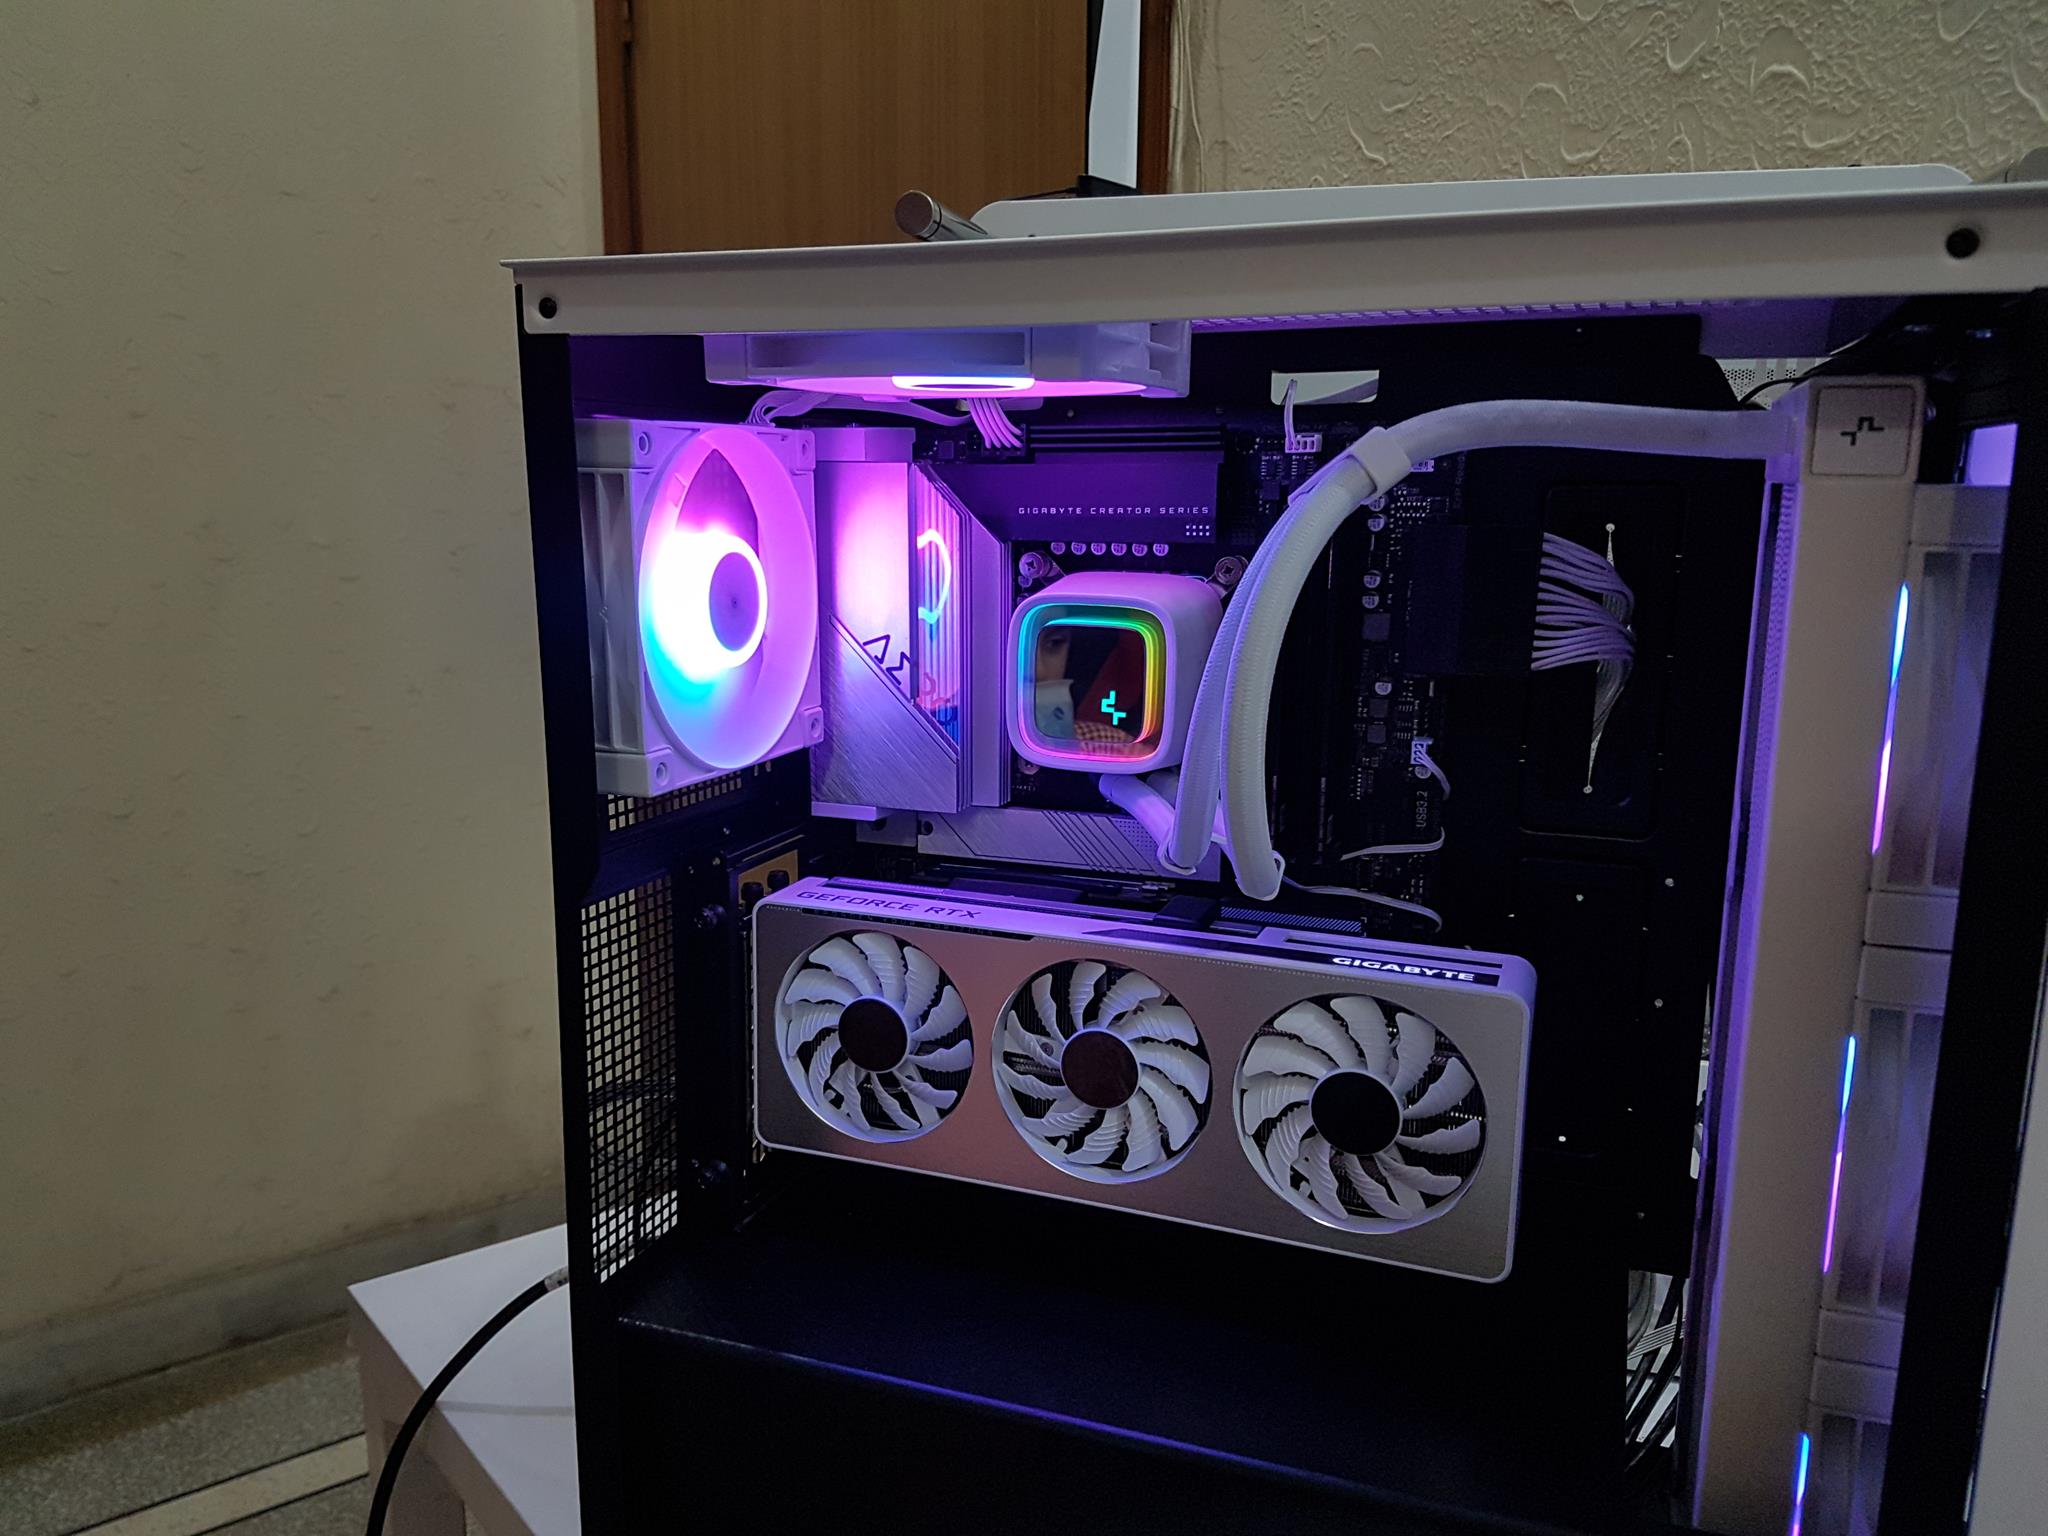
Here are a few build Pics.


Testing
The following test build has been used for thermal testing:
- GIGABYTE Z690 AERO G
- Intel i7 12700k [4.7GHz all P-cores,1.160V]
- DeepCool LS720 WH
- GIGABYTE GeForce RTX 3060 VISION OC 12G
- Sabrent Rocket DDR5 32GB Kits
- Sabrent Rocket Q 500GB NVMe SSD
- DeepCool DQ-750-M-V2L-WH
We used the Noctua NT-H1 thermal paste. The AIDA64 Engineers edition was used to stress the CPU using FPU and the graphics card at the same time. The following configurations have been tested and reported in the graph:
- Stock Configuration [Front Panel installed]
- Front Panel removed
All the fans and the AIO pump were set to run at full speed.
Let’s take a look at the results.
| Stock Configuration | Ambient | Idle | Load |
| CPU | 34°C | 35.5°C | 72°C |
| GPU | 34°C | 49.3°C | 66°C/79°C (GPU/Hot Spot) |
| Front Panel Removed | |||
| CPU | 34°C | 35.4°C | 72°C |
| GPU | 34°C | 49.2°C | 66°C/78°C (GPU/Hot Spot) |
We have reported absolute temperature. The average of the CPU cores temperature values was taken. We know the case should have been tested with the air cooler and the stock fans. Still, our testing is based on the AIO. So, anyone who is up for using an AIO in this case would be benefited and it has given us an idea of how the air cooled build would fair in this case. From our testing, it is apparent that this case is not airflow restricted and the overall thermal performance is nice.
Conclusion
The DEEPCOOL CK560 is a mid-tower chassis available in black and white colors. The CK560 WH has a dimension of 456x230x471mm (LxWxH). It is made of steel, plastic, and tempered glass. The chassis has a net weight of 8Kg. The chassis supports motherboard up to E-ATX size with ample provision for the cooling gear and the storage.
One of the key highlights is the tempered glass on the side to showcase your build. Another feature is the provision of 3x 120mm A-RGB fans on the front and a 140mm non-RGB fan on the rear. Another salient highlight is the magnetic front panel. The case comes with a GPU Support bracket and the SSDs installation is tool-less.
Cooling Provision
Following are the fan mounting possibilities:
- Up to 3x 120mm or 2x140mm fans on the front [3x 120mm A-RGB pre-installed]
- 1x 120mm/140mm fan on the rear [1x 140mm Pre-Installed]
- Up to 2x 120/140mm fans on the top
Following is the radiator mounting support:
- Up to 360mm Radiator on the front
- Up to 280mm Radiator on the top
- Up to 140mm Radiator on the rear
Storage Provision
Storage provision is:
- Up to 2x 2.5” and 2x 3.5” drives or a combination
Clearance
- CPU Cooler of up to 175mm height is possible
- Graphics Card of up to 380mm in length
- PSU length of 160mm
Filtration
- 1x Full-length mesh dust filter on the front
- 1x magnetic dust filter on the top
- 1x non-magnetic dust filter under the base
While DEEPCOOL has given good coverage for dust filtration in this case, there is one caveat to the design on the front. There are cutouts in the main frame on the front side of the case.
These are actually behind the front dust filter mount. That would mean dust can easily go through these cutouts in the case which fails the front dust filter.
The PCIe slots are in 7+0 configuration and the slot covers are vented and reusable. There is no vertical slot instead the whole area is perforated for ventilation. The front rail and the top mounting rails are not fragile.
DEEPCOOL is using proprietary connectors for the A-RGB though they have provided support cables with a standard 3-pin 5V A-RGB connector. The user can connect the fans to the supported motherboards or use the onboard, pre-programmed lighting effects.
The onboard hub is SATA powered. Build experience inside the CK560 WH was a walk in the park and we did not experience any issues. We have tested the chassis using the AIO.
Based on our testing, this case is not airflow restricted. Plus, with the right bracket, you can install the graphics card in the vertical layout as well.
We are grateful to DeepCool for the provision of the test unit.
Thank you! Please share your positive feedback. 🔋
How could we improve this post? Please Help us. 😔
[Hardware Reviewer & Editor]
Meet Nauman Siddique, a highly experienced computer science graduate with more than 15 years of knowledge in technology. Nauman is an expert in the field known for his deep understanding of computer hardware.
As a tech tester, insightful reviewer, and skilled hardware editor, Nauman carefully breaks down important parts like motherboards, graphics cards, processors, PC cases, CPU coolers, and more.
- 15+ years of PC Building Experience
- 10+ years of first-hand knowledge of technology
- 7+ years of doing in-depth testing of PC Hardware
- A motivated individual with a keen interest in tech testing from multiple angles.
- I majored in Computer Science with a Masters in Marketing
- Previously worked at eXputer, EnosTech, and Appuals.
Get In Touch: [email protected]


