An overheating graphics card is a source of annoyance for most of us gamers if not all. We want our GPU to stay within the temperature range provided by the manufacturer, so it can maintain its clock speeds while providing us with a stable frame rate during our gaming sessions. However, the moment our GPU starts to overheat, it lowers its clock speeds, resulting in a drop in our FPS.
Key Takeaways
- There can be a number of reasons why your GPU starts to overheat all of a sudden, including inadequate cooling and overclocking.
- An overheating graphics card can have a much-reduced lifespan and cause hardware failure.
- You can fix the issue by updating the drivers, disabling overclocking, cleaning your graphics card, and replacing its thermal paste.
How To Stop Graphics Card From Overheating
Without wasting any time, let us head directly to the fixes you will need to treat an overheating graphics card. We will be dividing these solutions into two categories. First will be the software-based fixes, the solutions that do not require you to do anything outside the interface of your system. If those do not end up working for you, then we will be heading over to the hardware-based fixes, physical measures you can take to prevent your graphics card from overheating.
Software Based Fixes
Before we jump to any conclusion and take the GPU out of the case and start inspecting it, it will be wise to monitor and adopt measures from within our operating system and see if we can eliminate the problem from there. Mentioned below are some of the fixes that are known to be very effective against an overheating graphics card. Let us take a look at them one by one and see if any of these solutions fix the problem for you.
Update Your Drivers
It is always suggested to keep your drivers up to date. GPU manufacturers, from time to time, will roll out an update for the drivers of your graphics card. This is to ensure that your graphics card is performing in the best possible way without malfunctioning.
Manufacturers continue to fine-tune our hardware with the software patches, so if your GPU is experiencing a sudden rise in temperature, chances are you have not updated its drivers in a while. Follow the instructions below to update your GPU drivers.
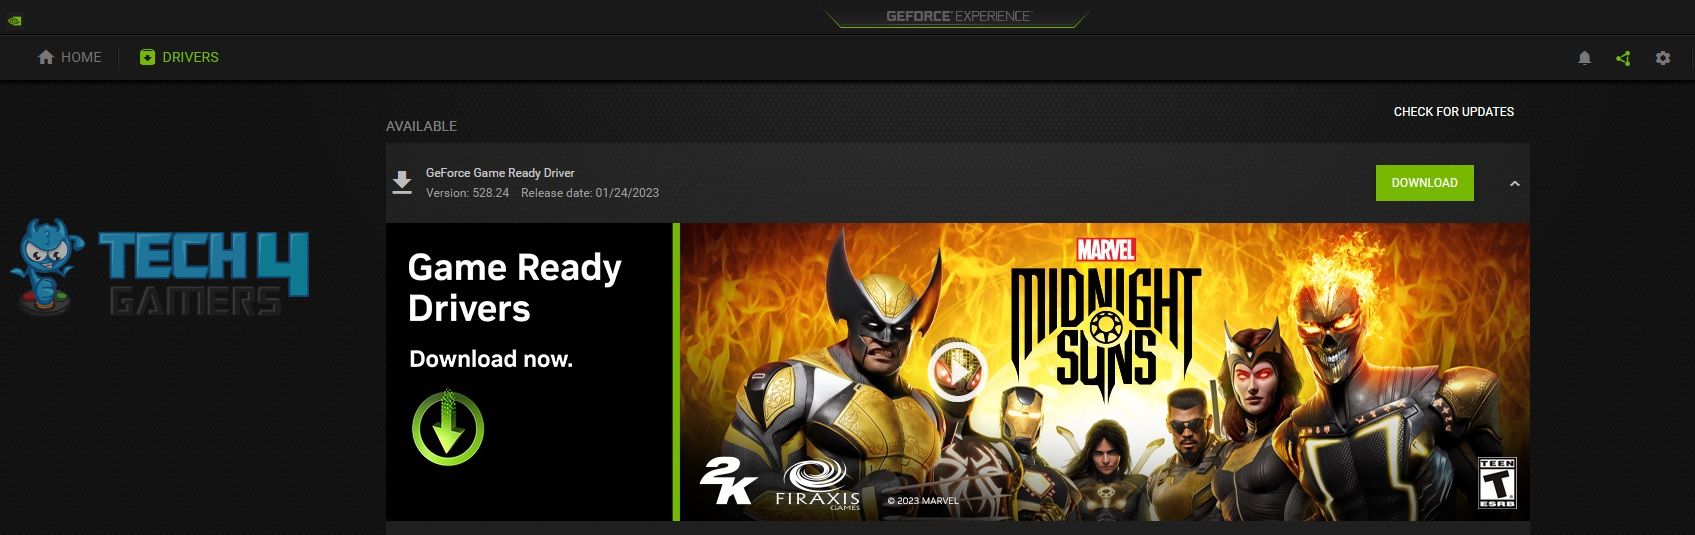
- Head over to the Geforce Experience and log in with your credentials.
- From home, enter the drivers’ section in the top left corner.
- Geforce Experience will automatically scan the web for a driver update.
- If the update is available, you will get the option to download the newer version of the driver.
- Download and install the driver.
- Restart your PC and see if it fixes the problem.
Roll Back The Drivers To The Previous Update
If the previously mentioned solution did not work for you. Or if you happen to experience an abrupt rise in the temperature of your graphics card after updating your drivers. In that case, chances are your GPU manufacturer has released a faulty update.
This can cause your graphics card to behave in absurd ways, and one of those ways could be overheating. In a case like this, we recommend rolling back to the previous version of your drivers until the manufacturer releases a fresh patch. Follow the instructions below to roll back to the previous version of your drivers.
- Right-click on “This PC” and click on “properties.”
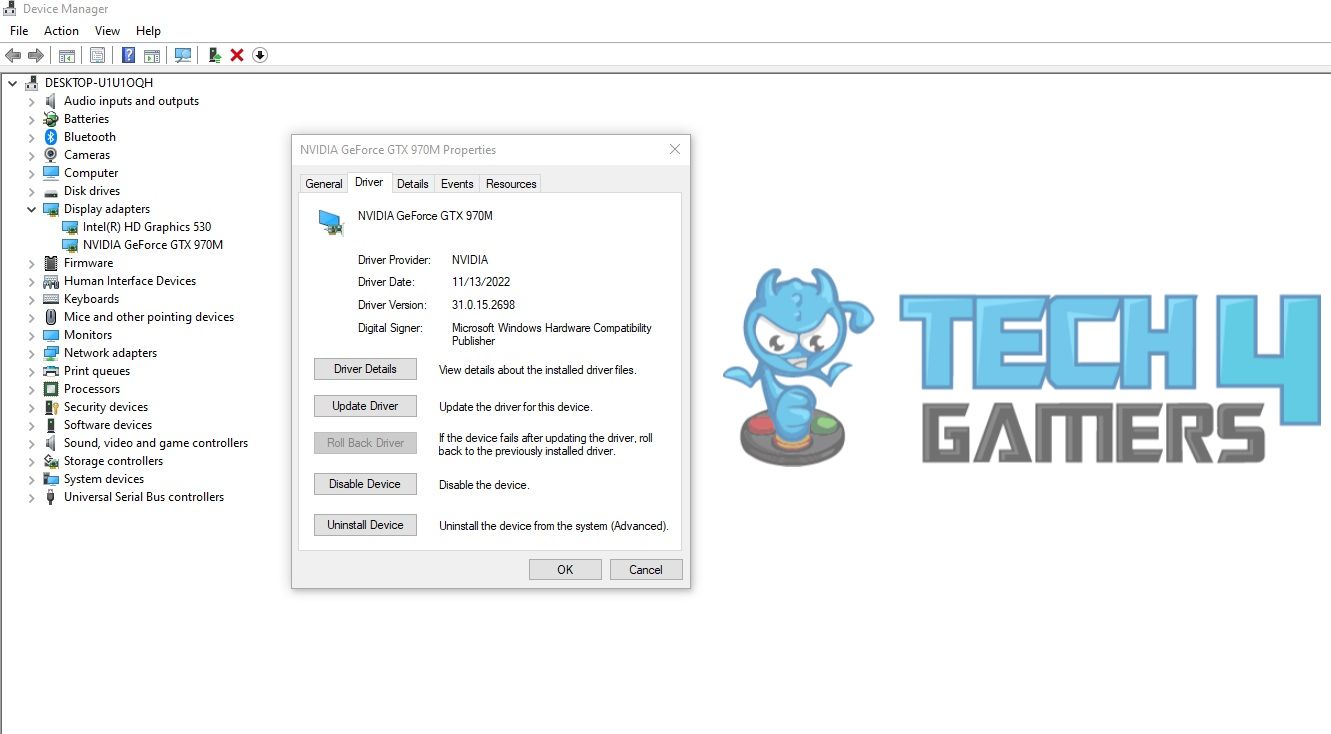
- From there, head over to the device manager.
- From the list, find the “Display adapters” and click on the name of your discrete GPU.
- This will open the properties of the drivers of your graphics card
- Head to the “driver” and click on “Rollback Driver.”
- The device manager will automatically uninstall the current driver version and roll it back to the previously installed version.
- Restart your PC and see if the problem is fixed.
Disable Any Overclocking
Overclocking is a process used to take out some extra performance juice from your graphics card. The process requires running your graphics card at higher clock speeds, which results in better performance in games. However, that does put an extra load on your graphics card, which is now forced to run at a higher temperature. This can result in overheating of the graphics card.
If you’ve recently found yourself in the world of overclocking, and you observe a sudden rise in your graphics card’s temperatures. In that case, the most apparent fix we recommend is to disable the overclocking and revert back to the base clock speeds.
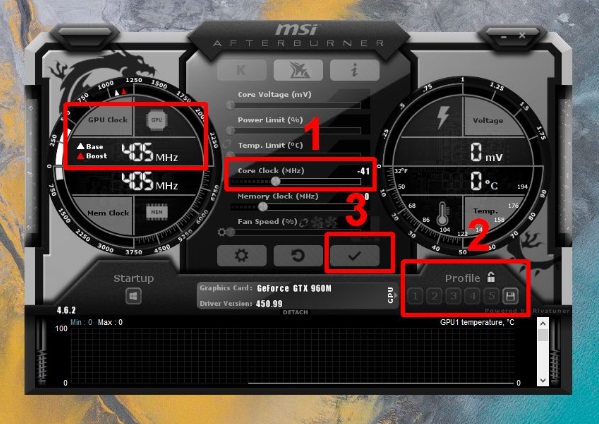
The software you used to overclock your GPU in the first place can be used to revert it back to the base clock speeds. However, you can also use Msi’s Afterburner to change your GPU’s clock speeds according to your liking. Follow the instructions below to revert your GPU back to its base clock speeds.
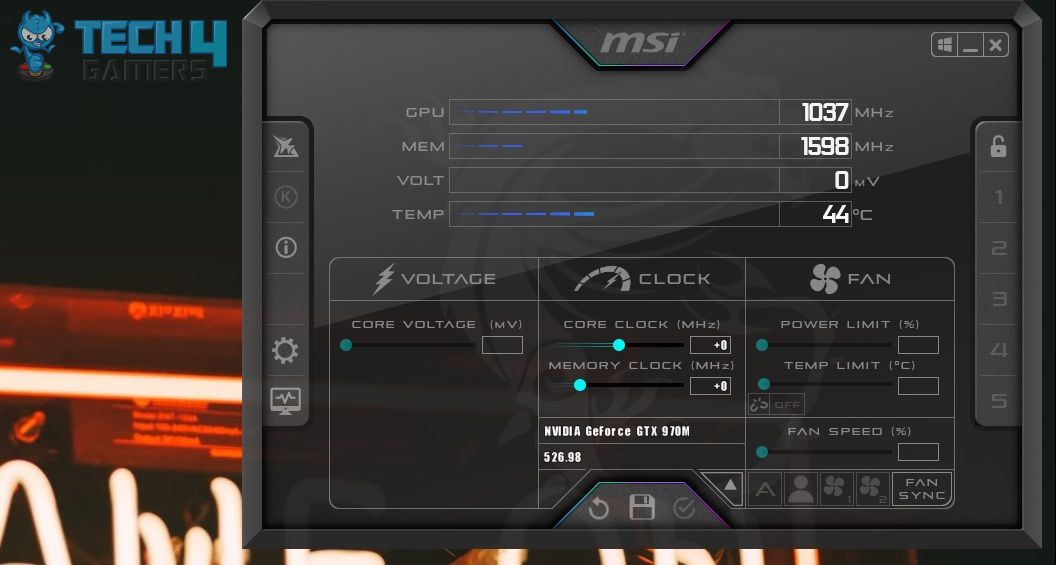
- Download and install MSI After burner from this link.
- Run the application as an administrator.
- From the interface, head over to the “clock tab.”
- Slide the “Core clock” and “memory clock” back to “+0.”
- Restart your PC and see if the problem is still there.
Maximize Fan Speeds
Many modern-day GPUs come with a pre-installed heatsink and a set of fans on top of it. Every graphics card manufacturer gives us control over the speeds of those fans.
These types of fine tunings can be done using the software your graphics card manufacturer has provided you with. If you observe that your graphics card is overheating, maximizing the fan speeds on it can bring its temperature down by a significant margin.
If you are worried about running your GPU fans at maximum speed all the time, you can also use the provided software to set a customized fan curve for your GPU. This will allow your GPU to automatically crank up the fan speeds as soon as your graphics card reaches a specific temperature.
This can not only prevent your graphics card from overheating but also spare you some fan noise, as it will only maximize the speeds on those fans when the graphics card is under a certain load. Follow the instructions below to maximize the fan speeds of your graphics card.
- Download and install the tuning software your GPU came with.
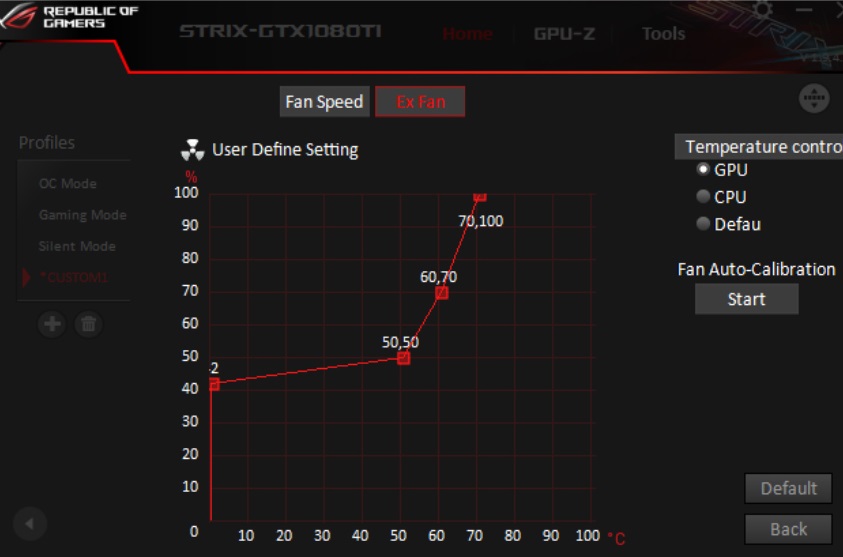
- We will be using Asus’s ROG software.
- Head over to the fan profiles and make a custom one.
- In this section, you will be able to design your custom fan speed curve.
- Set your desired RPM for a specific temperature.
- Increase the RPM as the temperature goes up.
Lower Down The Game’s Graphics Settings
Everyone wants to play their favorite games at the maxed-out settings, on the highest resolution. Unfortunately, our system’s hardware capabilities can occasionally limit us.
This is especially true while playing the next generation high-end games on maximum settings since it significantly strains your graphics card, causing it to render those extra frames. if your graphics card is overheating while gaming, it is very likely incapable of running that particular game on those settings.
If this is the case with you, we recommend taking those settings down by a notch. Not only will your game run significantly better, providing you with more frames, but it will also take some load off your graphics card, preventing it from overheating and, thus, further extending its lifespan. All this with a small sacrifice of visuals.
Things like textures, shadows, and anti-aliasing put a lot of stress on your graphics card, so turning them down by a notch will provide your GPU with some room to breathe and will automatically help it maintain those temperatures while preventing it from overheating.
Undervolt Your Graphics Card
If your graphics card is overheating, then undervolting is one of the best things you can do to it. Undervolting your graphics card is nowhere near as dangerous as it sounds. Your GPU draws slightly more power from the power supply than it uses. In most circumstances, it will continue to function normally but with somewhat reduced power. The process involves maintaining equal clock speeds while minimizing the power delivered to your GPU. This is known as undervolting.
Cutting off some of the additional power that your GPU gets but does not use can help you reduce heat without sacrificing performance. In many circumstances, you will notice no difference in performance.
It’s similar to putting your GPU into low-power mode. You are merely lowering your GPU’s power usage while maintaining the same clock speeds. Apps such as MSI Afterburner can assist you in undervolting your GPU.
Hardware Based Fixes
Now that you know how to reduce GPU temperature utilizing software-based techniques, it’s time to move on to the next part. If nothing of the above recommended software-based options worked. Then don’t worry; we have a variety of hardware-based solutions that will suffice for the job.
These solutions will mainly include taking your graphics card out, so all of these solutions are only recommended if you know what you are doing. Listed below are some of the most efficient hardware-based remedies for an overheating graphics card.
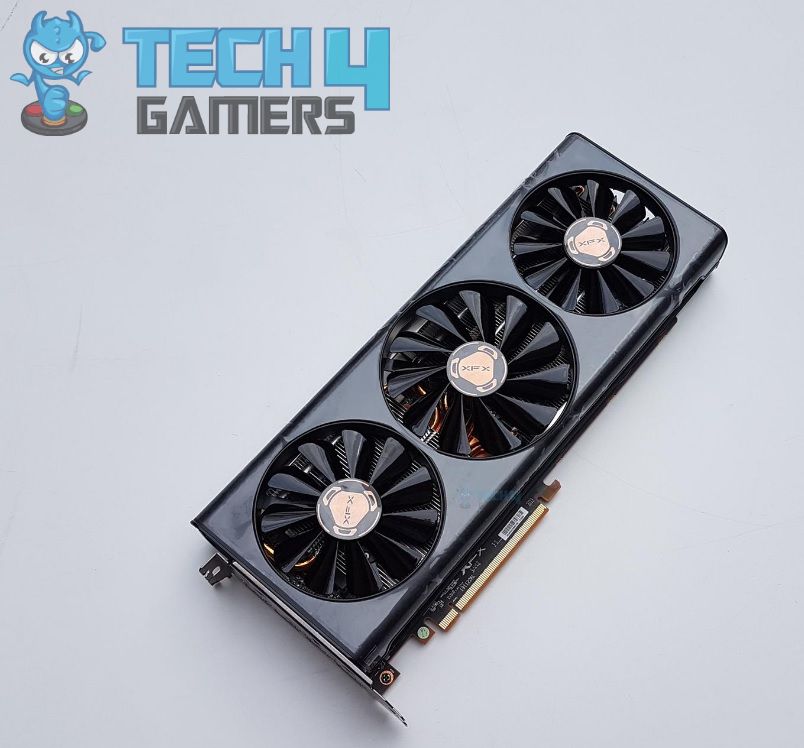
Check The Fans On Your Graphics Card
Before we get into the more in-depth solutions, the first and easiest thing we propose is that you check your graphics card’s fans. If you have a discrete graphics card, it most likely has a separate set of fans on top to keep it cool.
Simply launch any GPU-intensive game and monitor your fan speed to see if the GPU increases it on its own. Your graphics card should automatically turn those fans’ speeds up as long as there is a load on it.
This could be the reason why your graphics card was overheating in the first place, as its fans were not cooperating with it to keep itself cool. A new set of fans from the same manufacturer might solve the problem for you. However, if your fans are working fine, then the next solution is for you.
Clean Your Graphics Card
A simple wipe or cleaning of your graphics card does not sound like it could do much. However, we can assure you that it goes a long way in preserving your graphics card’s life.
We recommend cleaning it on a regular basis to prevent dust and other dirt particles from accumulating on your GPU and between its fan blades and clogging it. Before we begin, you should unplug your graphics card from your motherboard, unscrew it, and detach it.
If you need any help with that, you can check out our guide on How to remove the graphics card from motherboards.
You may always go a step further and wipe the heatsink from the inside by disconnecting the cooler. Just make sure you know what you are doing, and you know your way around the various wires and headers connecting to your graphics card. Watching a YouTube tutorial beforehand will also help.
Apply New Thermal Paste
Thermal paste is the metallic thermal component that ensures smooth transfer of heat between your GPU chip and the heatsink on it. It works like a charm since it is an excellent conductor of heat and can ensure most of the heat generated by your silicon is shifted away toward the heatsink.
However, there is one drawback to it. The thermal paste gets dried out with the passage of time, so you have to reapply it every now and then. There’s no way to tell if it’s time to reapply thermal paste without opening your GPU. We recommend replacing the thermal paste at least once every 6 months. Use the instructions below to apply the new thermal paste.
Before you continue, you may want to check out our guide on How to clean thermal paste off.
- Carefully detach all the cables from your graphics card and take it out.
- Unscrew the heatsink and fans and take the GPU apart.
- Gently take apart the cooler.
- Take a bunch of alcohol or acetone wipes to clean the pre-applied thermal paste.
- Apply the new thermal paste.
- Make sure you don’t add too much, as it will spill from the chip.
- Always invest in a good quality thermal component, as it will take longer to dry out.
- Reinstall the cooler and fans, and put your graphics card back on your PC.
- Notice any changes in the temperature of your graphics card.
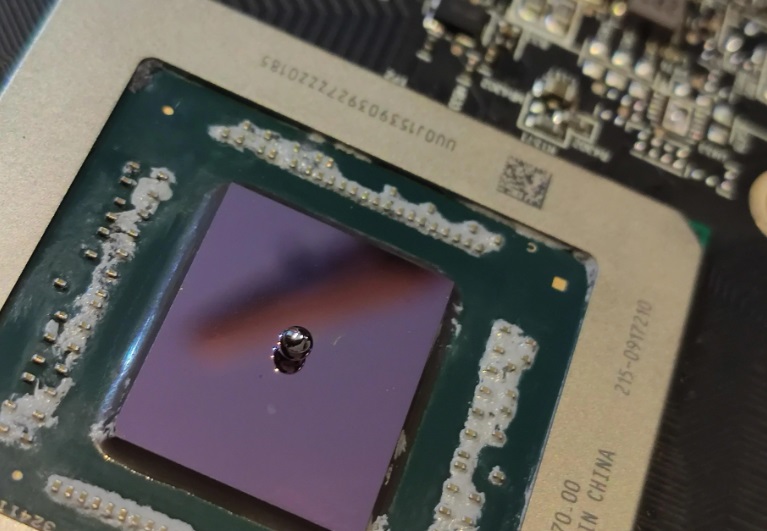
Invest In Liquid Metal
If the previous fix did not work for you, then the thermal paste may not be the best thermal component for your graphics card. In a case like this, we recommend the usage of liquid metal. In terms of thermal conductivity, liquid metal is known to outperform standard thermal paste by a considerable margin.
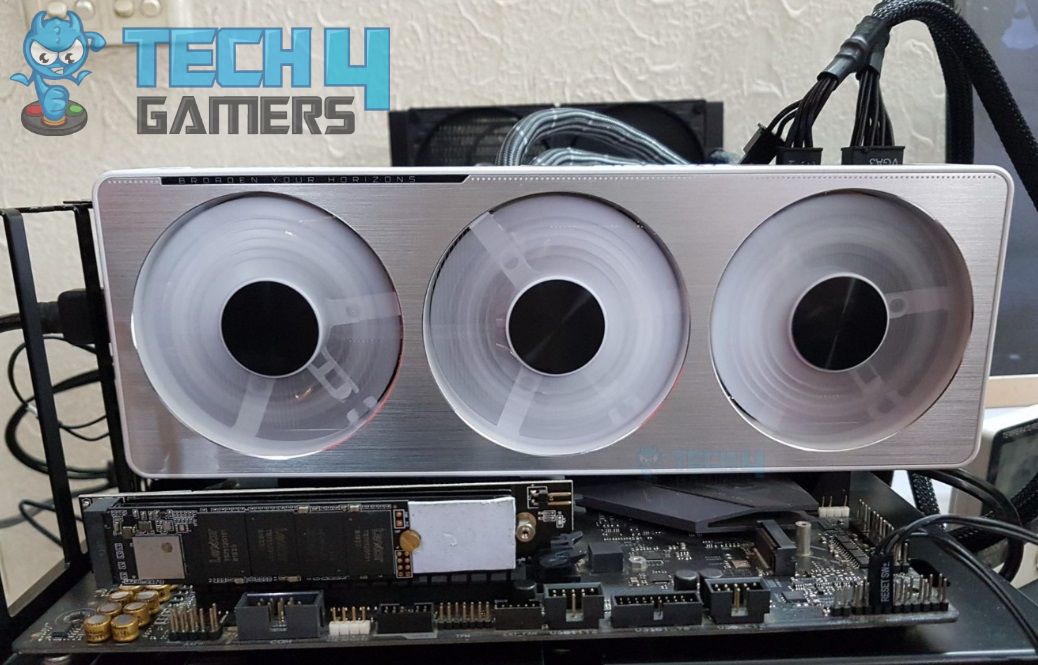
Having a thermal conductivity value of about 73 watts per meter kelvin (w/mk), standard thermal paste has no chance of competing with it. It offers a far superior cooling solution and lowers the temperatures by a couple of degrees. Many modern-day graphics cards from companies like ASUS ROG come pre-applied with it.
The process of applying liquid metal is exactly the same as replacing the thermal paste. Make sure you thoroughly wipe off the previously applied thermal component using alcohol wipes and use only a drop of liquid metal, as this stuff is conductive, so a spill might result in hardware failure.
Increase The Airflow In Your Casing
It is critical to have sufficient airflow within your case in order for your GPU to cool itself down properly. Your graphics card will do all it can to reduce heat, from increasing fan speeds to decreasing clock speeds. However, if you place it inside a case with inadequate airflow, it will ultimately fail to disperse the heated air outside the case owing to the restricted airflow.
Primarily either at the case’s top or front mesh, at least at a near distance to the graphics card. Lastly, it is always recommended to invest in a more oversized casing that can house more fans, as it will be really hard to maintain proper airflow in a cluttered case.
Use Compressed Air
When cleaning your graphics card, a blower may not be adequate, especially when cleaning hard-to-reach regions. In a case like this, a can of compressed air will be a better substitute for a blower as it is more precise and can reach the areas where a traditional blower can not.
Cleaning your graphics card using compressed air is a reasonably simple task because all you need to do is hold the fans properly when cleaning around them. This will prevent the compressed air from propelling them.
If you are still interested, we have a complete guide on how to clean your PC using compressed air. Make sure to check that out.
Refrain From Mining And Other Stress Inducing Activities
If you have an overheating graphics card and decide to mine crypto on it or put it under stress for long periods of time, chances are you are shortening the lifespan of your GPU. Activities like crypto mining or gaming for extended sessions are only recommended if your graphics card is capable of it.
If your graphics card ends up overheating during these activities, it is probably because you are pushing it to its limits. This can potentially lead to hardware failure. In a case like this, it is absolutely not recommended to put this much strain on a graphics card that is already overheating.
Not until you find a way to stabilize the overheating first, at least. So until then, it is recommended to avoid activities like crypto mining and long sessions of usage that put your graphics card under stress for extended periods of time.
Check The Power Supply
If your power supply fails to give enough power to your graphics card, it may struggle and heat up fast. In terms of quality and specification, power is critical for GPUs. Inadequate power guarantees overheating and malfunctions, which might eventually harm your computer’s hardware. This can be one of the most obvious reasons for an overheating graphics card.
This usually happens when an inexperienced person installs the incorrect power supply or fails to upgrade it after purchasing a new GPU. There might be other reasons your power supply is heating up the graphics card.
Older supplies, for example, have degraded performance and fail to supply adequate current. Therefore, it is always recommended to go through the required PSU requirement for your graphics card and make sure your current PSU matches the requirement. You can always future-proof your build and go for a slightly bigger power supply so that you can maximize the performance of your components without restricting them on power.
Consider Liquid Cooling
If nothing of the above options worked for you, we suggest that you invest in a decent liquid-cooling solution. Liquid cooling is extremely effective and is known to work miracles in terms of temperature reduction.
Many flagship graphics cards from companies like Asus and Gigabyte come with a liquid cooler option. However, you can also opt for a custom liquid cooling solution if your graphics card relies on air coolers. This fix will cost you more, and you will have to build up the heart to install a custom liquid solution inside your PC. However, it is the single most effective method when it comes to cooling, and no combination of air coolers or fans will be able to compete with it.
If you are interested, we have a complete guide on how to water-cool your graphics card.
What Happens If Your Graphics Card Gets Too Hot?
Running your graphics card at a higher temperature for an extended amount of time will definitely reduce its lifespan. Things only get worse if your graphics card is overheating in the first place. When a graphics card hits a particular temperature limit, it begins to thermal throttle. That is when your GPU proactively reduces core and memory speeds, compromising performance in order to save the hardware. Your GPU will continue functioning at these reduced clock speeds until it reaches a safe temperature.
If your graphics card fails to reach a safe temperature and continues to overheat, its built-in protection will immediately shut it down, and you will be unable to use it until the temperatures fall.
An overheating graphics card will also cause blue screens of death and other system failures. You will be missing out on a lot of performance as your GPU is already throttling and running at lower clock speeds. The system will run slowly and may freeze. In games, you will experience frequent frame dips. All this while also decreasing the lifespan of your graphics card.
Conclusion
That’s all there is to it. This was all you needed to know about how to fix an overheating graphics card. It is crucial to maintain consistent thermals in order to have a seamless gaming experience without sacrificing any performance on the table.
Preventing your graphics card from overheating will also increase its lifespan. The methods mentioned in the article can go a long way in extending the life of your GPU.
Frequently Asked Questions
An overheating GPU will first start to thermal throttle, then it will bombard you with various Blue screens of deaths and all this will shorten its lifespan.
Yes, undervolting a GPU is a safe and efficient way of making sure it stays cool without the cost of any performance.
As long as you properly build the system, you won’t have to worry about damage. If the system is not properly constructed, leakage may occur.
Related:
How To Fix Windows 10 “Diagnosing Your PC” Error
How To Fix Nvidia Control Panel Crashing [2023]
How To Fix The CPU Fan Error In ASUS Motherboards
Thank you! Please share your positive feedback. 🔋
How could we improve this post? Please Help us. 😔
[How To’s & Guides Editor]
Haddi has been in the Gaming and tech Space for over 10 Years Now; he has worked on notable websites like eXputer, Gamepur, Gear Siege, Gearnuke, and plenty more. He is an expert at Games & PC Hardware; you can expect him to solve any problem. People often joke, that if there is any problem anyone can solve, Haddi can solve it faster. Currently, Haddi writes and manages a Team of Experts at Tech4Gamers.
Contact: [email protected]


