We are seeing a trend of airflow edition chassis in the market and this is excellent news for the users who would love to see the form without compromising the functionality. Aerocool One Eclipse Review is another such example where we have a totally vented front panel without any glass. The idea is simple, let the maximum airflow inwards. This is what we saw on the SilverStone FARA R1.
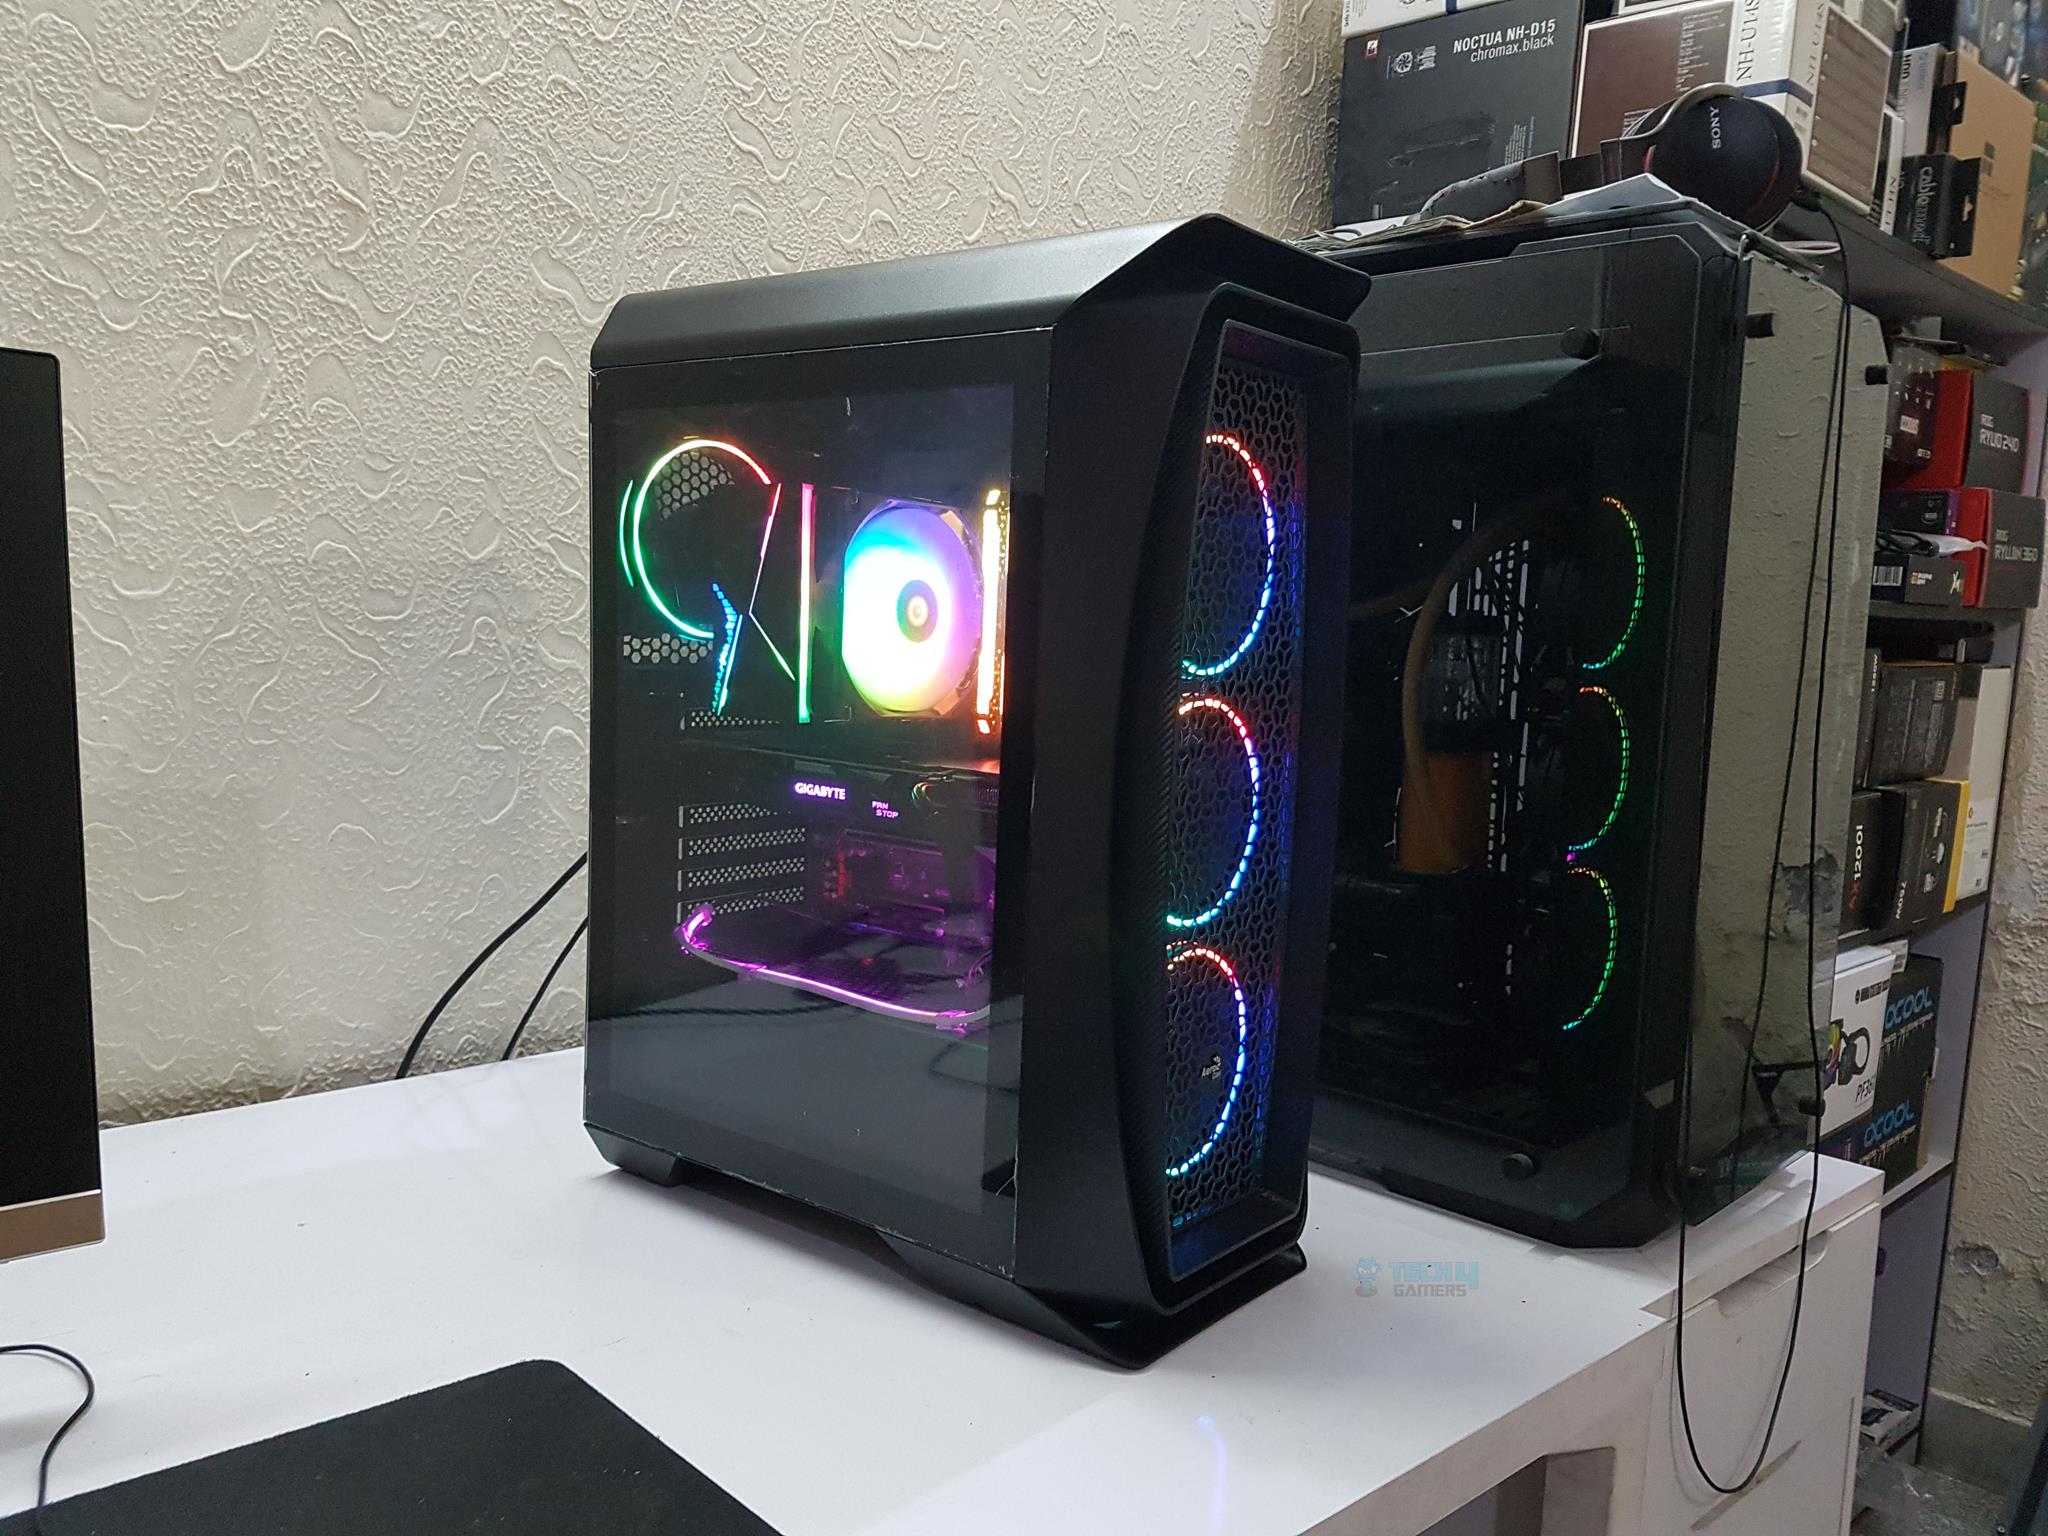
The Aero One Eclipse is a mid-tower chassis aiming at the middle segment of the market. It comes with 4x 120mm RGB fans pre-installed (3x on the front and 1x on the rear). In my opinion, the front-mounted fans on such designed chassis are a must and Aerocool has done a good job in this regard. The Aero One Eclipse has a 4mm tempered glass side panel and I love the attention to details on the panel by their design team.
Aerocool One Eclipse Chassis Review
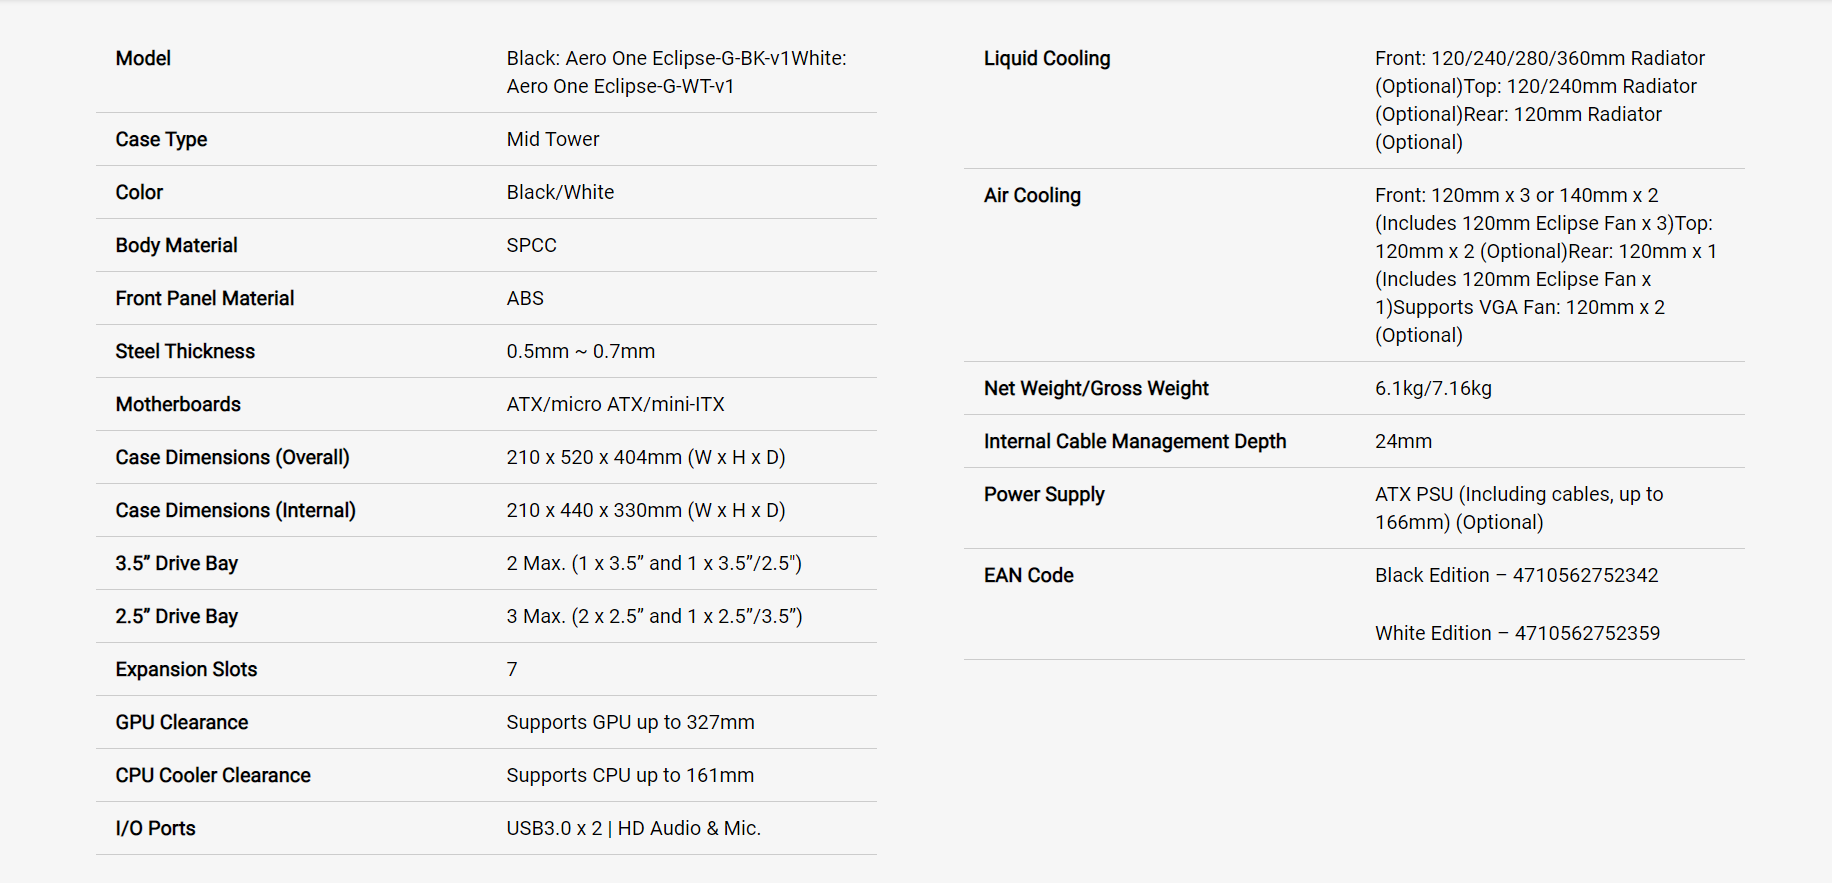
The chassis supports motherboards up to standard ATX size. The maximum height for the CPU cooler is 161mm. The maximum length of the graphics card is 327mm. In terms of the storage provision, the chassis can accommodate a maximum of two 3.5” drives and/or 3x 2.5” drives though this number can be played around depending upon the number of the drives.
The supported length for the PSU is 166mm. the cooling department is not overlooked as the chassis has ample provision for the cooling gear. Aerocool has included a hub to control the 4x pre-installed Eclipse fans. The hub is SATA powered and allows the user to attach 2x ARGB and 2x RGB components in addition to onboard 6x fans provision.
- Product: Aerocool One Eclipse Review
- Manufacturer: Aerocool
- Color: Black
- Price: Check Price on Amazon
Aerocool Aero One Eclipse Specifications
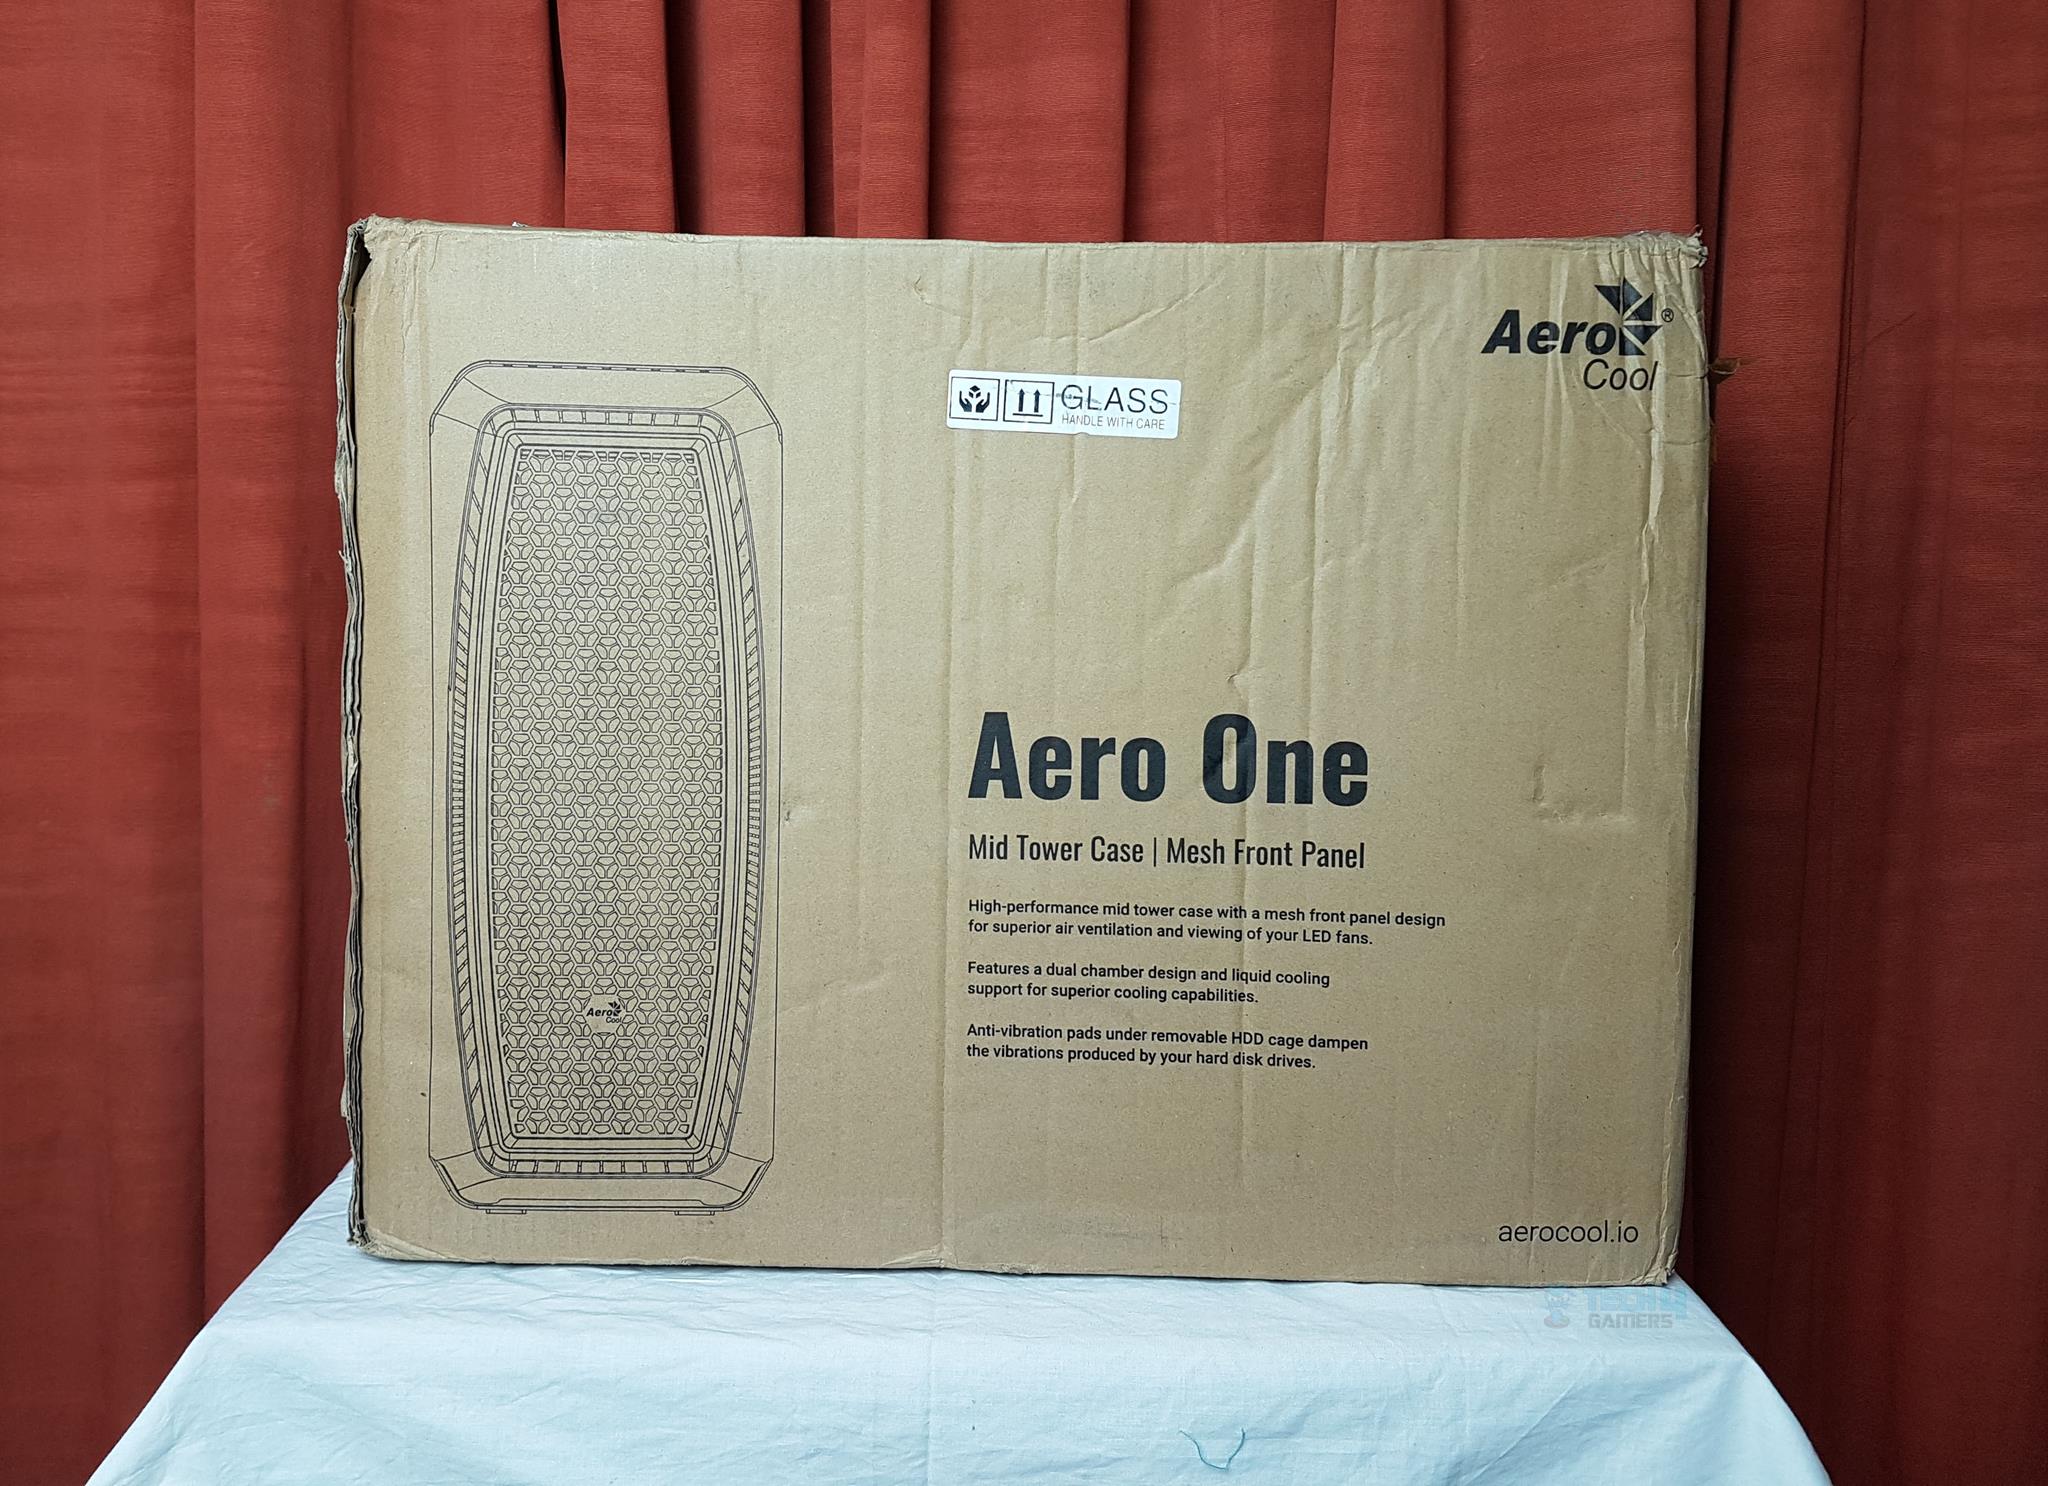
Aerocool Aero One Eclipse Packaging and Unboxing
The chassis is shipped in a cardboard box. The packing box was pretty banged up when reached to us and we suspected this might not have damaged the chassis but luckily the chassis particularly the glass panel was intact.
The packing box provides some features of information to the user. There is a diagram of the chassis highlighting its meshed front panel for maximum airflow. Another key highlight is the dual-chamber design.
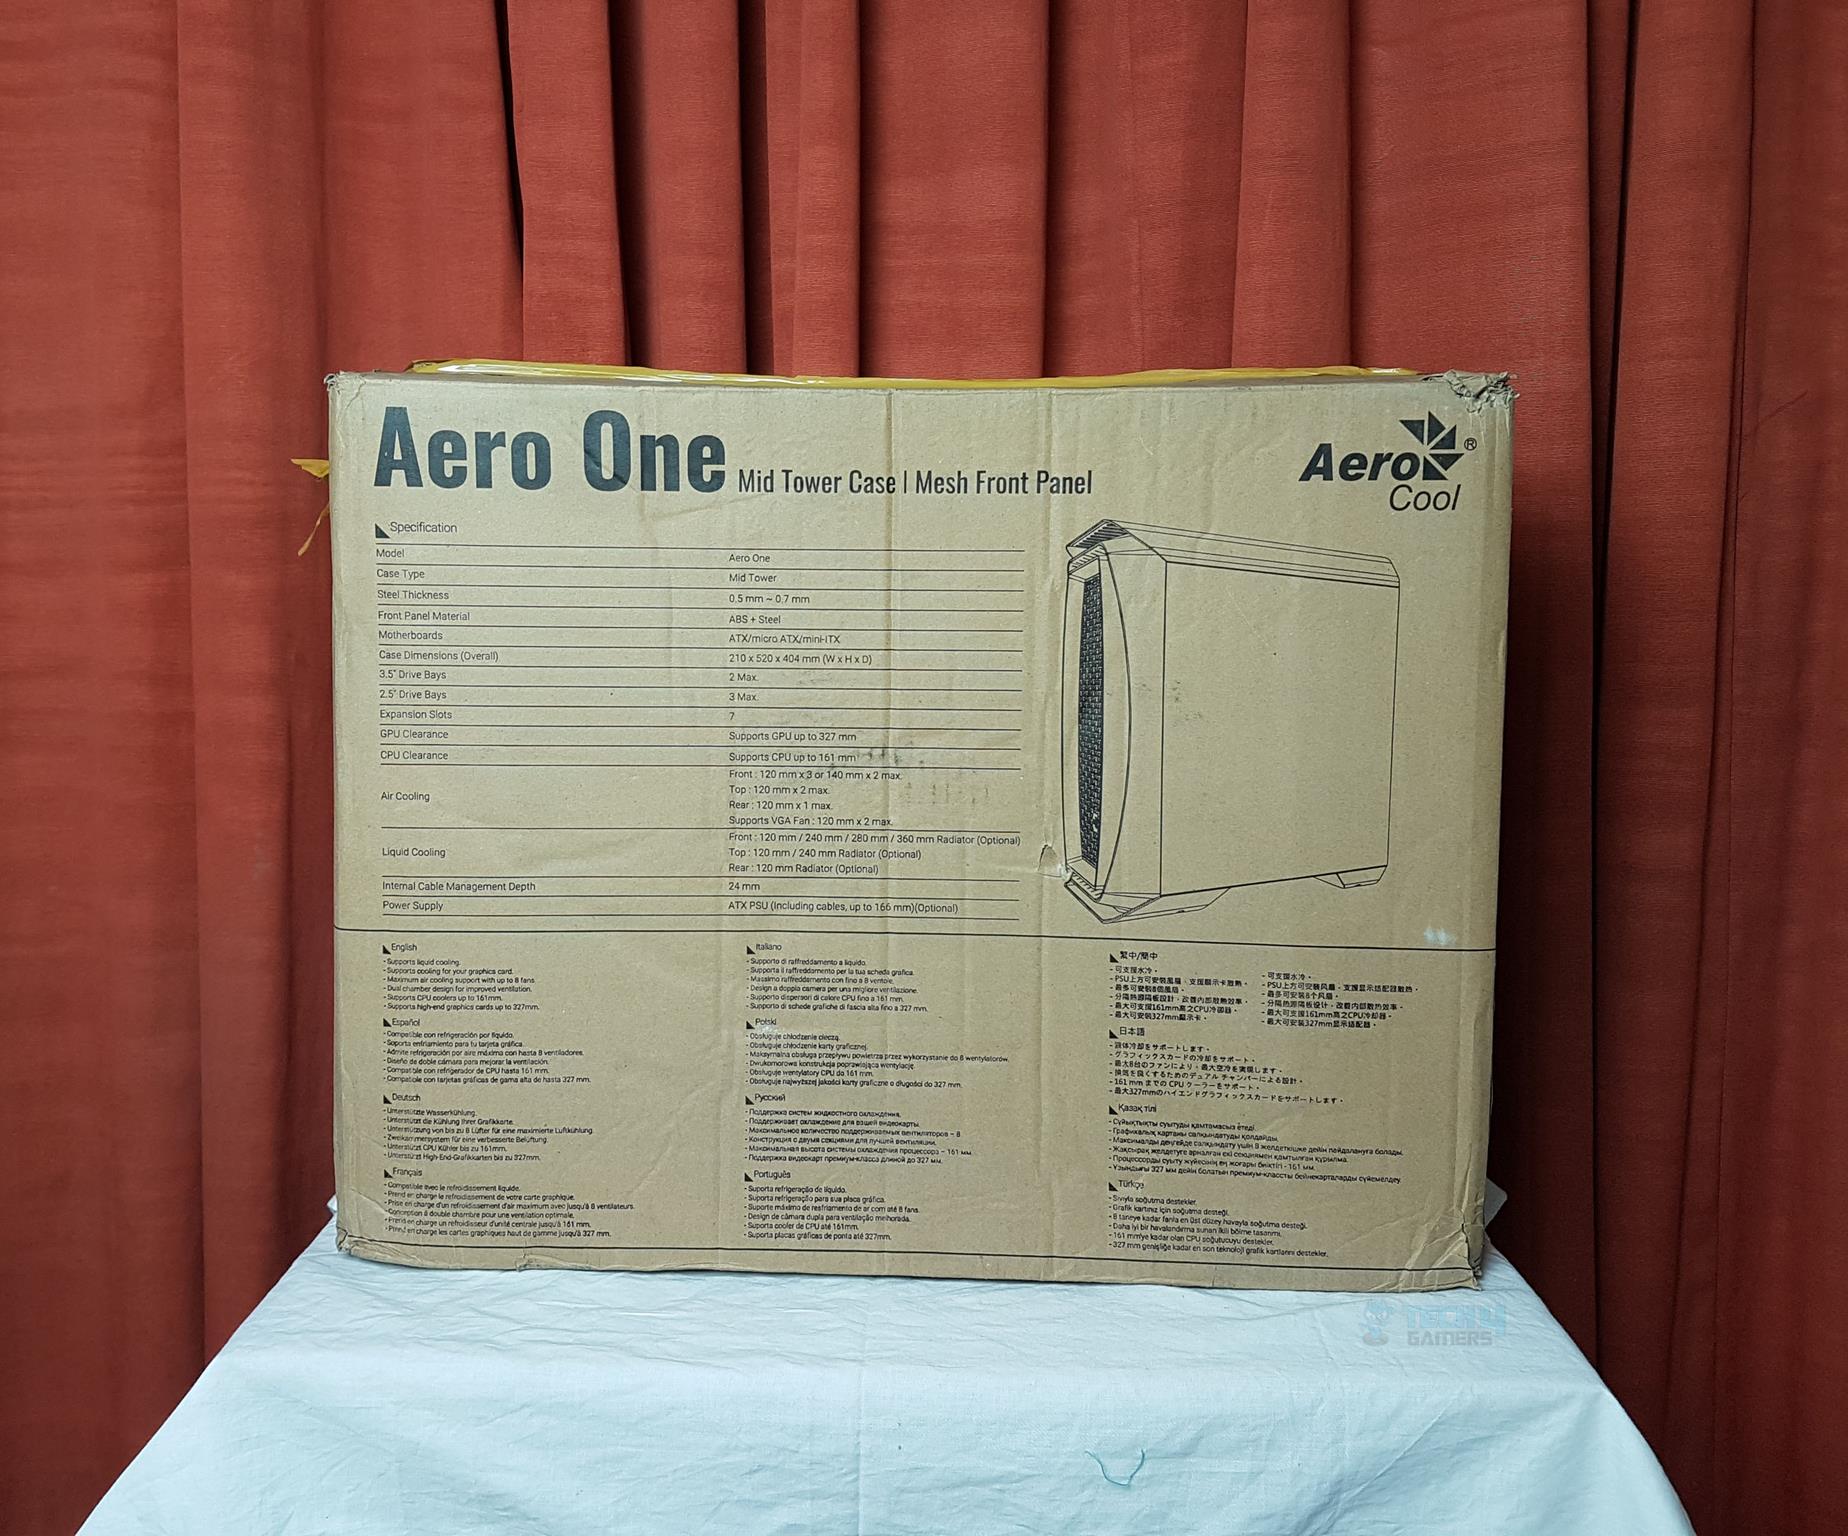
The specifications are printed in a tabular format. There is a diagram of the chassis showing the overall layout of the design.
Aerocool Aero One Accessories
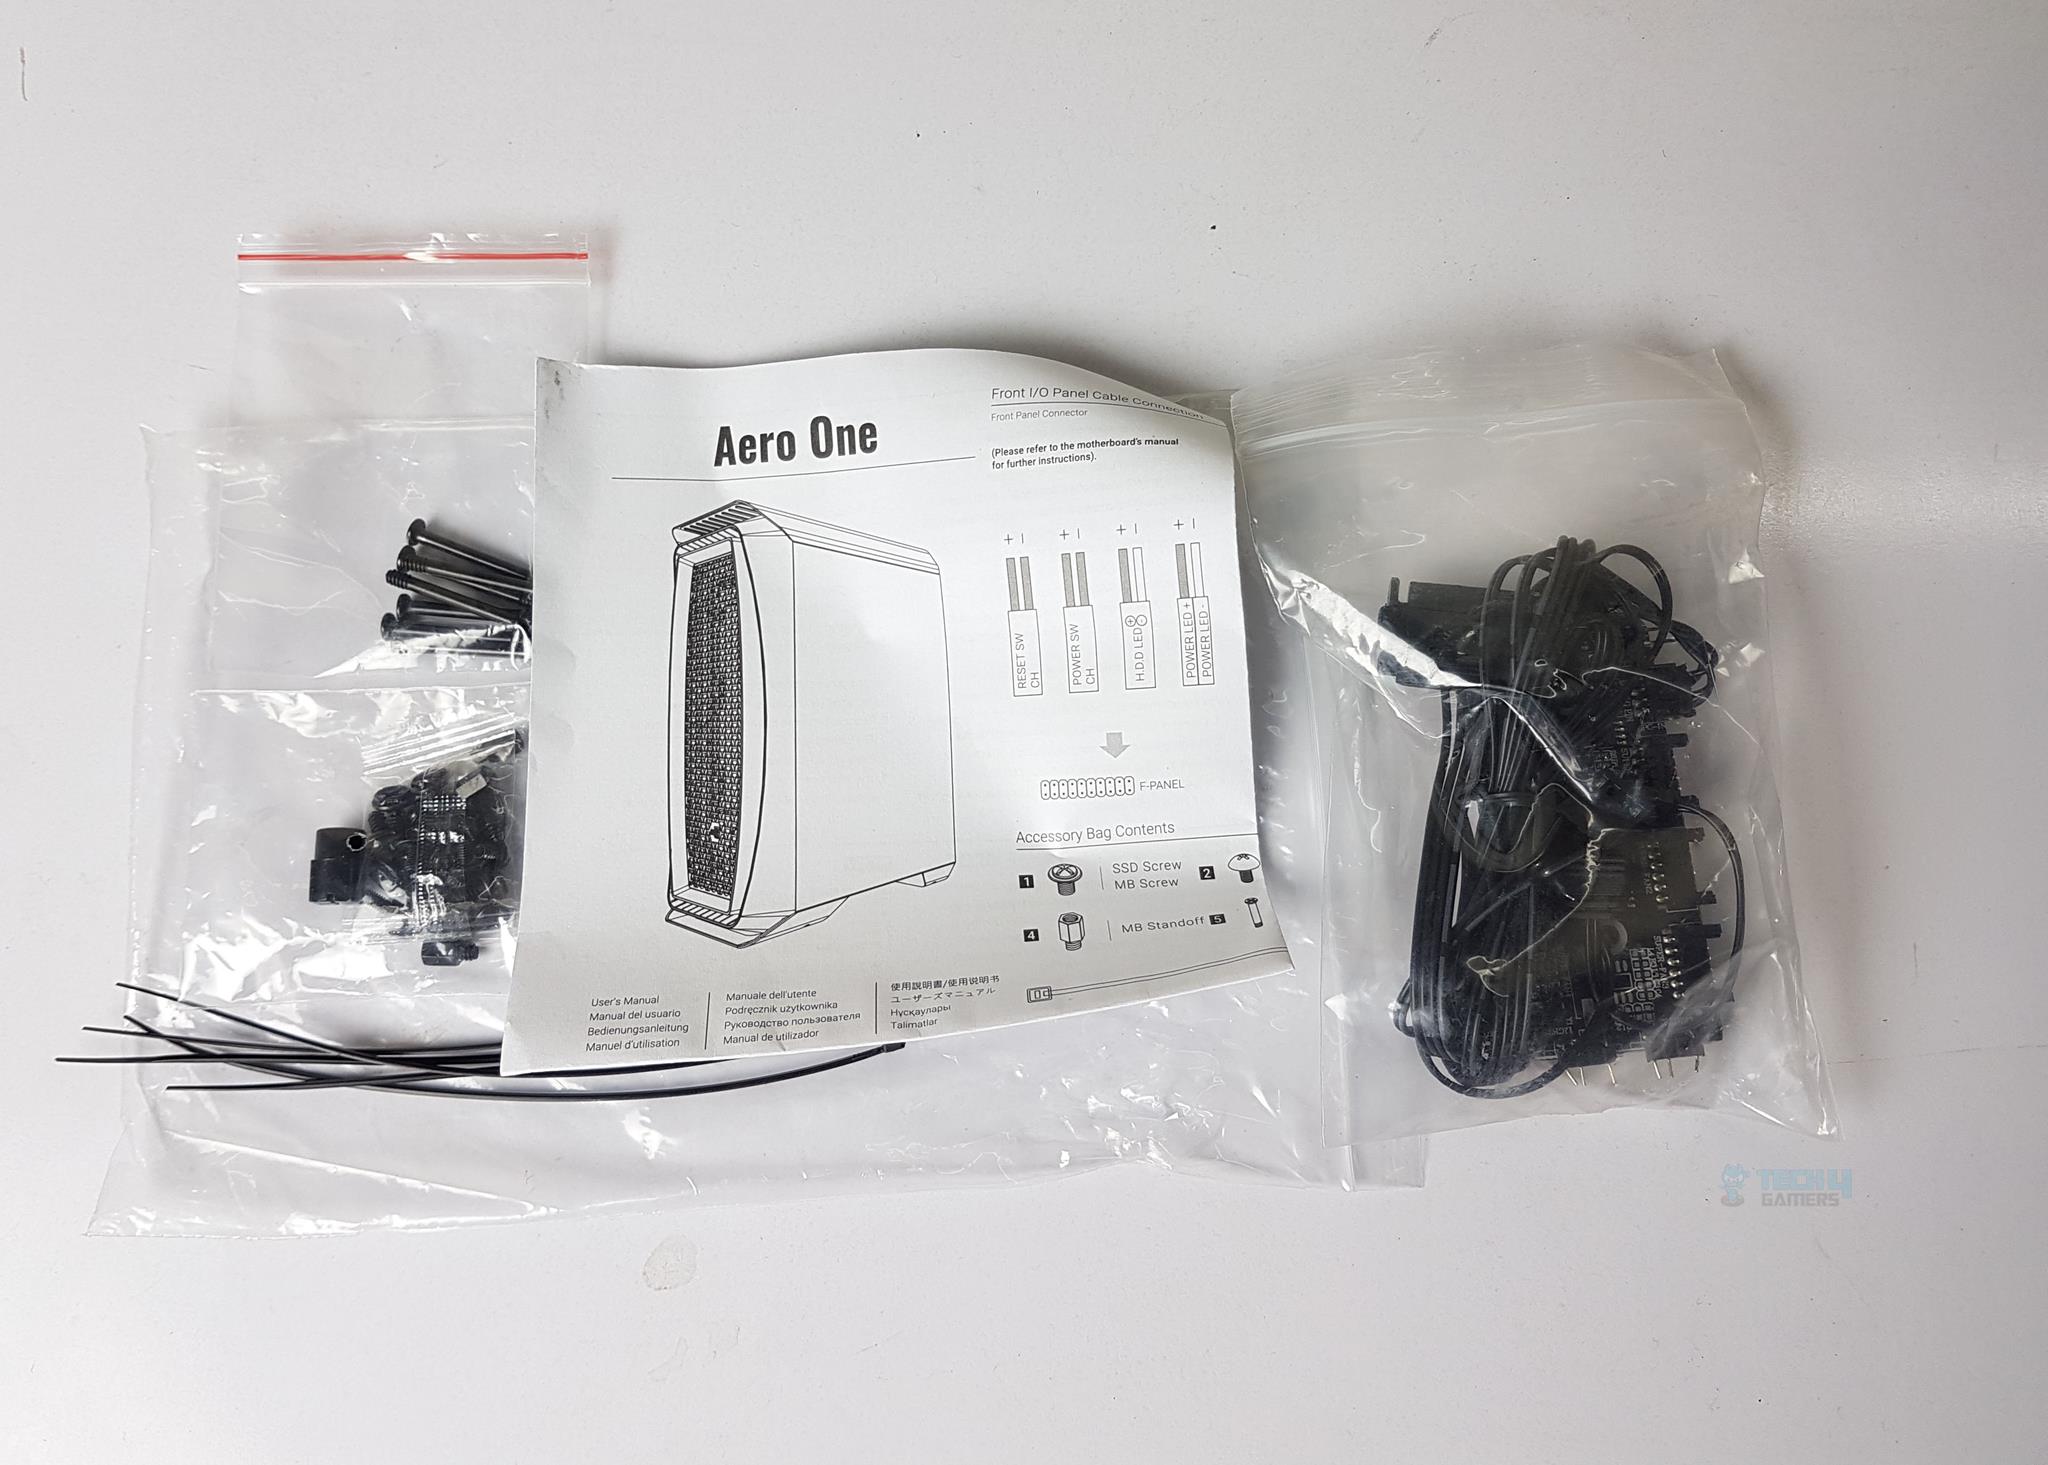
The Aerocool One Eclipse Review has provided a user manual to help in an installation inside this chassis and a bag full of various screws, standoffs, zip ties and a SATA powered hub. They have included long screws in case additional fans are to be mounted on the 240mm radiator if need be.
We made 3x observations:
- 1x standoff was missing.
- 1x long screw was missing.
- The ARGB header pins were twisted.
Quality control needs some workout!
Aero One Closer Look
The Aero One Eclipse is made of SPCC, ABS, and tempered glass. The steel’s thickness ranges from 0.5mm to 0.7mm. The overall case dimensions are 210 x 520 x 404mm (WxHxD). The internal dimensions are 210 x 440 x 330mm (WxHxD). It weighs 6.1Kg without any build. Let’s take a closer look at the chassis itself and discuss the design elements. We will look at the externals of the chassis followed by the internals.
Exterior View
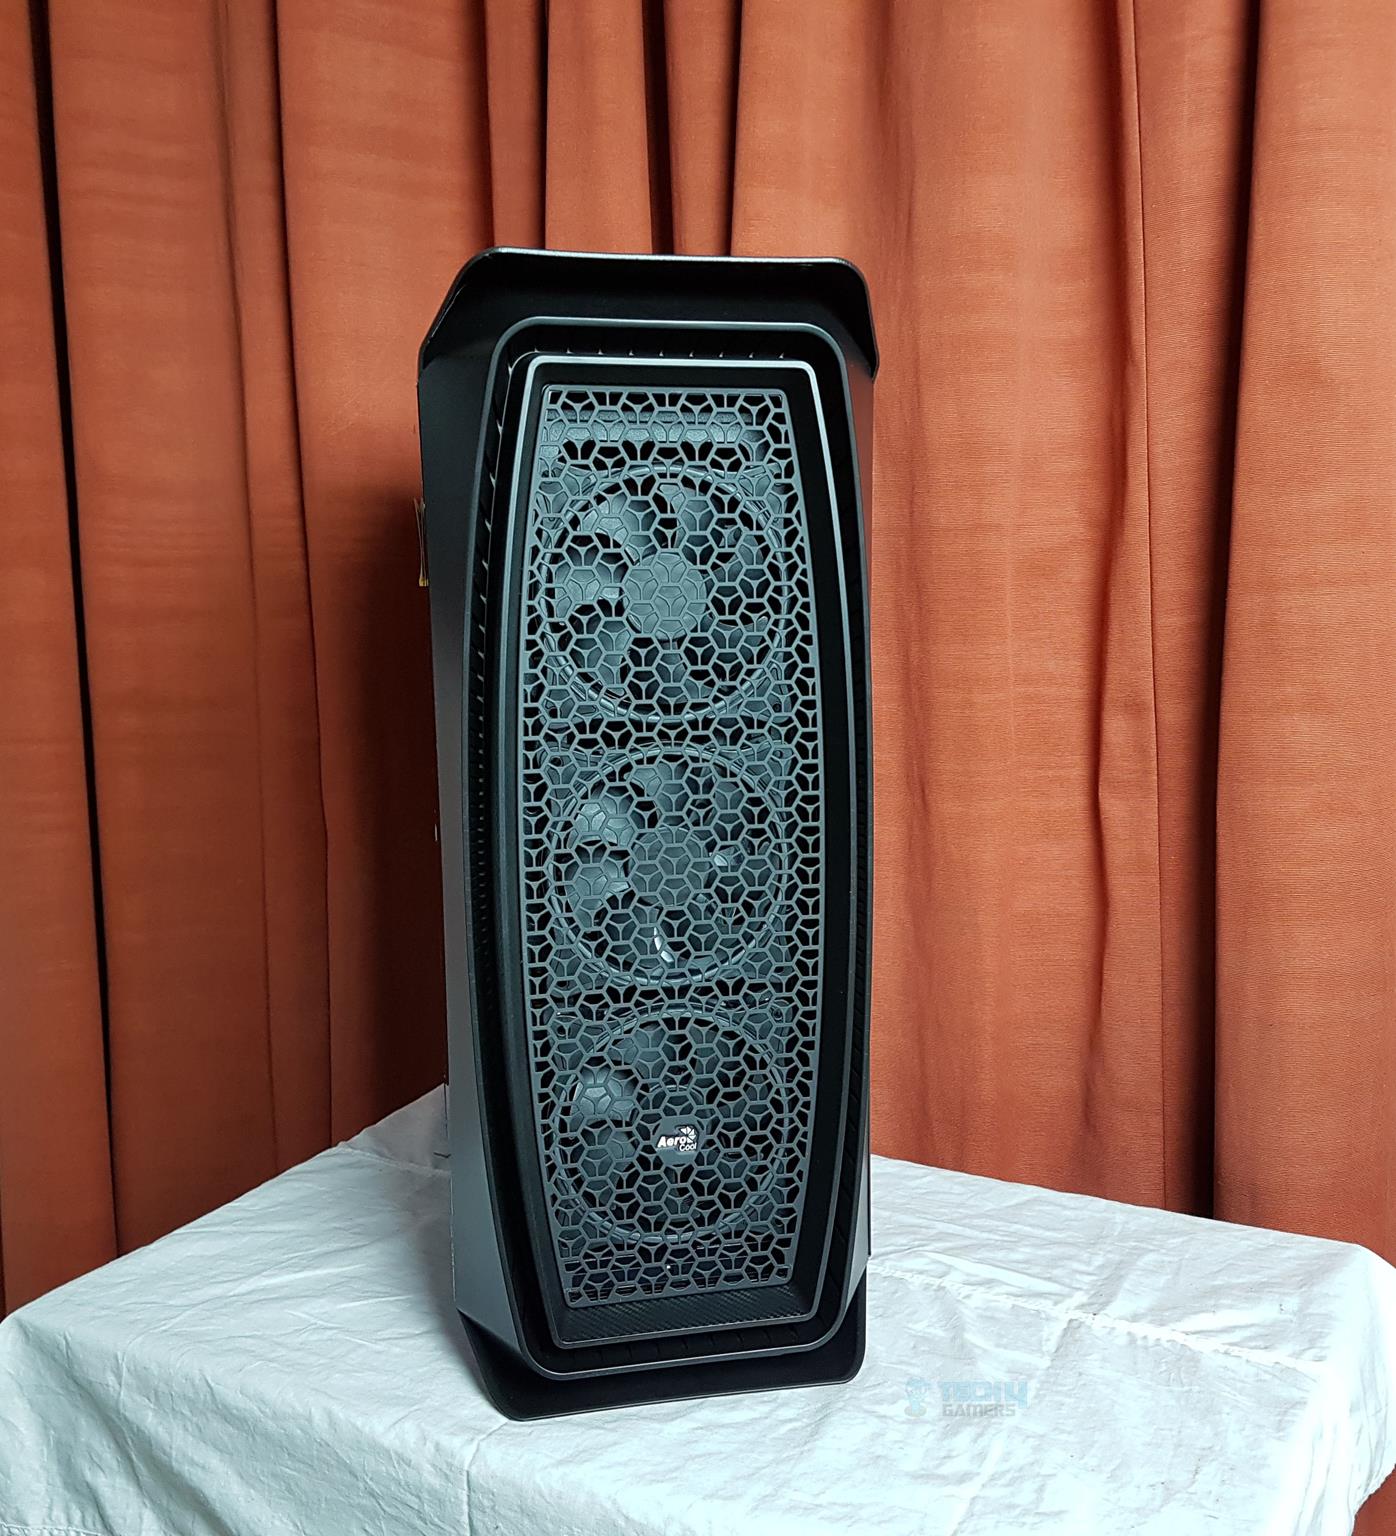
The front panel is quite a unique design on its own. It has multiple layers surrounding the central façade. The outermost layer is actually part of the main chassis frame. The central façade has a totally vented portion which is designed to give a better look.
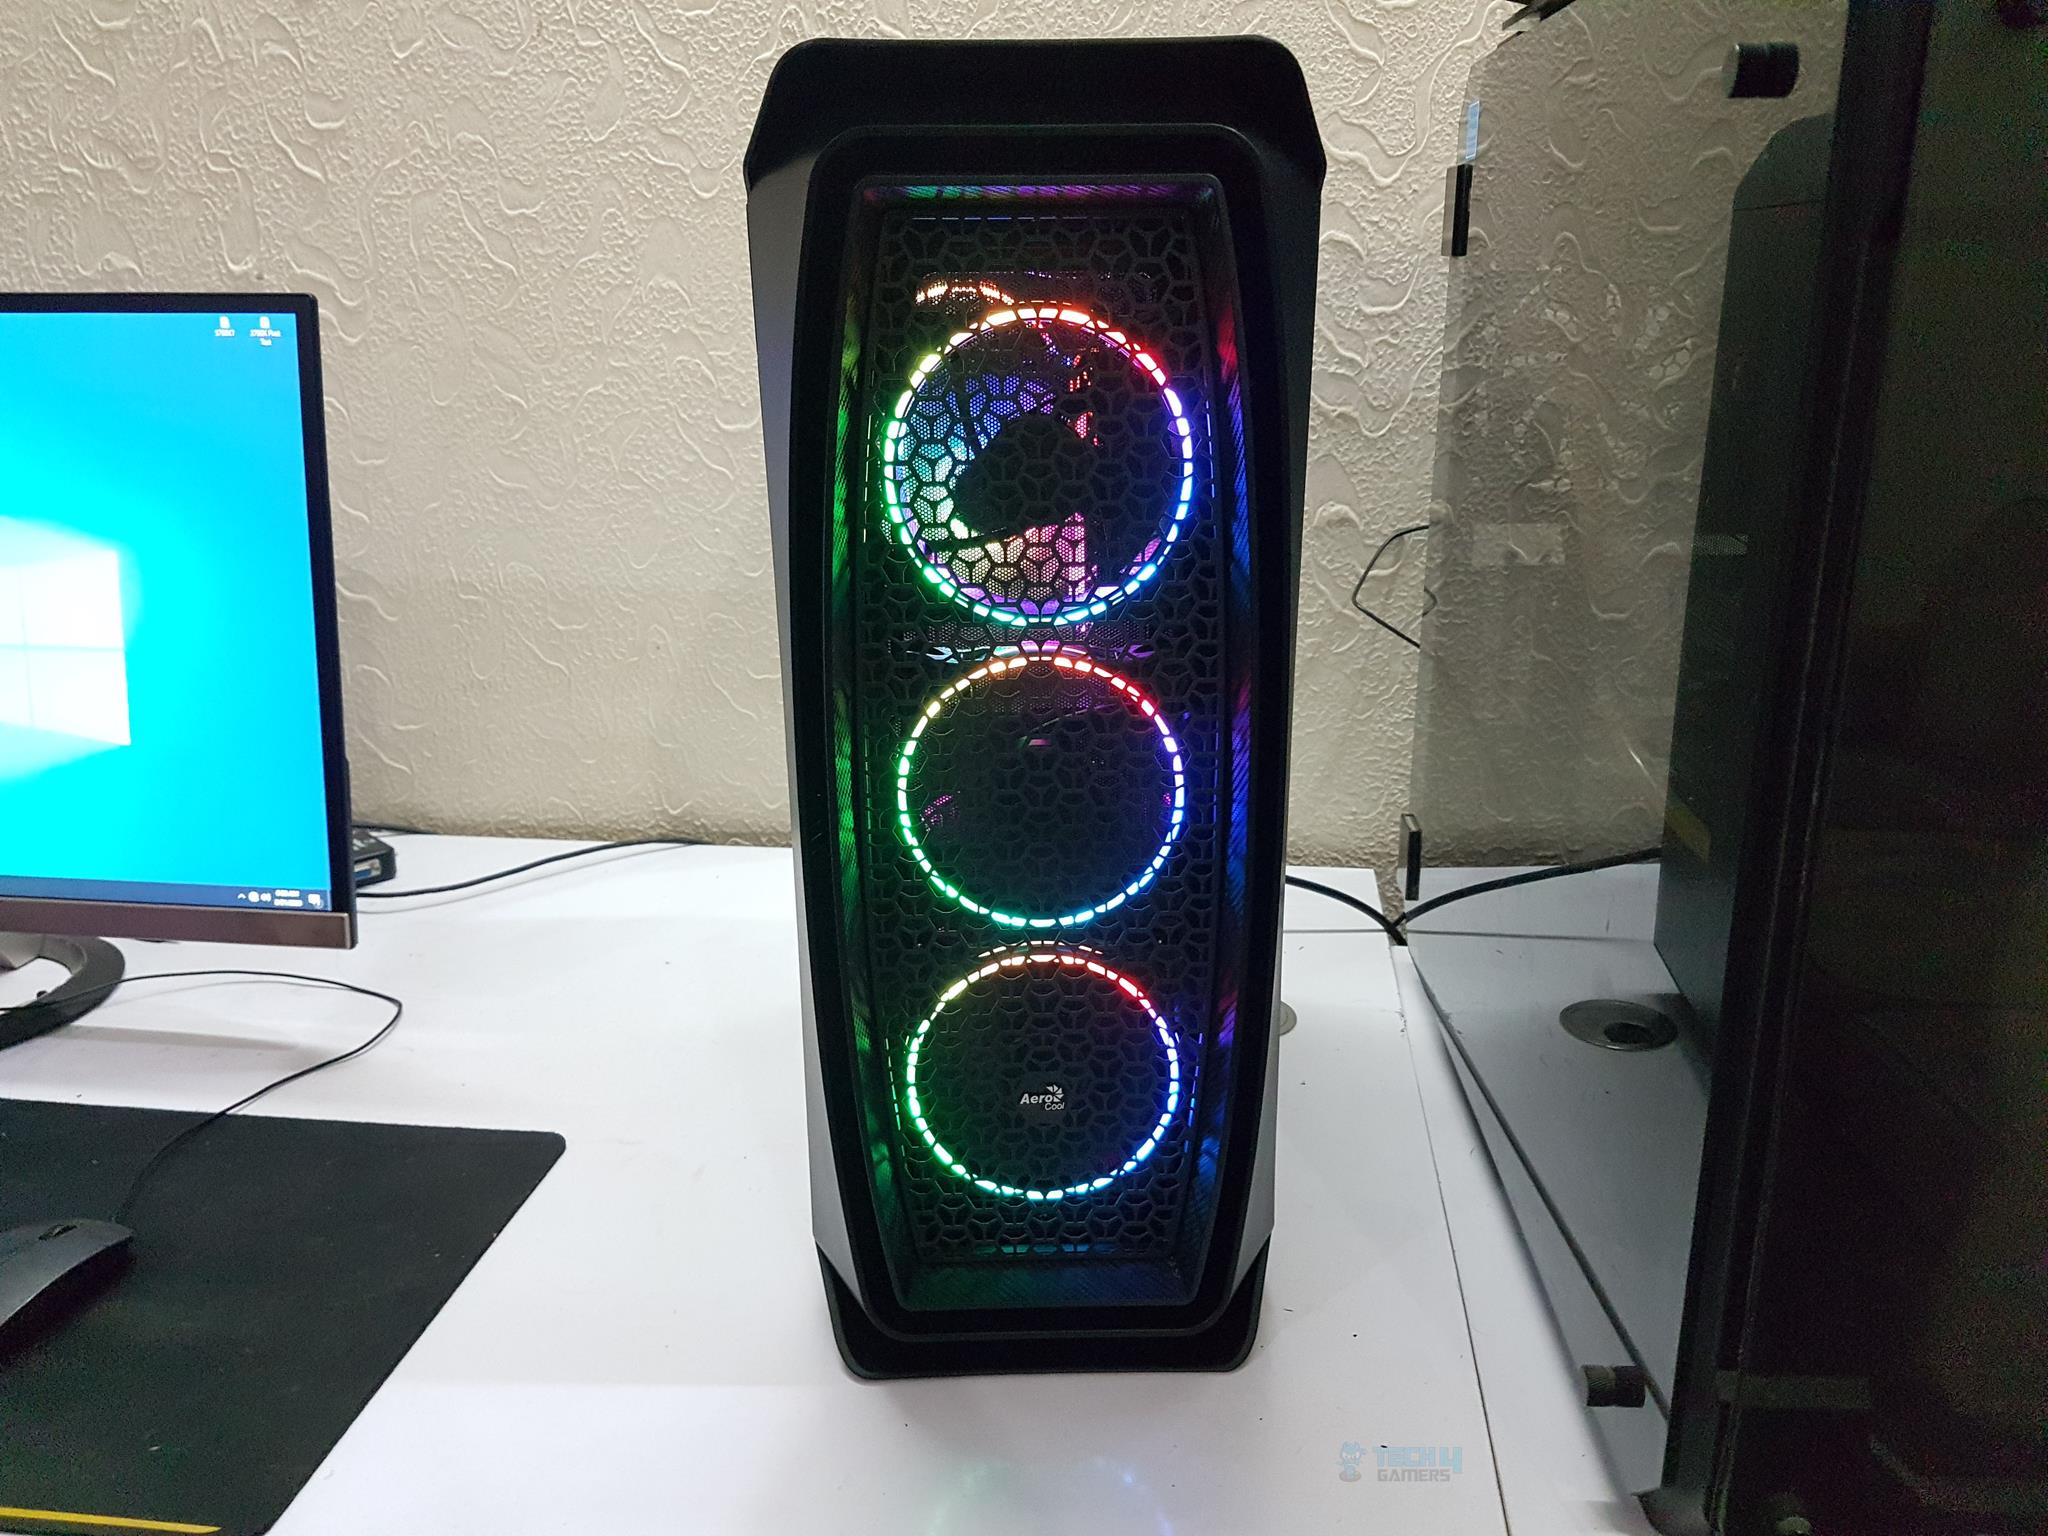
There is an Aerocool brand logo at the bottom. One can clearly see the 3x 120mm Eclipse RGB fans. A glimpse is enough to indicate that there is no dust filter/cover on the inner side of the vented portion.
Another cool feature is the carbon fiber wrap on the inner and outer sides of the inner layer which certainly adds more to the aesthetics though it has nothing to do with the functionality.
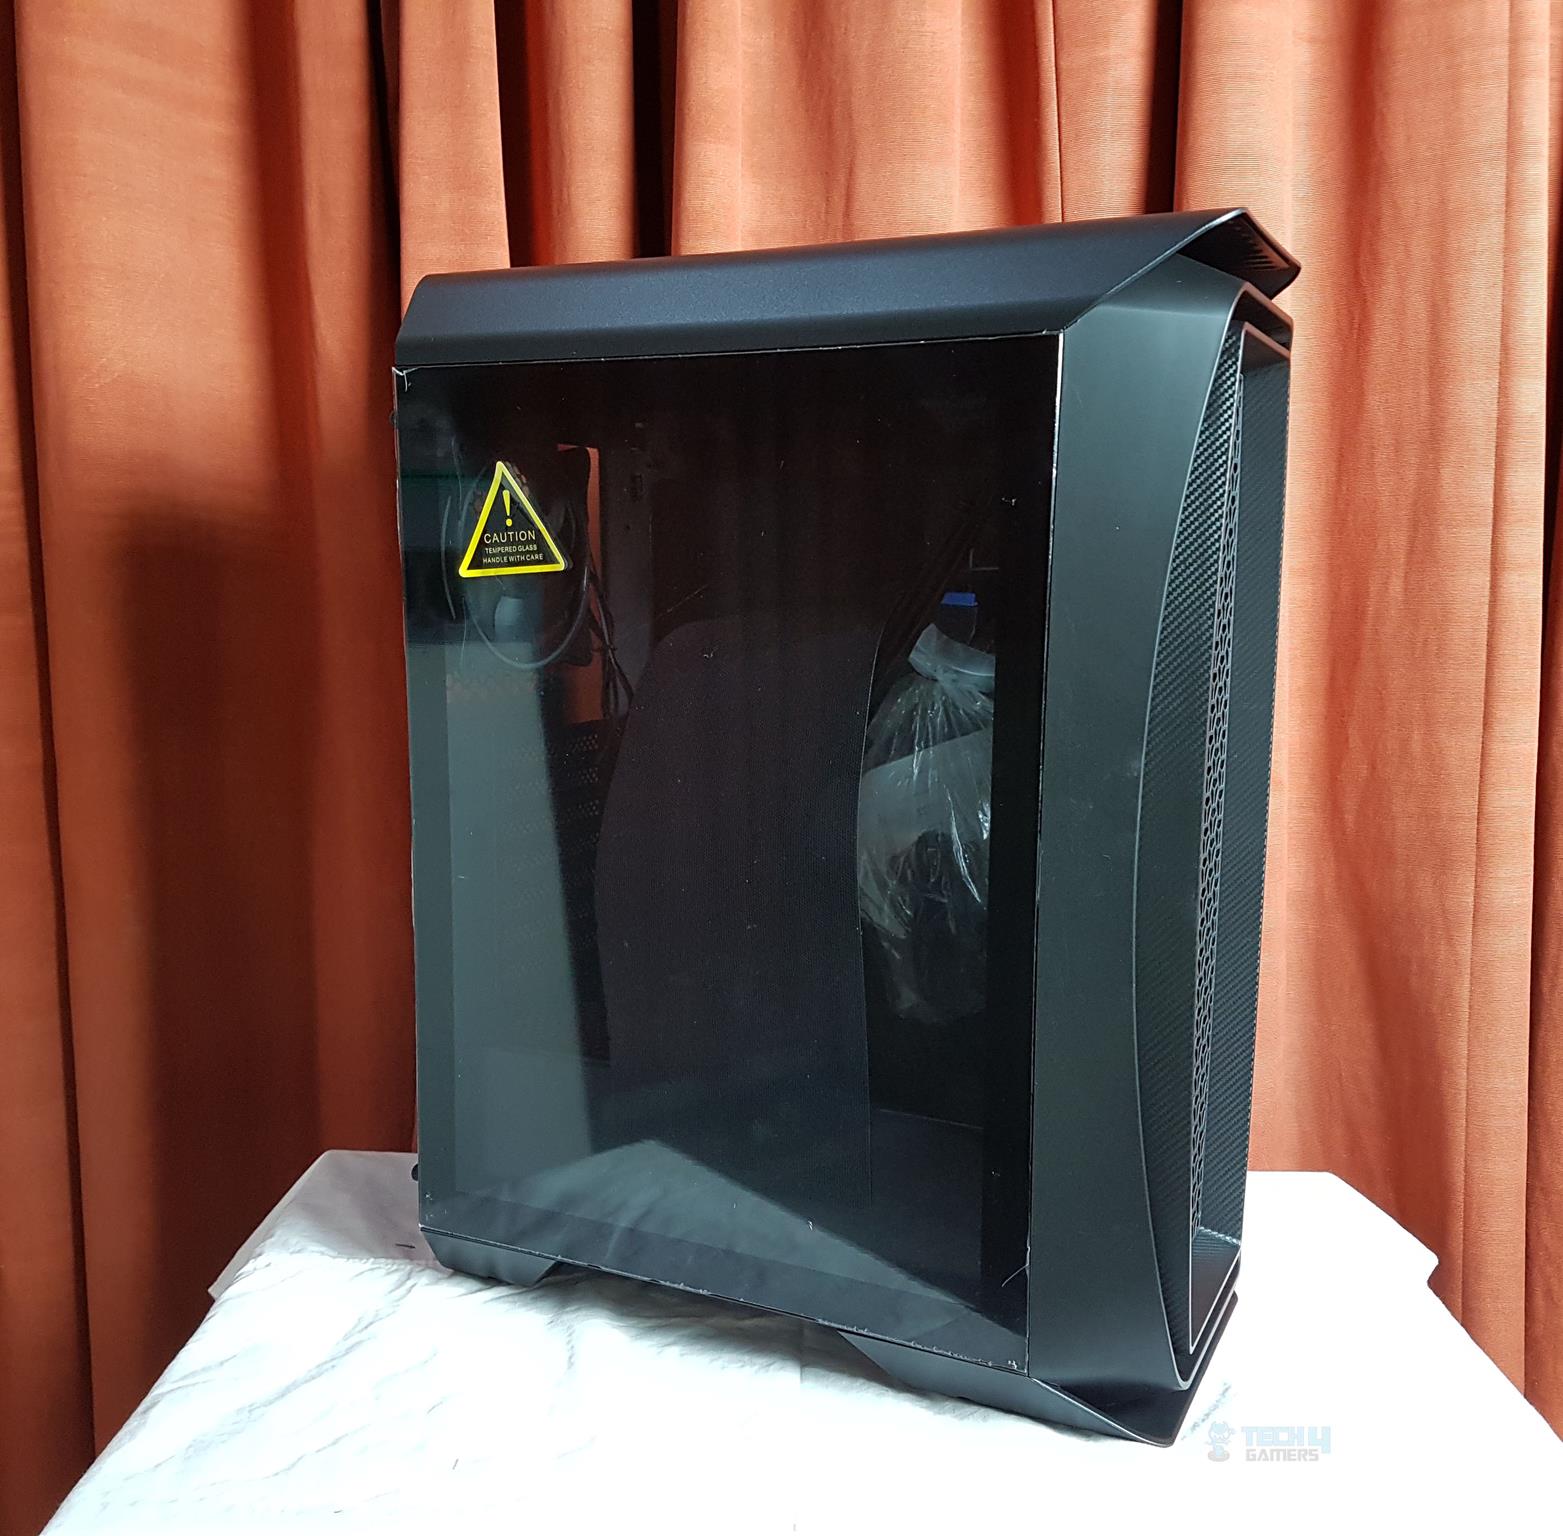
The Aerocool One Eclipse Review has a 4mm tempered glass side panel which is lightly tinted. This angle shows the artistic design of the Aero One Eclipse in a better way. The layered approach on the front is quite apparent and so is the carbon fiber wrap. This gives the chassis a bold but beautiful design overall.
I really appreciate how Aerocool has focused on the glass panel. It is secured using two thumbscrews from the rear side. The panel will not fall down upon removing those screws which is good design execution. The inner side of the panel has padding done on the top and bottom.
The panel slides in/out of the chassis frame and has a mechanism where two studs on the inner side lock the panel to the frame.
A glimpse of inside shows that a dust filter is out of its place, hanging on the front panel’s cables. This is a magnetic dust filter which is supposed to be placed on the backside of the front fans.
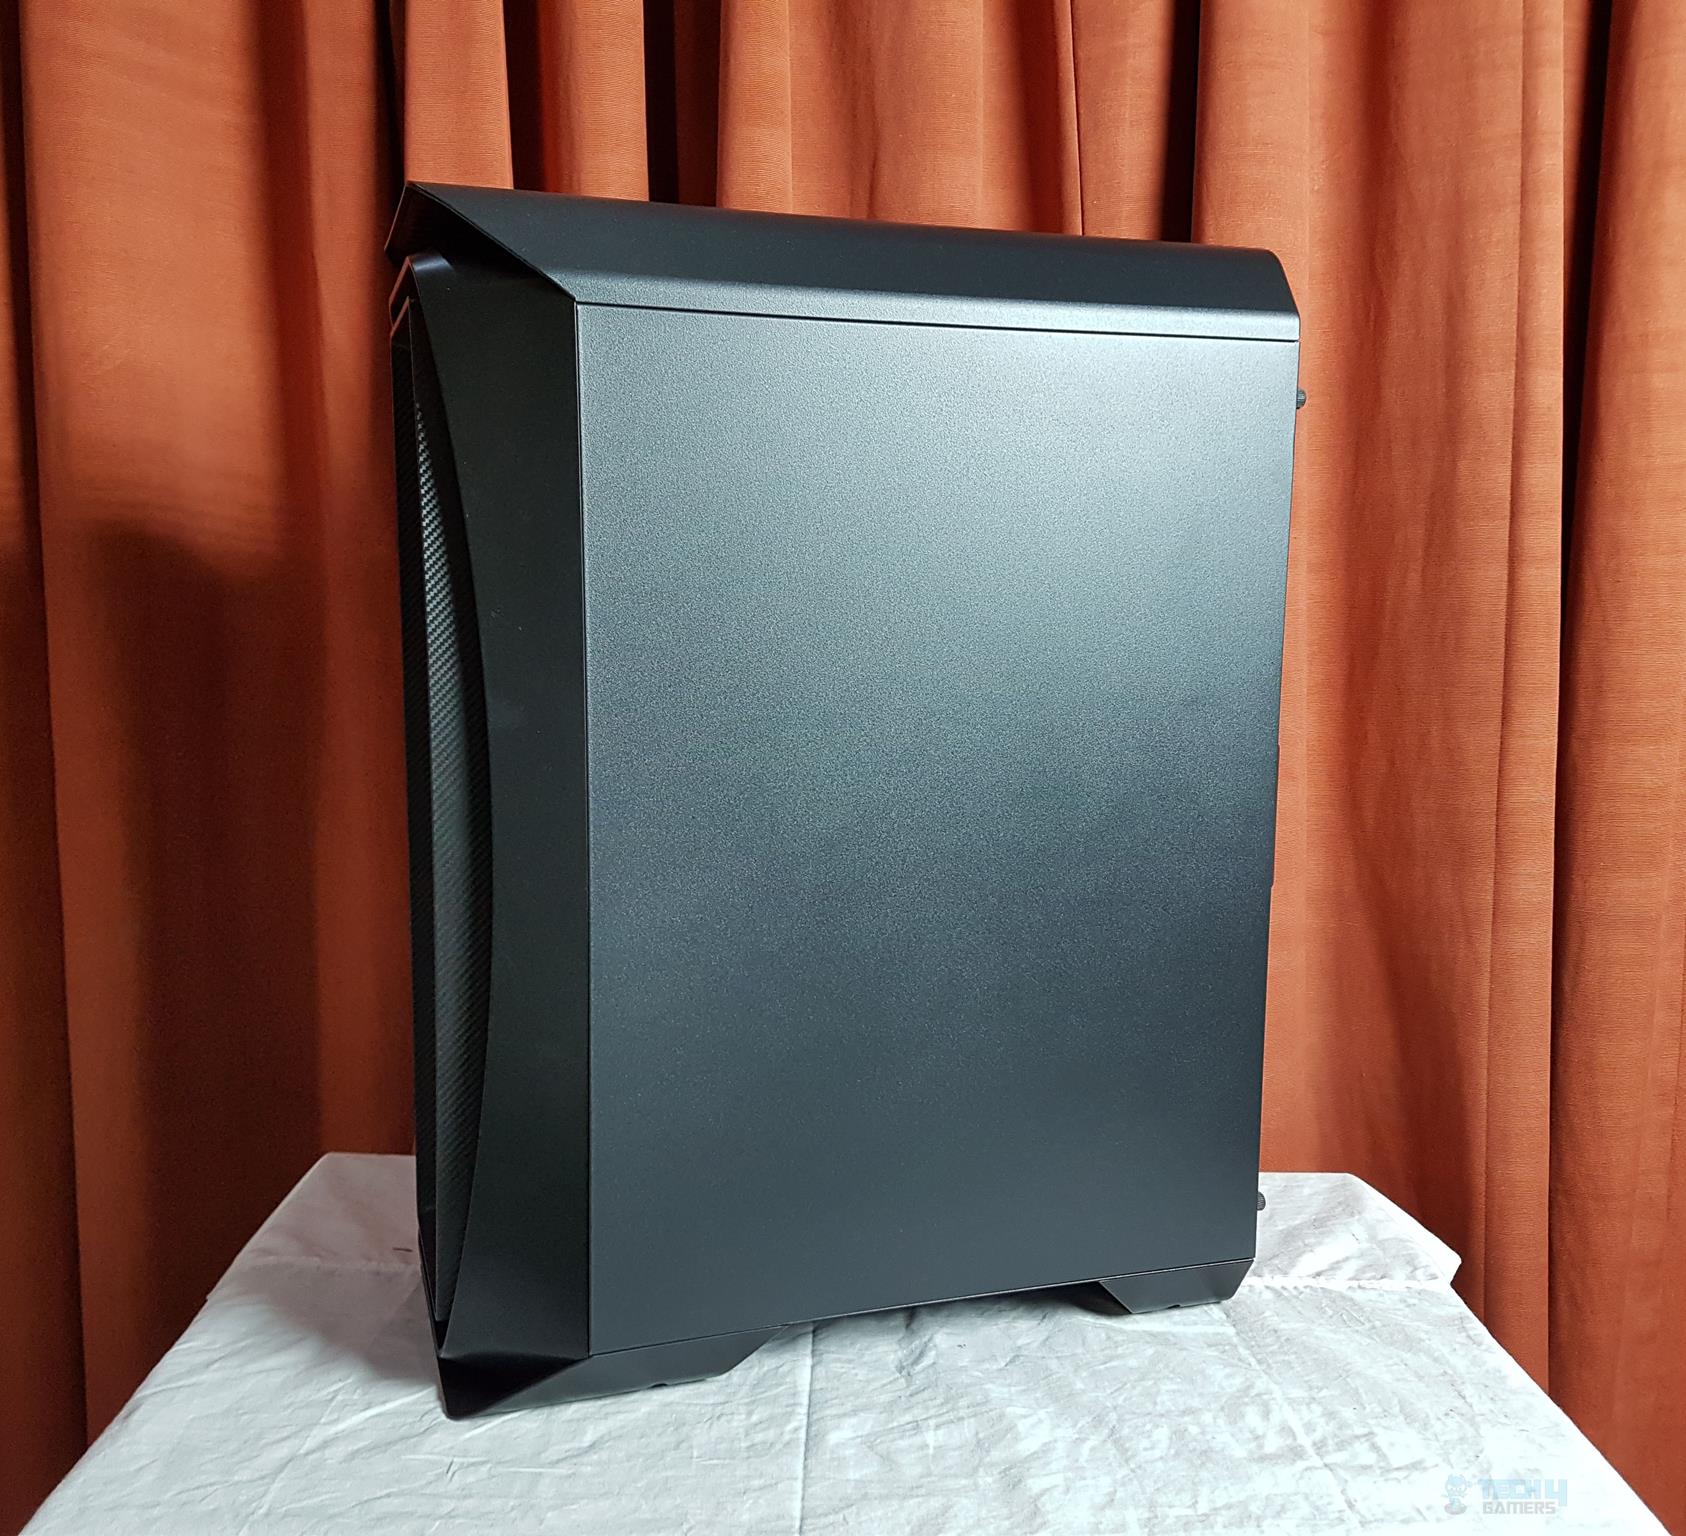
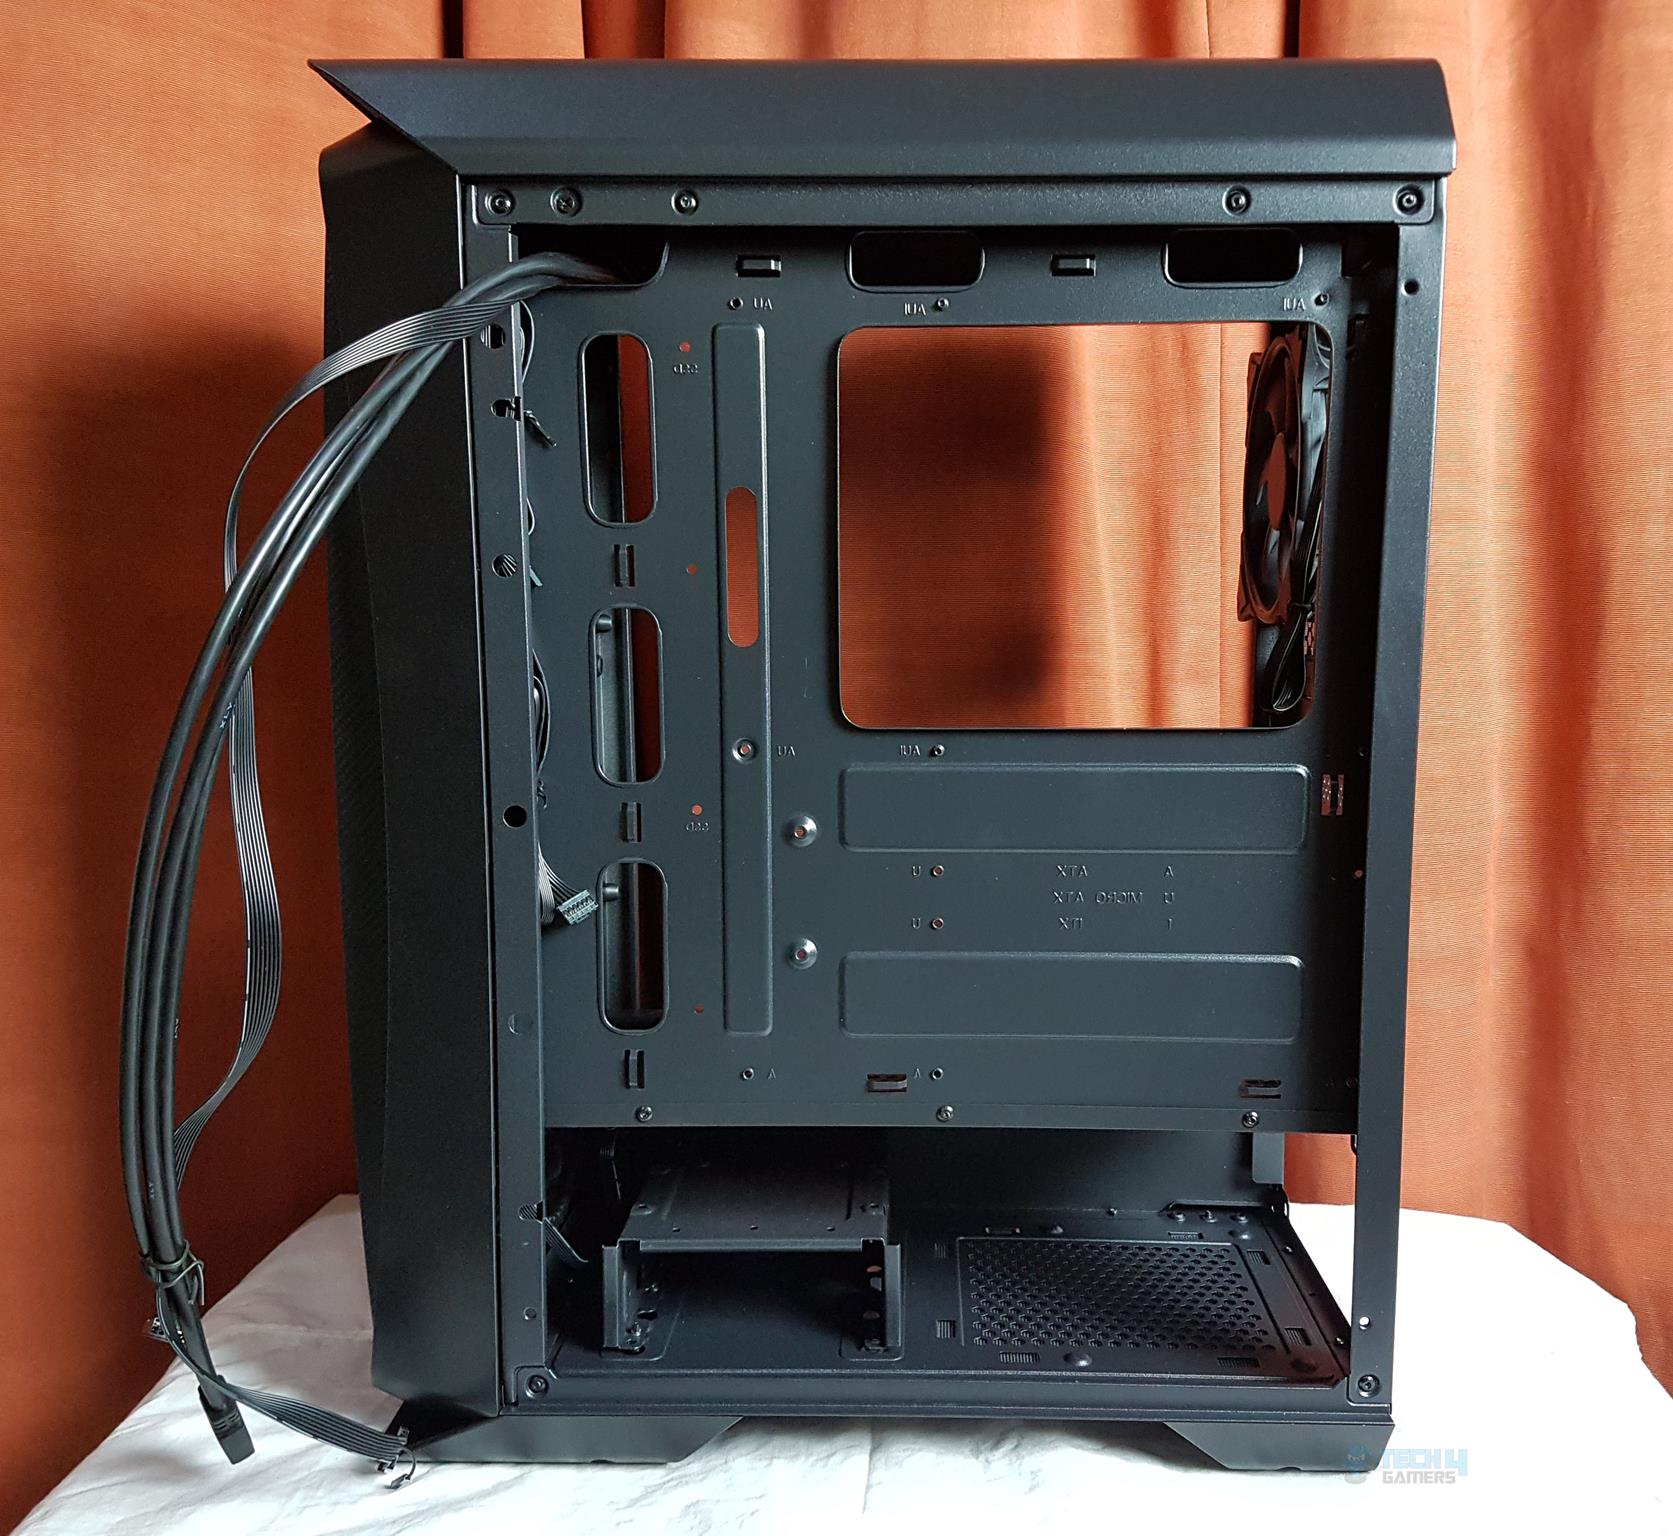
The backside of the chassis has a solid steel made side panel which also slides in/out of the chassis frame. It is also secured using two thumbscrews on the rear.

Looking at the rear of the Aerocool One Eclipse Review, we have a standard layout. Up top is a cutout for motherboard’s I/O shield. There is a vented portion on the right side with a 1x 120mm fan pre-installed. The height of the fan can be adjusted. In the middle, we have 7x PCIe slot covers.
These covers are not reusable as they follow the push-out design. This is my complaint area as the SilverStone FARA R1 which costs less than this chassis has at-least first two slots with reusable covers. I would have preferred ditching the carbon fiber wrap in favor of providing 2x reusable PCIe slot covers.
There is the main cover for the PCIe slot area with a thumbscrew. At the bottom, we have a standard ATX PSU mount.
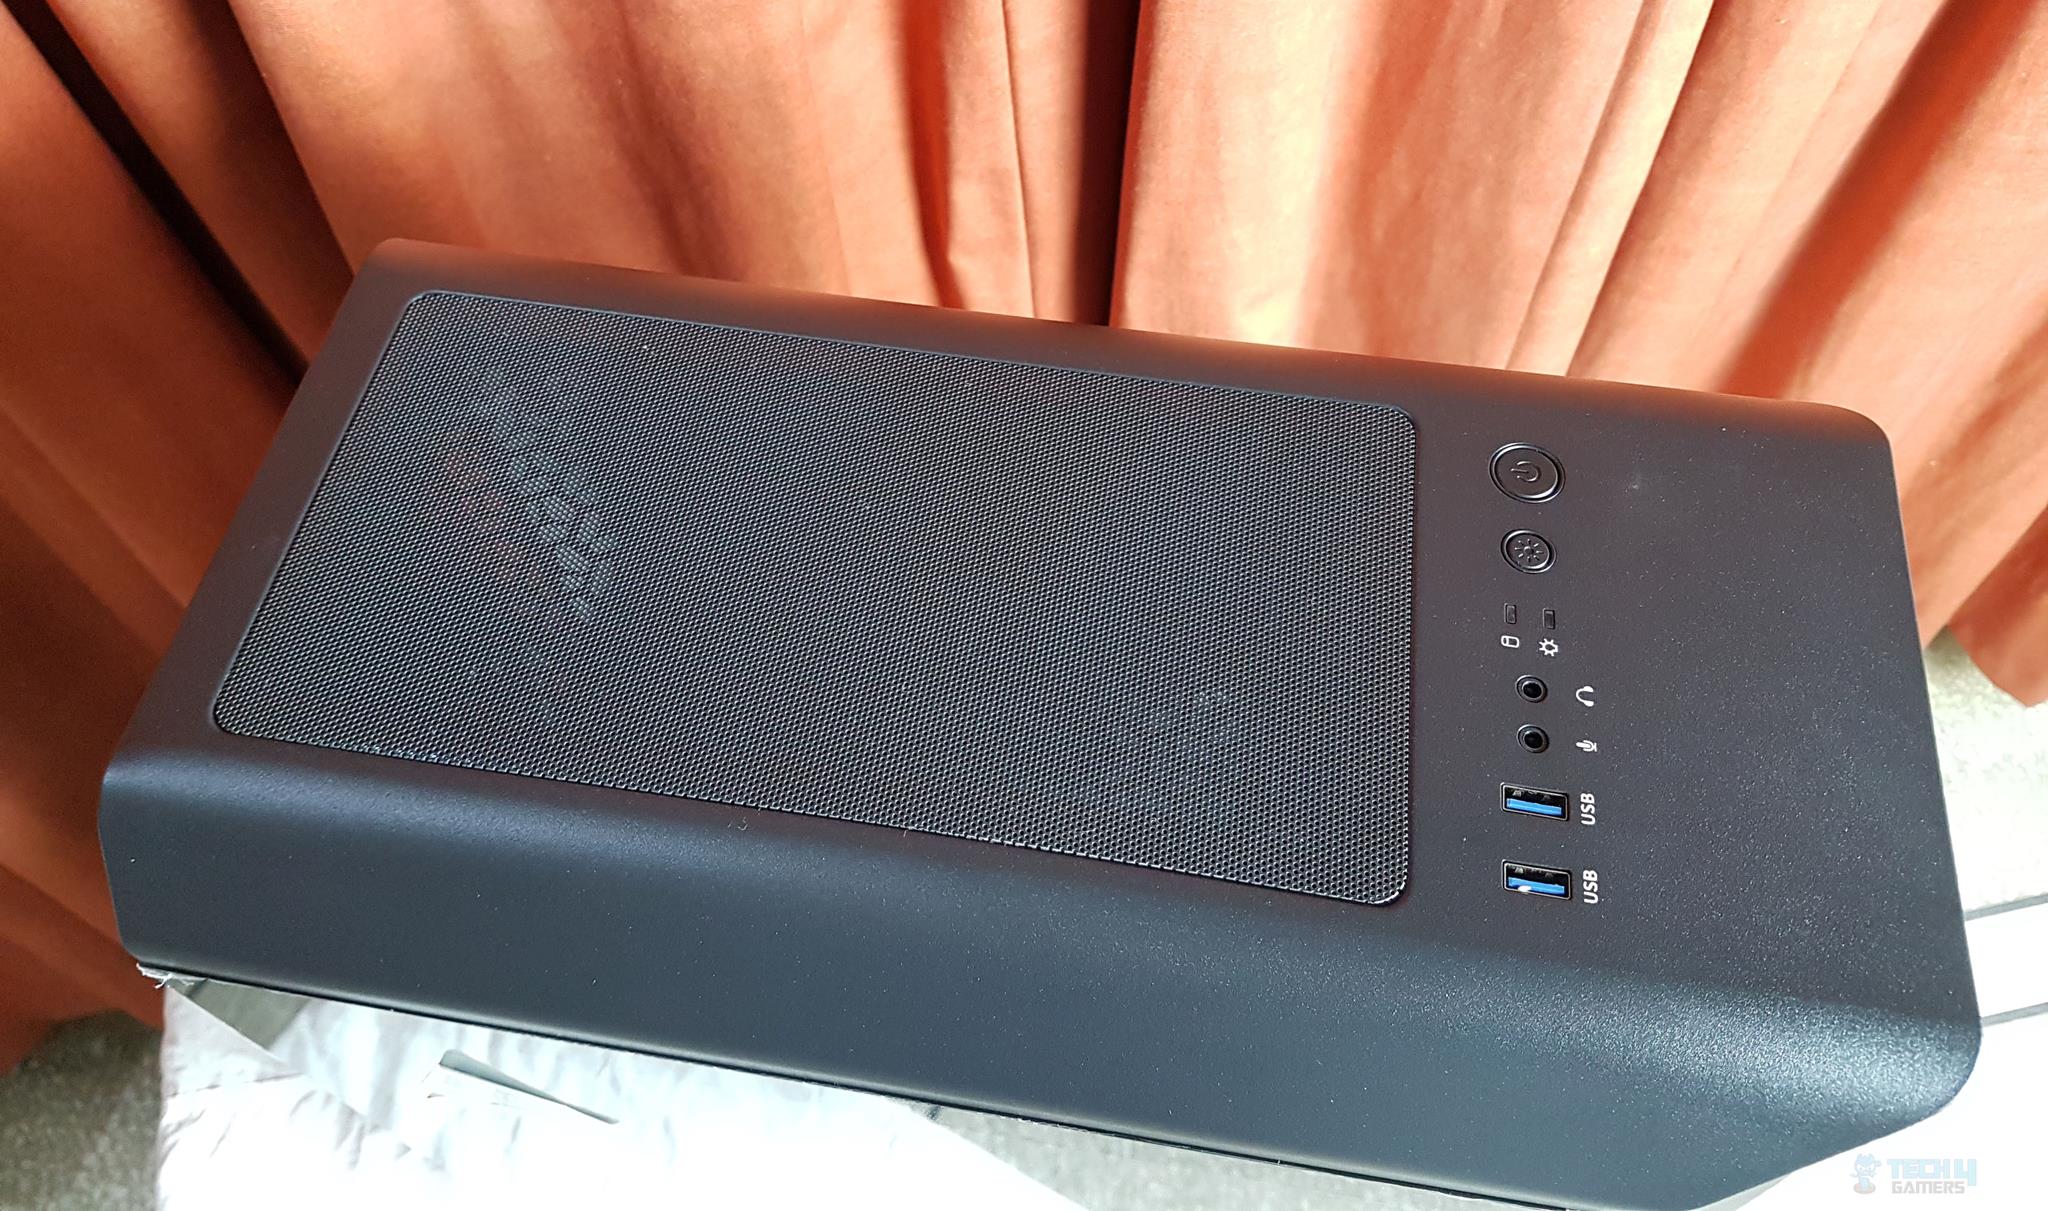
The top side of the chassis has an I/O panel towards the front side. There is a magnetic dust filter on the top covering the fan mounts.
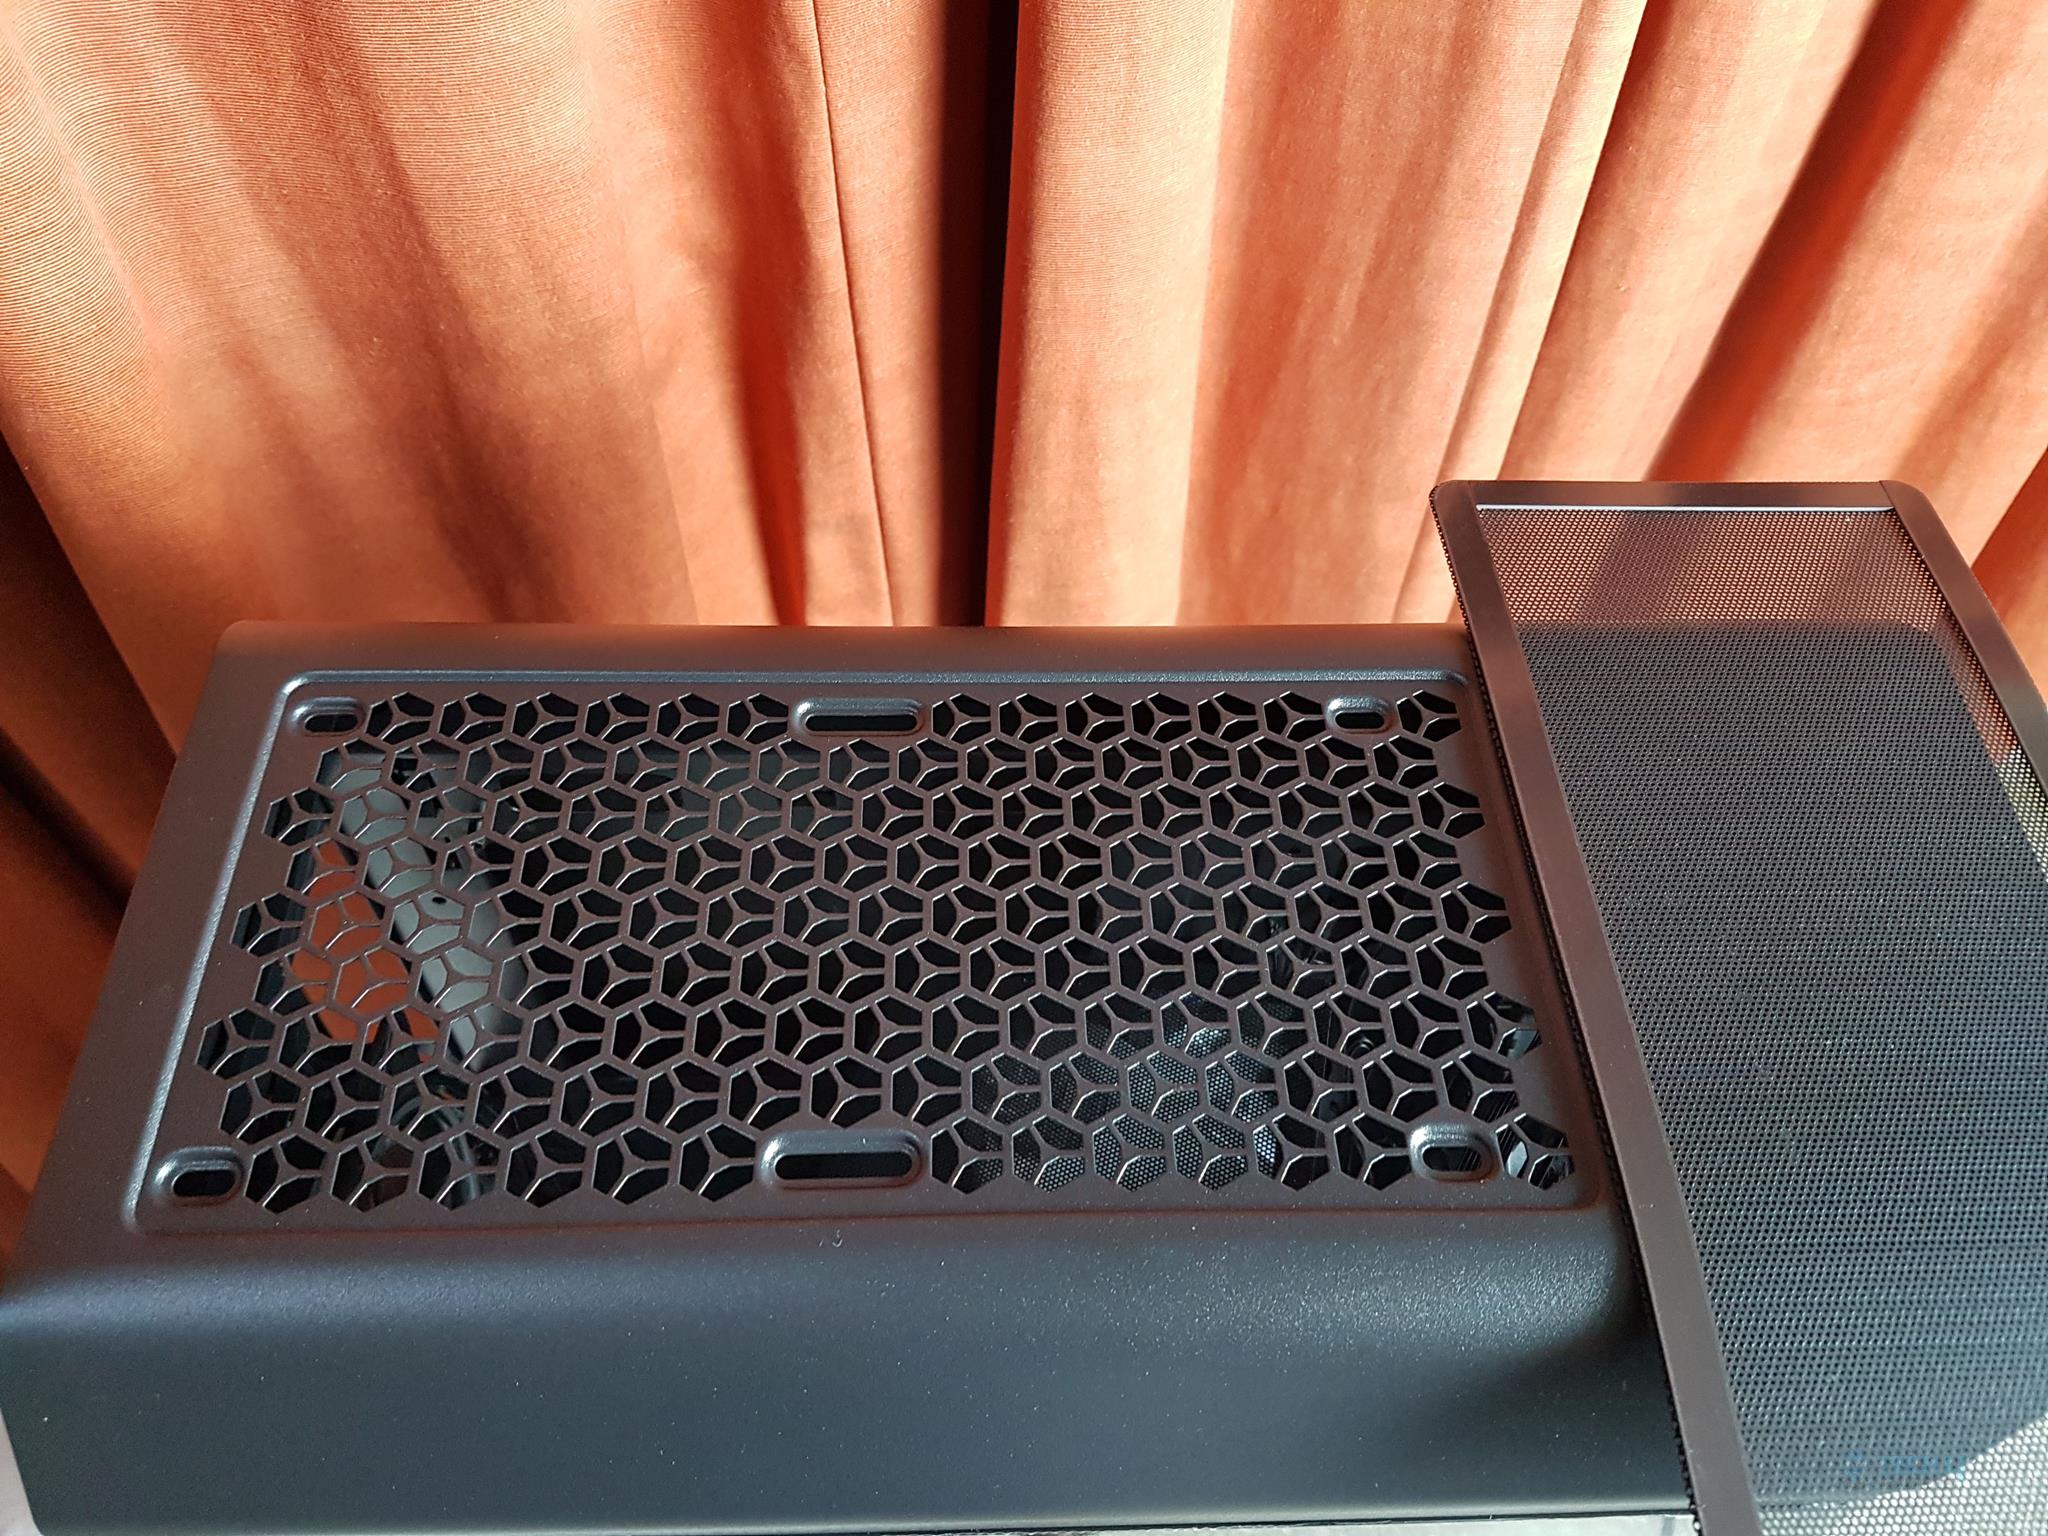
The user has an option to install 2x 120mm or 140mm fans and 120mm or 240mm radiator on the top. The steel cutout design is the same as is on the front vented portion.
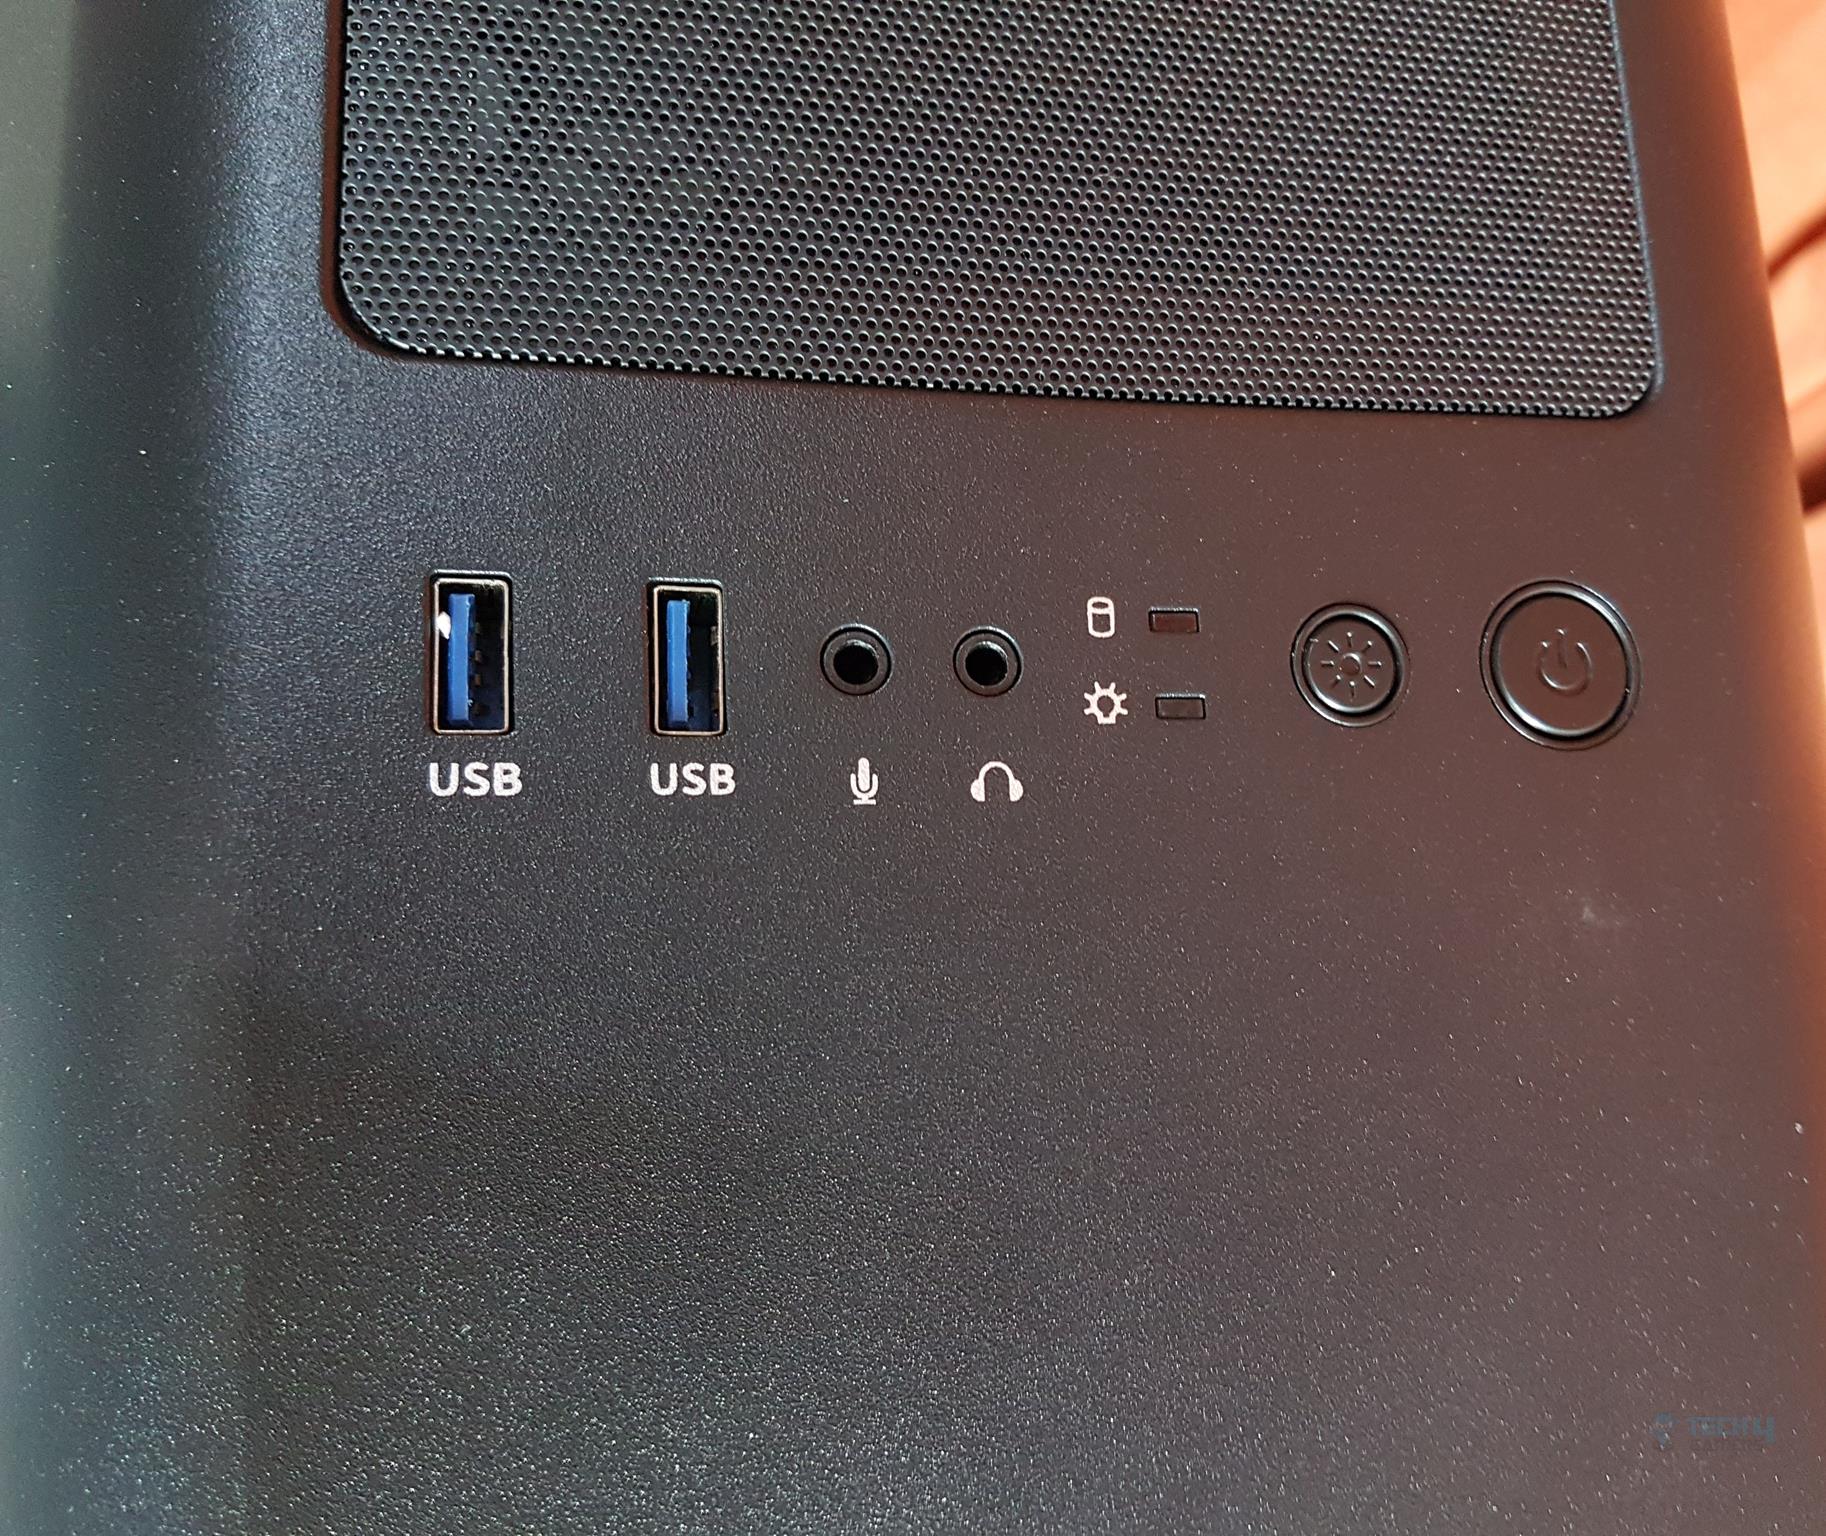
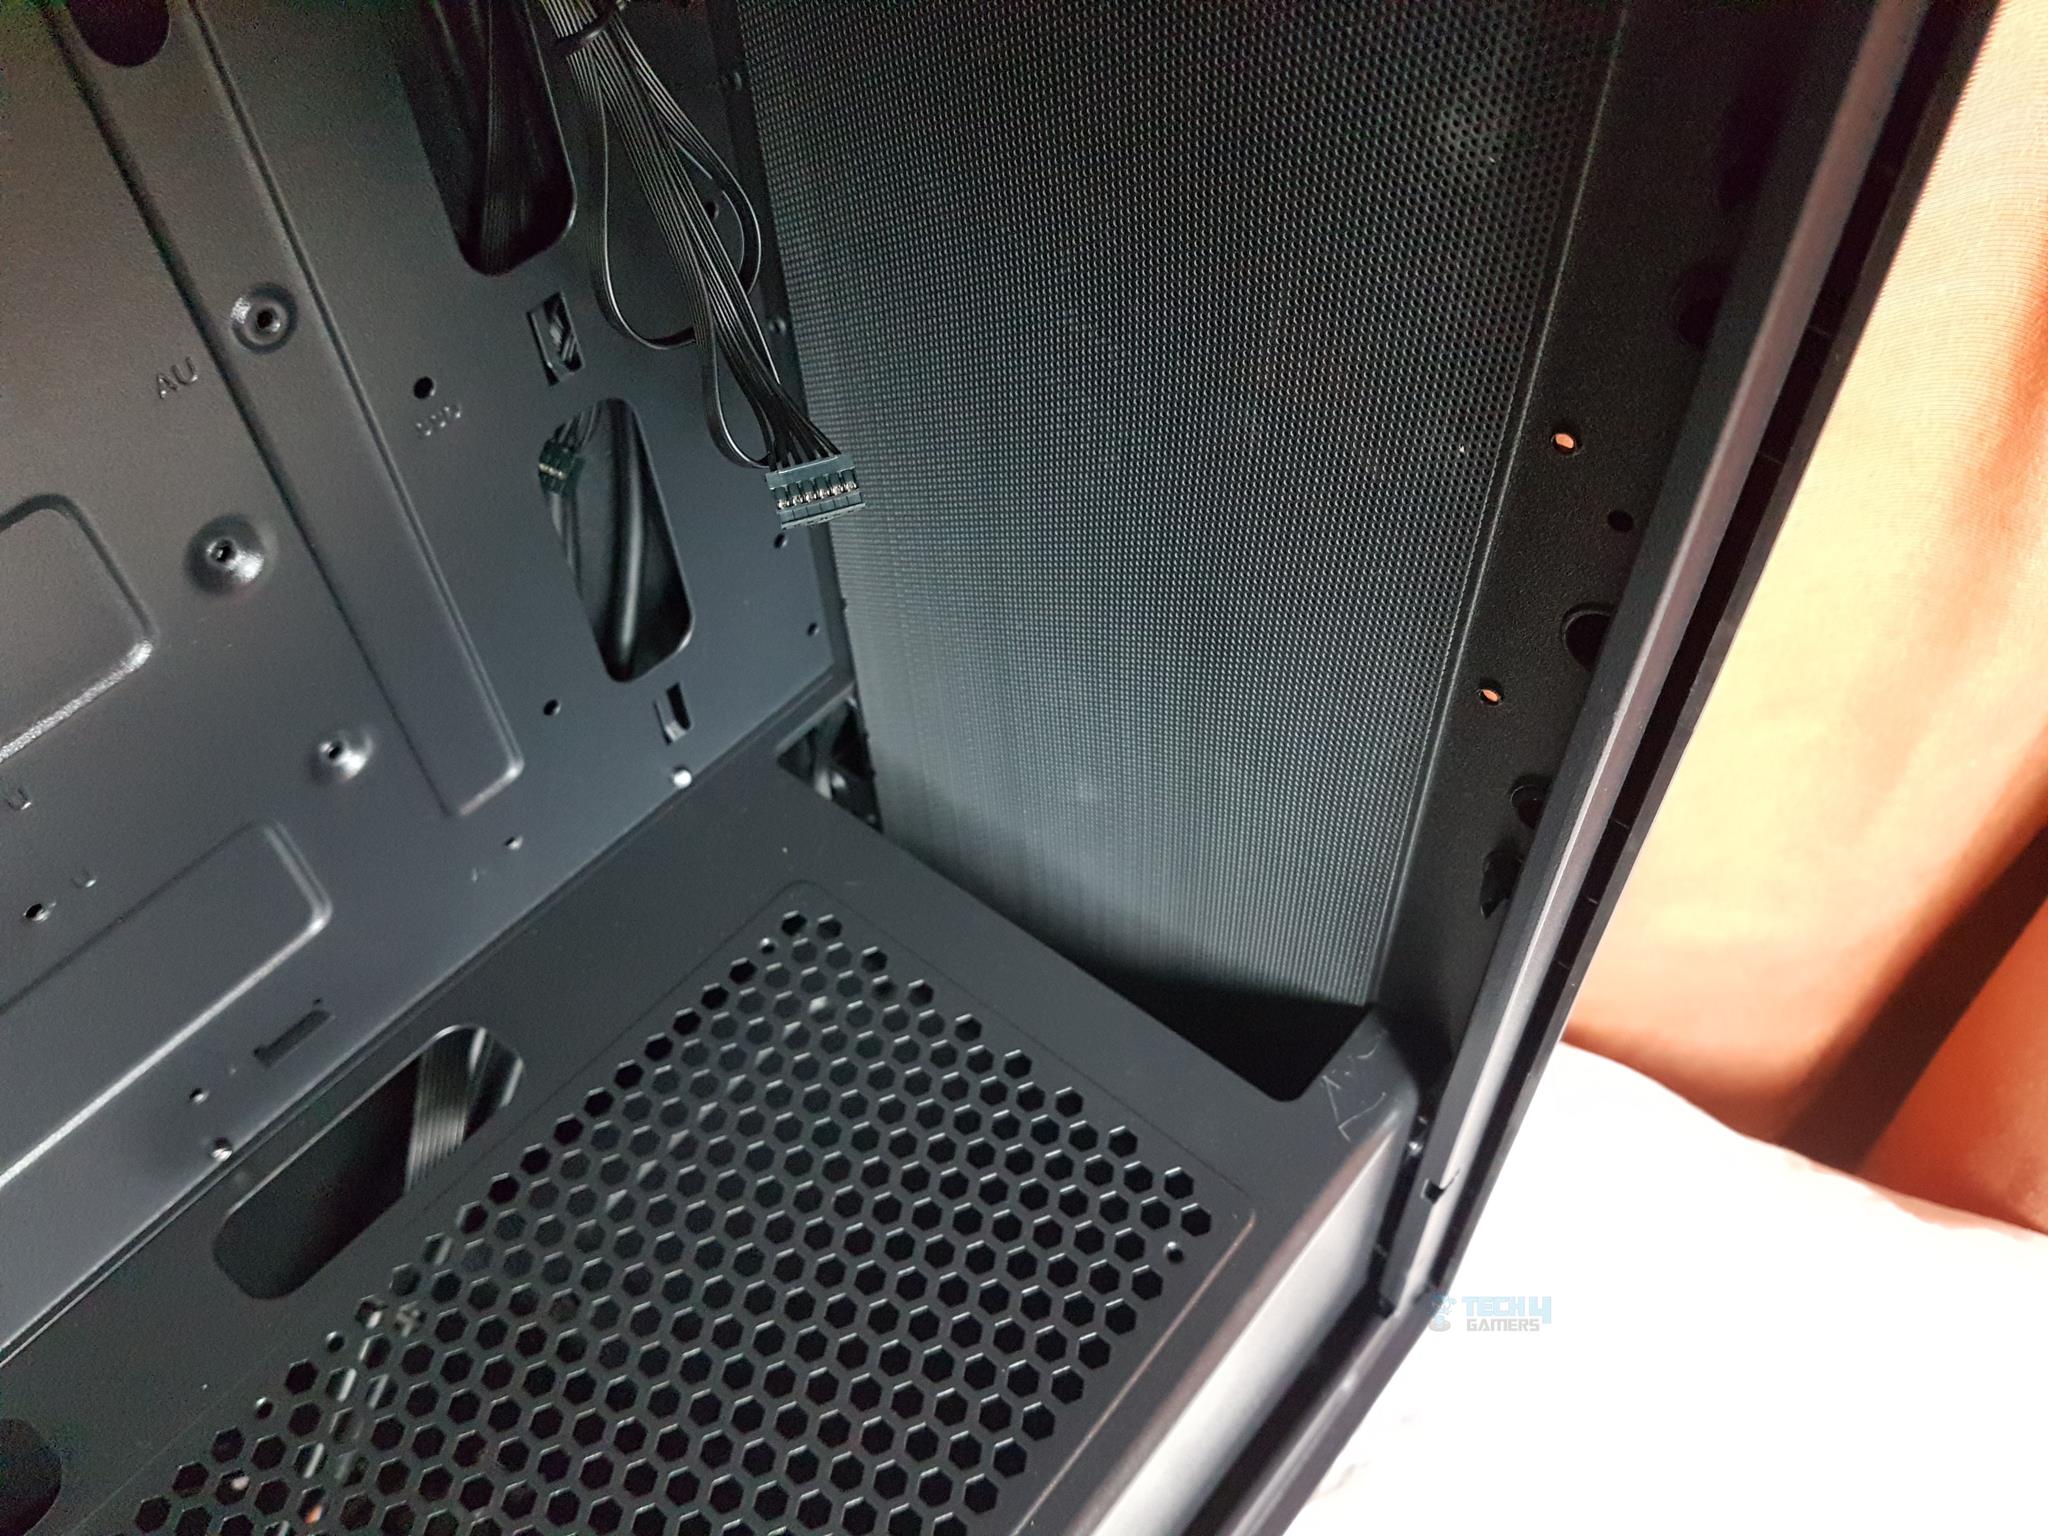
The I/O panel has the following connectivity provisions:
- 1x Power Button
- 1x Reset/Lighting Control Button
- LED Indicators
- Headphone and Microphone Jack
- 2x USB 3.0 ports
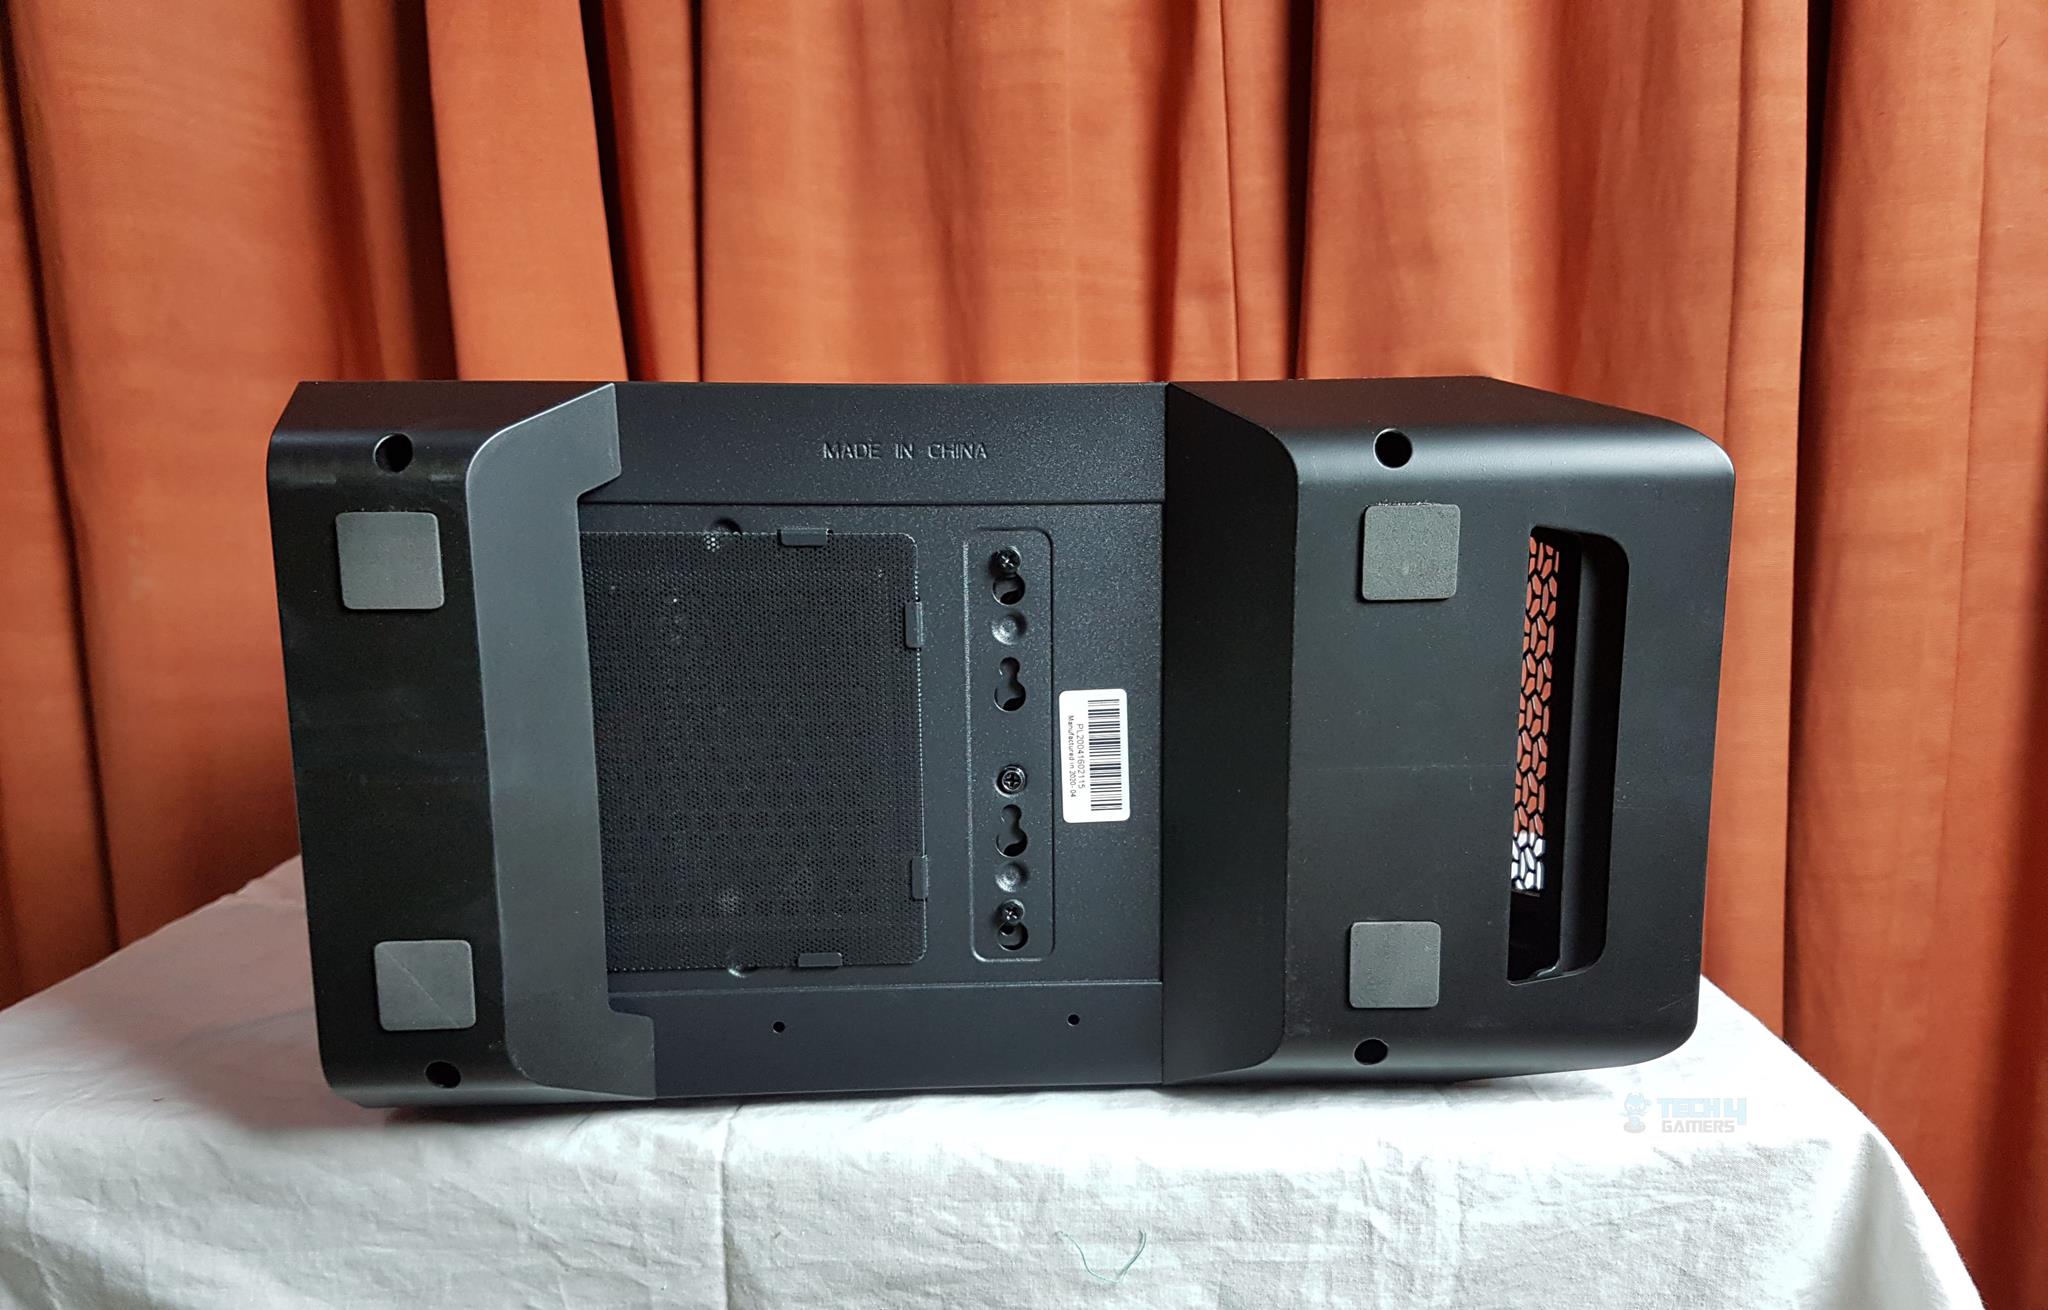
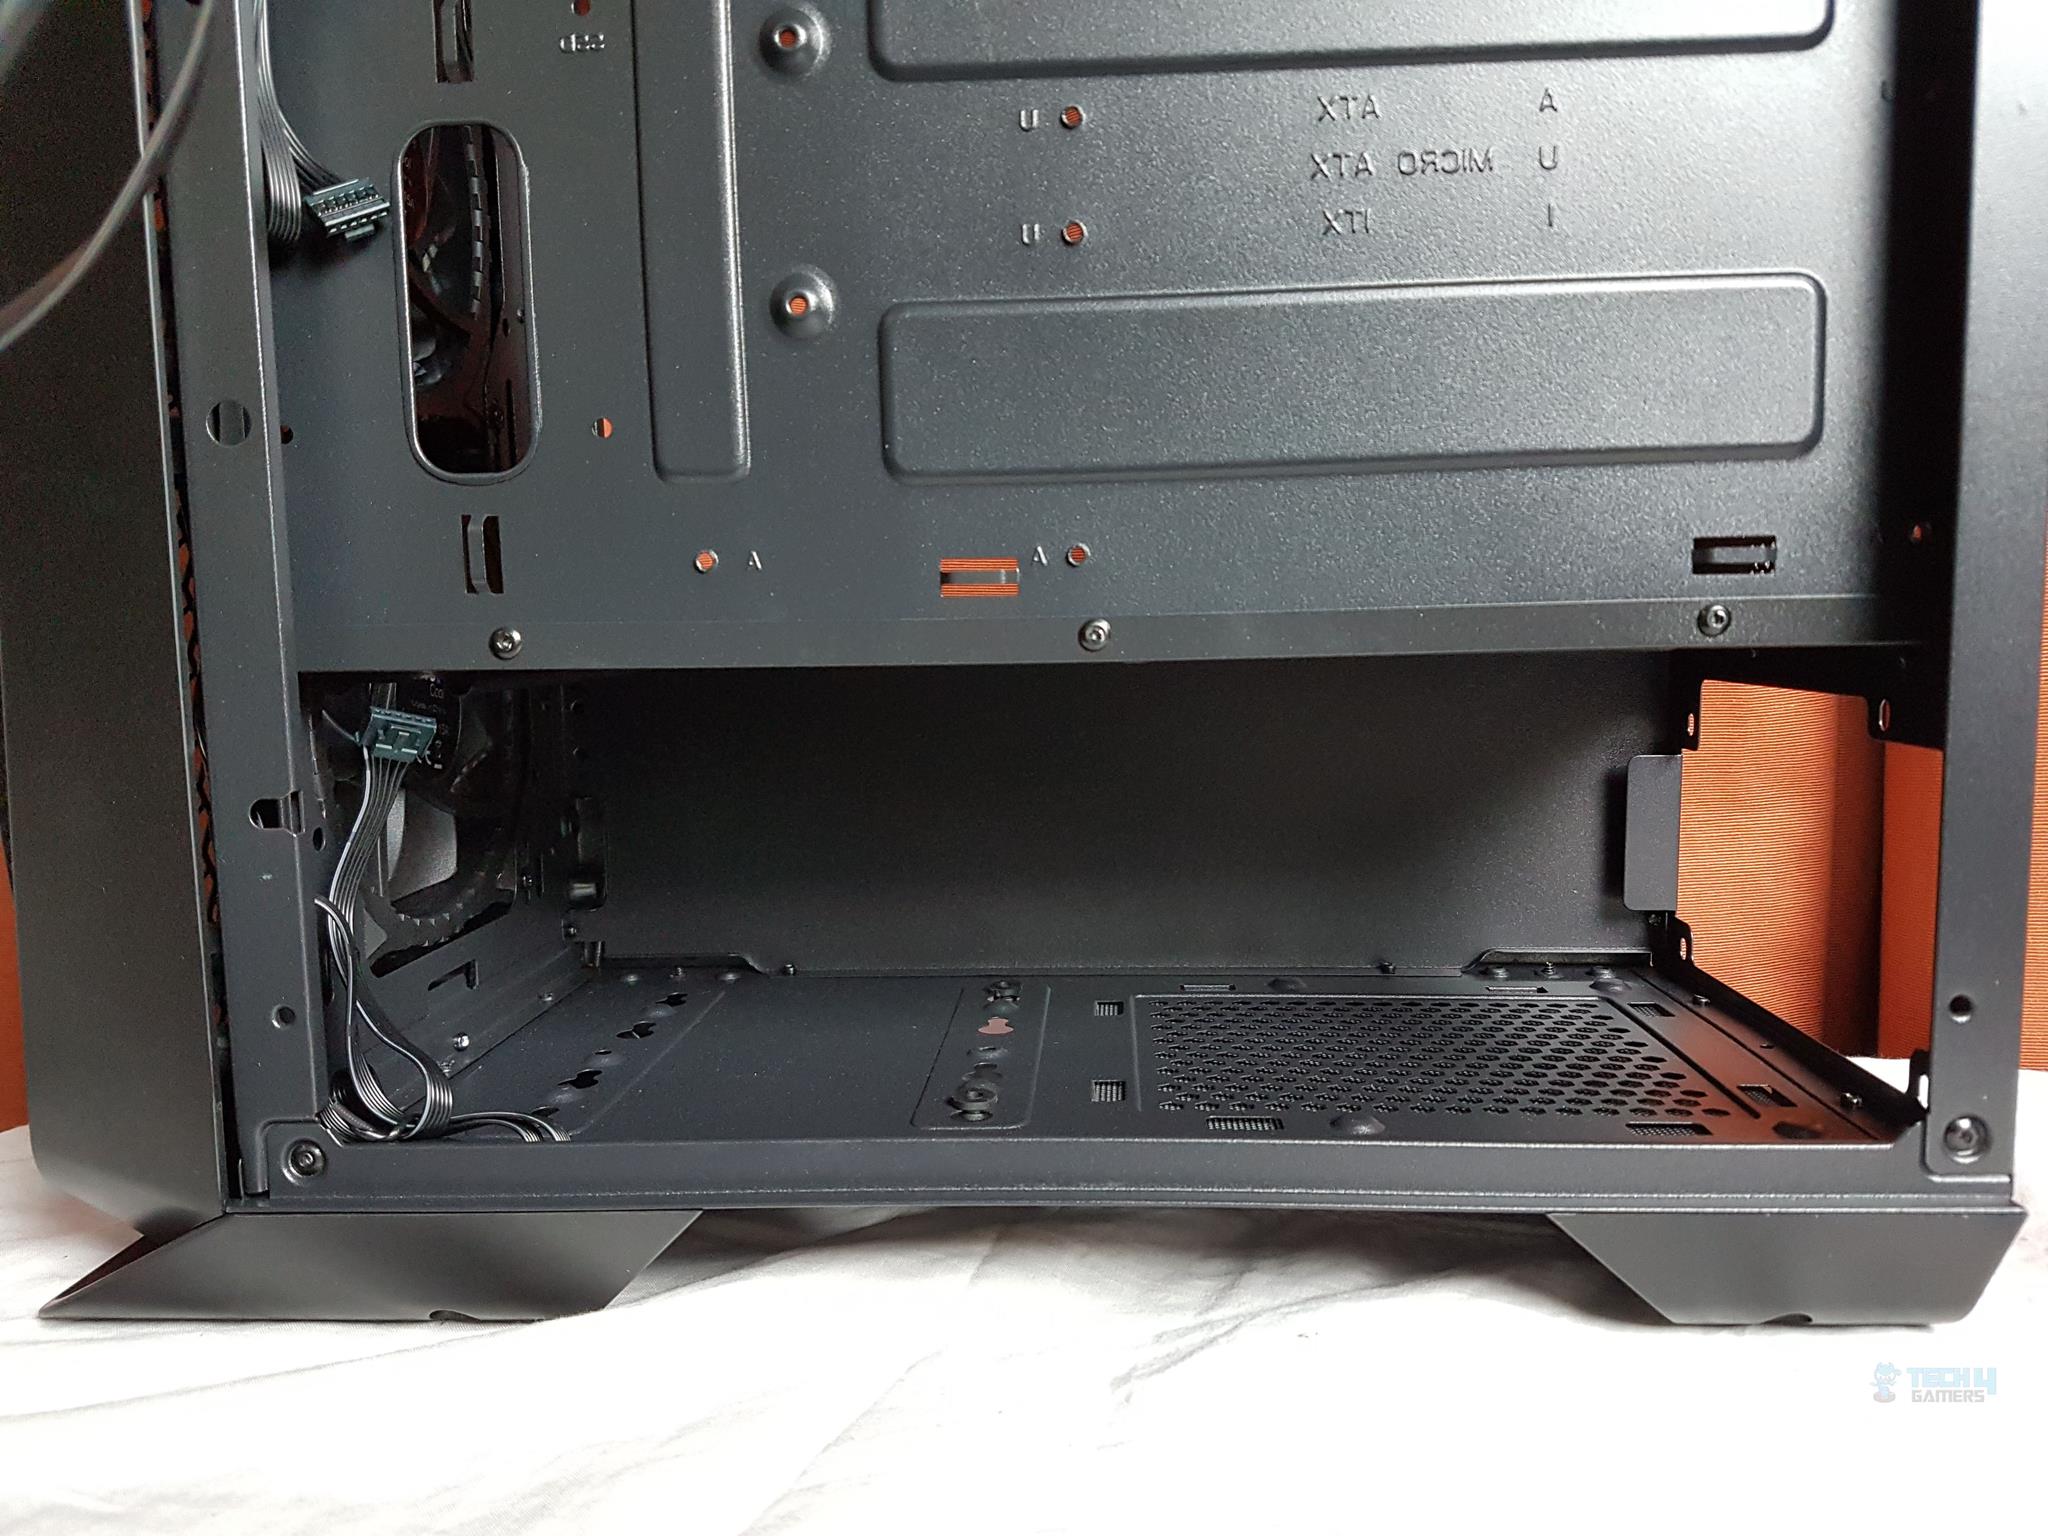
The bottom of the chassis does not have a standard or traditional 4 feet design. There are two large size cut-to-design structures on the front and the rear side. Oh, these remind me of the similar layout on the Phanteks Evolv ATX! As can be seen, these structures are hindering the PSU shroud area and the access to the other side of the HDD cage mount. There is a non-magnetic dust filter on the PSU shroud.
We can see 3x screws. These screws are holding the HDD cage. There are a total of 5 screws securing the HDD cage. There is a cutout on the front side. This is where you can place your hand to pull the front panel out.
In order to access the other two screws, we have to remove the feet structure from the base. Now, we can see all the screws which can be removed to take out the HDD cage. The good thing is one does not need to take off the feet structure to remove the HDD cage. One can take out the three screws on the visible area and slide the HDD cage (from the backside) to take it out.
Aero Case Review Interior View
It is time to take a peek at the inners of the chassis and see what it offers to the builder/user.
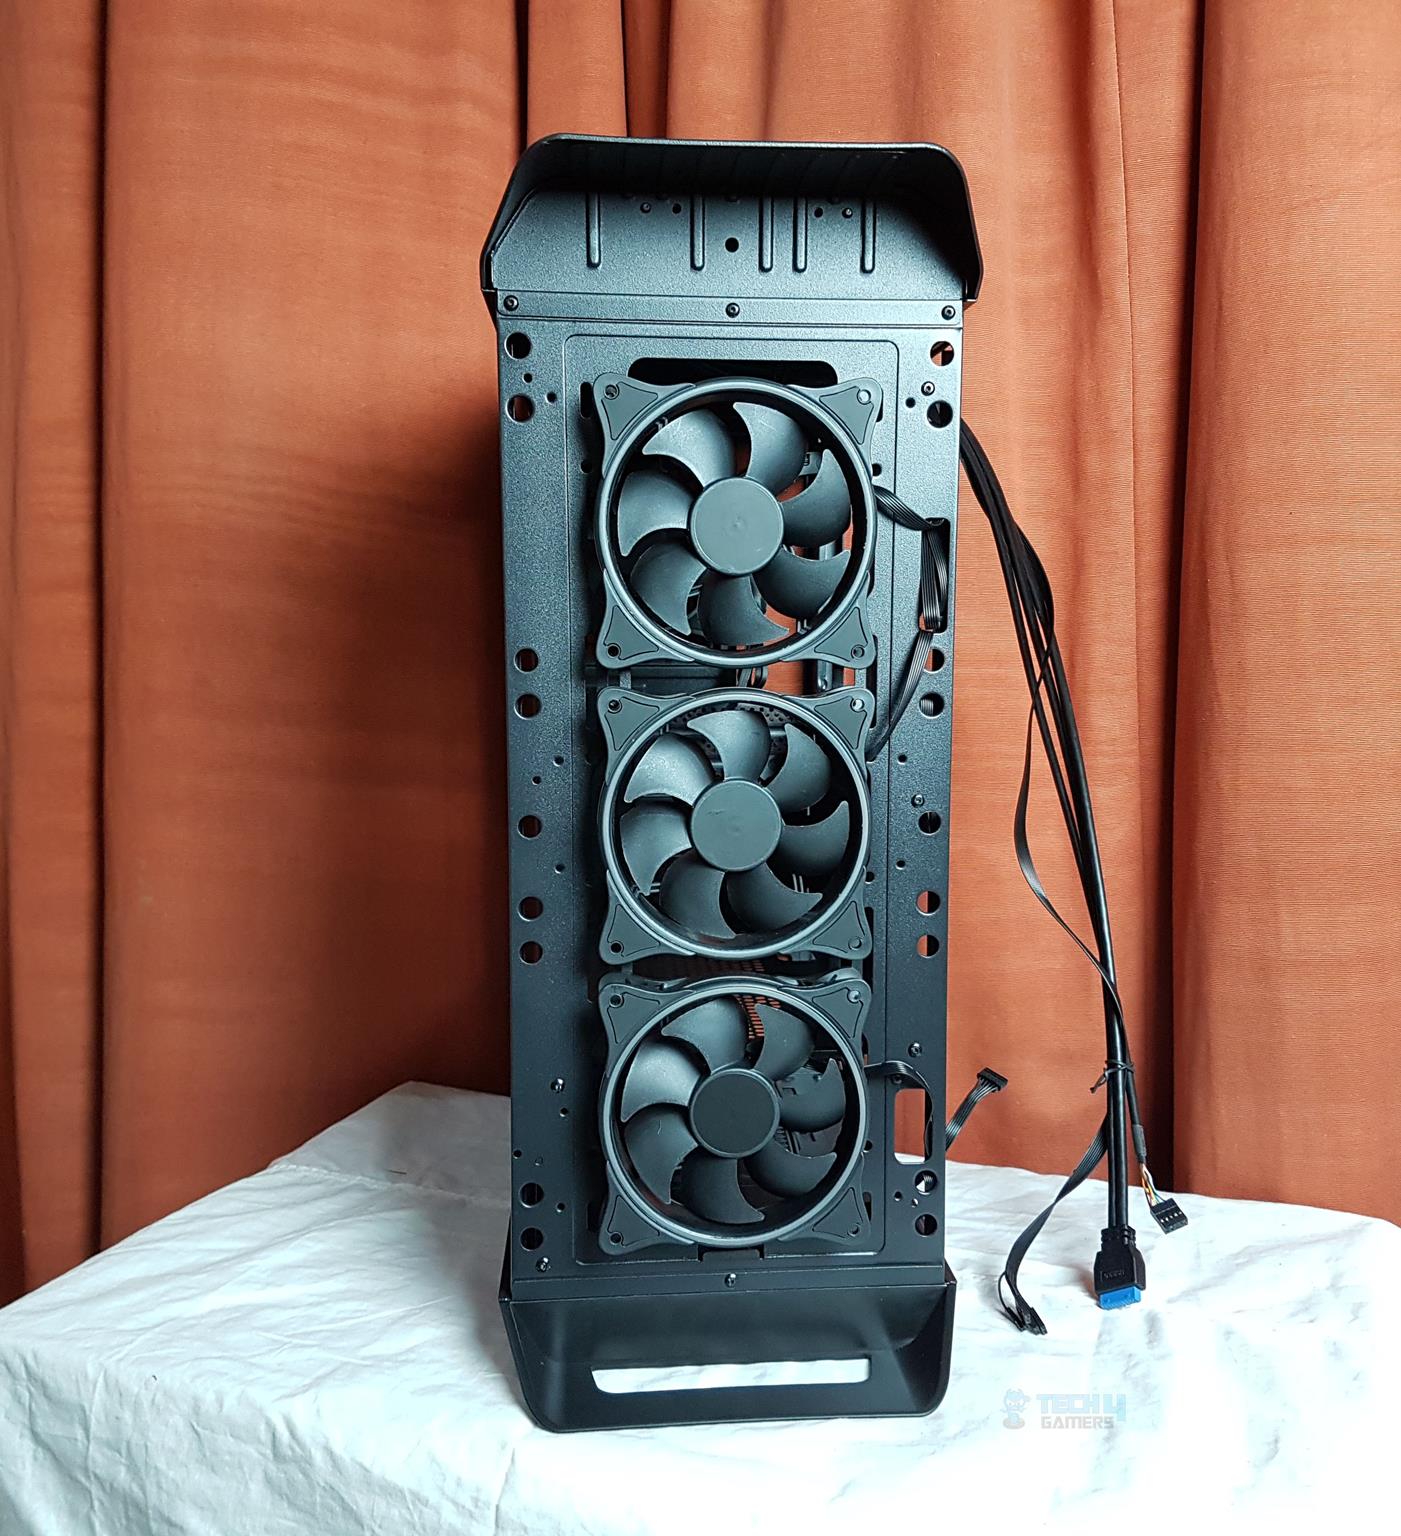
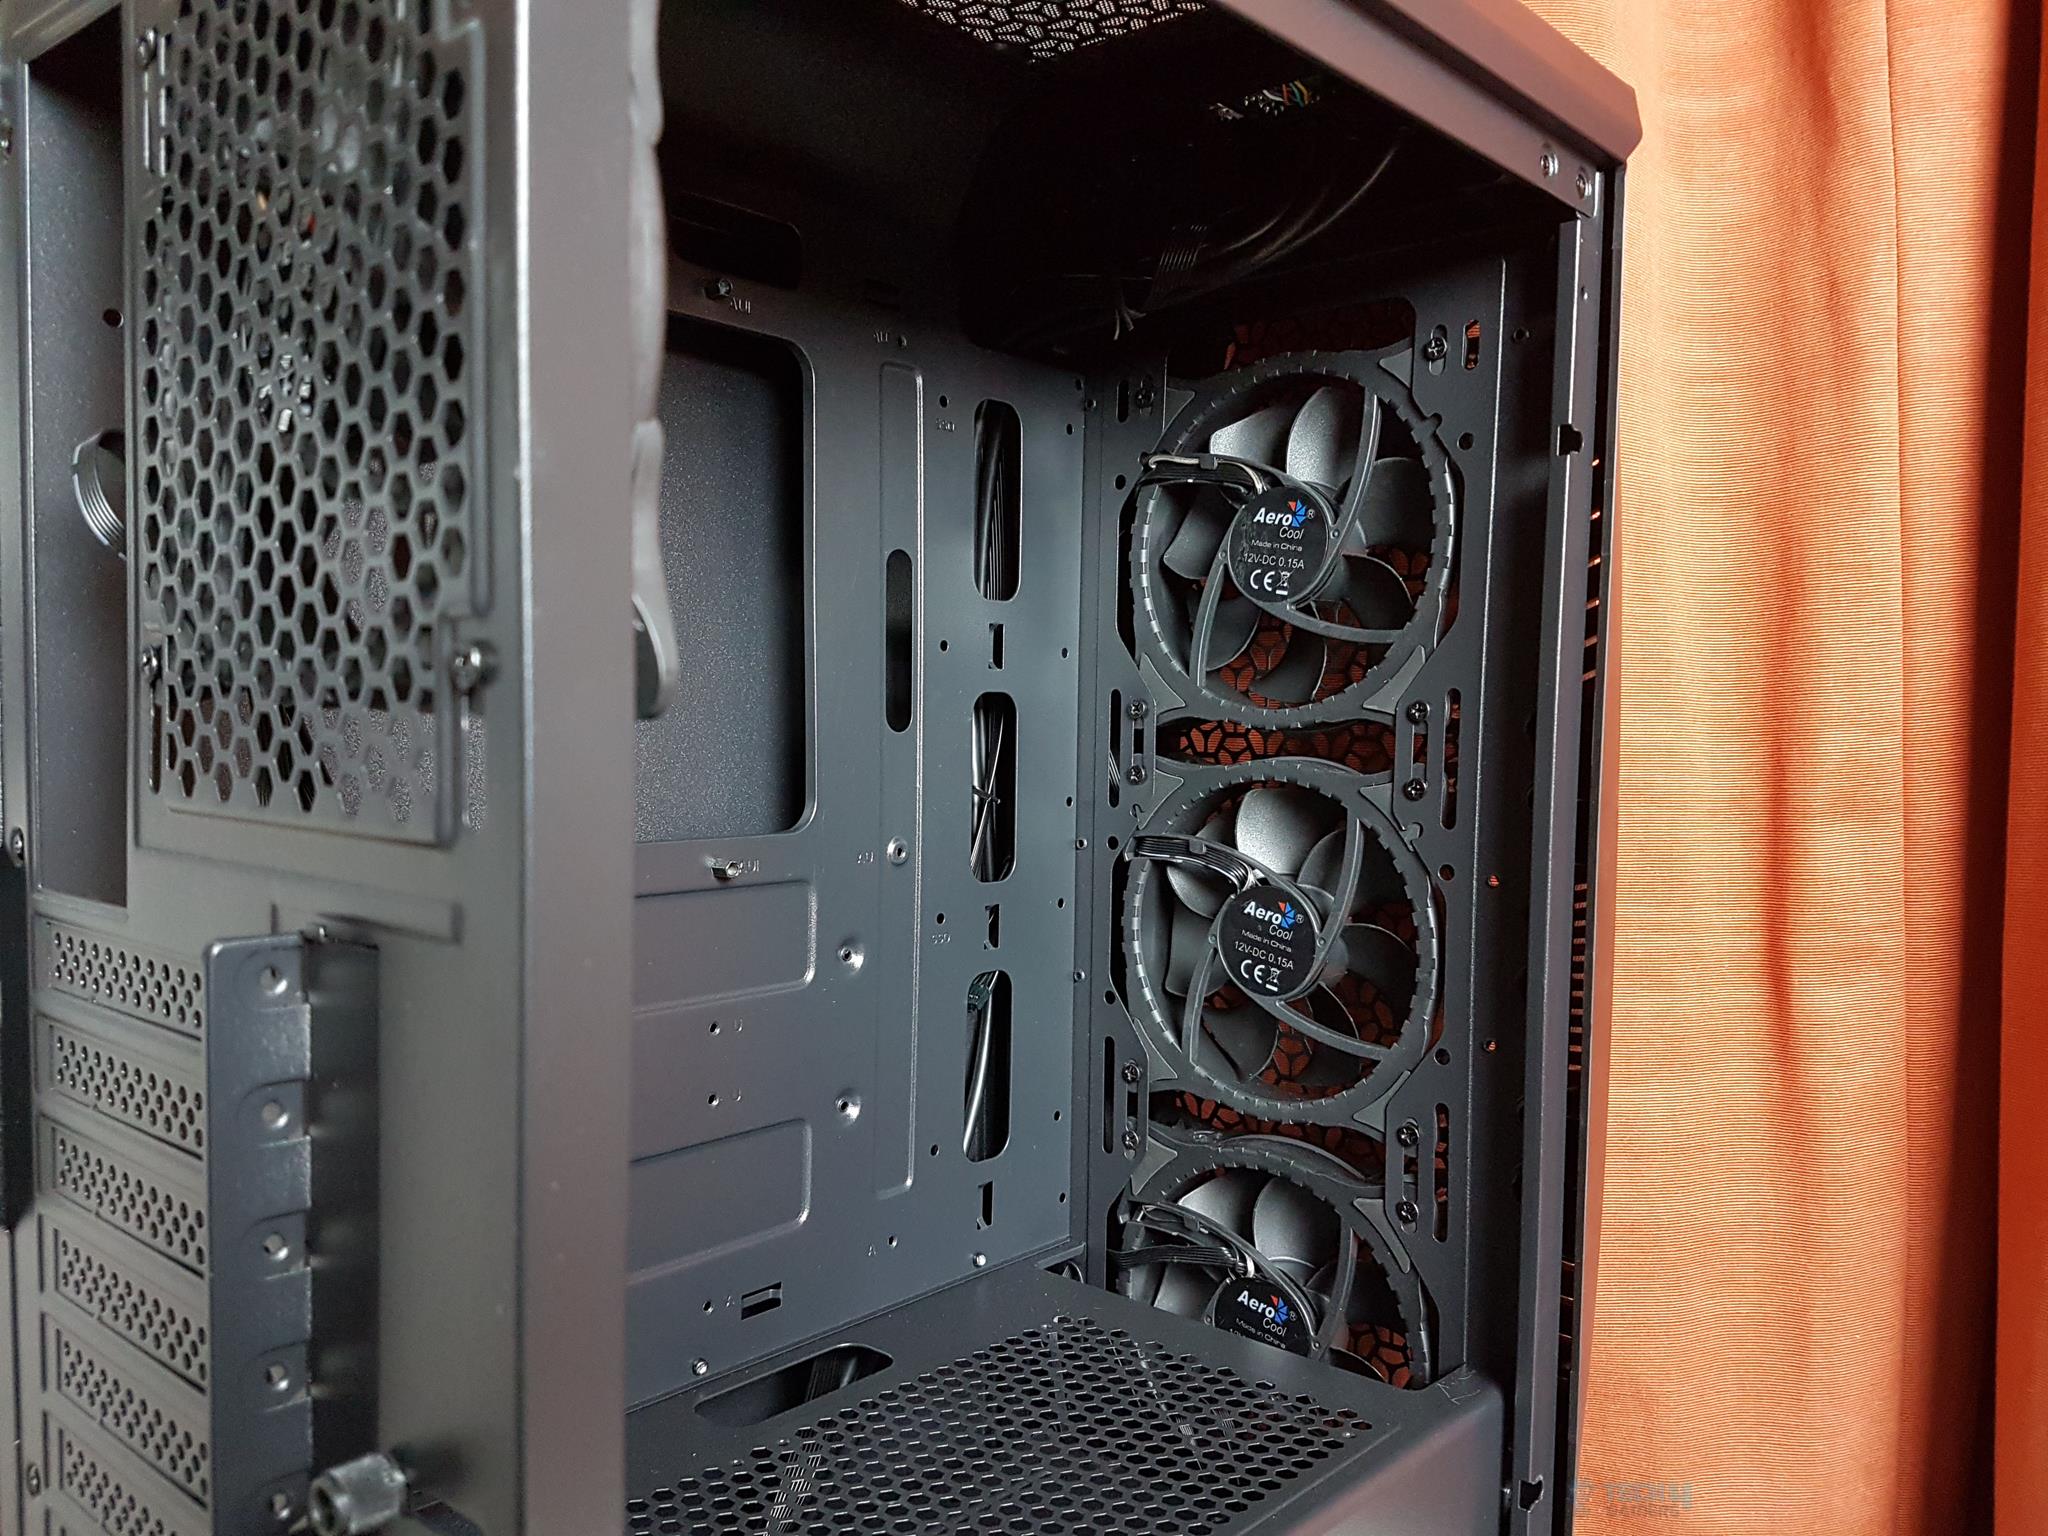
Starting from the front side, taking the front panel off will show the 3x 120mm Eclipse RGB fans. Each of these fans has dual rings that light up when powered. The blades are not translucent and don’t light up. The user has the option to install:
- Up to 3x 120mm or 2x 140mm Fans
- Up to 360mm radiator
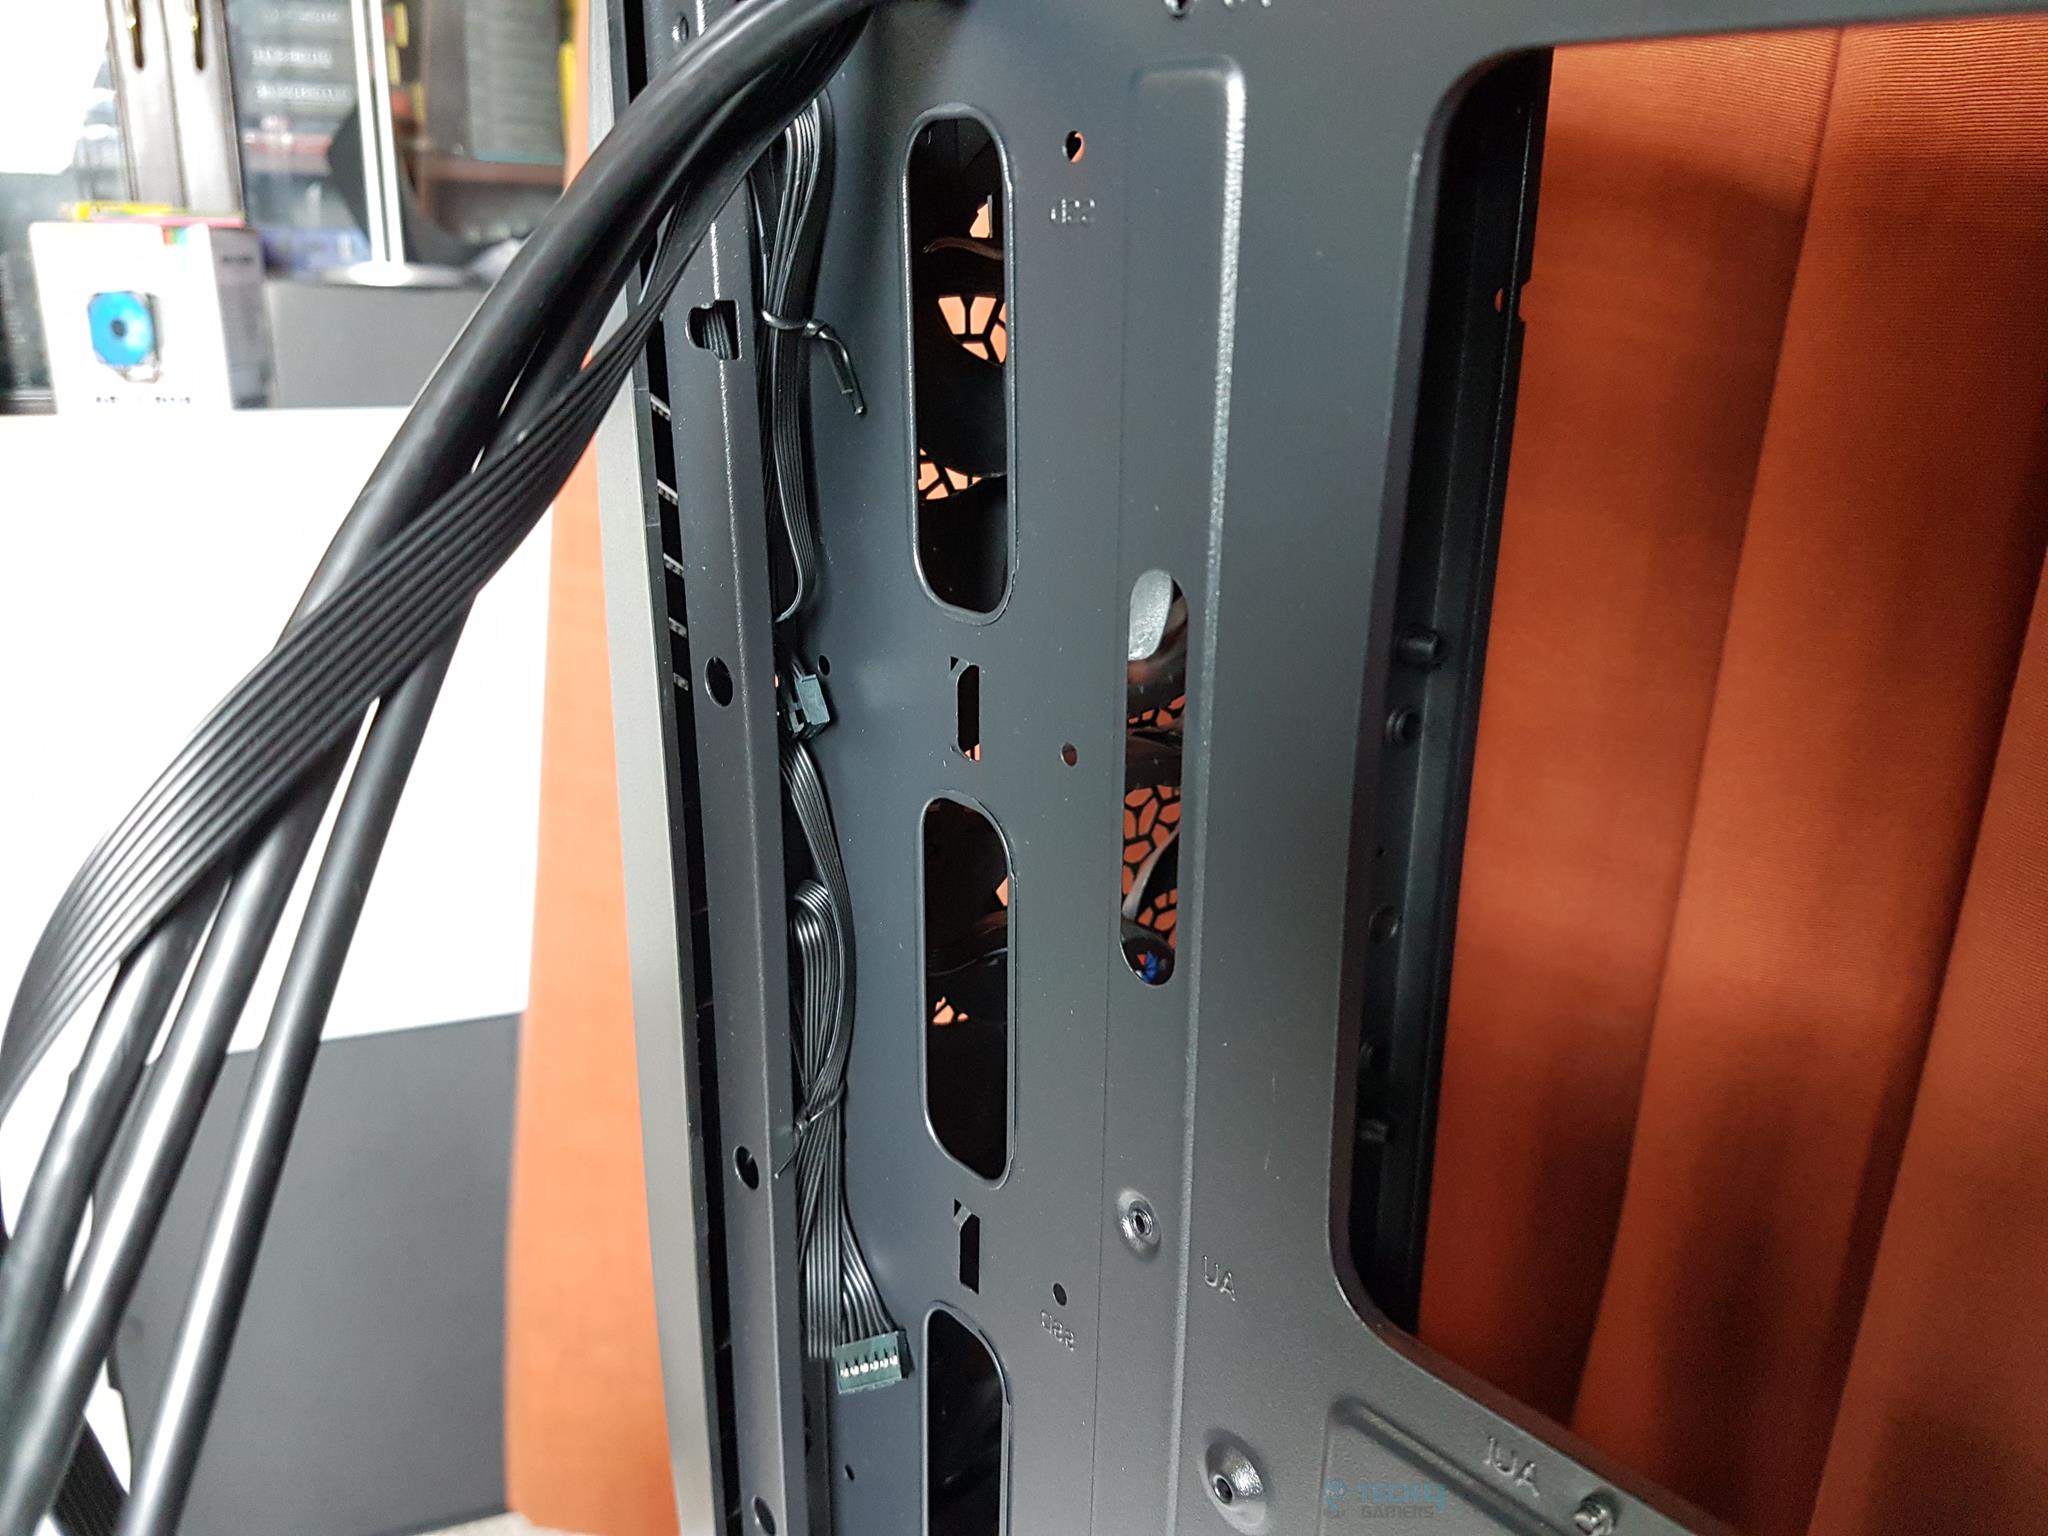
There are only two cutouts on the right-side frame to pass the fans’ cables through.

There is no dust filter on the inner side/backside of the vented portion on the front panel. In my opinion, a cut-to-size dust filter should have been placed here instead. Aerocool does not rule out the front dust filtration as a magnetic dust filter is provided which is placed on the backside of the front-mounted fans.
It is time to take a look at the main area where the components will be rested. The inner section is what makes the Aero One Eclipse a compact mid-tower.
I like the approach where they have increased the height of the chassis with compact approach on the length as it will allow the fans on the front to be closer to the main components and still provides enough room where the user can install up to 240mm AIO on the top without many hurdles.
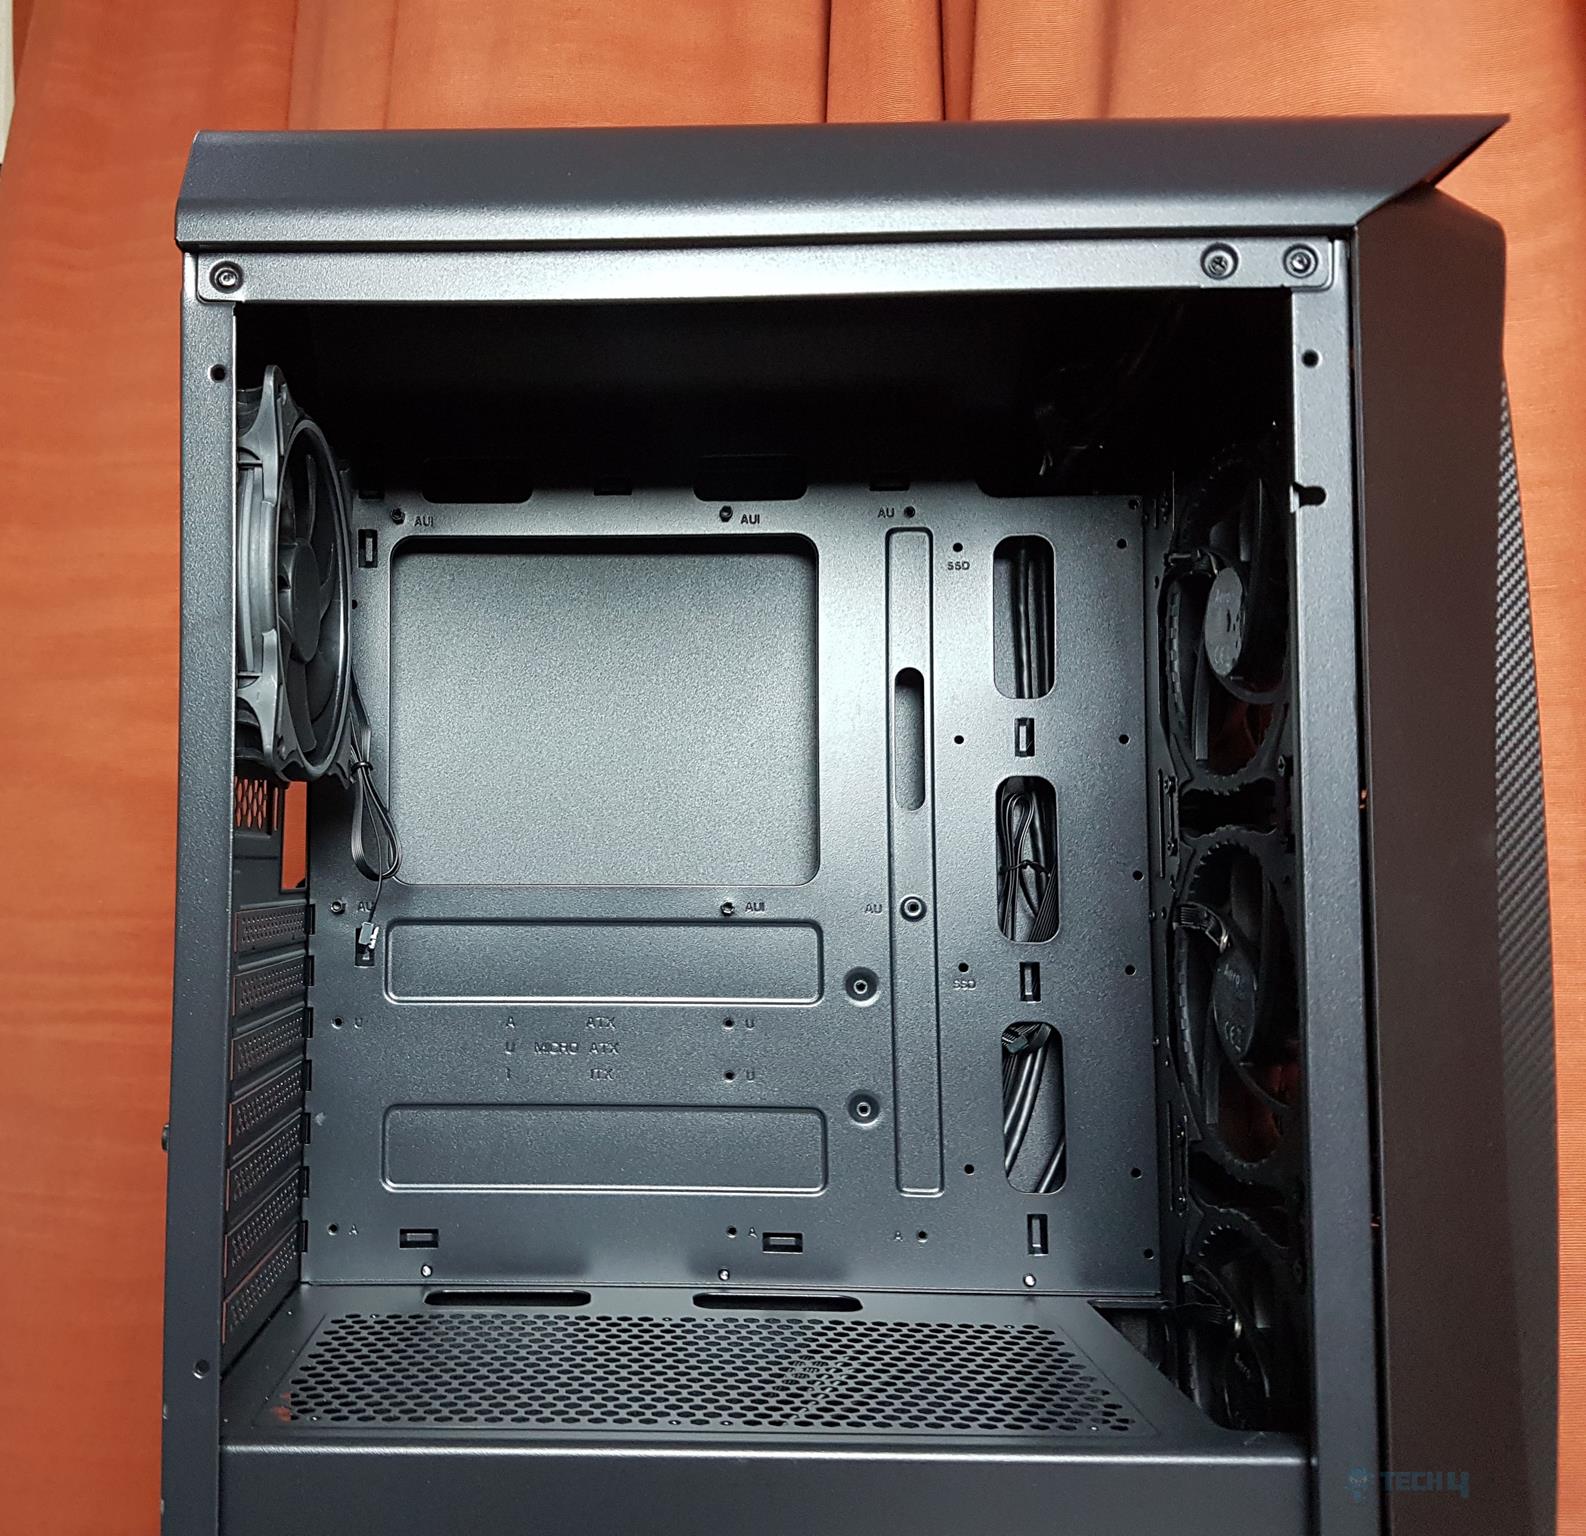
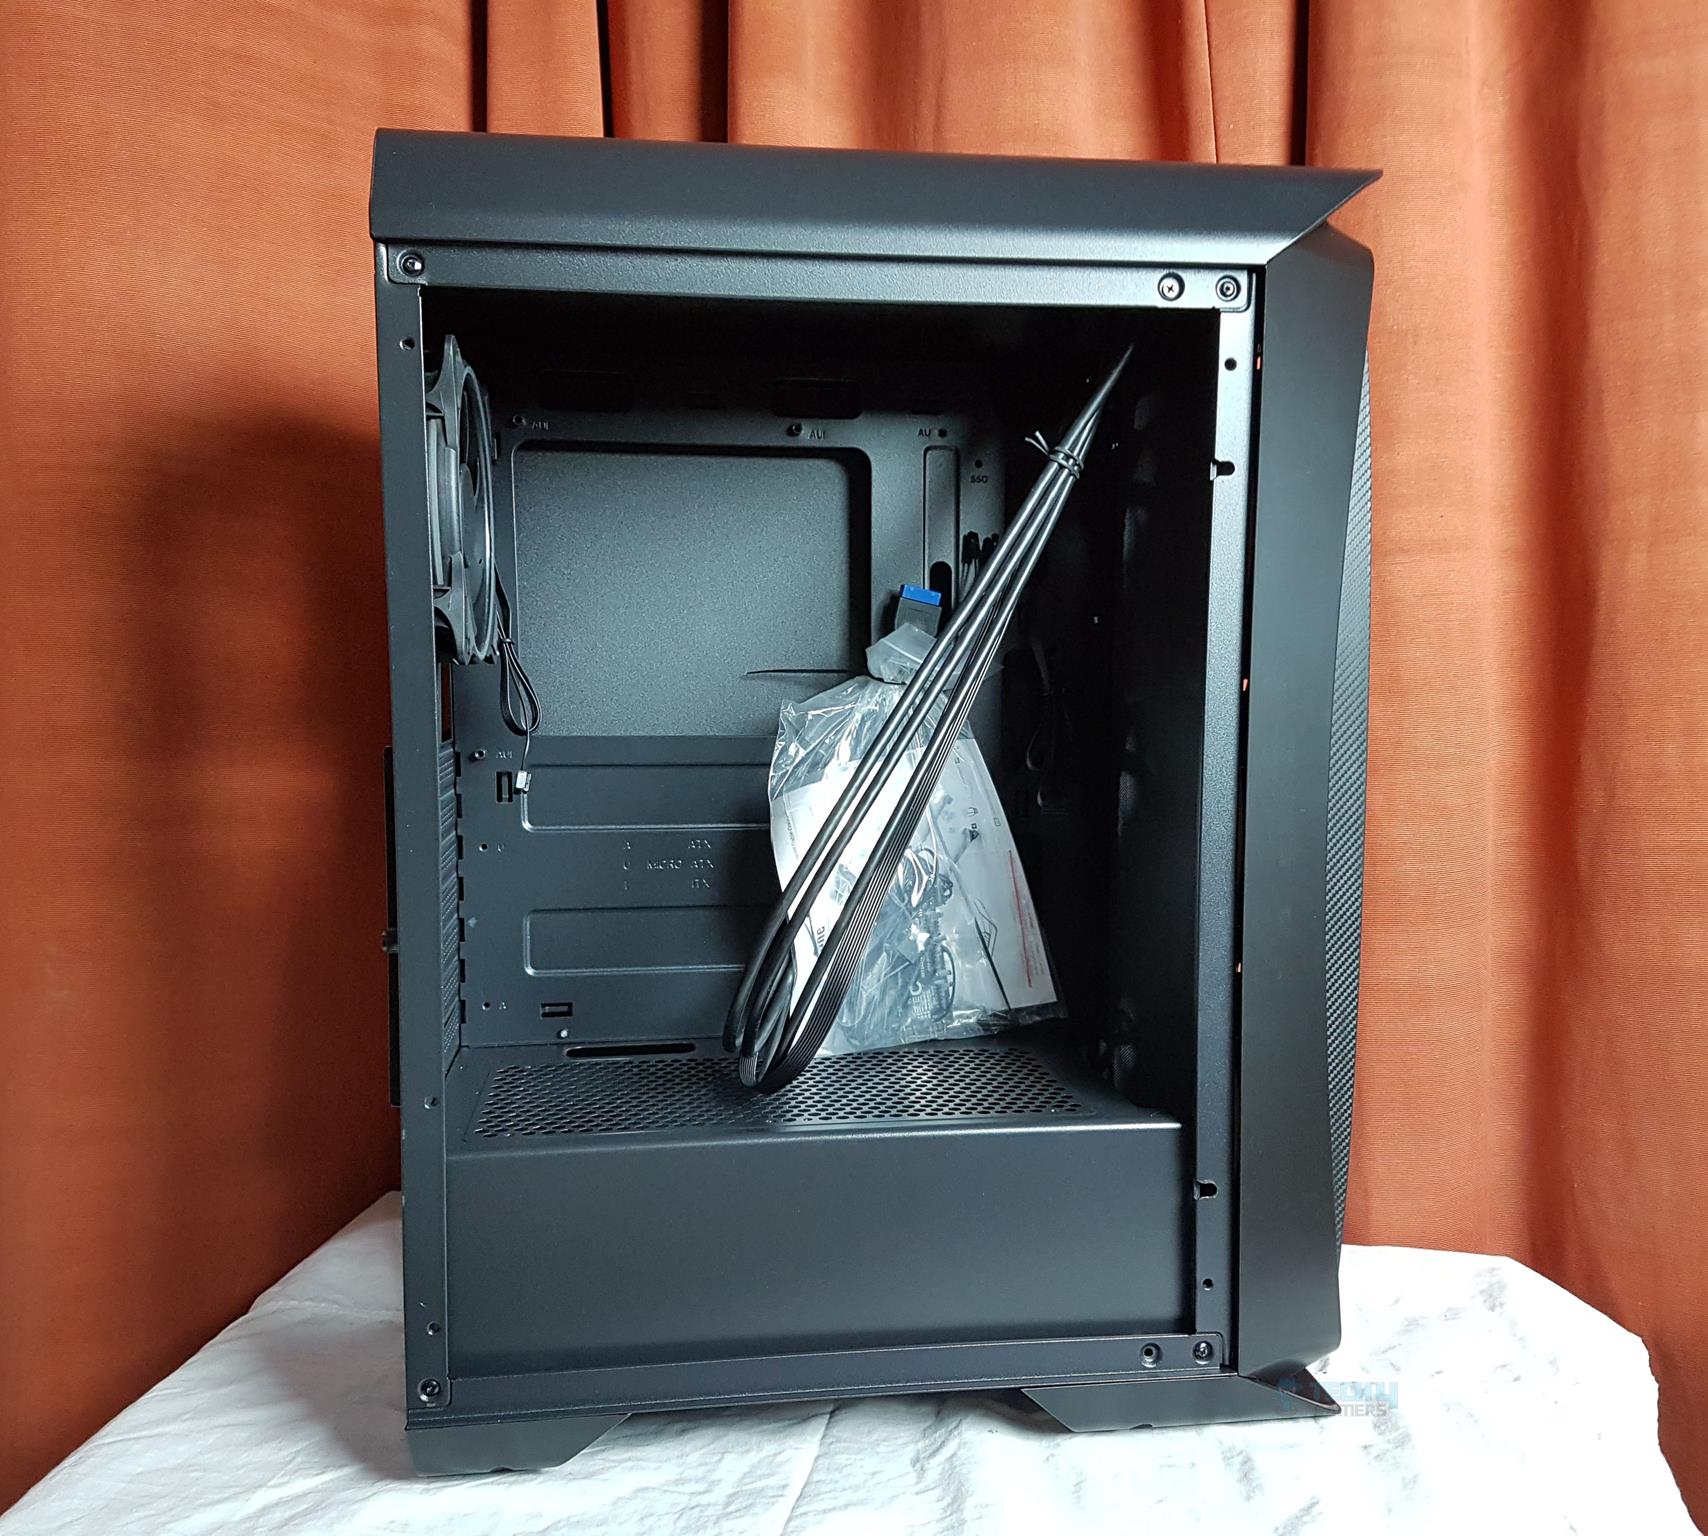
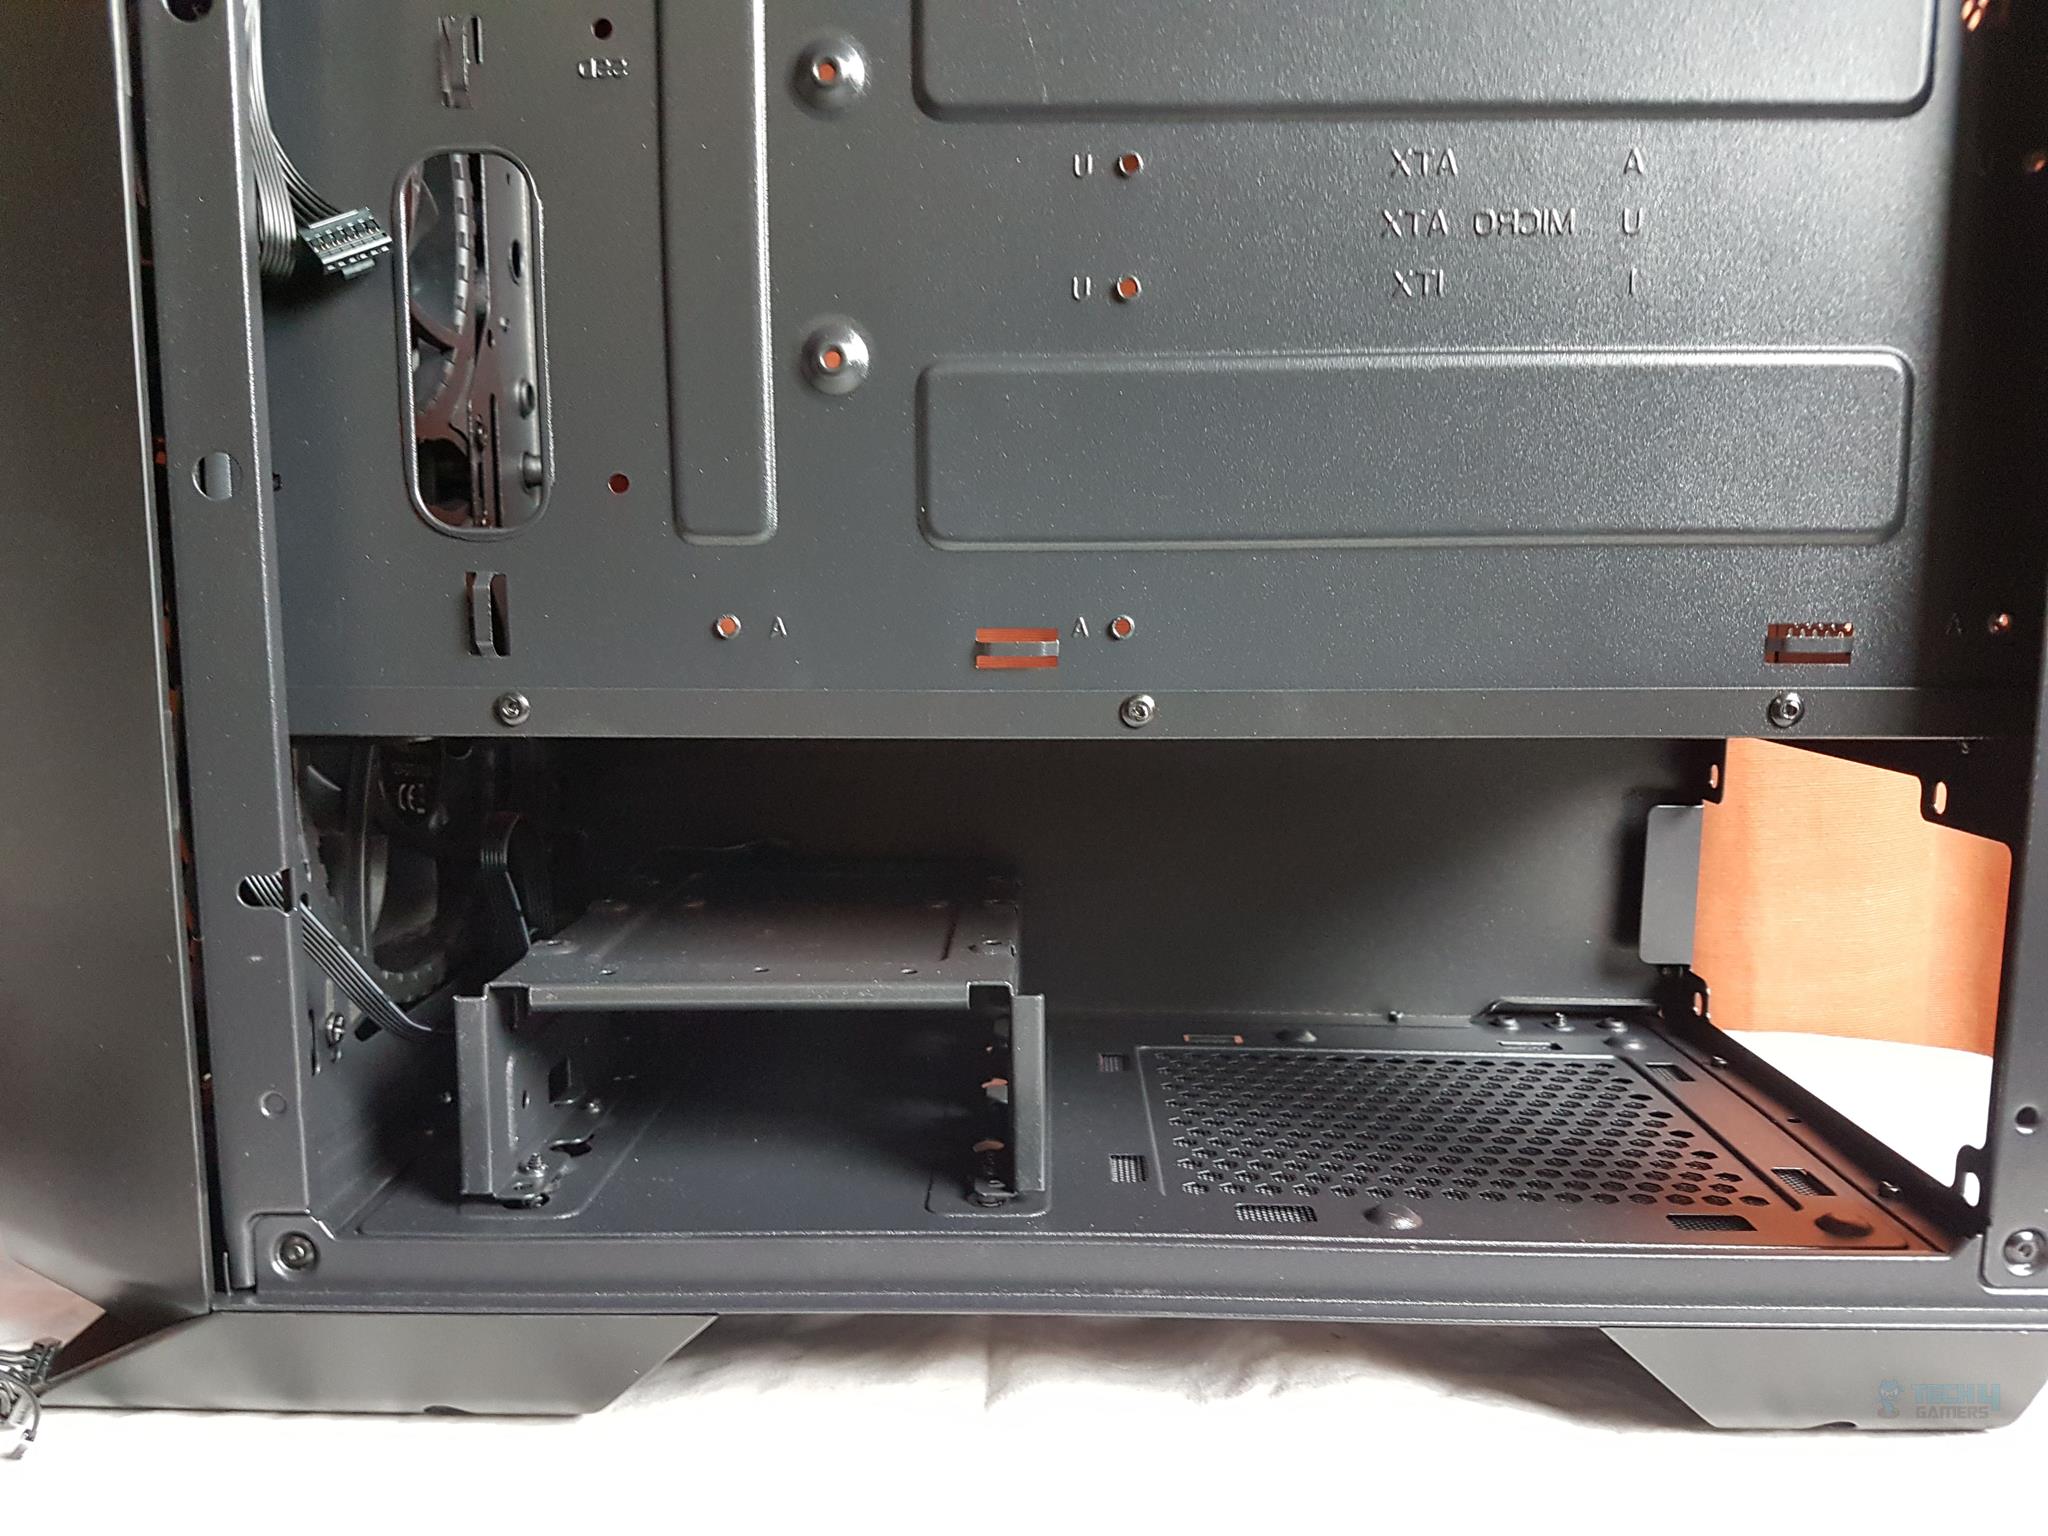
The motherboard tray has a bit of flux in it though nothing serious. Only 4x standoffs are pre-installed. The user is required to install the other standoffs using the wrench socket provided in the accessories. Each standoff location is A/U/I where A stands for standard ATX, U stands for micro-ATX, and I stands mini-ITX.
There is a large size cutout area in the tray for CPU cooler’s installation. We have three cutouts on the top. Sorry for the poor take of the picture as it does not clearly show these cutouts. Next, we have three cutouts in the vertical layout on the right side of the tray. None of the cutouts have rubber grommets.
There is an approximate gap of 68mm from the top of the chassis to the top of the motherboard which allows for easy installation of the AIO on the top. The distance from the front-mounted fans to the three cutouts is roughly 33mm. Up to two 2.5” drives can be installed on the motherboard tray on the far right side where the mounting holes are labeled SSD. The user can’t install the SSD in the mid-section as only two holes would be available there.
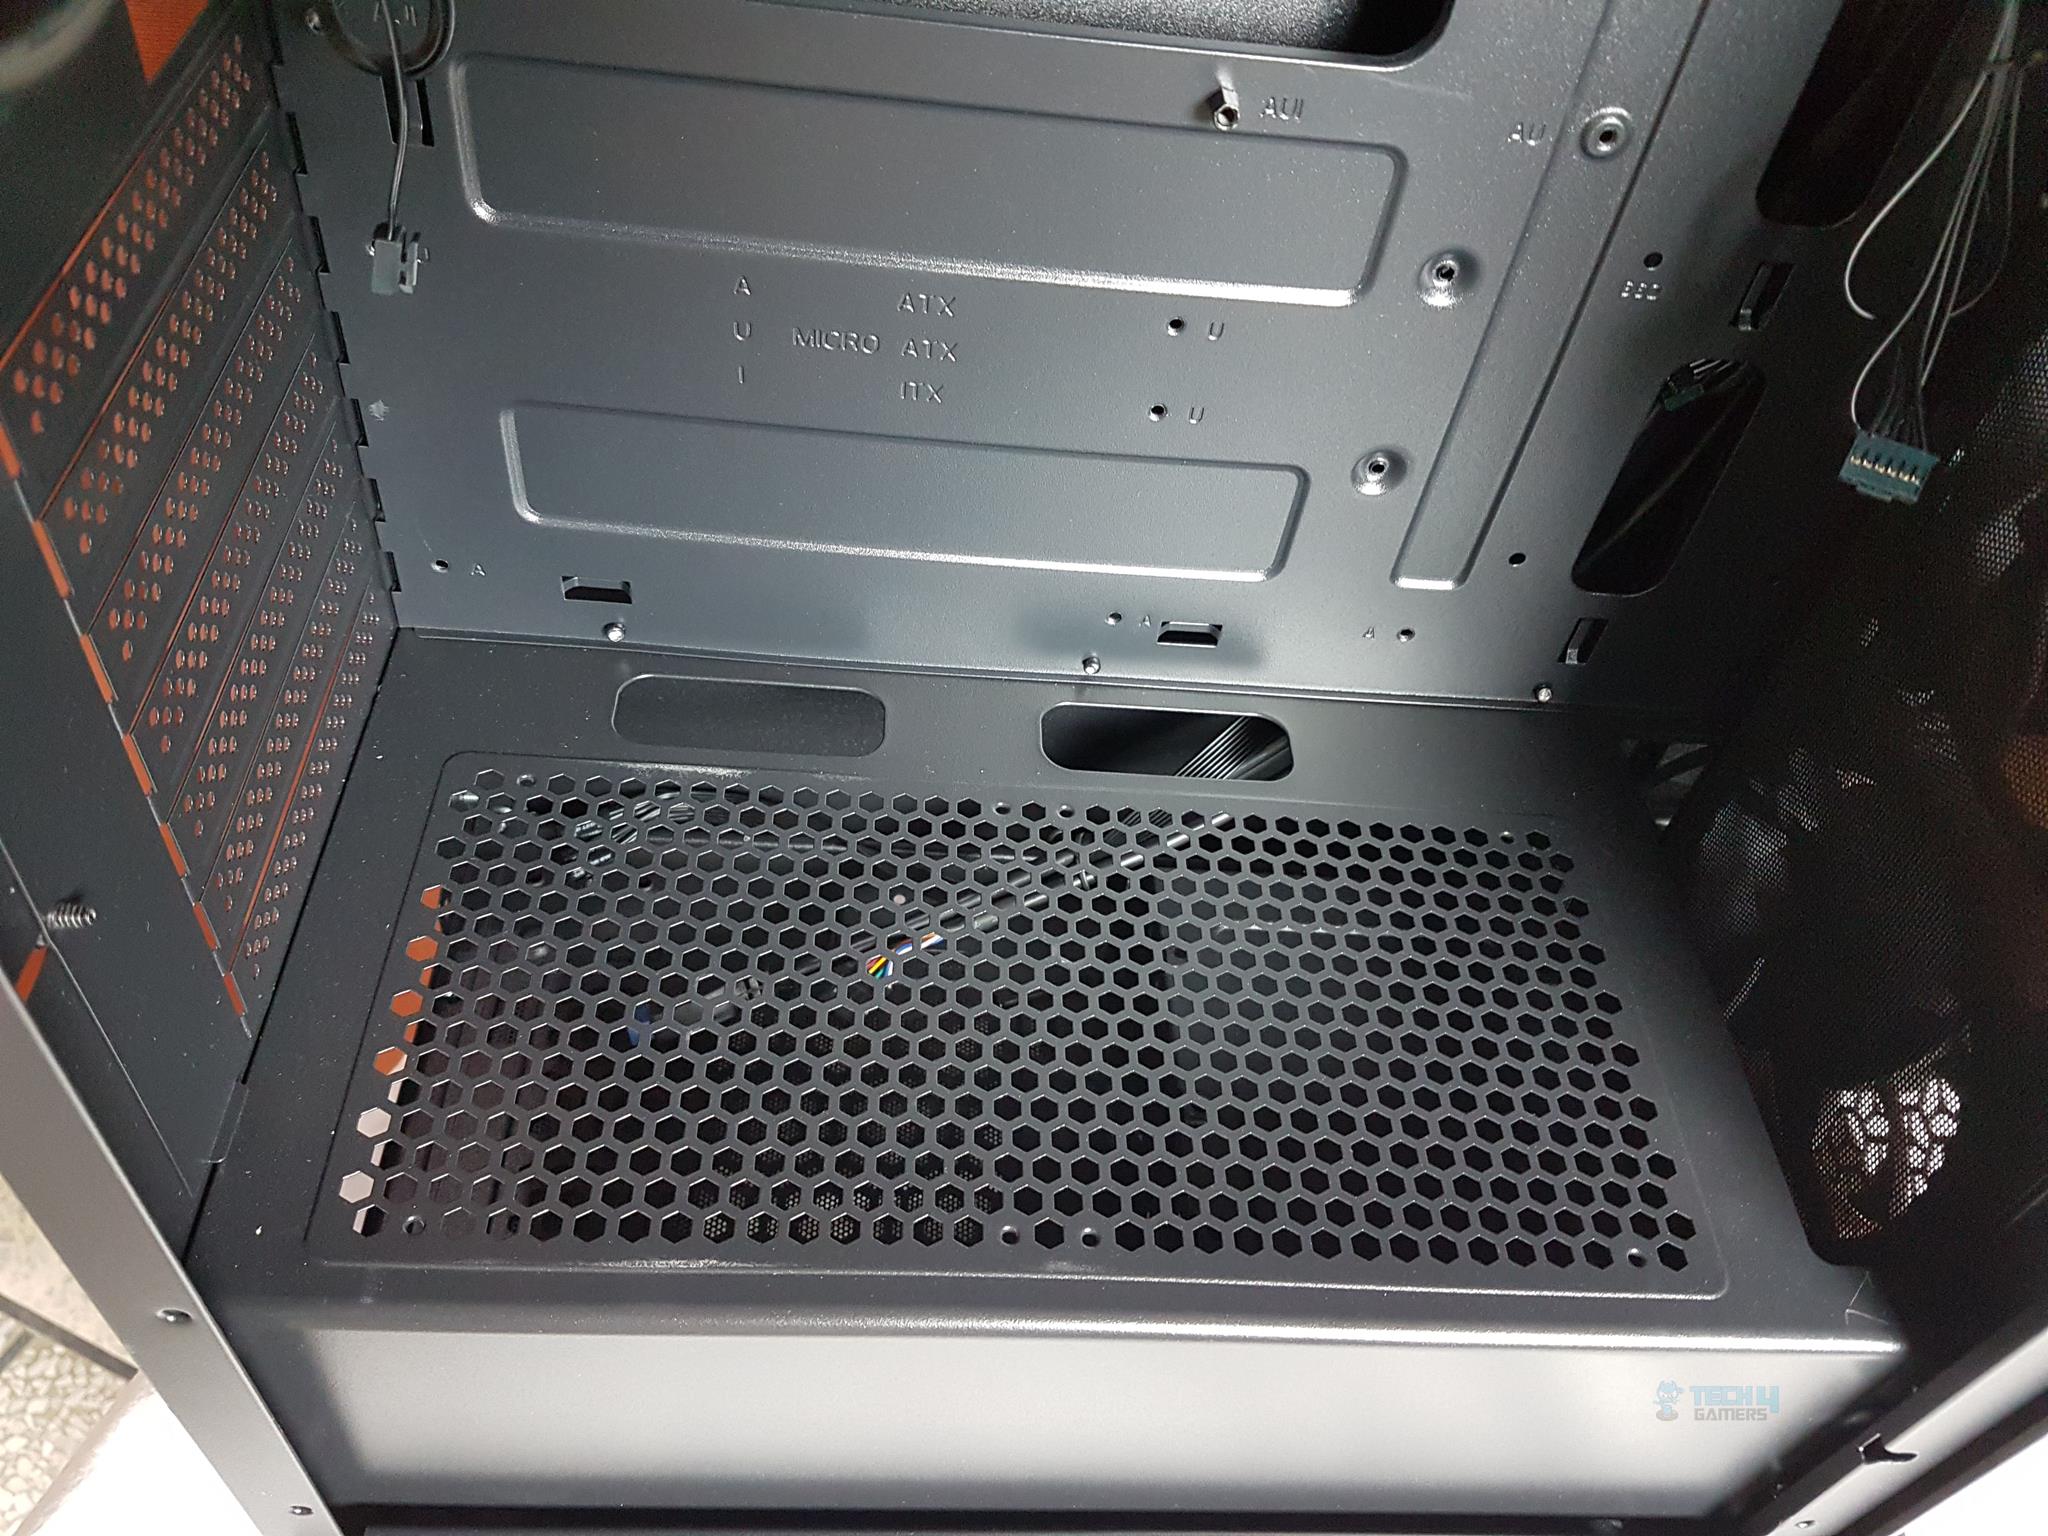
The PSU shroud is vented. Looking closely, one can observe the 120mm fans mounts. The user can install up to 2x 120mm fans to draw air in from the bottom which would be helpful for the graphics card. There are two cutouts on the far side of the shroud in front of the motherboard tray.
These are there to route the cables through for connectivity on the bottom area of the motherboard. These cutouts don’t have rubber grommets.
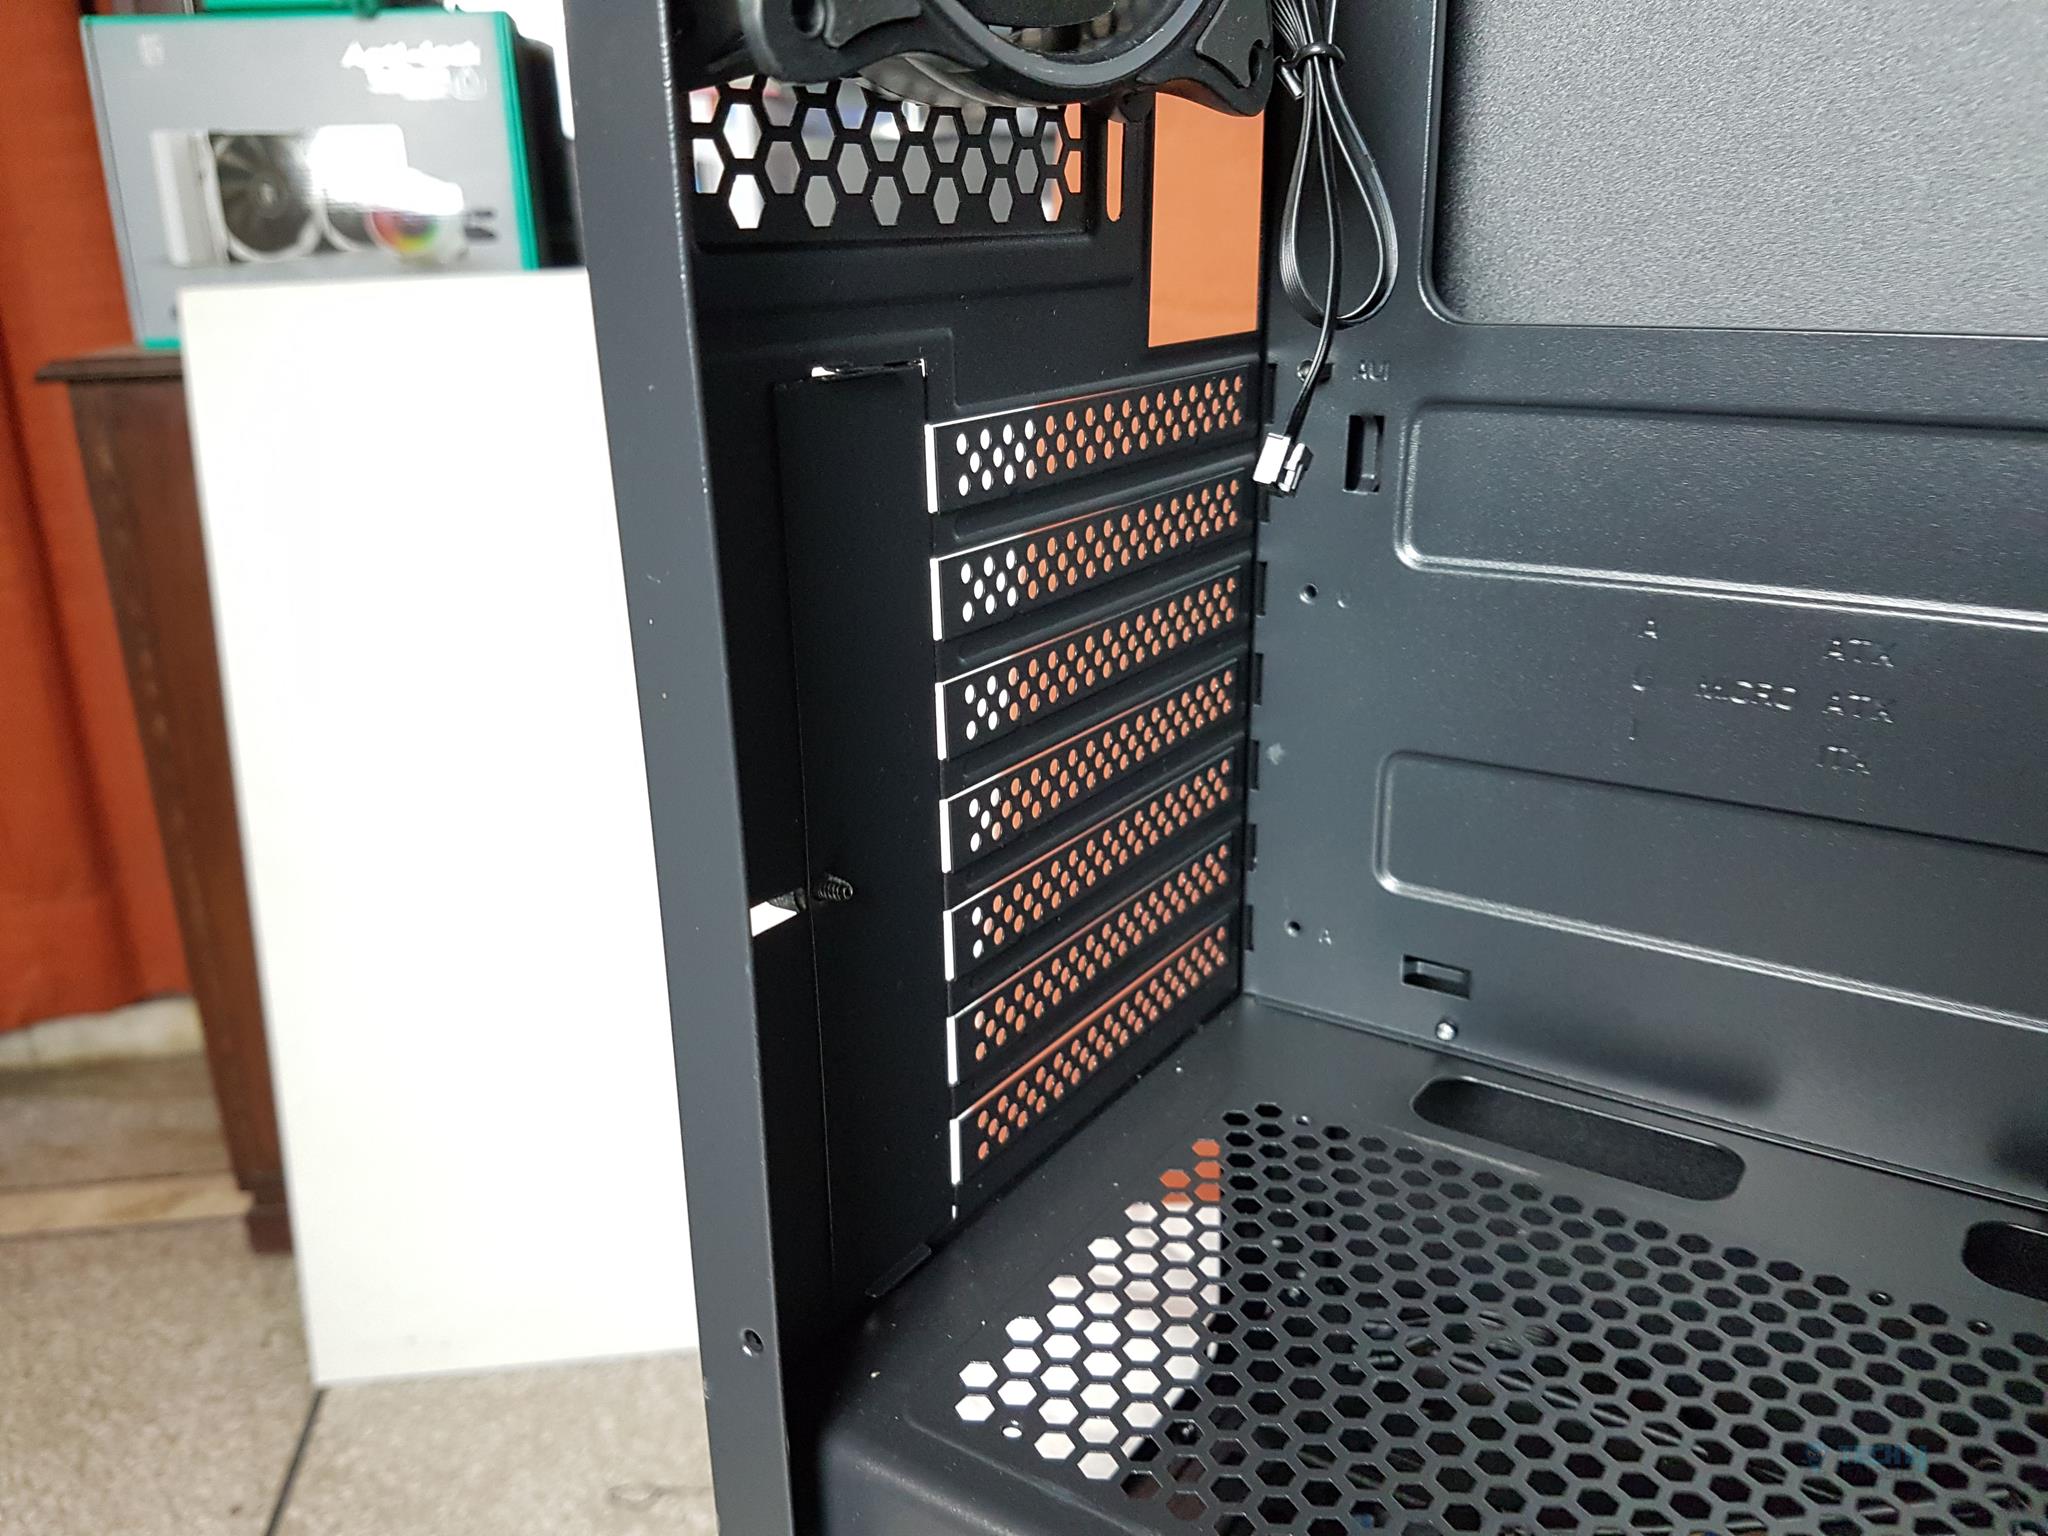
The rear side shows the pushed-out design PCIe slot covers which are in the line with the chassis frame. At least two of these should have been re-usable covers.
The front side has a magnetic dust filter. The gap from the front fans to the shroud is approximately 30mm. If you are installing a 360mm radiator on the front then the permissible thickness without fans would be 29-30mm.
The 3x Eclipse RGB fans are installed on the front side of the mounting rail. I have removed the magnetic dust filter to show the backside of the fans and the rail.
There is enough room up top for the installation of the 240mm AIO.
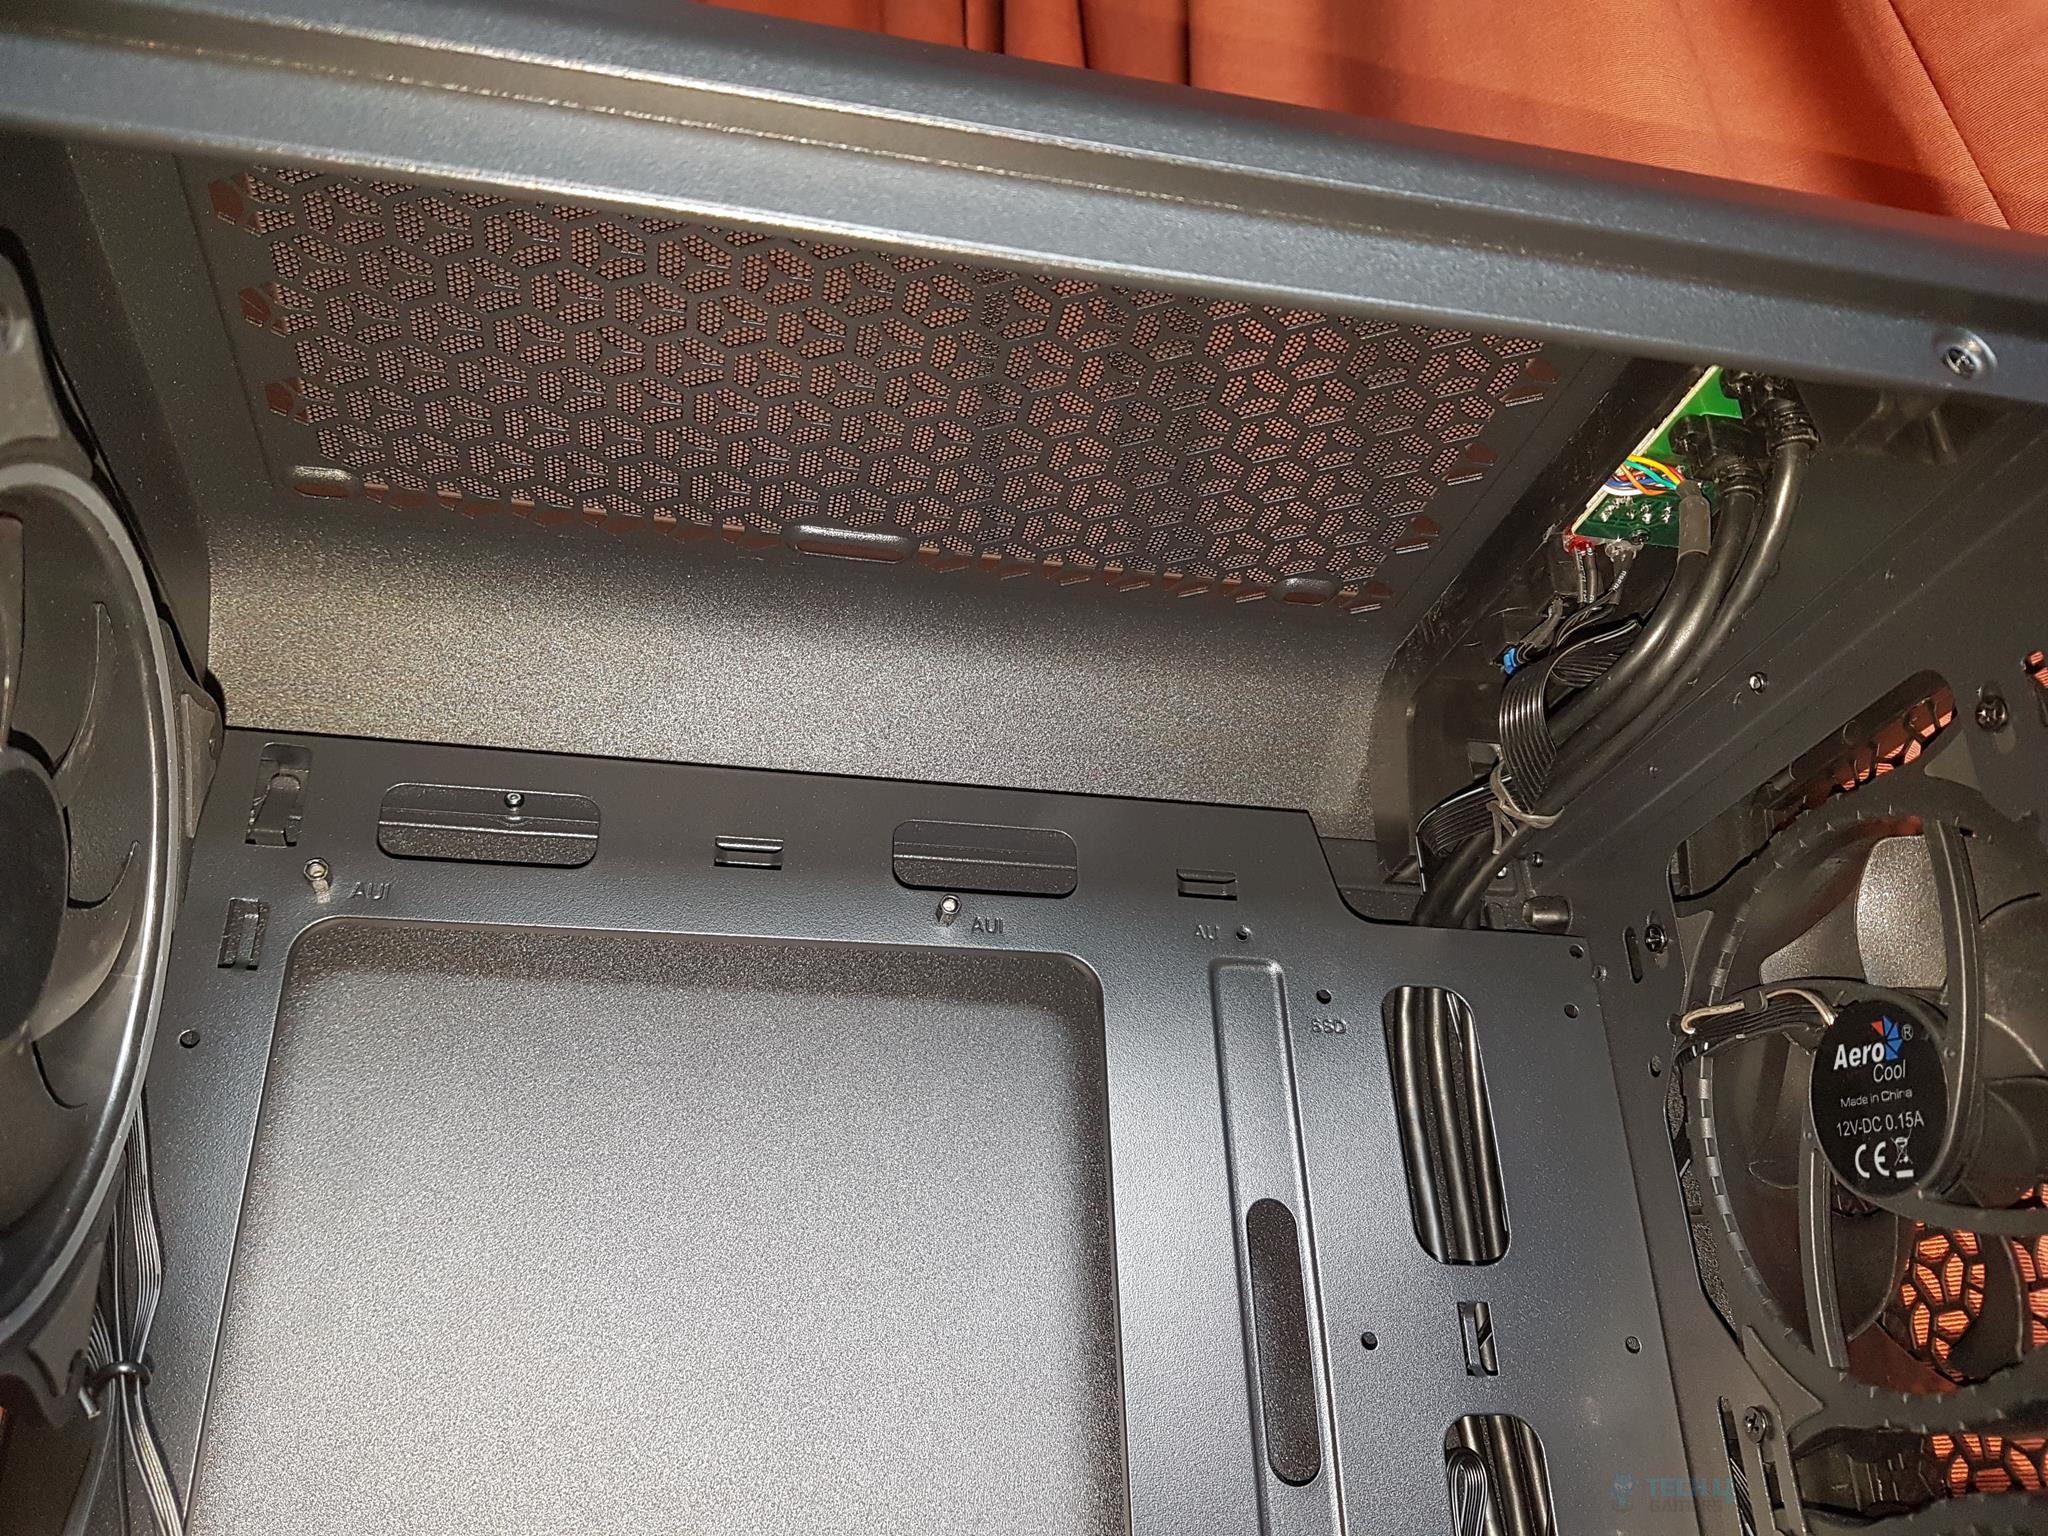
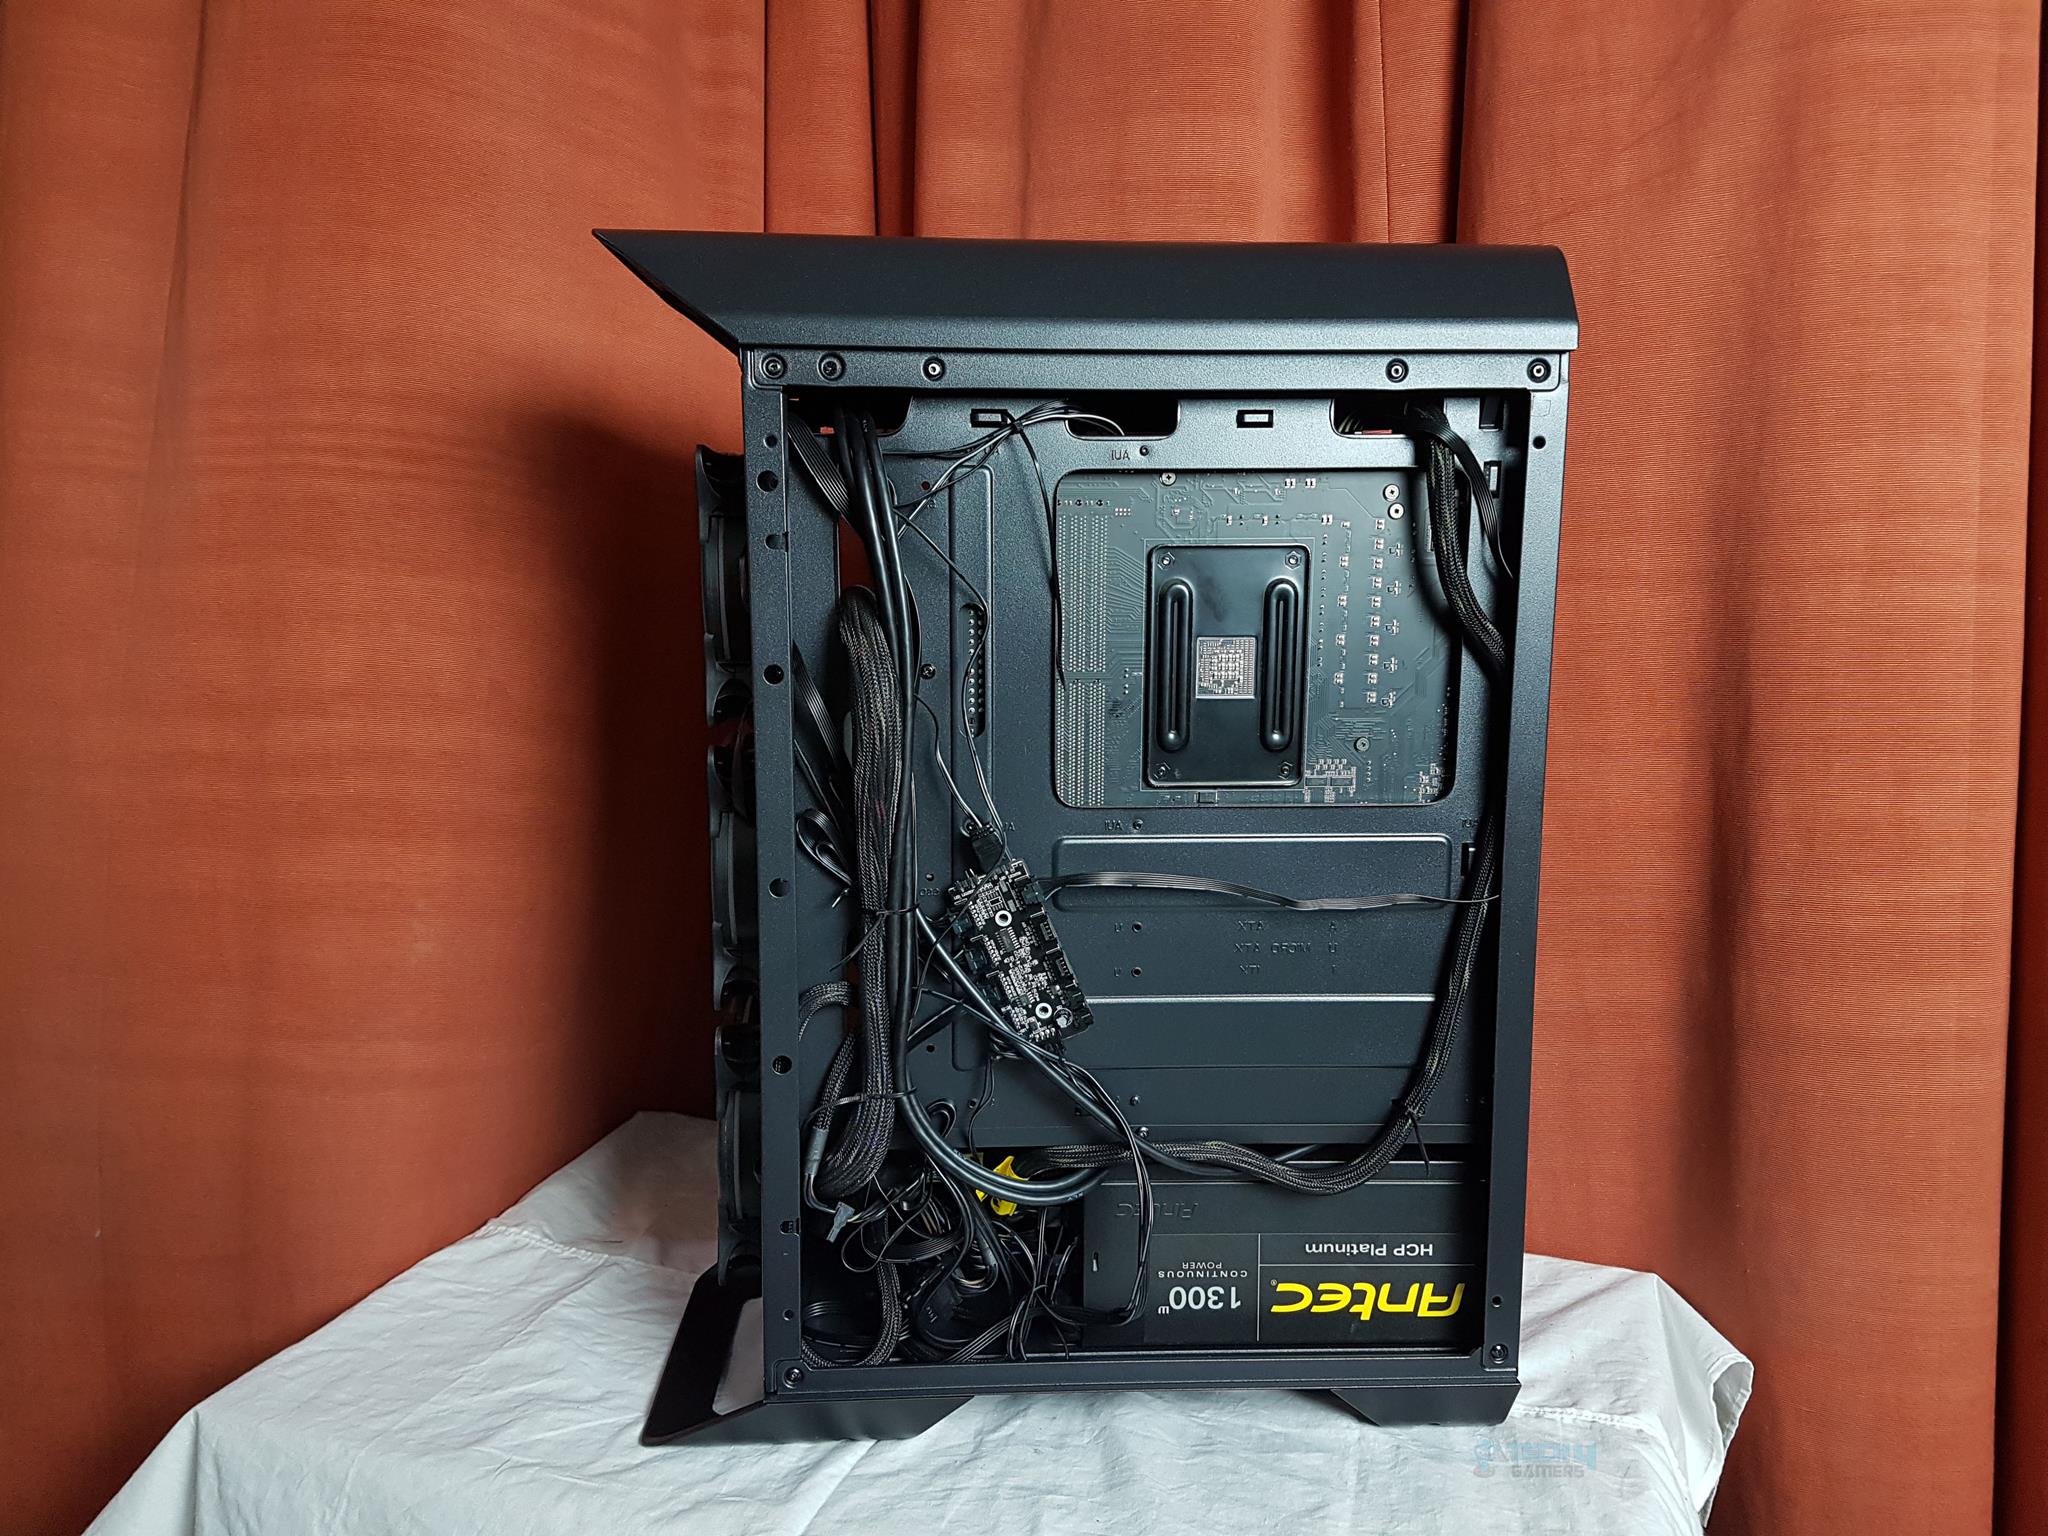
It is time to take a peek at the backside of the chassis. We have a total of 9 cable tie points. The dual-chamber design is obvious here. The PSU shroud is making the dual-chamber isolating the storage drive cage and PSU from the rest of the build. I have routed the top I/O panel’s cables from the top left most cutout towards the backside.
The Aero One Eclipse has roughly 23mm of cable management space which is quite good.
There is roughly 185mm of space on the right side of the HDD cage. If the user is installing a 160mm lengthen PSU, this would leave roughly 25mm for the cables. A non-modular PSU would be a challenge particularly if the user is installing two 3.5” drives in the HDD cage.
The HDD cage does not have any caddy which is disappointing. Also, the user can only install a 1x 3.5” driver inside the caddy. The second has to be installed on the top of the HDD cage. There is another observation with regard to installing two drives in and on the HDD cage.
If the user has already installed a drive inside the cage then it would need to be taken out so that the second drive can be installed on the top as the mounting screws have to be routed from the inside of the cage.
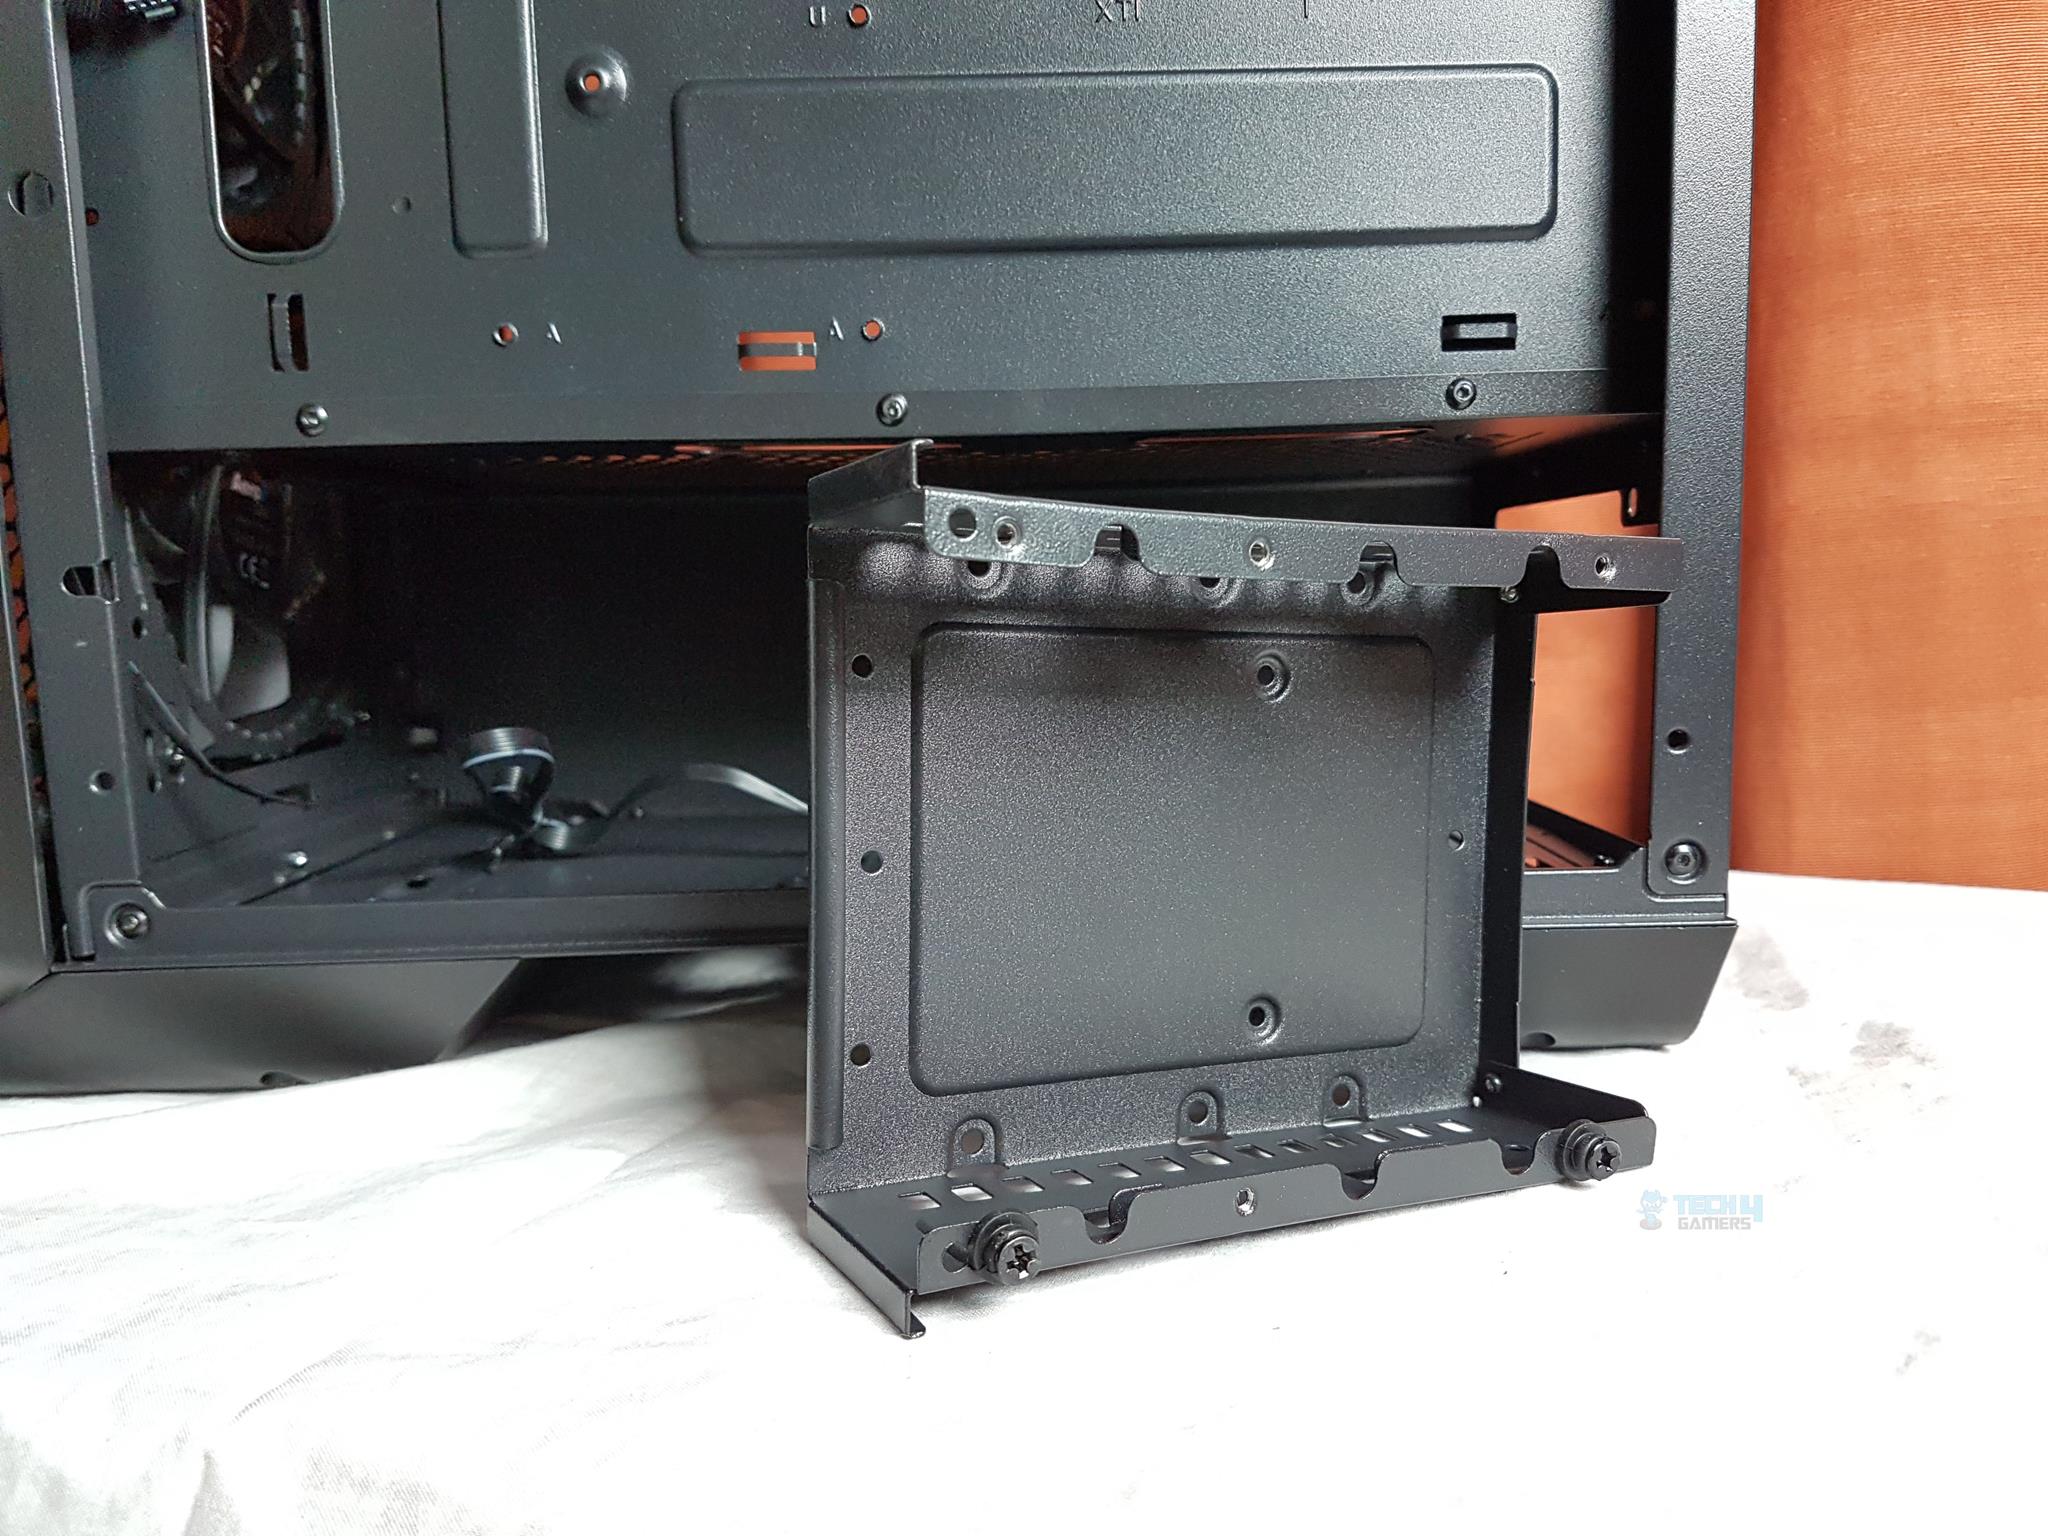
The HDD cage is made of steel and finished in the black color. It has a vented portion on the left and right sides.
There is roughly 325mm or so space available to the user by removing the HDD cage. The bottom mounts on the HDD cage location have rubber tops which help in reducing the vibrational noise. There is no rubber padding on the tabs where the PSU is placed.
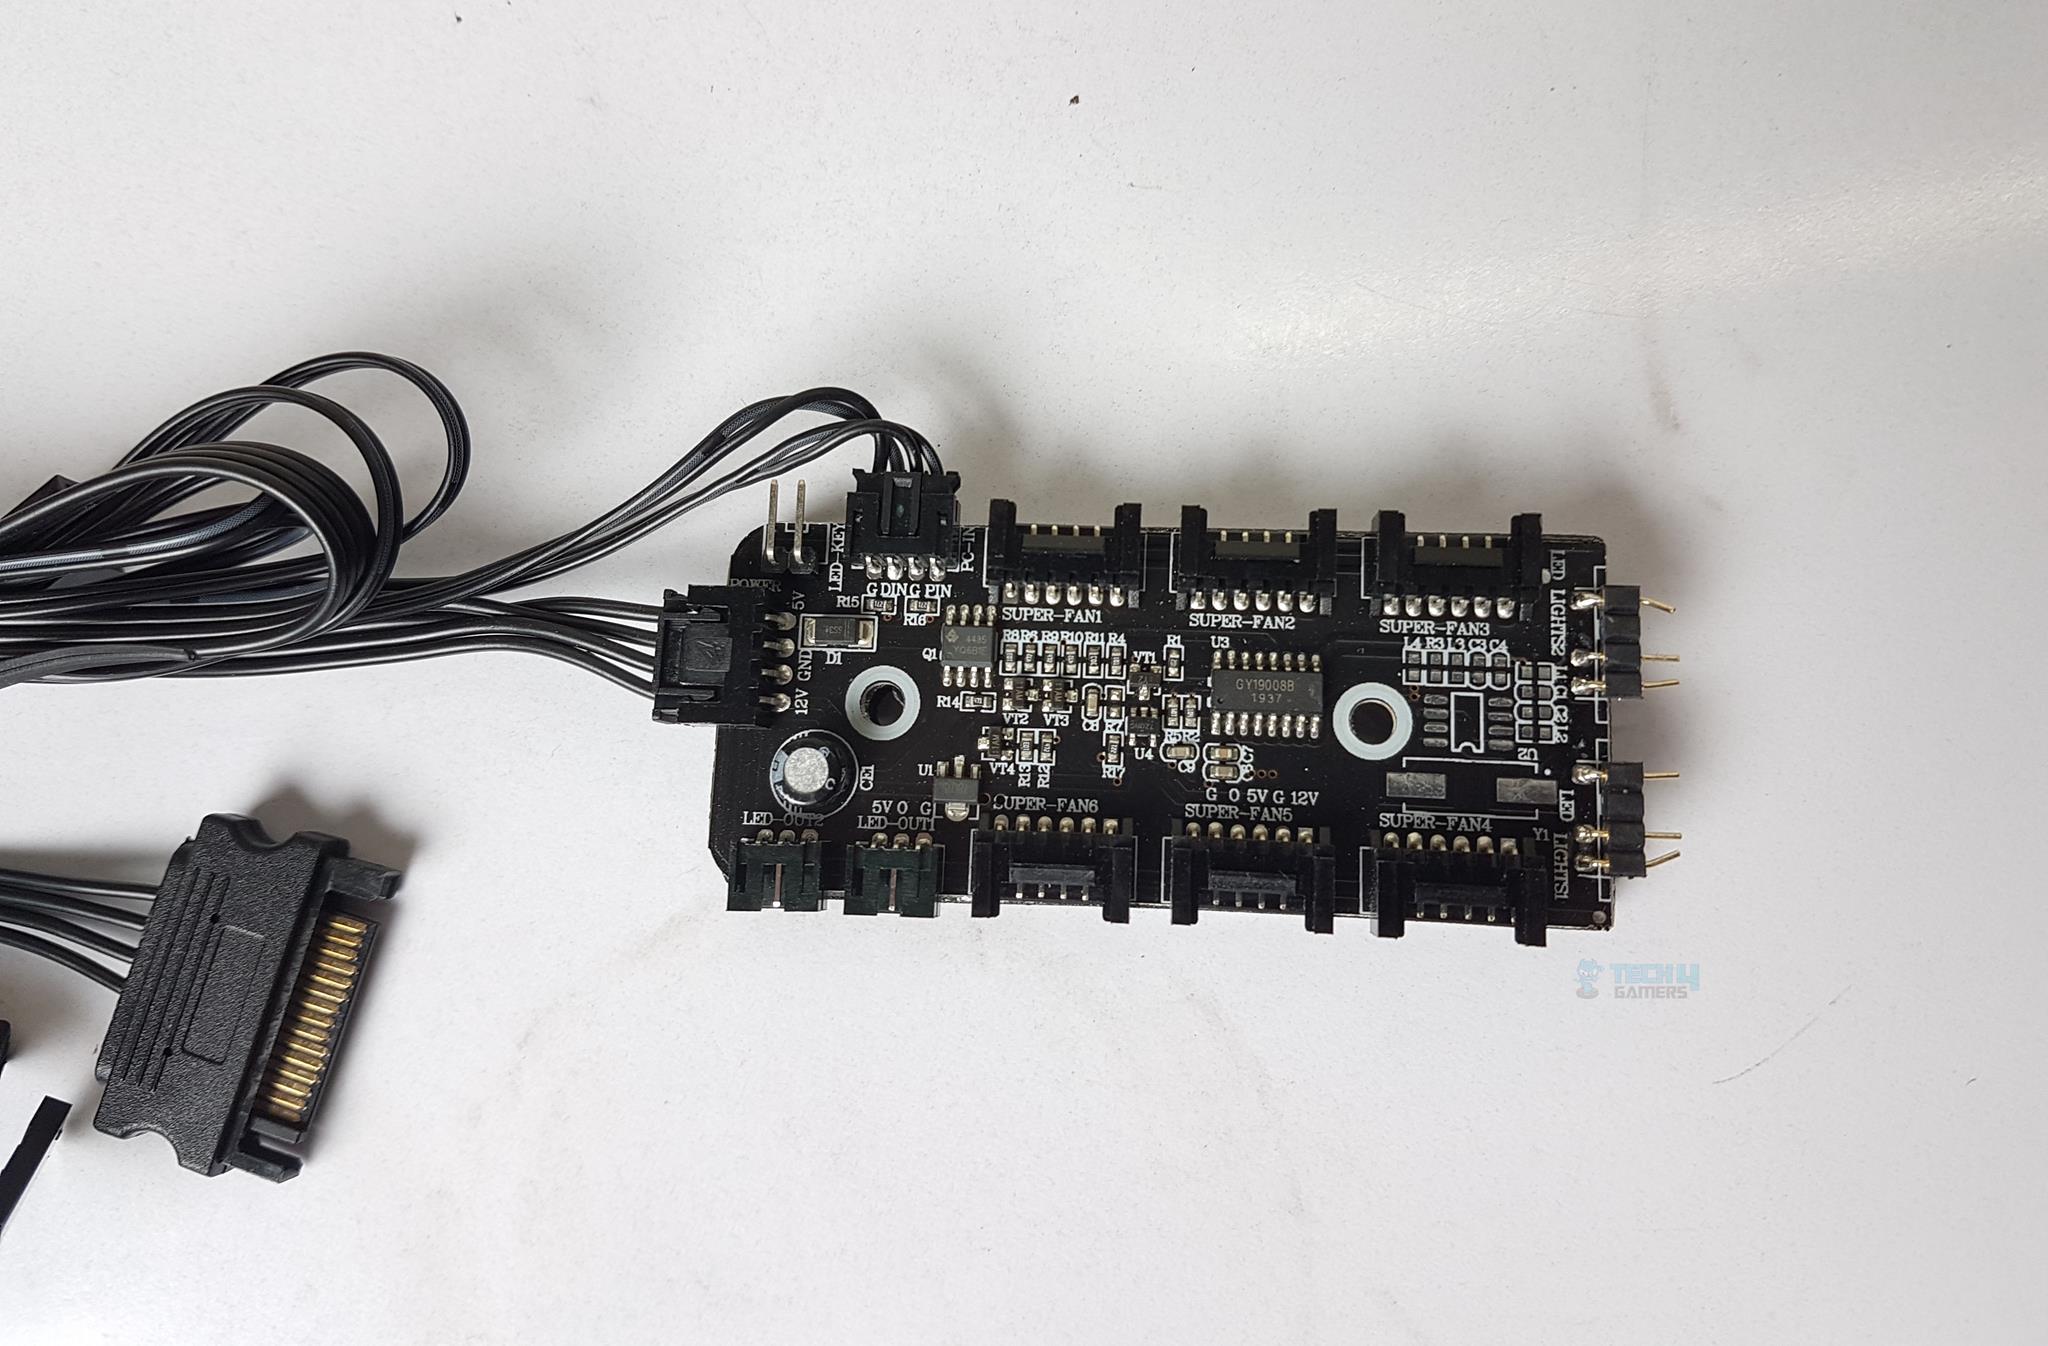
The Aerocool has provided a Hub to control the lighting of the pre-installed Eclipse fans. These fans are not using the standard RGB/ARGB lighting connector. Each fan has a 6-pin connector that can only be used on the RGB Fan Hub provided in the accessories.
Personally, I am not in favor of the proprietary connectors. The reason is if the provided hub malfunctions, the user would lose total control over the fans.
There are 3x 6-pin headers on each side of the fan RGB hub. These are where the Eclipse RGB fans are to be connected to. These headers are numbered from SUPER FAN 1 to SUPER FAN 6. I am not sure if the numbering has to do something with the lighting effects.
On the far end, we can see two headers with 3-pins on each, labeled as LIGHTS1 and LIGHTS2. These headers allow the user to connect ARGB (5V) lighting devices to the hub. Better yet, the user can also connect up to two standard RGB lighting devices to the two dedicated headers as well. The twisted pins on the addressable RGB headers raise the question on the QC and manufacturing run.
The leftmost side has a power header with SATA cable connected to it. There is a two-pin header where the user can connect the Reset button’s cable of the front I/O Panel. Going this route will allow the user to switch the RGB lighting using the Reset button though this would take off the reset functionality.
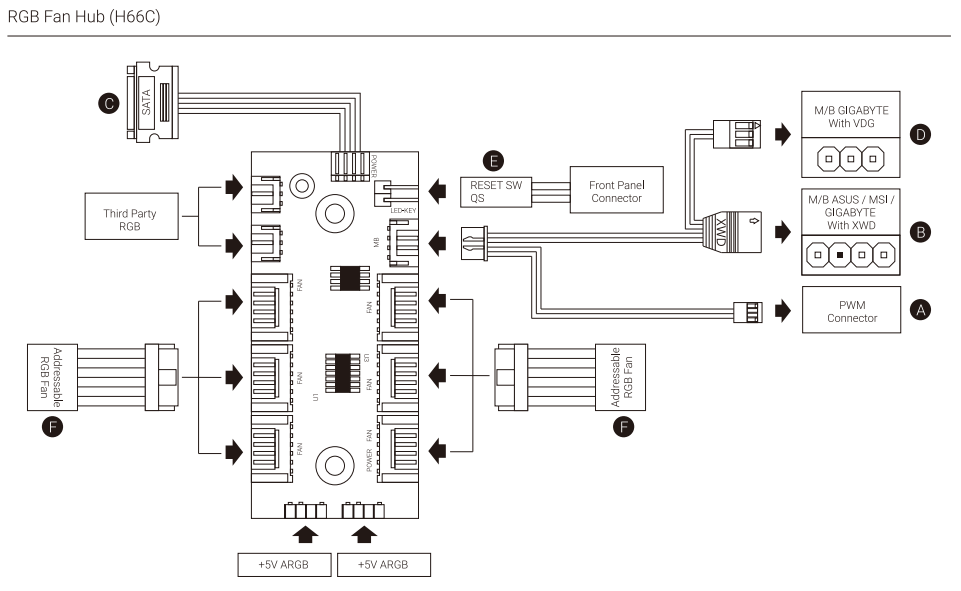
The above diagram layouts the RGB Hub and its connectivity options. The hub can be connected to the addressable lighting header of the respective motherboard. They have listed ASUS, MSI, and GIGABYTE only in the diagram as the compatible lighting sources.
There is a 4-pin PWM connector as well. It has only two wires connected to it. I was unable to control the speed of the fans as the connected PWM connector was not providing an RPM signal to the motherboard.
The user can press the Reset button for 3 seconds to switch the control from and to the RGB hub and the motherboard. Pressing the button for 6 seconds will turn off the lights. Pressing the button once afterward would turn the lights on.
Aerocool Computer Case Test build and Experience
Following components were used for the test build:
- AMD Ryzen 7 3600X
- ID-Cooling SE 234-ARGB
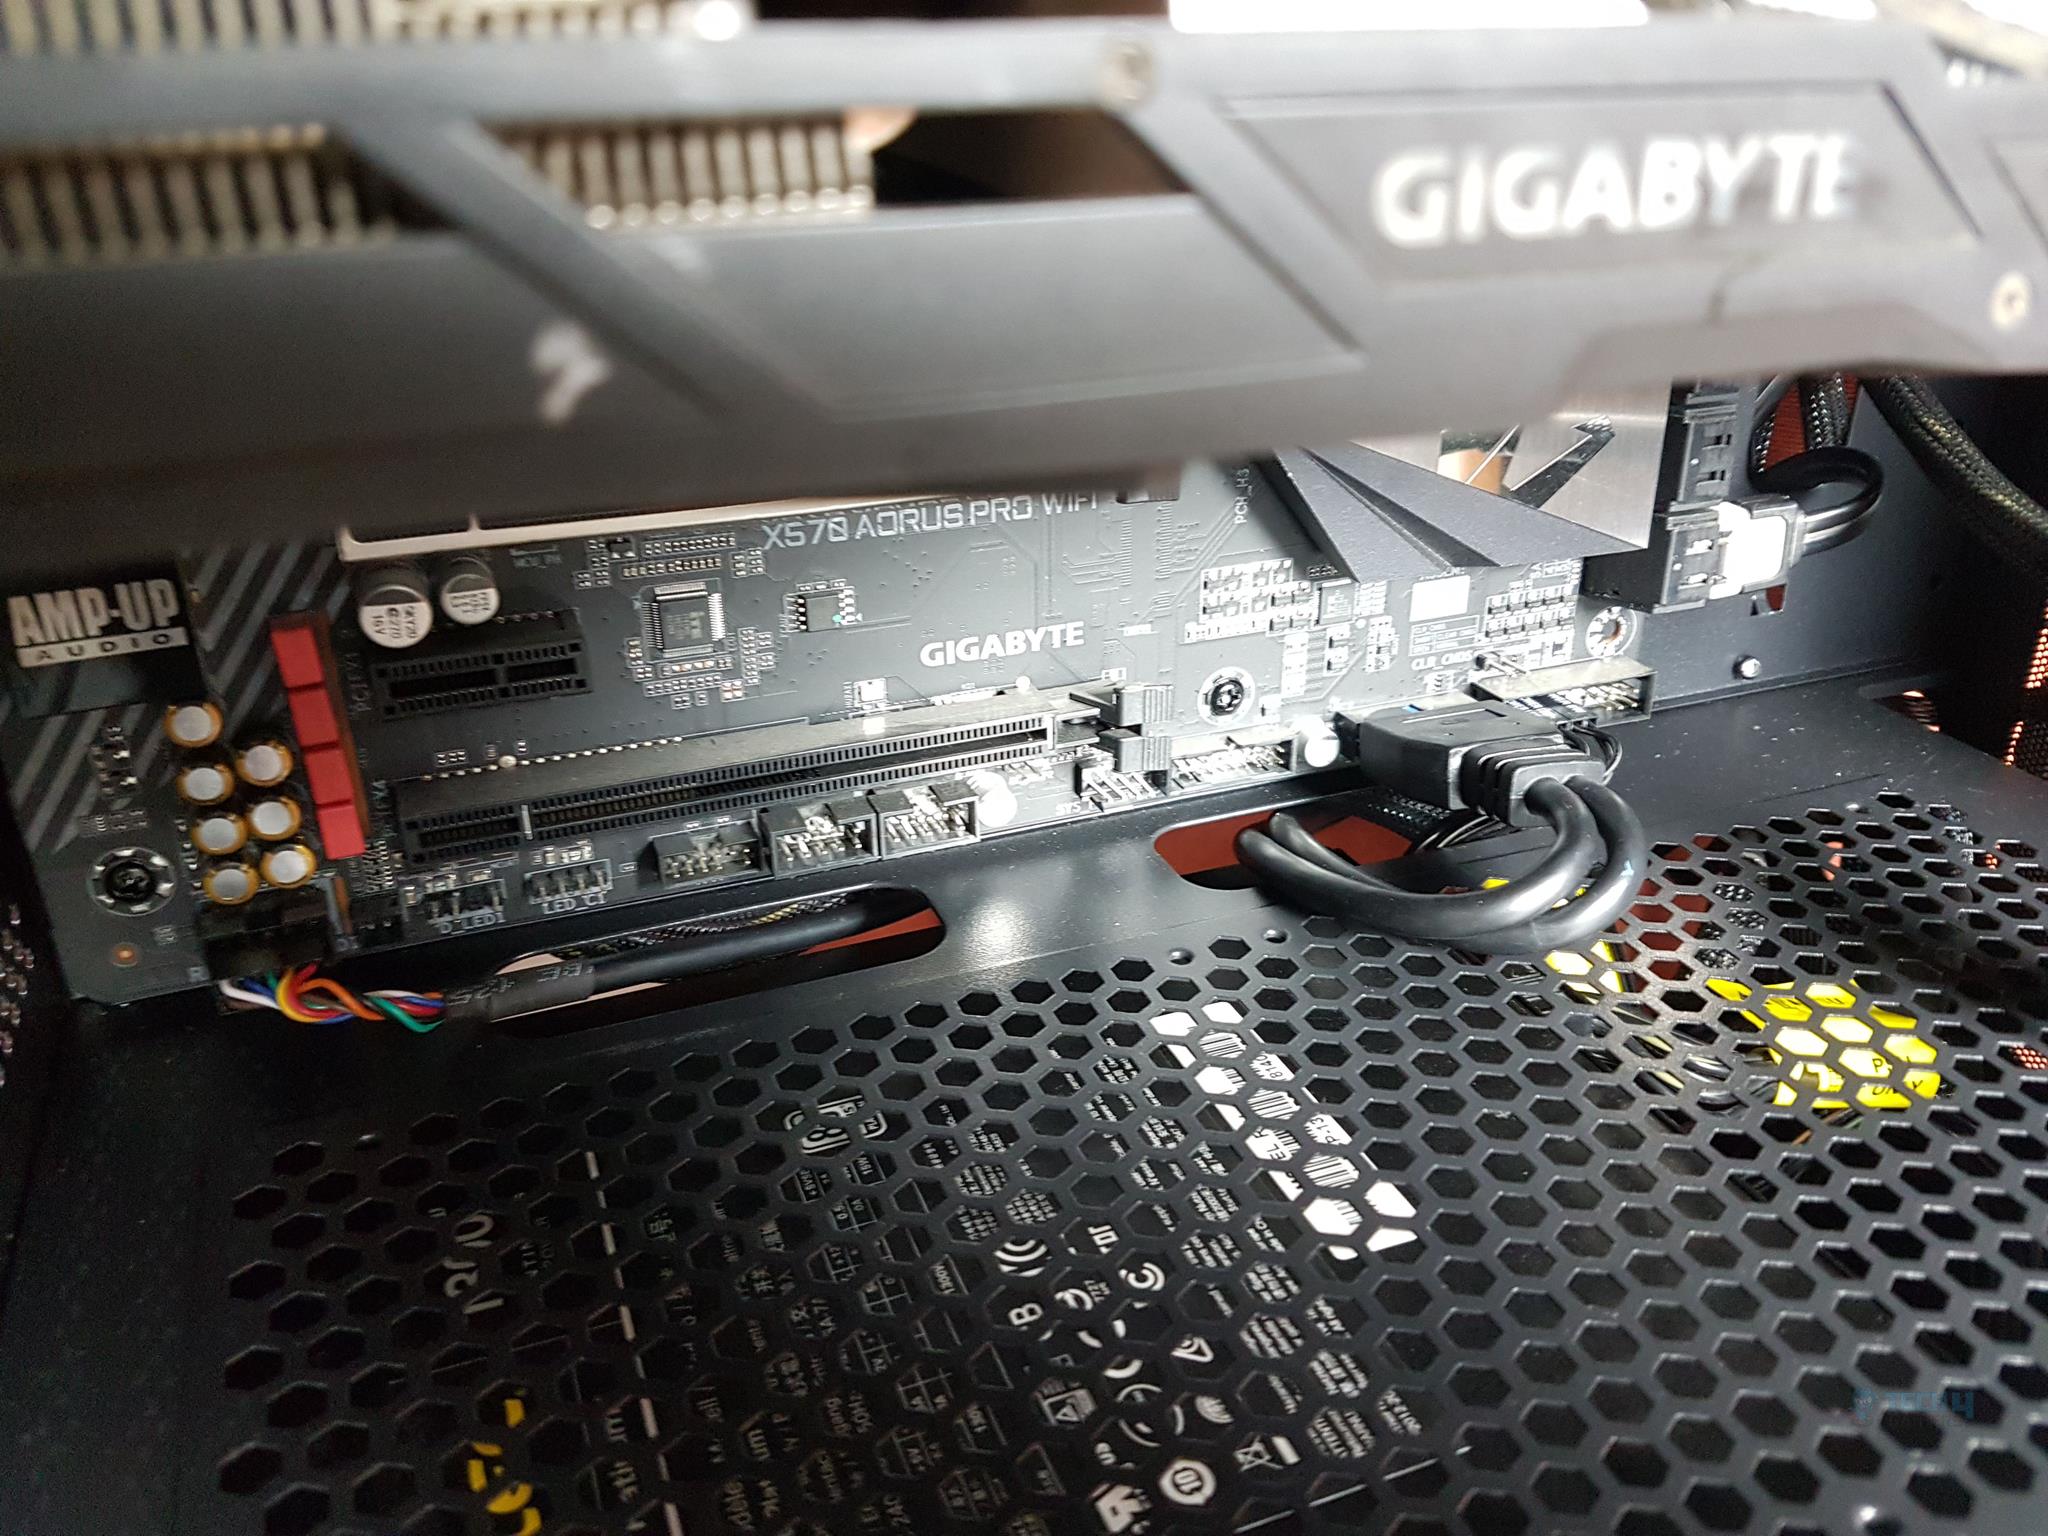
- X570 AORUS Pro WIFI
- Corsair Vengeance Pro 2x8GB DDR4 @ 3200MHz CL16
- GIGABYTE GeForce GTX 1060 6G Gaming G1
- HyperX 120GB SSD
- Antec HCP1300 PSU
I started with installing the standoffs and it was found that 1x standoff was missing from the accessories. Moving on, the motherboard was installed. I installed the cooler and the RAM on the motherboard outside of the chassis. Next, the PSU was installed with the fan side facing down.
So far there was no hiccup except the lacking of the standoff. The graphics card was an easy install as well. Then the PSU cables and the front panel’s cables were routed and connected.
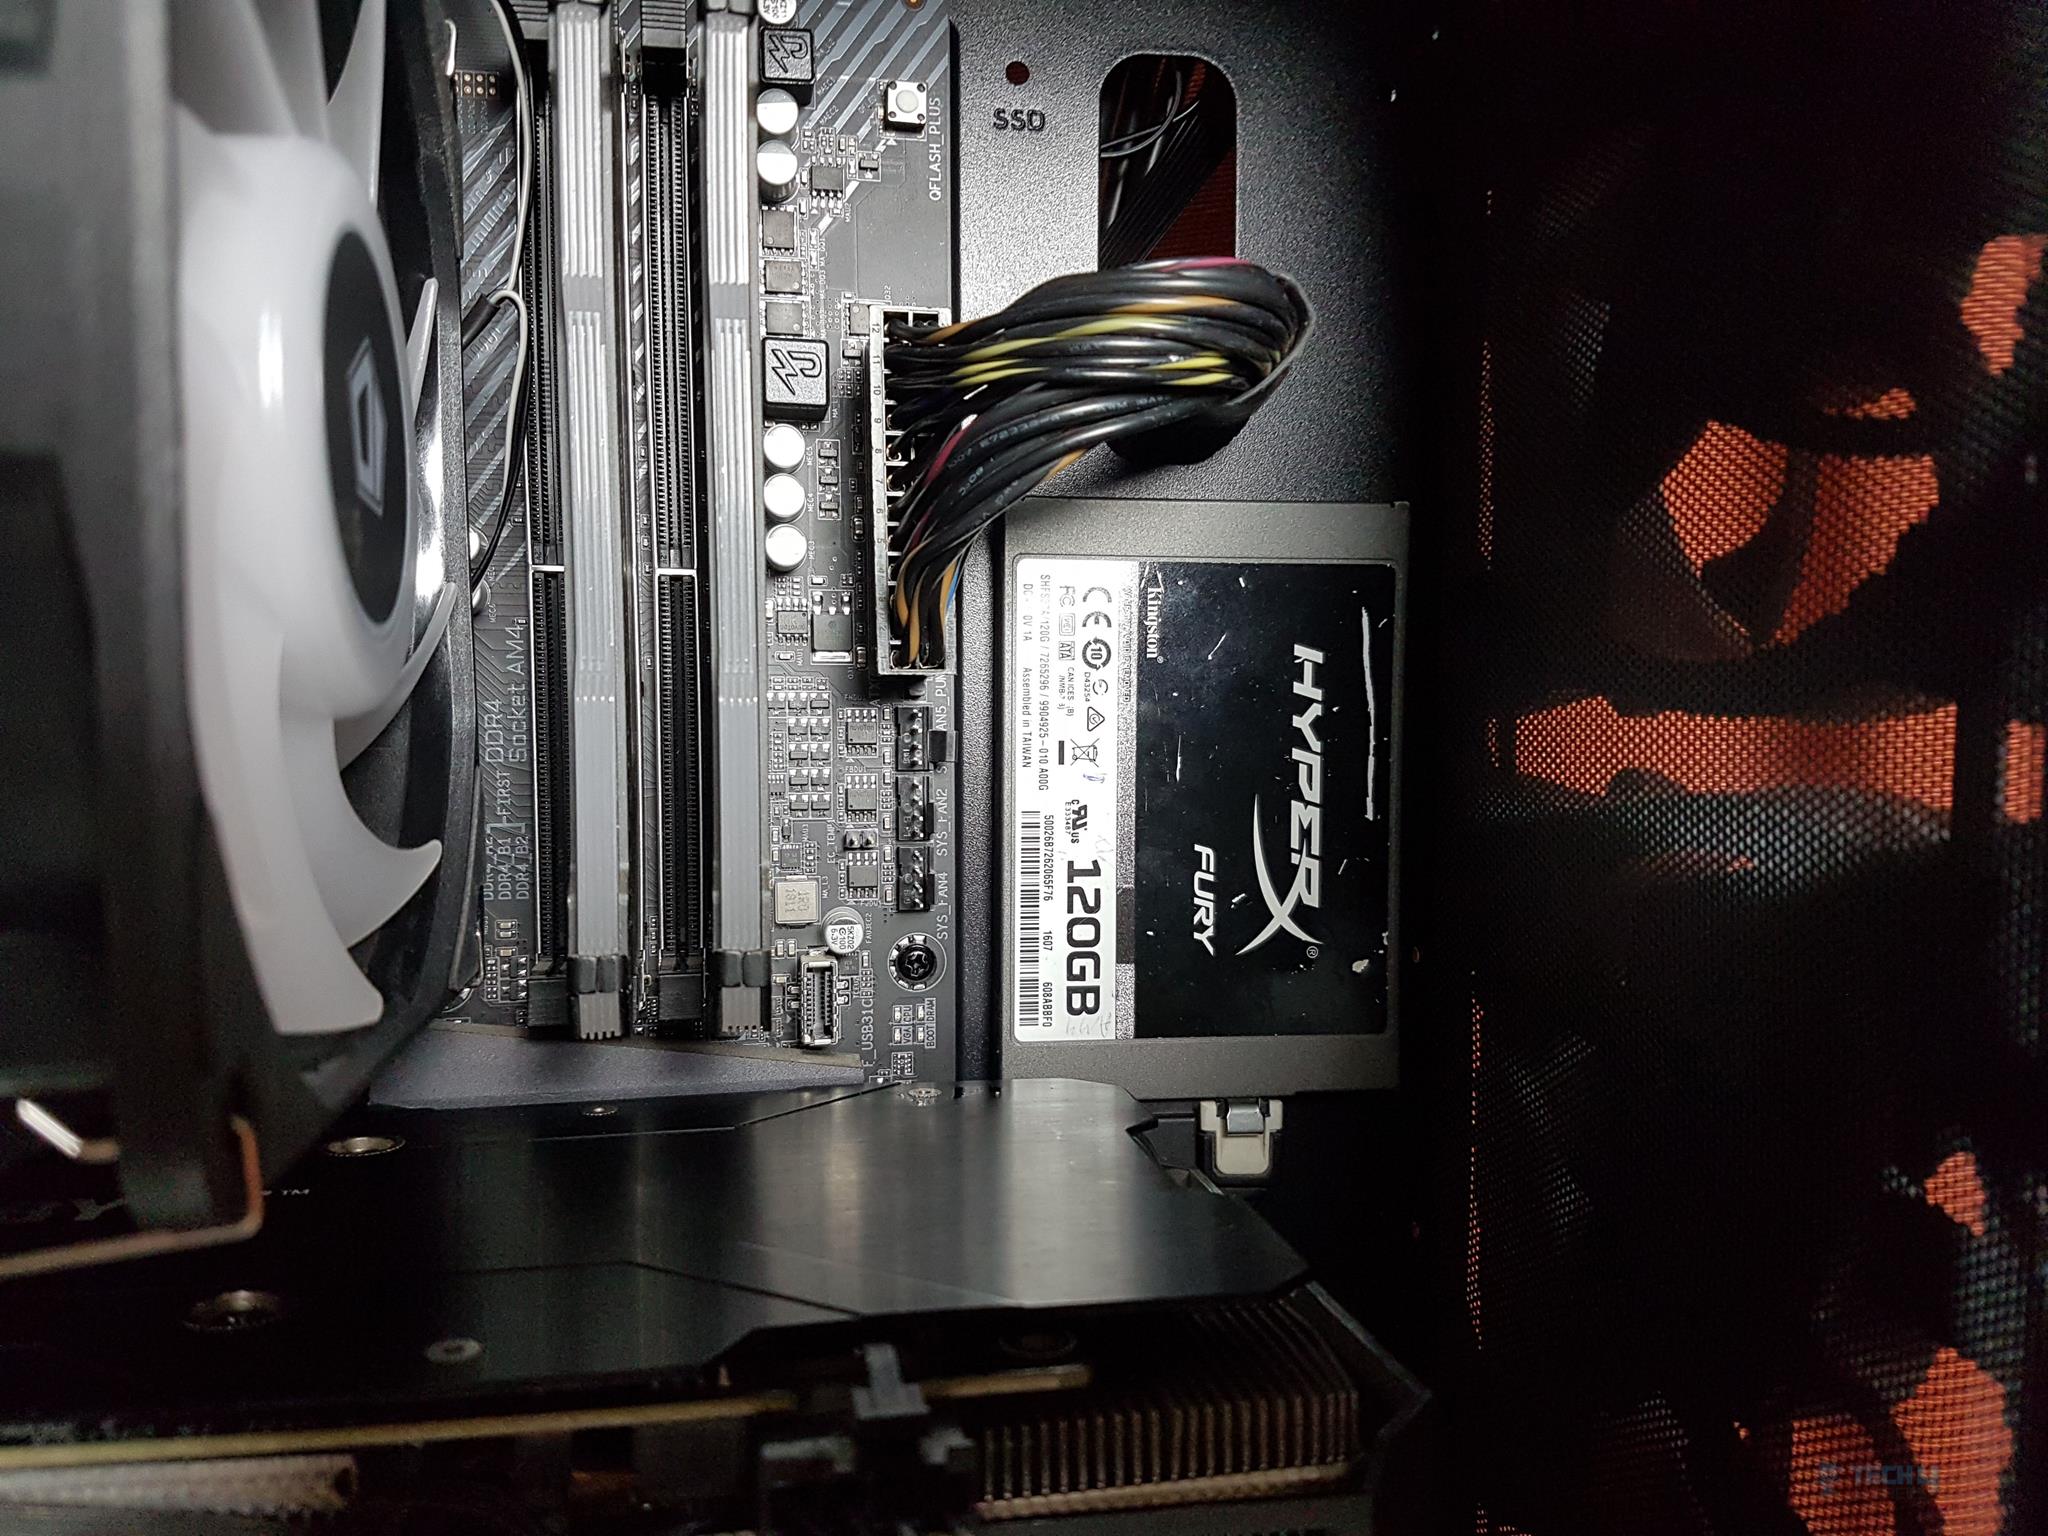
I wanted to install the 2.5” SSD on the front side of the motherboard tray but after passing the cables through the cutouts, I could not install the SSD either on the top slot or on the bottom slot as the cables were hindering it. I ended up installing the SSD in the middle using two screws as there is no such provision for 2.5” drive installation in the middle.
The RGB hub is not pre-installed and the user has to decide upon its location on the backside of the chassis where it can be pasted using the supplied dual-sided tape. Once placed, the 4x cables of the Eclipse fans are to be routed and connected to the RGB Hub. The SATA cable is to be connected to the PSU and the 2-pin Reset cable of the front panel to the hub.

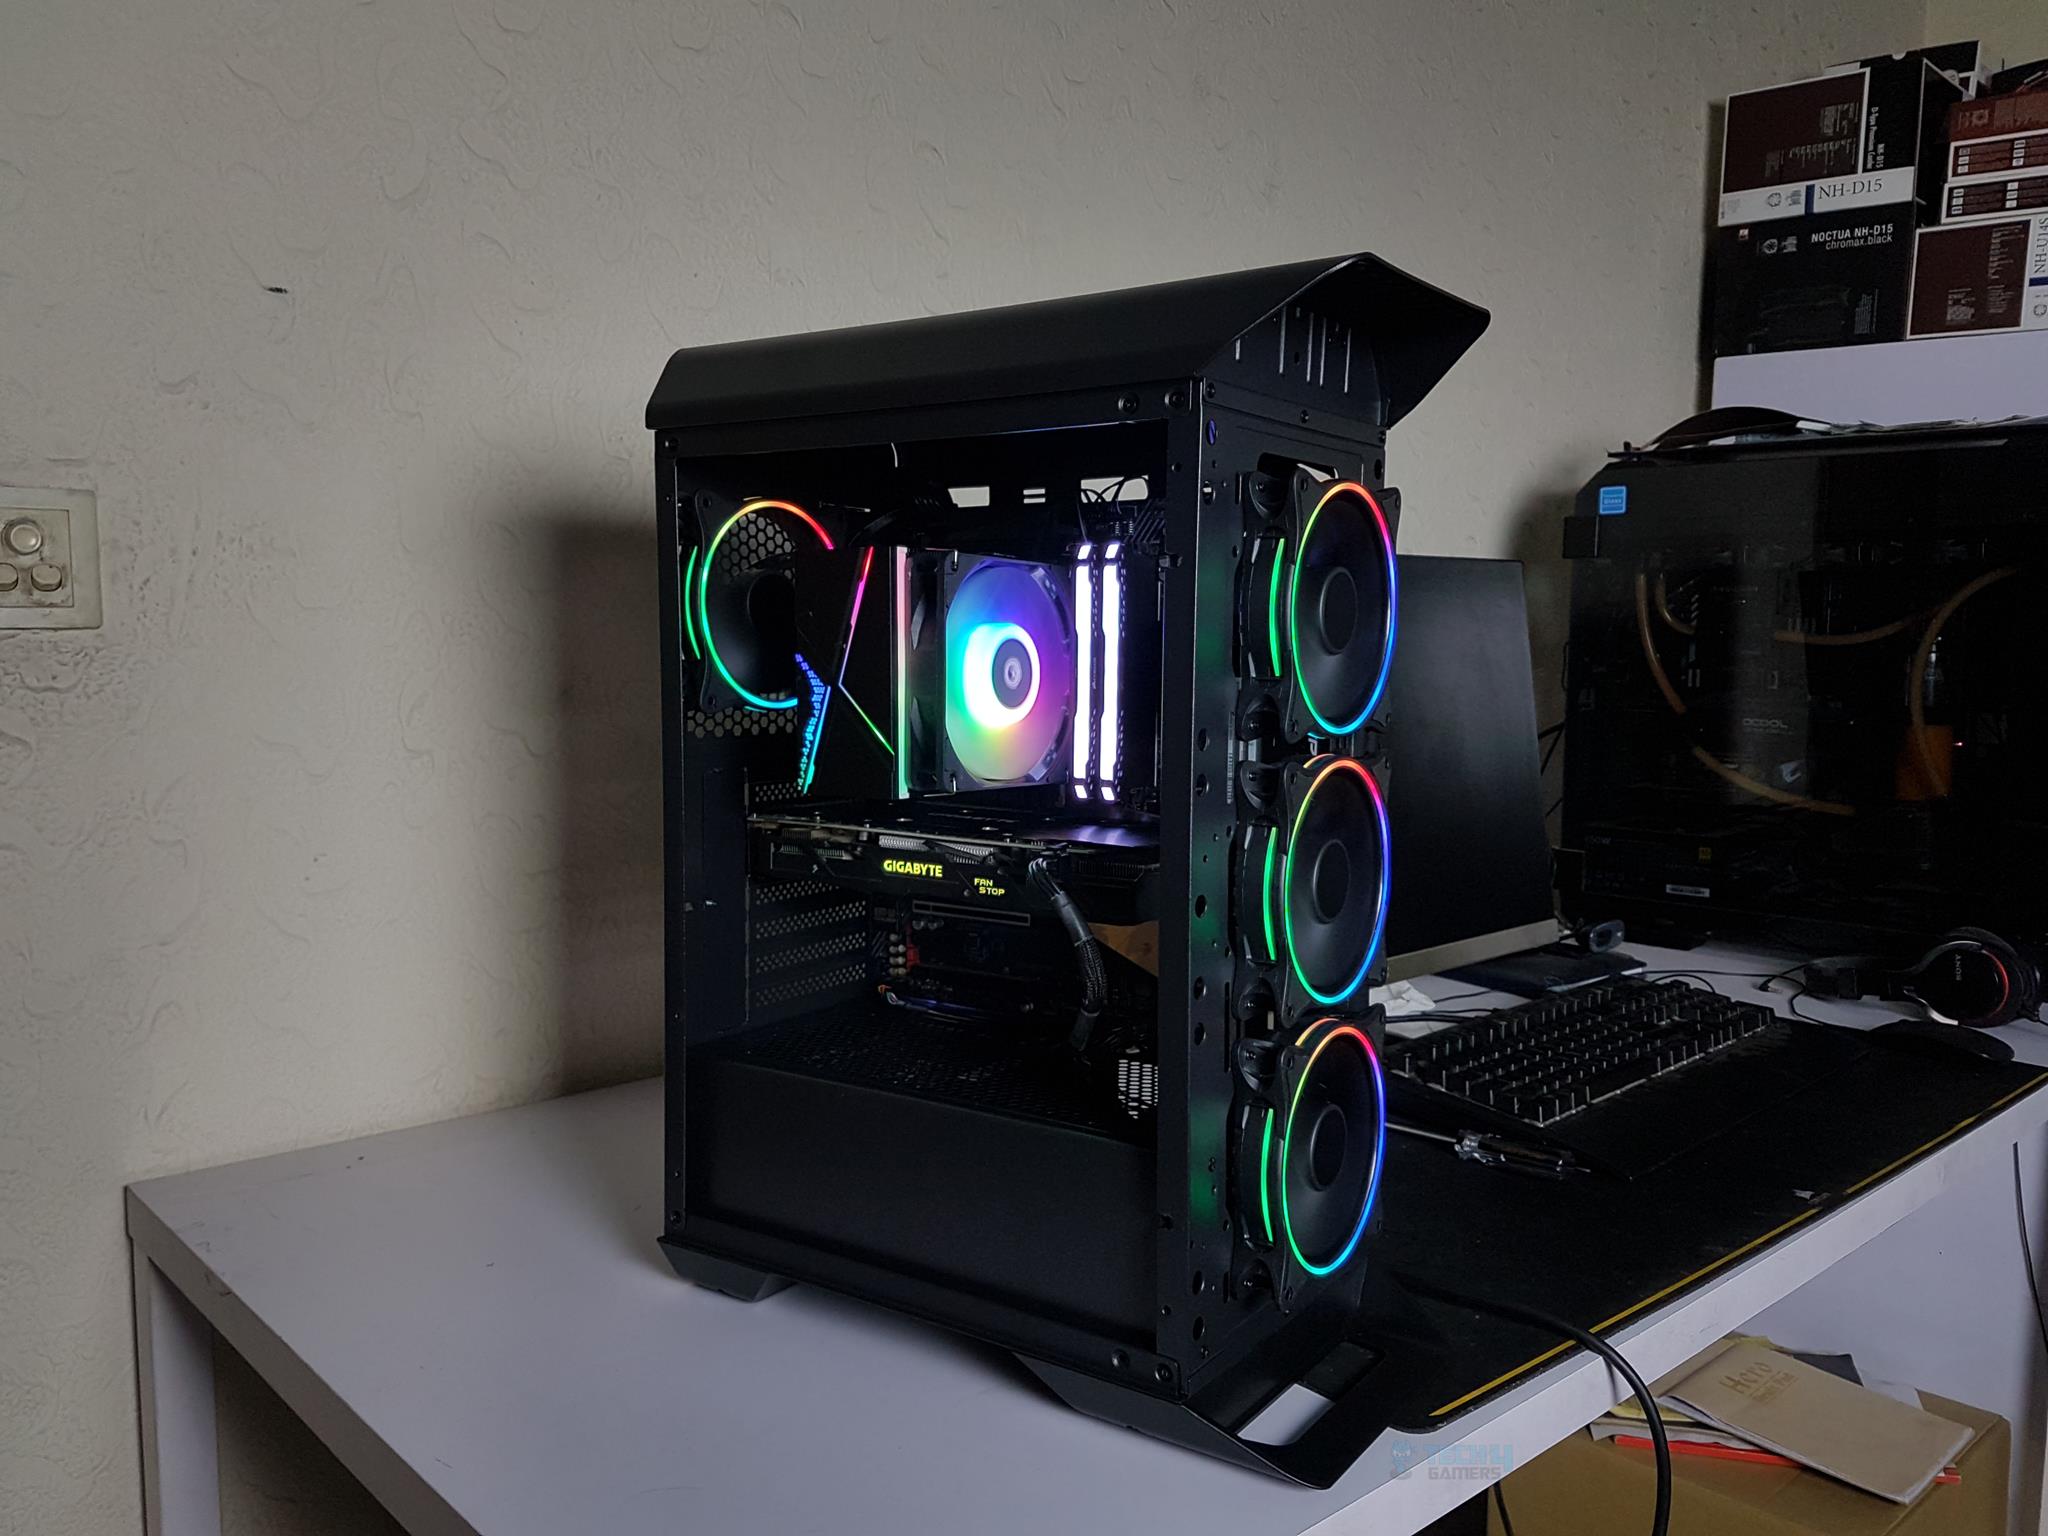
The build came out nice and clean.
There was enough space on the shroud cutouts to pass the cables through even after the PSU installation.
I purposely did not manage the cables on the backside much to see if the side panel can be closed with the bulk of the cables. The panel can be closed in this configuration with a bit of the force pressing it inside.
Aerocool Aero One RGB Lighting
The RGB lighting on the Eclipse fans is subtle and not overly done. I like the minimalistic lighting approach using two rings only instead of lighting up the entire fan using the blades as well. This is personal preference though.
Aerocool Computer CaseThermal Performance
We have tested the thermal performance of the chassis using the following configuration:
- Configuration1 with the front panel and front magnetic dust filter installed
- Configuration2 with the front panel removed and front magnetic dust filter installed
- Configruation3 with front panel installed and front magnetic dust filter removed
- Configuration4 with the front panel and front magnetic dust filter removed
Since there was no response to the speed regulation of the Eclipse fans, they were in their stock configuration throughout the testing. I am not sure at what speed they were operating.
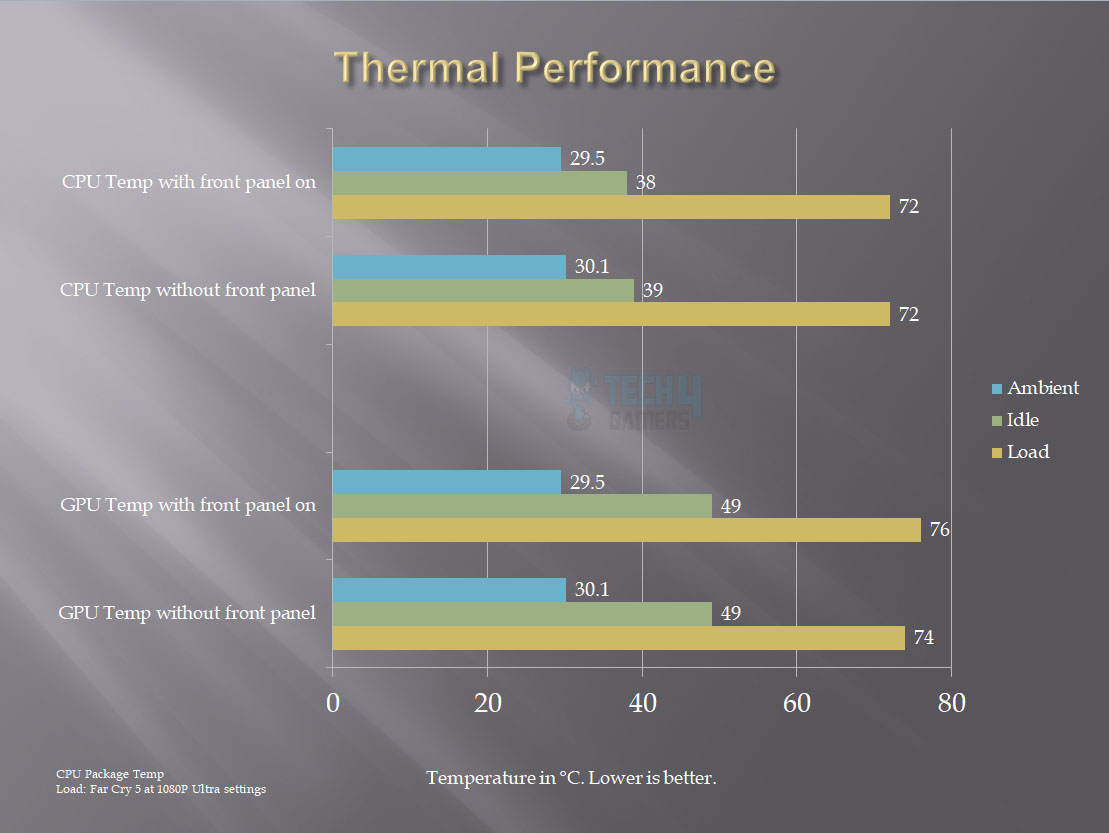
The above graph is for our configuration 1 and 2. We are not seeing any drastic thermal differences in both configurations.
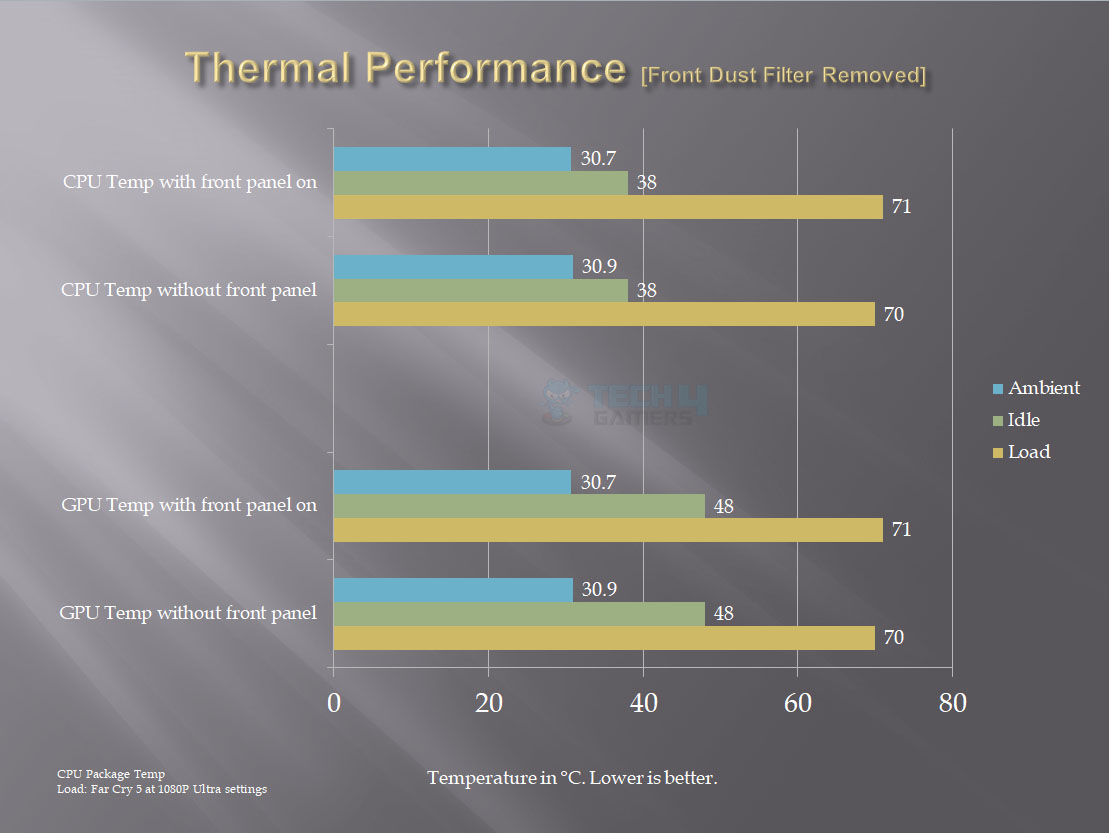
The above graph is for our configuration 3 and 4. The comparison with the configuration 1 and 2 shows no significant difference for the CPU temperature but there was a reduction of 5°C in the graphics card showing that the magnetic dust filter is limiting the air intake.
In my opinion, this dust filter should have been installed on the front panel’s vented portion on the inner side.
Conclusion
The Aerocool One Eclipse Review is a mid-tower with some nice features set and a bold but beautiful design. It is made of SPCC, ABS, and tempered glass. The steel’s thickness ranges from 0.5mm to 0.7mm. The overall case dimensions are 210 x 520 x 404mm (WxHxD). The internal dimensions are 210 x 440 x 330mm (WxHxD). It weighs 6.1Kg without any build.
Cooling provision is:
- Up to 3x 120mm or 2x 140mm fans on the front
- 1x 120mm fan on the rear
- Up to 2x 120/140mm fans on the top
- Up to 360mm radiator on the front
- Up to 240mm radiator on the top
Aerocool has pre-installed 3x Eclipse 120 RGB fans on the front and same fan on the rear making it almost a complete package from the cooling perspective when combined with the mesh front panel for maximum airflow.
Storage provision: With the combination, the HDD cage can hold a 1x 3.5” drive and 1x 2.5/3.5” drive. Similarly, 2x 2.5” drives and 1x 2.5”/3.5” drive. Two 2.5” drives can be installed on the motherboard’s tray on the front side with one at the top and one at the bottom. I was not able to use these mounting areas as the PSU cables were obstructing their installation.
HDD cage does not have a caddy and the 3.5” drive needs to be placed inside the cage and secured using the screws. The other drive (2.5”/3.5”) can be installed on the top of the HDD cage. If going that route, make sure to install the top mount drive first as its screws have to come from the inside of the cage.
The Aero One Eclipse has support for a CPU cooler with height up to 161mm. The maximum length of the graphics card is 327mm and 160mm for the PSU length. All 7x PCIe slot covers are not reusable. Aerocool should have provided at-least 2x reusable covers.
The front panel has a carbon fiber wrap on it which adds to the aesthetics. In my opinion that can be dropped in favor of 2x reusable PCIe slot covers. The tempered glass panel has my praise. It does not fall off after removing the two thumbscrews. Also, there is the padding on the top and the bottom on the inner side. Both panels slide in/out of the chassis frame.
The PSU shroud has mounting holes for up to 2x 120mm fans to have some direct air intake for the graphics card. The top panel has a magnetic dust filter.
The PSU shroud has a non-magnetic but removable dust filter. The front panel does not have a dust filter in it rather the magnetic dust filter sites on the backside of the fans. Our thermal testing is showing that removing this dust filter improves the graphics card’s temperature.
The Aerocool is using proprietary connectors for their Eclipse 120 RGB fans and to that end, they have bundled an RGB Hub. Up to 6 such fans can be connected to this hub with 4x more RGB/ARGB lighting devices. The Hub is SATA powered and is not pre-installed.
The user can connect the Hub to the supported motherboard’s lighting header (ASUS, MSI, and GIGABYTE) and turn the control to the motherboard for lighting control.
Aerocool has also provided a PWM connector coming out of the RGB Hub but it was not reporting any speed nor controlling the speed of the Eclipse fans.
To my disliking, 1x standoff and 1x long screw were missing from the accessory bag. Also, the pins on the 5V addressable lighting headers were twisted. I was able to straighten up only one header’s pin the other just snapped as it was quite stiff.
We are thankful to the Aerocool for giving us the opportunity to review their Aero One Eclipse Chassis.

Thank you! Please share your positive feedback. 🔋
How could we improve this post? Please Help us. 😔
[Hardware Reviewer & Editor]
Meet Nauman Siddique, a highly experienced computer science graduate with more than 15 years of knowledge in technology. Nauman is an expert in the field known for his deep understanding of computer hardware.
As a tech tester, insightful reviewer, and skilled hardware editor, Nauman carefully breaks down important parts like motherboards, graphics cards, processors, PC cases, CPU coolers, and more.
- 15+ years of PC Building Experience
- 10+ years of first-hand knowledge of technology
- 7+ years of doing in-depth testing of PC Hardware
- A motivated individual with a keen interest in tech testing from multiple angles.
- I majored in Computer Science with a Masters in Marketing
- Previously worked at eXputer, EnosTech, and Appuals.
Get In Touch: [email protected]


